
To get the best results with calibration frames, you need consistent camera settings, stable temperatures, and multiple frames for each type—darks, flats, and biases. Keep everything organized, label files clearly, and avoid using outdated or improperly taken frames. Make certain flats are even and unbiased, bias frames are short and clean, and dark frames match your light exposures. Follow these tips closely to maximize image quality; there’s more to discover if you keep exploring.
Key Takeaways
- Always match calibration frame settings (ISO, exposure, temperature) precisely to your light frames for optimal results.
- Capture multiple calibration frames (darks, flats, bias) to create high-quality master files through averaging.
- Keep calibration frames organized with clear naming conventions and store them in dedicated folders for easy retrieval.
- Verify calibration frames for uniformity, absence of dust, gradients, or artifacts before applying them to your light frames.
- Regularly update calibration frames to reflect current imaging conditions and maintain consistency across sessions.

Astrophotography Accessories for Refraction Reflector Telescope Optical Calibration 3V
Adapter type: DC5.5*2.1. Type: Monocular.
As an affiliate, we earn on qualifying purchases.
As an affiliate, we earn on qualifying purchases.
Understanding the Role of Calibration Frames in Astrophotography

Have you ever wondered why astrophotographers take multiple types of calibration frames? It’s mainly to improve image quality by reducing noise and artifacts caused by light pollution and sensor limitations. Sensor cooling plays a crucial role here, as it minimizes thermal noise, allowing you to capture clearer images. Calibration frames like darks, flats, and biases help correct uneven illumination, sensor defects, and unwanted light interference. Light pollution introduces unwanted brightness that can distort your photos, so calibration frames help to eliminate these effects during post-processing. By using these frames, you can ensure your final images are more accurate, detailed, and true to the night sky. Mastering calibration frames is essential for achieving professional-looking astrophotography results. Additionally, understanding the importance of Hyundai Tuning techniques can inspire you to optimize your equipment for better image capture.

SVBONY SV405CC Cooled Telescope Camera, 11.7 MP USB3.0, BI IMX294 CMOS Color Sensor, Astrophotography Camera with AR Coating, Astronomy Electronic Eyepiece for Deep Sky Astrophotography&Lucky Imaging
High-Sensitivity 4/3" Sensor: Back-illuminated IMX294 with 4.63μm pixels (4144×2822) for excellent light capture. The 63ke- full well capacity…
As an affiliate, we earn on qualifying purchases.
As an affiliate, we earn on qualifying purchases.
How to Capture High-Quality Dark Frames

Capturing high-quality dark frames is a vital step in ensuring your calibration process effectively reduces thermal noise in your images. To do this, keep your sensor cooled during the entire capture process, as consistent sensor temperature helps dark frames match your light frames. Use a camera with proper sensor cooling or ensure your equipment is in a stable environment to prevent temperature fluctuations. Avoid capturing darks in areas with significant light pollution, which can introduce unwanted thermal signals. Set your camera to the same exposure length as your light frames, and keep the camera’s temperature constant. Take multiple dark frames to average out any residual noise, increasing their effectiveness in calibration. This careful approach guarantees your dark frames accurately represent your sensor’s thermal noise. Additionally, monitoring air quality and maintaining a dust-free environment can help prevent particles from affecting your calibration frames.

Audio Express AXHDCAP 4K HDMI Video Capture Card, Cam Link Card Game Audio Adapter HDMI to USB 2.0 Record Capture Device for Streaming, Live Broadcasting, Video Conference, Teaching, Gaming
[Enhanced 4K-1080P Video Capture Experience] Capture the Magic: Elevate your video recordings to new heights with our upgraded…
As an affiliate, we earn on qualifying purchases.
As an affiliate, we earn on qualifying purchases.
Proper Techniques for Creating Flat Frames
To create effective flat frames, you need to guarantee your illumination is as uniform as possible. Using consistent exposure settings helps prevent variations that could affect calibration. Focus on maintaining steady lighting and camera parameters for the best results. Additionally, employing proper techniques ensures your calibration frames are reliable and accurate.
Uniform Illumination Strategies
Achieving uniform illumination is essential for high-quality flat frames, as uneven lighting can introduce artifacts and reduce calibration accuracy. To guarantee lighting consistency, position your light source directly above the flat panel or screen, avoiding angles that cause shadows or hotspots. Use a diffuser or integrating sphere to spread light evenly, minimizing glare and brightness variations. Keep the flat panel at a fixed distance from your camera to maintain illumination uniformity across the frame. Regularly check the flat frames for any uneven spots or gradients before use. By controlling these factors, you create flat frames with consistent brightness and smooth gradients, which lead to more accurate calibration and cleaner final images. Proper uniform illumination is the foundation for effective calibration frame creation. Additionally, incorporating natural materials such as linen or wood in your setup can help diffuse light more effectively, further enhancing uniformity.
Consistent Exposure Settings
Maintaining consistent exposure settings is essential for producing flat frames that accurately reflect your camera’s response to illumination. When you keep exposure consistent, you ensure that each flat frame is comparable, avoiding variations that can introduce artifacts. This practice supports session standardization, making your calibration process reliable across multiple imaging sessions. To achieve this, consider these key points:
- Use the same camera settings (ISO, shutter speed, aperture) for all flats
- Keep the light source intensity stable throughout the session
- Avoid adjusting exposure parameters between frames
- Record exposure details for future reference
- Use a fixed setup to minimize variability
- Color accuracy in your calibration setup helps ensure that flat frames correctly represent true illumination conditions.

Helios – Mechanics' LED Flat Panel Work Light and Undercarriage Lamp – 60 Watt and 8200 Lumens – Dimmable – Impact Resistant – Waterproof – Auto Shop and Field-Tested – Supports Up To 15 Tons
AUTO UNDERCARRIAGE LED LIGHT PANEL: Helios LED Light Panel is the last shop mechanics' service light you'll purchase!…
As an affiliate, we earn on qualifying purchases.
As an affiliate, we earn on qualifying purchases.
The Importance of Bias Frames and How to Take Them

Bias frames are essential for removing camera noise from your images, ensuring cleaner results. To get the best quality, you need to acquire them correctly and understand how to use them properly. Let’s look at the purpose, proper techniques, and tips for ideal bias frame usage. Additionally, understanding data privacy challenges can help you safeguard your images and personal information during processing.
Bias Frame Purpose
Why are bias frames so essential in astrophotography? They help remove sensor noise caused by electronic bias, ensuring your images are clear and accurate. Bias frames capture the inherent electronic bias present in your camera’s sensor, which can add unwanted noise to your images. By subtracting this bias, you isolate true signal from electronic interference. Visualize a dark, starry sky with subtle flickers of sensor noise, or imagine a camera’s circuitry quietly generating a baseline voltage. Bias frames act like a shield, protecting your data from these electronic imperfections. They’re vital for high-quality calibration, especially when working with faint objects or long exposures. Proper bias frames improve your final image’s clarity, color accuracy, and detail, making your astrophotography truly shine. Understanding sound design techniques can also help you optimize your workflow and produce more precise calibration images.
Proper Acquisition Techniques
To guarantee your calibration frames are effective, you need to acquire bias frames correctly. Bias frames capture sensor noise, which is present regardless of exposure time, so it’s crucial to take them with the shortest possible exposure, typically just a few seconds or less. Keep your camera in the same temperature environment as your light frames to prevent variations in sensor noise. Avoid light pollution by covering your telescope or camera lens or shooting in a dark, enclosed space. Ensure your camera’s settings are fixed—no gain changes or adjustments—so the bias frames accurately represent your sensor noise. Consistency is key; properly acquired bias frames will help you subtract sensor noise reliably, improving the quality of your overall calibration process. Additionally, understanding sensor characteristics can help optimize your acquisition technique for even better results.
Optimal Usage Tips
Have you ever wondered how to guarantee your calibration process effectively removes sensor noise? Proper bias frame acquisition is key for sensor calibration and successful image stacking. To assure optimal results, keep these tips in mind:
- Take bias frames at the same temperature and camera settings as your light frames.
- Use a stable, uniformly lit surface to avoid introducing unwanted noise.
- Capture multiple bias frames to create a high-quality master bias.
- Keep your camera’s sensor temperature consistent between captures.
- Store bias frames in a dedicated folder to prevent accidental deletion or mixing.
- Ensure your camera’s sensor protection features are activated to prevent damage during calibration.
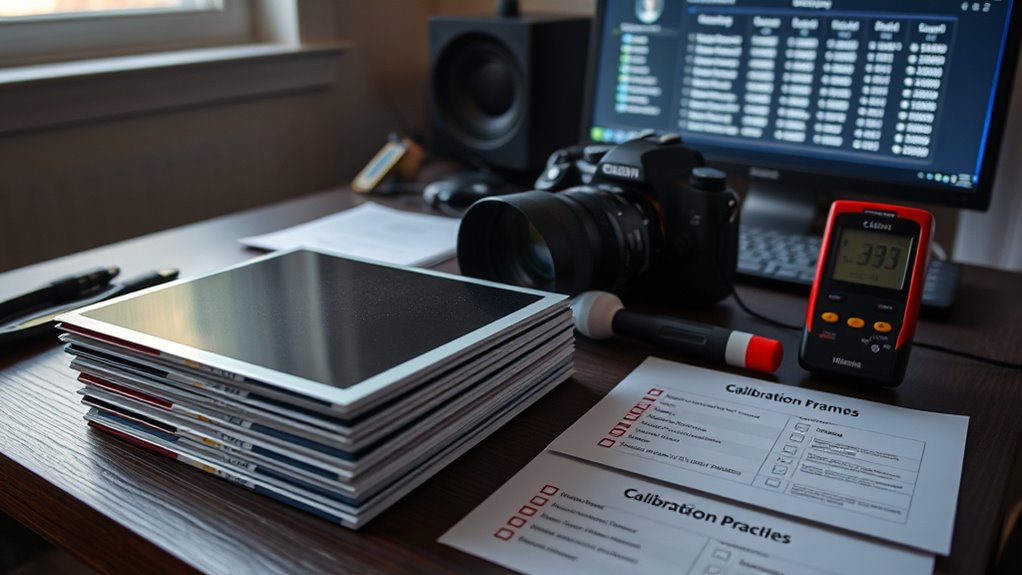
Best Practices for Managing and Organizing Calibration Files

Effective management and organization of calibration files are essential to maintaining a reliable and efficient calibration process. Start by establishing a consistent file naming convention that clearly indicates the type of frame, date, and session details. This makes it easier to locate specific files quickly. Next, choose robust storage solutions—preferably structured folders or dedicated drives—that keep calibration frames separate from light frames. Regularly back up your files to prevent data loss. Keep an organized archive system, such as date-based folders or project-specific directories, to streamline workflows. Label files clearly and avoid clutter by removing outdated or duplicate calibration frames. Proper management saves time, reduces errors, and ensures you always have the correct calibration data ready for your imaging sessions. Inspiring sustainable practices can also be incorporated into your workflow by utilizing energy-efficient storage devices and reducing unnecessary digital clutter.
Common Mistakes to Avoid When Using Calibration Frames
One common mistake is using calibration frames that are outdated or not specific to your current imaging session. This can lead to overexposure pitfalls or misaligned frames that don’t match your lights. To avoid these issues, watch out for:
- Using calibration files taken with different camera settings
- Ignoring temperature differences between sessions
- Reusing frames that are too old or damaged
- Overlooking slight shifts in framing or focus
- Neglecting to verify calibration frame quality before application
These mistakes can cause artifacts or incorrect calibration results, reducing image quality. Always update your calibration frames regularly and ensure they match your current imaging conditions. Properly aligned and recent calibration frames are vital for achieving sharp, accurate astrophotos.
Frequently Asked Questions
How Often Should Calibration Frames Be Recalibrated for Optimal Results?
You should recalibrate your calibration frames regularly, ideally after every session or if your equipment setup changes. Calibration frequency depends on factors like temperature shifts, equipment adjustments, and environmental conditions. Performing a session recalibration ensures your darks, flats, and biases stay accurate, reducing noise and artifacts in your images. Always verify your calibration frames before processing new images to maintain ideal results and avoid potential issues caused by outdated frames.
Can Calibration Frames Be Reused Across Different Sessions or Equipment?
Did you know that many astrophotographers reuse calibration frames up to 80% across multiple sessions? You can reuse calibration frames like darks, flats, and biases if your equipment stays consistent, ensuring session calibration consistency. However, if you change your camera or setup, it’s best to recapture calibration frames. Reusing frames saves time, but always double-check that they match your current gear and conditions for ideal results.
What Are the Best Storage Formats for Calibration Files?
You should store calibration files in widely compatible formats like FITS or TIFF, which guarantee good file compatibility across different software. FITS is preferred in astronomy because it preserves data integrity and contains metadata. TIFF also works well for easier access and editing. Using these formats helps you avoid compatibility issues, making it easier to process and share your calibration frames across various platforms and tools.
How Do Temperature Changes Affect Calibration Frame Accuracy?
Temperature changes are like a rollercoaster for calibration frames, causing thermal stability issues. When thermal stability isn’t maintained, temperature drift occurs, which reduces your calibration accuracy. Fluctuations in temperature can alter dark and bias frames, leading to inconsistent results. To guarantee precision, keep your camera in a controlled environment, avoid sudden temperature shifts, and regularly update calibration frames to counteract the effects of temperature drift.
Are There Software Tools That Automatically Manage Calibration Frame Workflows?
Yes, automation software can manage calibration frame workflows for you. Tools like Sequence Generator Pro, NINA, and AstroPixelProcessor automate tasks such as capturing, organizing, and applying calibration frames, saving you time and reducing errors. They streamline workflow management, ensuring your calibration frames are handled consistently and efficiently. Using these programs lets you focus more on capturing great images instead of manual adjustments, making astrophotography more enjoyable and productive.
Conclusion
Think of calibration frames like the tuning pegs on a guitar—they’re essential for perfect harmony. When you master capturing darks, flats, and biases properly, your astrophotography results will be crystal clear, just like a well-tuned instrument. Skipping or rushing these steps is like playing out of tune; the imperfections stand out. Invest time in calibration, and you’ll be amazed at how your images come to life with stunning detail and clarity.