To build a DIY mini guide scope from telescope parts, start by selecting a small, sturdy optical tube or find a compatible telescope component. Attach it securely to your main telescope using appropriate brackets or adapters, ensuring proper alignment with the optical axis. Use collimation tools or reticle eyepieces to fine-tune the setup for sharp star images. If you keep exploring, you’ll discover detailed tips to improve your guiding performance and astrophotography results.
Key Takeaways
- Gather compatible telescope parts like a small refractor or secondary mirror, plus mounting hardware.
- Attach the guide scope securely to the main telescope, ensuring alignment with the optical axis.
- Use collimation tools or reticle eyepieces to fine-tune the guide scope’s alignment for accurate tracking.
- Mount a camera or guiding eyepiece to the guide scope for star alignment and calibration.
- Test and adjust the setup with guiding software to optimize tracking precision during astrophotography sessions.

If you’re looking to improve your astrophotography setup, building a DIY mini guide scope from telescope parts is a straightforward and cost-effective solution. A guide scope helps you track celestial objects more precisely, reducing star trails and ensuring sharp images. To get the most out of your guide scope, you need to focus on proper alignment techniques. Accurate alignment is essential because even minor misalignments can cause guiding errors. Start by attaching the guide scope securely to your main telescope, ensuring it’s aligned with the optical axis. Use a collimation tool or a reticle eyepiece to fine-tune the alignment, making sure the guide scope’s view matches the main scope as closely as possible. Once aligned, you can calibrate your guiding software by capturing a series of test images and adjusting the mount’s tracking parameters accordingly. This process guarantees your guiding corrections are accurate, leading to sharper images. Additionally, high contrast ratios in your equipment can help improve the visibility of guiding stars, making calibration easier and more precise. Power supply options are another critical aspect when setting up your DIY guide scope. Stability and reliability in power are essential, especially during long imaging sessions. You have several options to choose from. Many astronomers opt for a dedicated power tank, which provides a stable source of power and prevents voltage fluctuations that could disrupt guiding. If you prefer a more portable setup, a high-quality portable power bank designed for sensitive electronics works well, provided it offers enough capacity for the duration of your session. Some setups also utilize regulated power supplies that connect directly to your mount or guide camera, ensuring consistent voltage. Whichever option you choose, always verify that your power supply can deliver adequate current and voltage to all connected devices. Using a power distribution hub can help organize your cables and prevent accidental disconnections during a session. Proper power management minimizes guiding errors caused by electrical inconsistencies, so investing time in choosing the right power supply options is just as important as aligning your guide scope correctly.
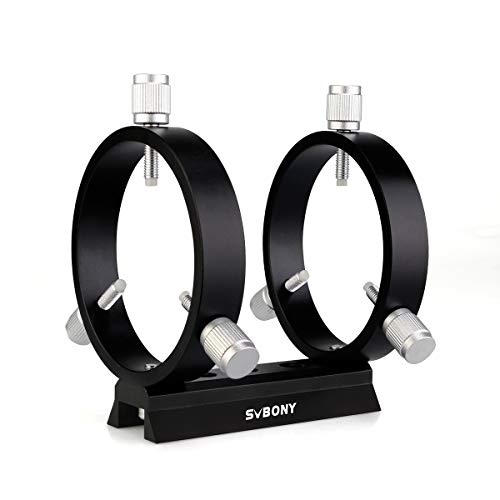
SVBONY SV116 Guiding Scope Ring Kit for Telescope Tube Diameter or Finders 43mm to 70mm with Pair Ideal for Astrophotography
Two tube rings made of metal;the guide scope rings are suitable for small and medium-sized guiding telescopes;70mm compact…
As an affiliate, we earn on qualifying purchases.
As an affiliate, we earn on qualifying purchases.
Frequently Asked Questions
What Tools Are Essential for Assembling the Guide Scope?
You’ll need a power drill to securely attach components and guarantee precise holes. Alignment tools, like a collimator or bubble level, are essential for accurate setup. A screwdriver, pliers, and possibly a wrench help tighten screws and secure parts. Don’t forget a ruler or measuring tape to keep everything aligned. These tools make assembling your guide scope easier, safer, and assure peak performance during astrophotography.
How Do I Align the Guide Scope With My Main Telescope?
Aligning your guide scope with your main telescope might seem like taming a wild beast, but it’s straightforward with patience. First, perform polar alignment to ensure your mount’s axis matches celestial rotation. Then, utilize calibration techniques like star alignment to fine-tune your guide scope’s positioning. Carefully adjust until stars appear centered in both scopes, ensuring your tracking is precise and your imaging results are spectacular.
Can I Use Parts From Different Telescope Brands?
Yes, you can use parts from different telescope brands, but you need to guarantee compatibility. Check the telescope compatibility and part interchangeability before mixing components. Measure mounting holes, focusers, and dovetails carefully to avoid fit issues. If parts aren’t directly compatible, consider adapters or custom modifications. This approach can save costs and expand your options, but always verify that the parts will work together seamlessly to ensure proper alignment and performance.
What Is the Ideal Focal Length for a Mini Guide Scope?
For ideal guide scope magnification, aim for a focal length around 50-80mm, which balances ease of use with precise tracking. Focal length considerations suggest that a shorter scope offers wider fields, making star alignment smoother, while ensuring your guiding setup remains effective. Keep in mind, a well-matched focal length enhances your tracking accuracy without overwhelming your mount, making your astrophotography journey more enjoyable and successful.
How Do I Prevent Optical Misalignment During Assembly?
To prevent optical misalignment during assembly, carefully follow proper assembly techniques and prioritize optical calibration. Use precise tools and confirm each component aligns correctly before tightening any screws. Regularly check the scope’s alignment with a collimation tool or laser before final assembly. Take your time, double-check connections, and avoid rushing. Properly calibrated components and meticulous assembly techniques help maintain alignment, ensuring clear, accurate guiding during observations.

Astromania Dual Finder Scope Mount, Finderscope Mounting Bracket with Double Finder Mount Bracket – Adjustable Metal Aluminum Telescope Finder Bracket Installation of Red Dot Finderscope for Telescope
Dual Finder Scope Mounting System: Finder scope adapter for two finders is designed with two finder scope base…
As an affiliate, we earn on qualifying purchases.
As an affiliate, we earn on qualifying purchases.
Conclusion
Now that you’ve built your DIY mini guide scope, you’re like a captain steering your own ship through the night sky. With a little patience and a few parts, you’ve crafted a trusty tool that’ll help you capture clearer images and track celestial objects more accurately. Think of this guide scope as your starry compass, guiding your telescope’s gaze through the vast universe. Happy stargazing—your cosmic adventure is just beginning!

Astromania Laser Collimator for Newtonian Dobsonian Marca Telescopes, Telescope Alignment 1.25 Inch with 7 Red Laser Bright Levels, Great Telescope Accessories Laser Alignment Tool for Collimation
Multi-Function: Designed for Reflector telescope; fit for standard 1.25 inch diameter; this sturdy laser unit allows to swiftly…
As an affiliate, we earn on qualifying purchases.
As an affiliate, we earn on qualifying purchases.

Astrophotography is Easy!: Basics for Beginners (The Patrick Moore Practical Astronomy Series)
As an affiliate, we earn on qualifying purchases.
As an affiliate, we earn on qualifying purchases.