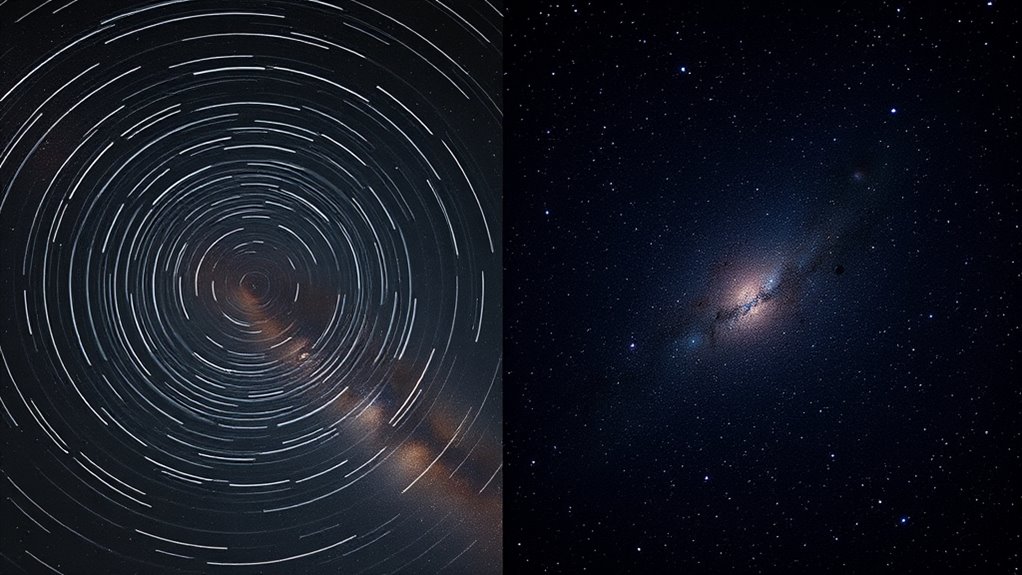
Star trails and deep-sky tracking are two distinct astrophotography techniques. Star trails capture star movement using long exposures or stacking, emphasizing motion and artistic effects, often with wider apertures. Deep-sky tracking follows celestial objects precisely, requiring accurate mounts and longer exposures to reveal faint details like galaxies and nebulae. While star trails focus on motion, deep-sky tracking aims for detail and clarity. Continue exploring, and you’ll discover how choosing the right method enhances your sky photography.
Key Takeaways
- Star trails capture star movement with shorter exposures or stacking, emphasizing motion effects, while deep-sky tracking involves precise mount control for detailed object imaging.
- Aperture choices differ: wider for star trails to gather more light quickly, slightly narrower for deep-sky to enhance detail and reduce aberrations.
- Noise reduction is essential in deep-sky imaging due to longer exposures and higher ISO, whereas star trails can mitigate noise through stacking techniques.
- Deep-sky tracking demands meticulous equipment calibration and longer exposures, while star trails are more forgiving with less precise tracking.
- Artistic goals influence technique choice: star trails highlight star motion paths, whereas deep-sky tracking reveals faint celestial structures.
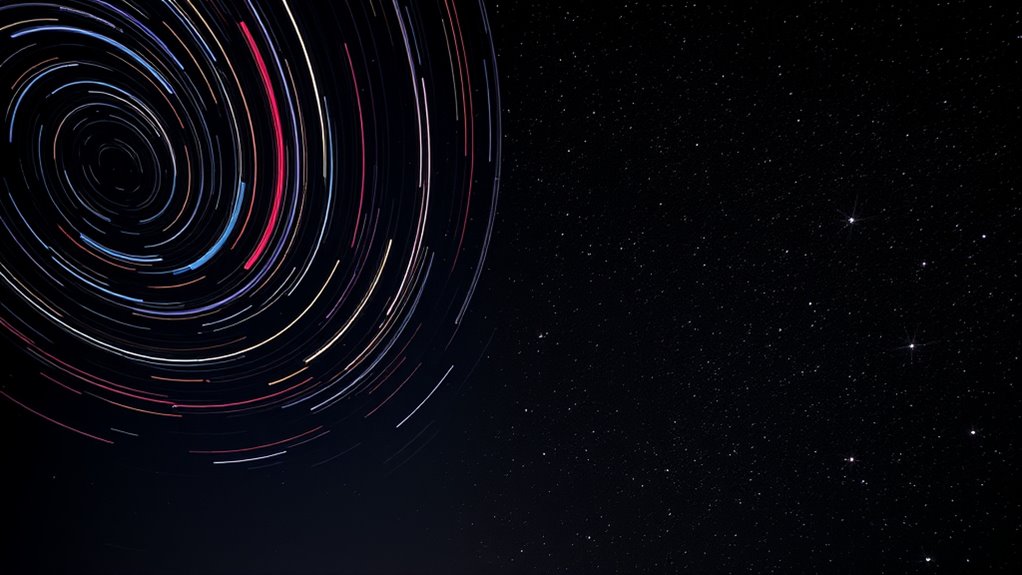
When choosing between star trails and deep-sky tracking, understanding their differences is vital for capturing stunning astrophotography. Both techniques serve different artistic and technical purposes, and your approach depends on what you want to achieve. Star trails involve taking long exposures or stacking multiple shorter exposures to create mesmerizing circular or streaked images of the night sky. Deep-sky tracking, on the other hand, requires precise movement of your mount to follow celestial objects like galaxies, nebulae, or star clusters, allowing for detailed, high-resolution images of these faint objects. Understanding these differences is essential to selecting the right technique for your astrophotography goals. Your choice of aperture choices plays a significant role in both techniques. For star trails, a balance must be struck: a wide aperture allows more light, which helps in capturing the movement of stars in a single shot or with fewer exposures. However, if your aperture is too wide, you risk introducing more noise, especially in low-light conditions. When using deep-sky tracking, a slightly narrower aperture often works better because it reduces aberrations and allows for sharper details. Selecting the right aperture ensures you gather enough light without compromising image quality, which is especially important when you plan to do longer exposures.
Choosing between star trails and deep-sky tracking depends on your artistic vision and technical goals.
Noise reduction techniques become indispensable, particularly when working with high ISO settings or longer exposure times. In star trails photography, stacking multiple images helps mitigate noise; the more frames you combine, the better your signal-to-noise ratio becomes. Additionally, post-processing methods like noise reduction software can smooth out graininess without sacrificing detail. For deep-sky astrophotography, noise reduction is even more vital. Since deep-sky objects are faint, you often need longer exposures or higher ISO, both of which amplify noise. Using dedicated noise reduction tools both during capture—such as cooling your camera sensor—and in post-processing helps produce cleaner, more detailed images.
Ultimately, your success hinges on understanding how aperture choices influence light intake and noise levels, as well as employing noise reduction techniques effectively. Star trails emphasize the motion and beauty of star paths, requiring less precise tracking but more stacking and processing. Deep-sky imaging demands meticulous tracking and longer exposures, with a focus on minimizing noise to reveal intricate details of distant objects. Knowing when to prioritize each method based on your equipment, goals, and conditions will help you craft breathtaking astrophotos that truly showcase the wonders of the night sky.

Sky-Watcher Star Adventurer 2i Pro Pack – Motorized DSLR Night Sky Tracker Equatorial Mount for Portable Nightscapes, Time-Lapse and Panoramas – Wi-Fi App Camera Control – Long Exposure (S20512)
Portable nightscape tracking platform: Motorized portable tracking platform perfect for capturing incredible detail of the Milky Way, eclipses…
As an affiliate, we earn on qualifying purchases.
As an affiliate, we earn on qualifying purchases.
Frequently Asked Questions
What Equipment Is Best for Beginner Astrophotography?
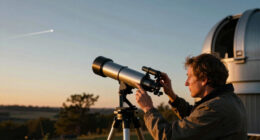
For beginner astrophotography, you want a simple setup with a stable camera mount and versatile lens selection. A DSLR or mirrorless camera paired with a sturdy tripod is ideal, allowing you to capture clear images. Start with a wide-angle lens to photograph star trails or deep-sky objects. Focus on keeping your camera steady, and experiment with different lens choices to find what works best for your night sky shots.
How Do Weather Conditions Affect Star Trail and Deep-Sky Photography?
Weather conditions are like an artist’s brush, shaping your astrophotography canvas. Atmospheric distortion can blur your star trails and deep-sky shots, making them appear wobbly or hazy. Cloud cover acts as a thick curtain, blocking your view and turning clear nights into cloudy nightmares. To capture stunning images, plan for nights with minimal atmospheric distortion and clear skies, ensuring your celestial masterpiece isn’t washed out by nature’s unpredictable mood swings.
Can Both Techniques Be Combined in a Single Session?
Yes, you can combine tracking techniques in a single session by using a tracking combination approach. Start with deep-sky tracking for capturing detailed, long-exposure images of celestial objects, then switch to star trails for capturing the motion of stars over time. Technique integration allows you to creatively blend both styles, capturing stunning images that showcase both detailed deep-sky objects and dynamic star trails, maximizing your astrophotography potential.
What Post-Processing Methods Enhance Star Trail Images?
You can enhance your star trail images through post-processing by using image stacking, which combines multiple shots to create smooth, continuous trails, and noise reduction techniques to improve clarity. Start with stacking your images to reduce grain and enhance trail brightness. Then, apply noise reduction tools to minimize digital noise, especially in dark areas. These methods will make your star trail photos look sharper, cleaner, and more professional.
How Long Does Setup Typically Take for Each Technique?
Setting up for star trails usually takes around 15 to 30 minutes, as you focus on polar alignment and equipment calibration to guarantee steady shots. Deep-sky tracking setups can be more complex, often requiring 30 minutes to an hour to accurately polar align your mount and calibrate your equipment. Your familiarity with the gear and environmental conditions can influence these times, so practice helps streamline the process.

ZWO Seestar S30 Pro Smart Telescope, App-Controlled Astrophotography
Effortless Smart Digital Telescope for Beginners: Simply power on, connect the app, and start exploring the universe. With…
As an affiliate, we earn on qualifying purchases.
As an affiliate, we earn on qualifying purchases.
Conclusion
Think of star trails and deep-sky tracking as two different dance partners. Star trails sweep across the sky like a graceful waltz, capturing motion in a single shot. Deep-sky tracking is more like a precise ballet, freezing intricate details of distant galaxies. Choose the technique that matches your passion—whether you want to dance with the stars in motion or hold still to reveal hidden wonders. Either way, your night under the cosmos becomes a masterpiece in the making.

Kase 77mm Magnetic Bright Star Focus Kit Focusing Tool + Wolverine Neutral Night Didymium Light Pollution Filter inc Adapter Ring
KIT: Neutral Night Light Pollution Filter + Star / Night Time Focusing Aid / Tool + Magnetic Adapter…
As an affiliate, we earn on qualifying purchases.
As an affiliate, we earn on qualifying purchases.
HOYA 77mm STARSCAPE Light Pollution Astrophotography Filter – Didymium Glass with Enhanced HMC Multicoating Technolgy – Boost Star-to-Sky Contrast – Reduce Night City Sky Color Cast
BLOCKS LIGHT POLLUTION FOR CRISP, CLEAN NIGHT SHOTS – The Starscape 77 mm lens filter cuts unwanted yellow-orange…
As an affiliate, we earn on qualifying purchases.
As an affiliate, we earn on qualifying purchases.