
To plan a year-long deep-sky imaging project, start by organizing your equipment and setting a detailed schedule that considers seasonal target visibility and moon phases. Incorporate regular calibration with dark, flat, and bias frames to maintain image quality. Keep thorough records of your sessions, weather, and settings to troubleshoot and improve over time. Practice stacking and processing techniques to enhance faint details. If you follow these steps, you’ll discover more tips to refine your cosmic captures.
Key Takeaways
- Develop a comprehensive target list aligned with seasonal object visibility and equipment capabilities.
- Schedule regular calibration sessions using dark, flat, and bias frames to ensure consistent image quality.
- Record detailed logs of imaging sessions, weather conditions, and equipment settings for troubleshooting and analysis.
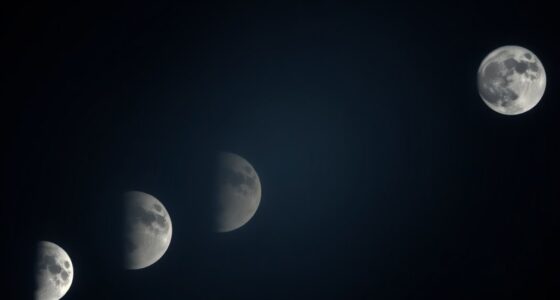
- Plan imaging sessions during new moon phases to minimize light pollution and maximize faint object capture.
- Allocate time for technique experimentation, calibration, and stacking to progressively improve image depth and clarity.
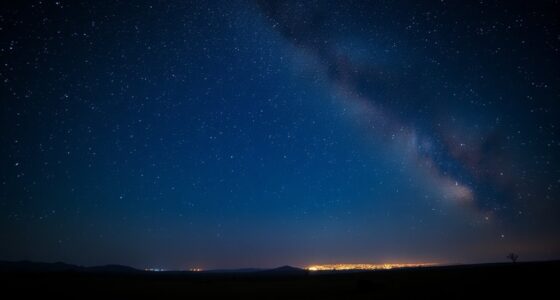
The Deep-Sky Imaging Project is a dedicated effort to capture stunning images of distant celestial objects beyond our solar system. Starting on a year-long deep-sky imaging journey requires careful planning, patience, and a solid understanding of astrophotography techniques. One of your first priorities should be mastering sensor calibration. Proper calibration ensures your camera’s sensor produces accurate, noise-free images. This involves capturing dark frames, flat frames, and bias frames regularly. Dark frames help you eliminate thermal noise, flat frames correct for optical vignetting and dust on your sensor, and bias frames account for readout noise. Consistently calibrating your sensor throughout the year guarantees your images remain consistent and of high quality, especially when combining data from multiple sessions.
Master sensor calibration with dark, flat, and bias frames for consistent, high-quality deep-sky images throughout your year-long project.
As you progress, image stacking becomes an essential technique to improve signal-to-noise ratio and reveal faint details in your deep-sky objects. You should plan to acquire multiple exposures of each target—sometimes dozens or more—over many nights. When stacking these images, you’re fundamentally averaging out noise while amplifying the true signal of stars, nebulae, or galaxies. This process allows you to capture subtle features that are otherwise invisible in individual frames. To maximize the effectiveness of stacking, guarantee your images are well-aligned, which involves precise tracking and guiding during your sessions. Software tools like DeepSkyStacker or PixInsight can facilitate alignment and stacking, but your initial data quality makes all the difference.
A year-long project benefits from meticulous record-keeping. Track your imaging sessions, weather conditions, equipment settings, and calibration frames. This information helps you troubleshoot issues later and identify the best conditions for capturing faint objects. Planning your target list in advance ensures you optimize your time, focusing on objects that are seasonally visible and suited to your equipment’s capabilities. Additionally, consider the phases of the moon; imaging during a new moon minimizes light pollution and maximizes your chances of capturing clear, detailed images. Developing a solid understanding of astrophotography techniques and how they connect with your equipment can greatly enhance your success.
Finally, patience and persistence are key. Deep-sky imaging is a process of continuous learning and refinement. Even with diligent sensor calibration and image stacking, your results will improve over time as you gain experience and fine-tune your techniques. Keep pushing your limits, experiment with different exposure times, and continually review your results. Over the course of the year, your dedication will lead to breathtaking images that reveal the wonders of our universe, deepening your appreciation for the cosmos and the art of astrophotography.

Celestron CG-4 German Equatorial Mount and Tripod
SUPERIOR STABILITY - The CG-4 German Equatorial Mount features a robust stainless steel tripod with 1.75" diameter legs,...
As an affiliate, we earn on qualifying purchases.
Frequently Asked Questions
What Are the Best Months for Imaging Specific Deep-Sky Objects?
You should image deep-sky objects during their peak seasonal visibility, typically when they’re highest in the sky at night. Consider moon phase considerations; plan your imaging around the new moon for the darkest skies, especially in winter and fall when many objects are best visible. Summer and spring also offer excellent opportunities, but avoid bright moonlight to minimize light pollution and maximize image clarity.
How Do I Track and Manage My Imaging Data Over a Year?
You should implement digital cataloging to organize your imaging data efficiently throughout the year. Regularly update your catalog with details like date, object, and conditions. Also, develop backup strategies by saving copies on external drives or cloud storage to prevent data loss. Keeping everything well-organized and backed up allows you to easily track progress, compare sessions, and guarantee your valuable images remain safe over the long term.
What Software Options Are Recommended for Image Calibration and Stacking?
Ever wonder how you’ll keep your images perfectly calibrated and stacked? For this, you should explore software like PixInsight or DeepSkyStacker, which offer robust calibration and stacking features. They support automation scripting and hardware integration, making your workflow smoother. Don’t you want to spend more time capturing stunning images rather than fiddling with software? These tools help streamline your process, ensuring consistent, high-quality results with less hassle.
How Can I Prevent Equipment Wear and Tear During Long Projects?
To prevent equipment wear and tear during long projects, prioritize regular equipment maintenance and monitor your gear closely. You should perform routine checks, clean optics carefully, and make certain connections are secure. Consider gear upgrades with more durable components to handle extended use. Also, give your equipment proper rest periods and store it in a climate-controlled environment to prolong its lifespan and maintain ideal performance throughout your deep-sky imaging journey.
What Are Common Troubleshooting Steps for Persistent Imaging Artifacts?
If you notice persistent imaging artifacts, start by checking your optical alignment and ensuring your camera settings are correct. For example, a hobbyist once had star trails caused by misaligned optics; realigning the optical path solved the issue. Also, review focus, exposure, and ISO settings, and clean your sensor and lenses regularly. These troubleshooting steps can help eliminate artifacts and improve your images’ clarity.

iEXOS-100-2 PMC-Eight Equatorial Tracker System Tripod and Mount for Astrophotography with WiFi and Bluetooth Compatible
Integrated Explore Scientific PMC-Eight system that transcends the industry standard single processor by utilizing eight CPUs that operate...
As an affiliate, we earn on qualifying purchases.
Conclusion
As you plan your year-long deep-sky imaging journey, remember that patience often reveals the most stunning surprises. Sometimes, a clear night aligns just when you need it most, like the universe nodding in agreement. Embrace the unexpected moments—they often lead to your best shots. With persistence and a bit of luck, your efforts will turn into breathtaking images, making the entire adventure worth every late night and cloudy evening.

Sky-Watcher HEQ5 – Fully Computerized GoTo German Equatorial Telescope Mount – Motorized Astrophotography Mount with 42,000 Object Database,White
LIGHTWEIGHT COMPUTERIZED EQUAORIAL MOUNT: The HEQ5 is ideal for beginning astrophotographers, or skilled astronomers looking for a lightweight...
As an affiliate, we earn on qualifying purchases.

Sky-Watcher Star Adventurer 2i Pro Pack – Motorized DSLR Night Sky Tracker Equatorial Mount for Portable Nightscapes, Time-Lapse and Panoramas – Wi-Fi App Camera Control – Long Exposure (S20512)
Portable nightscape tracking platform: Motorized portable tracking platform perfect for capturing incredible detail of the Milky Way, eclipses...
As an affiliate, we earn on qualifying purchases.