
To make backfocus easy, focus on precise nail spacing and proper surface prep. Use the right tools like gauges, guides, and marking tools to measure and mark even intervals, especially in tight corners. Double-check measurements and alignments before nailing to avoid mistakes. If corners seem off, carefully remove and re-nail for proper alignment. Keep practicing these techniques, and you’ll quickly improve your accuracy—continue exploring for more detailed tips and tricks to perfect your woodworking projects.
Key Takeaways
- Use nail spacing gauges and guides for consistent, even spacing in corners and tight spaces.
- Measure and mark nail positions carefully to prevent drift and ensure accuracy.
- Remove loose nails gently and realign corners to correct bad or crooked corners.
- Practice proper backfocus techniques to achieve precise cuts and seamless finishes.
- Maintain safety and attention to detail to improve overall project quality and durability.
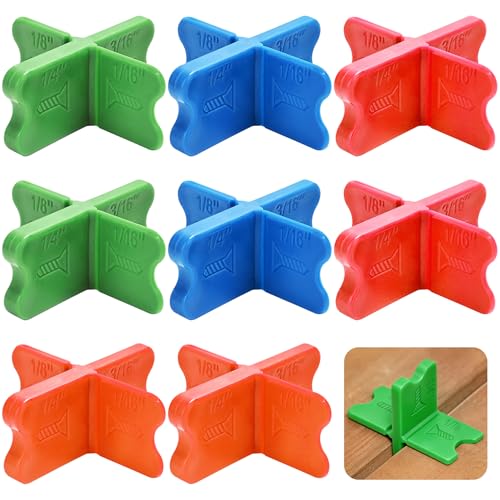
8 Pcs Deck Spacers, 4 Sizes (1/16", 1/8", 3/16", 1/4") Deck Board Spacing Tool with Screw Guides, Multi-Color Gap Gauge for Uniform Decking, Fits Pressure Treated, Composite, PVC & Hardwood
- 4 Precision Sizes – More Options Than Standard…
- High-Toughness ABS – Won’t Crack Like Cheap Plastic:Made…
- 4 Bright Colors – Find the Right Size…
As an affiliate, we earn on qualifying purchases.
As an affiliate, we earn on qualifying purchases.
Why Proper Backfocus and Nail Spacing Matter for a Flawless Finish
Proper backfocus and nail spacing are vital steps in guaranteeing a flawless finish because they directly affect the stability and appearance of your project. When you focus on color matching, you create a seamless look that hides imperfections and enhances overall quality. Surface preparation is equally important, as it ensures your surfaces are clean, smooth, and ready to accept nails. Proper nail spacing prevents cracking, warping, or uneven surfaces, which can ruin your work’s visual appeal. If nails are too close, they weaken the material; if too far apart, they compromise stability. By paying attention to backfocus, nail placement, and surface prep, you set a solid foundation for a professional, clean finish that lasts. These steps are essential for achieving a high-quality, polished result. Additionally, exploring digital content formats can provide innovative insights that enhance your overall workflow.
240 Pcs White Nail Sticker, Manicure Nail Art Tips Form Guide Sticker Edge Tape DIY Stencil Tool Stickers Decals
- Package Contents: 240 white nail stickers for nail art
- Application Types: Suitable for natural, acrylic, gel nails
- Ease of Use: Self-adhesive guides for precise tips
As an affiliate, we earn on qualifying purchases.
As an affiliate, we earn on qualifying purchases.
The Essential Tools You Need for Accurate Nail Spacing
To achieve perfect nail spacing, you need the right tools, like nail spacing guides and spacers. Using accurate measurement techniques guarantees consistent results and a professional finish. With these tools and methods, you’ll make the process straightforward and reliable. Additionally, understanding technical concepts related to your tools can further enhance your precision and efficiency. For instance, knowing about watt-hours can help you choose the right battery inverter generator for your needs, ensuring you have enough power for your projects. Incorporating tools that enhance color accuracy can also improve the visual appeal of your finished work. Furthermore, exploring regional flavors in coffee and tea can inspire creative design choices in your projects. Using well-drained soil for your outdoor workspace can also prevent moisture-related issues that may affect your tools and materials.
Nail Spacing Tools
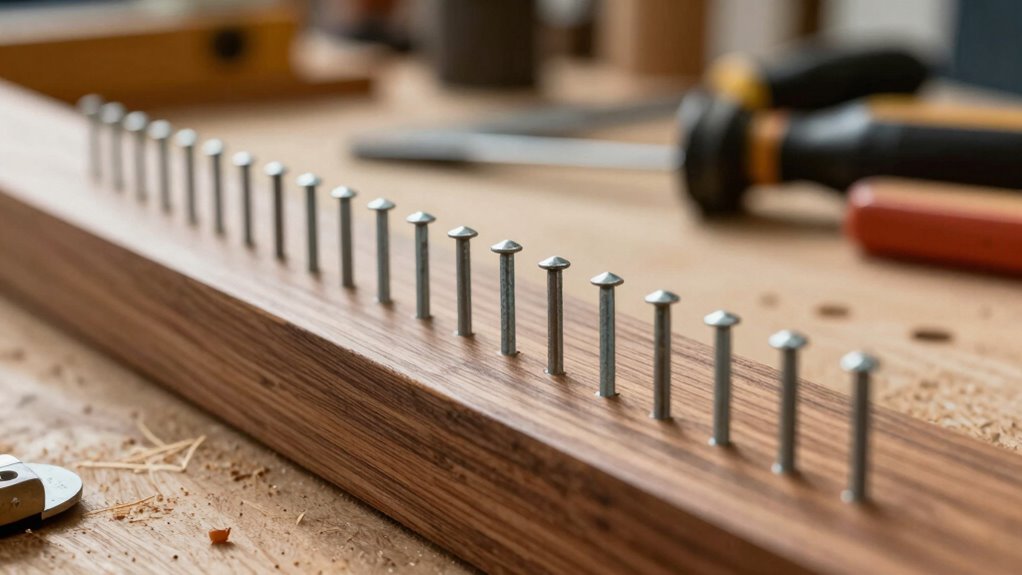
Achieving evenly spaced nails is vital for a professional-looking finish, and having the right tools makes all the difference. Nail spacing tools help you maintain consistent gaps, which is essential when using Backfocus techniques. These tools ensure your nails are perfectly aligned, saving you time and effort.
Some must-have nail spacing tools include:
- Nail spacing gauges for quick measurements
- Spacing clips to hold nails in place
- Adjustable nail guides for different distances
- Marking tools to pre-mark nail positions
Using these tools streamlines your process and guarantees uniform spacing. They’re especially helpful when working on large projects or intricate corners, where precision makes all the difference. Incorporate these nail spacing tools into your routine for flawless results every time. Additionally, consider incorporating eco-friendly practices to enhance your overall project sustainability. Furthermore, utilizing music therapy during your work sessions can enhance focus and creativity, making the process even more enjoyable. Understanding the importance of training resources can also elevate your skills and ensure successful project execution. As you work, keep in mind that aligning your projects with AI ethics can contribute to a more responsible and trustworthy approach. Remember that using fresh ingredients can inspire creativity and improve the overall quality of your projects.
Accurate Measurement Techniques
Accurate measurement techniques are the backbone of consistent nail spacing, ensuring your project looks polished and professional. When working with decorative accents or finish carpentry, precision matters. Using reliable tools helps you avoid crooked seams or uneven gaps, especially around corners. A tape measure, combination square, and a marking gauge are essential for precise measurements. Consider this quick reference:
| Tool | Purpose | Best For |
|---|---|---|
| Tape Measure | Measure distances accurately | Large or irregular spaces |
| Combination Square | Marking and checking right angles | Corners and decorative accents |
| Marking Gauge | Scribing consistent lines | Repeating measurements in trim |
| Level | Ensuring level surfaces | Finish carpentry and detailed work |
Mastering these tools guarantees careful, accurate results every time. Additionally, understanding real-world applications of these techniques can greatly enhance the quality of your craftsmanship.

DRDS 10Pcs Nail Tips Clip for Quick Building Polygel nail forms Nail clips for polygel Finger Nail Extension UV LED Builder Clamps Manicure Nail Art Tool
- Package Includes: 10 nail tips clips for building nails
- Ergonomic Design: Fits finger shape without causing pain
- Compact Size: Measures 3.5cm x 3.5cm x 3cm
As an affiliate, we earn on qualifying purchases.
As an affiliate, we earn on qualifying purchases.
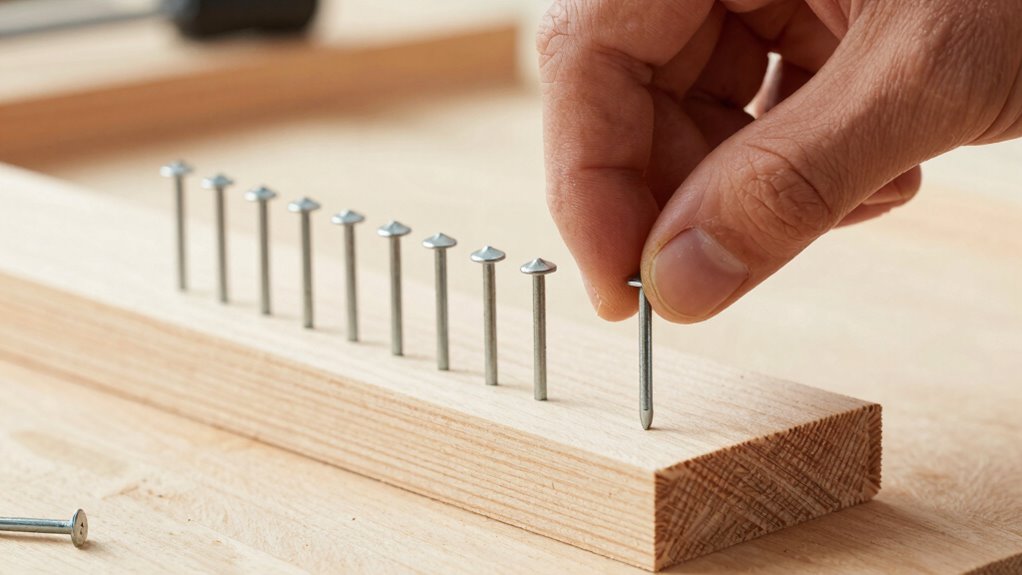
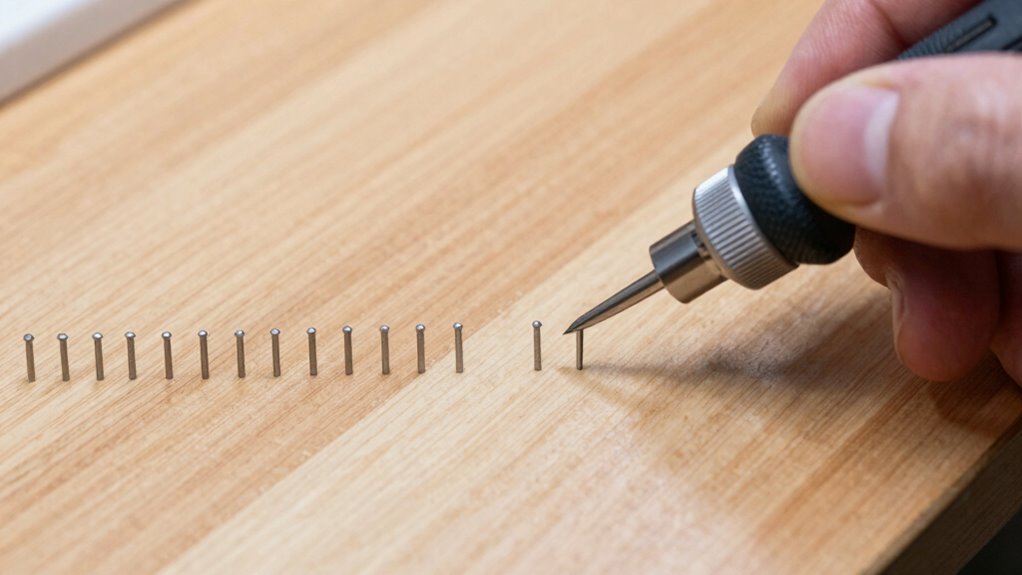
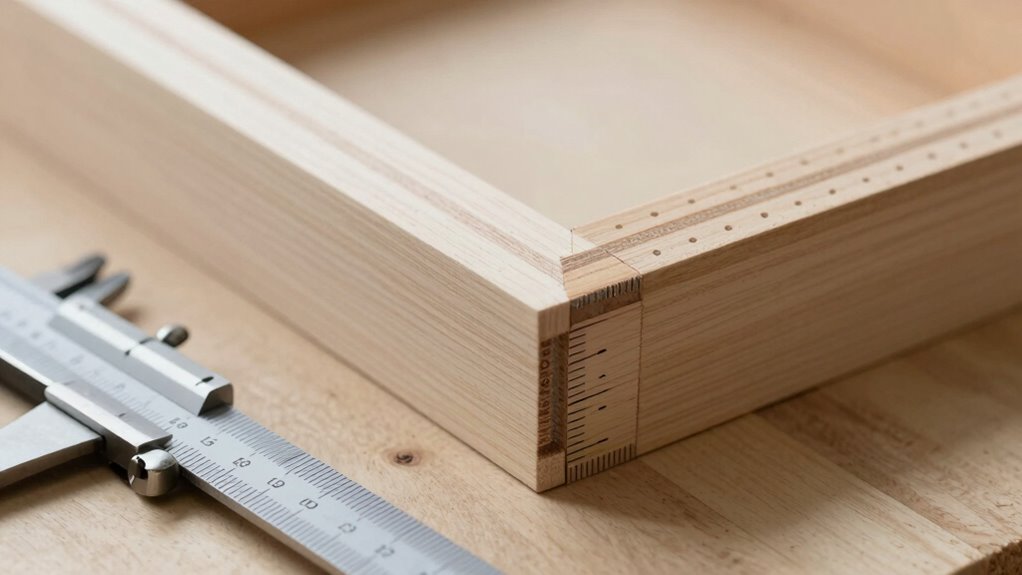
How to Measure and Mark Nail Spacing in Tight Corners
Measuring and marking nail spacing in tight corners can be tricky, but with the right approach, you can do it quickly and accurately. Proper nail placement depends on precise corner measurement, ensuring your nails are evenly spaced and secure. To do this effectively:
- Use a ruler or measuring tape to mark consistent intervals along the edge.
- Mark the nail spots lightly with a pencil, keeping your measurements aligned with the corner.
- Consider using a scrap piece of wood or a nail guide to maintain even spacing.
- Double-check your measurements before driving nails to avoid misalignment.
These steps help you achieve accurate nail placement, even in tight corners, reducing the need for corrections later and ensuring a strong, professional finish. Additionally, understanding time measurement can inform how we approach changes in industries, including construction techniques. Incorporating practical insights into your project can further enhance your overall results.

2Pack Woodworking Marking Knife with High Carbon Steel Blade – Dual Bevel Striking Knife for Precise Marking – Premium Quality Woodworking Tool for Woodworkers and Craftsmen
- Optimal for Woodworking: Creates durable, precise markings
- High Carbon Steel Blade: Double-edged, ultra-durable for longevity
- Ergonomic Design: Enhanced grip and control for accuracy
As an affiliate, we earn on qualifying purchases.
As an affiliate, we earn on qualifying purchases.
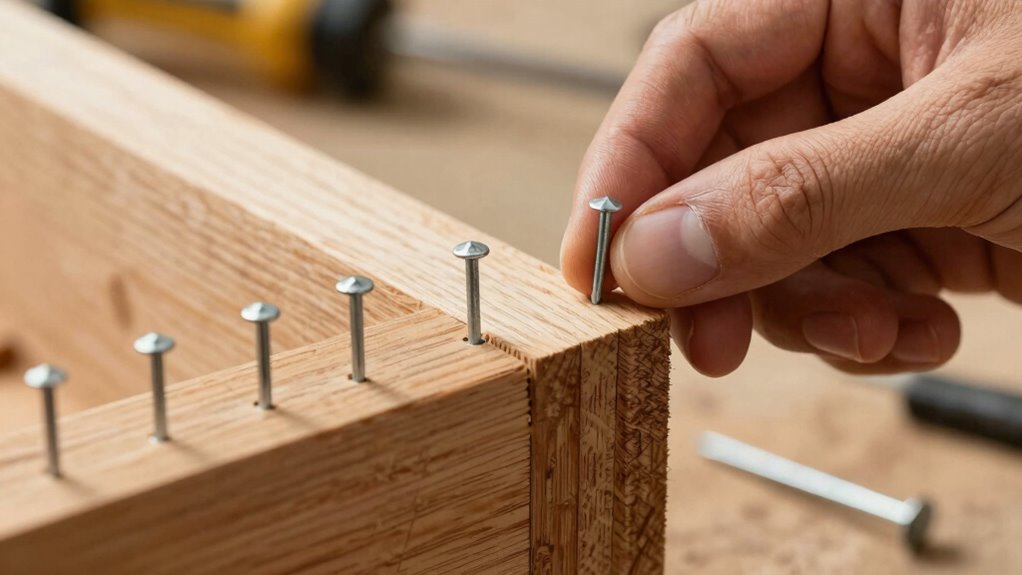
Techniques for Consistent Nail Spacing in Your Projects
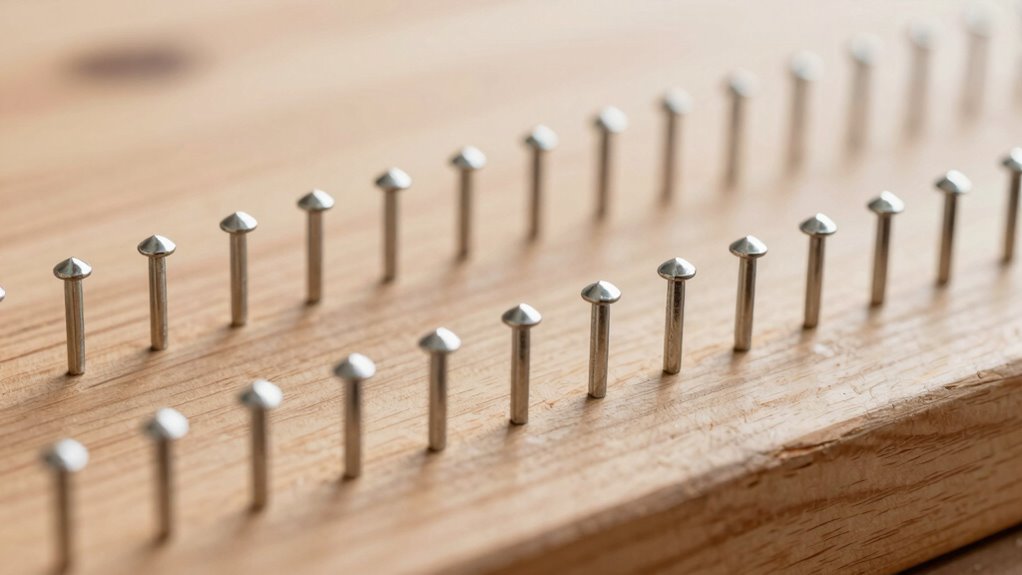
Maintaining consistent nail spacing is essential for a professional and durable finish, and doing so requires deliberate techniques. Use a nail set with a guide or spacing tool to keep nails evenly spaced. Mark your spots with a pencil for accuracy before nailing. When working with wood staining or applying nail polish, uniform spacing ensures a clean look and prevents cracking. To visualize the process, consider this table:
| Technique | Tool/Method | Purpose |
|---|---|---|
| Spacing guides | Nail spacing gauge | Consistent nail placement |
| Marking with pencil | Ruler or square | Precise nail spots |
| Using a jig | Custom fixture | Repeatable spacing |
| Clamping boards | Clamps | Secure positioning |
| Regular measurement | Tape measure | Steady intervals |
These methods help you achieve even, reliable results for your projects.
Quick Tips for Fixing Bad Corners and Restoring Alignment
When corners are out of alignment or look uneven, quick fixes can save your project from needing a complete redo. To restore proper alignment, start by adjusting your nail placement or adding small shims behind decorative accents to even out the surface. If wall texture is uneven, lightly sanding or smoothing the surface before re-nailing can help. For a quick fix, use a level or straightedge to identify the misaligned corner and make small adjustments. Applying joint compound or caulk at the corner can also hide minor imperfections. Remember, small tweaks can considerably improve the overall look, especially when working with textured walls or decorative accents that draw attention to corners. Additionally, considering multi-mower setups can enhance your yard care efficiency, just like small adjustments can enhance your project’s appearance.
- Use shims behind decorative accents for realignment
- Sand or smooth uneven wall texture before fixing
- Apply joint compound to hide minor imperfections
- Always double-check with a level before final adjustments
Common Nail Spacing Mistakes and How to Avoid Them

Incorrect nail spacing can weaken your project and lead to visible flaws, so paying attention to proper placement is vital. One common mistake is uneven nail alignment, which can cause the surface to warp or crack over time. Avoid this by maintaining consistent spacing between nails; inconsistent spacing can compromise structural integrity. Many beginners tend to nail too close to edges or too far apart, disrupting the overall spacing consistency. To prevent this, use a measuring tool or spacing gauge to guarantee nails are evenly distributed. Additionally, understanding astrophotography techniques can help you visualize the importance of precision in your work. Proper nail spacing not only strengthens the connection but also ensures a clean, professional appearance. Remember, consistent nail placement is key to avoiding weak spots and achieving a polished finish in your project. Additionally, understanding essential DIY tools can greatly enhance your accuracy and efficiency. Using proper paint application techniques can also help maintain the integrity of your finished surfaces. Proper placement of nails also reduces the risk of infection risks that can arise from improperly secured materials.
Step-by-Step Guide to Re-Nailing and Correcting Bad Corners
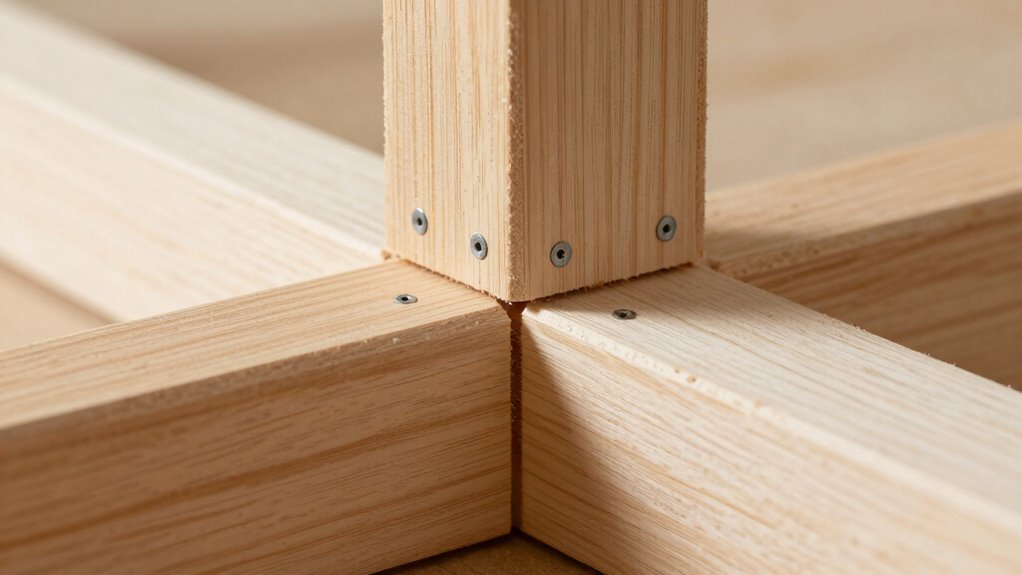
If you notice that your corners are weak, crooked, or coming apart, re-nailing can often fix the issue. Start by removing loose nails carefully, ensuring you don’t damage the woodgrain patterns. Use a nail gun safely, keeping your fingers clear of the firing area. Next, align the corner pieces properly, checking for even gaps. When nailing, place nails at consistent intervals for a clean look and strong hold. Be mindful of the woodgrain pattern to maintain a seamless appearance. Use a level to verify the corner’s straightness before finishing. Here’s what to keep in mind:
- Remove old nails gently to avoid splitting
- Use a nail gun with proper safety gear
- Check woodgrain patterns for a seamless look
- Maintain even spacing for a professional finish
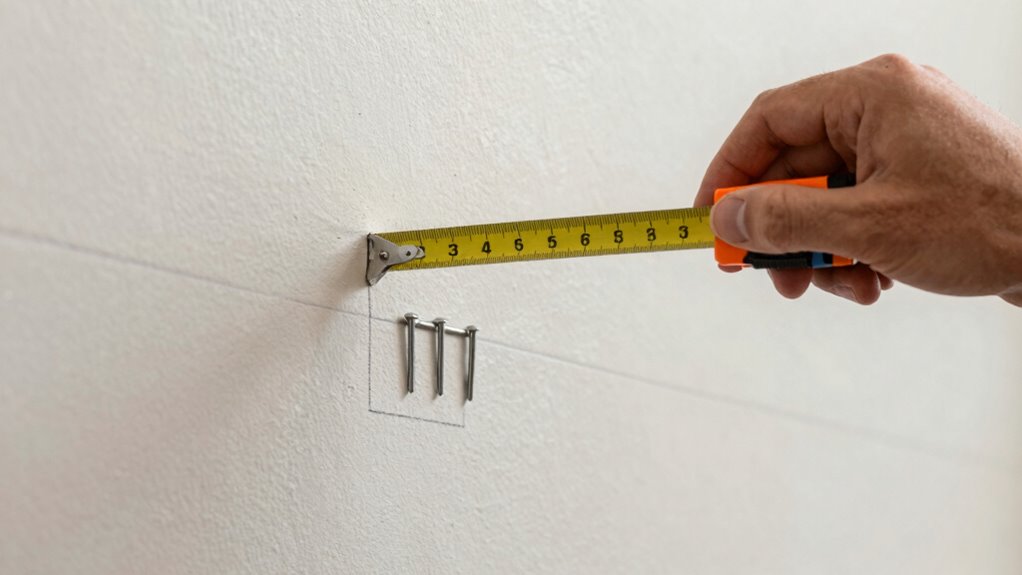
How to Ensure Even Nail Spacing in Confined Spaces
To guarantee even nail spacing in tight spots, start by marking precise nail locations to keep your work accurate. Using spacers can help maintain consistency, especially in confined areas where freehand placement is tricky. Always measure before nailing to confirm your spacing is correct and avoid mistakes. Incorporating color theory principles into your design process can also enhance the visual appeal of your work. Additionally, understanding media literacy allows you to critically evaluate the resources and techniques you choose in your projects.
Mark Precise Nail Positions
When working in confined spaces, ensuring even nail spacing can be challenging, but precise marking makes all the difference. Proper nail positioning depends on measurement accuracy; careful marking helps maintain consistent spacing. To ensure your nails are evenly spaced, start by measuring the total distance and dividing it into equal parts. Use a pencil and a straightedge for accuracy. Mark each point clearly before nailing to prevent drift. Keep these tips in mind:
- Use a measuring tape to confirm distances before marking
- Mark reference points for each nail position
- Double-check measurements after marking
- Keep tools steady for consistent marks
This approach guarantees even nail spacing, making your project look professional and ensuring secure fastening.
Use Spacers for Consistency
Using spacers can greatly improve the consistency of nail spacing, especially in tight spaces where measuring and marking alone might be difficult. Spacer techniques involve placing small, uniform items—like scrap pieces of wood, cardboard, or specialized spacers—between nails to maintain even gaps. These tools help guarantee consistent spacing, reducing the chances of uneven rows or crooked nails. To use spacers effectively, position them before nailing and remove them once the nails are driven in. This method saves time and improves accuracy, especially in confined areas where pinpointing exact measurements is tricky. By adopting spacer techniques, you create a professional, uniform look with minimal effort, ensuring your nails are evenly spaced and your project remains neat and structurally sound. Additionally, using spacers can enhance safety tips by preventing nail mishaps that could occur in cramped conditions.
Measure Before Nailing
Measuring carefully before you start nailing is essential, especially in confined spaces where precision matters most. Using a nail gun speeds up the process, but inconsistent spacing can weaken your project. To guarantee even nail spacing, start by marking your spots, considering the wood grain direction for better grip. Double-check measurements before firing the nail gun to prevent mistakes. Keep in mind, nails should follow the natural flow of the wood grain for a cleaner look.
- Use a pencil and ruler to mark precise nail placement
- Space nails evenly, avoiding clusters or gaps
- Adjust the nail gun depth for secure fastening
- Verify measurements again before each nail to maintain consistency
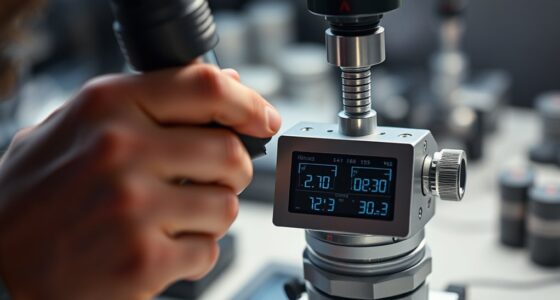
Troubleshooting Backfocus Problems : When to Call a Pro
Backfocus issues can be tricky to troubleshoot on your own, especially if adjustments don’t seem to improve your images. If you’ve tried rechecking your tool maintenance and verifying everything is calibrated correctly, it might be time to call a pro. Persistent backfocus problems could indicate deeper issues with your equipment or technique. When your efforts aren’t resolving the problem, consider consulting an expert who can diagnose underlying causes more accurately. Professional help is especially valuable if your project planning involved complex setups or if you’re dealing with high-precision tools. Knowing when to seek assistance saves time, prevents frustration, and ensures your work remains accurate. Additionally, understanding the importance of testing accuracy can further enhance your troubleshooting efforts. Don’t hesitate to reach out if troubleshooting efforts aren’t yielding the results you need.
Maintaining Your Backfocus Skills for Better Woodworking Results
Once you’ve addressed major backfocus issues with professional help, maintaining your skills becomes key to ensuring consistently sharp woodworking results. Regular practice of backfocus techniques keeps your accuracy sharp and prevents errors. To stay on top, focus on:
- Consistently checking your tools for proper calibration
- Practicing safe, controlled adjustments to maintain woodworking safety
- Keeping your workspace organized to avoid accidents
- Reviewing technique tutorials to refine your backfocus skills
Staying diligent with these habits helps you produce precise cuts and perfect corners every time. Remember, maintaining your backfocus skills isn’t just about craftsmanship—it’s also about safety. By practicing regularly and following proper procedures, you’ll improve your woodworking results and work confidently with less risk.
Frequently Asked Questions
How Do I Choose the Right Nails for Different Woodworking Projects?
You choose the right nails by considering nail types and your wood joint techniques. For example, use finishing nails for delicate trim work, while framing nails are best for heavy-duty projects. Thin nails work well with fine joints, and thicker nails provide extra strength. Always match nail size and type to the specific joint technique you’re employing, ensuring your project stays sturdy and looks professional.
Can I Fix Bad Corners Without Disassembling the Entire Piece?
A stitch in time saves nine, so you can often fix bad corners without full disassembly. For corner repair, try using clamps or corner braces to realign and secure the joint. You might also apply wood glue and reinforce with nails or screws, avoiding the need to take apart the whole piece. These disassembly alternatives save time and preserve your project, making minor fixes simple and effective.
What Are the Signs of Incorrect Backfocus or Nail Spacing?
You’ll notice issues with incorrect backfocus or nail spacing if your nail alignment appears uneven or inconsistent, and your furniture or frames seem to wobble or shift. Gaps might be visible between joints, or corners may look misaligned. To fix this, perform a backfocus adjustment, ensuring nails are spaced evenly and aligned properly. Proper nail spacing and backfocus help secure your pieces firmly, preventing future misalignments and maintaining a professional finish.
How Does Humidity Affect Nail Spacing and Backfocus Accuracy?
Think of your project like a sponge—humidity causes moisture expansion, which affects nail spacing and backfocus accuracy. High humidity can make materials swell, shifting nails slightly and throwing off alignment. I once worked in a humid climate, and my measurements kept changing until I improved humidity control. To prevent this, maintain consistent moisture levels, use dehumidifiers, and keep your workspace climate steady to guarantee precise nail spacing and backfocus.
Are There Specific Techniques for Working With Irregular or Uneven Surfaces?
When working with irregular or uneven surfaces, you should first assess surface irregularities and adjust your technique accordingly. Use longer nails or specialized fasteners to improve nail alignment and guarantee stability. Pre-drill holes if necessary, and tap nails gently to prevent surface damage. Keep your nails slightly countersunk for a flush finish. These steps help maintain proper backfocus and assure your project remains sturdy despite surface irregularities.
Conclusion
Think of backfocus and nail spacing like tuning a guitar—small adjustments make a big difference. When you master these techniques, your projects come together smoothly, just like a perfectly played chord. I once saw a DIYer fix a crooked corner with patience and a few precise nips, transforming a shaky wall into a masterpiece. With practice, you’ll develop a steady hand and keen eye, turning woodworking challenges into confident, flawless finishes.