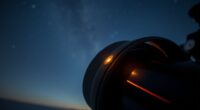
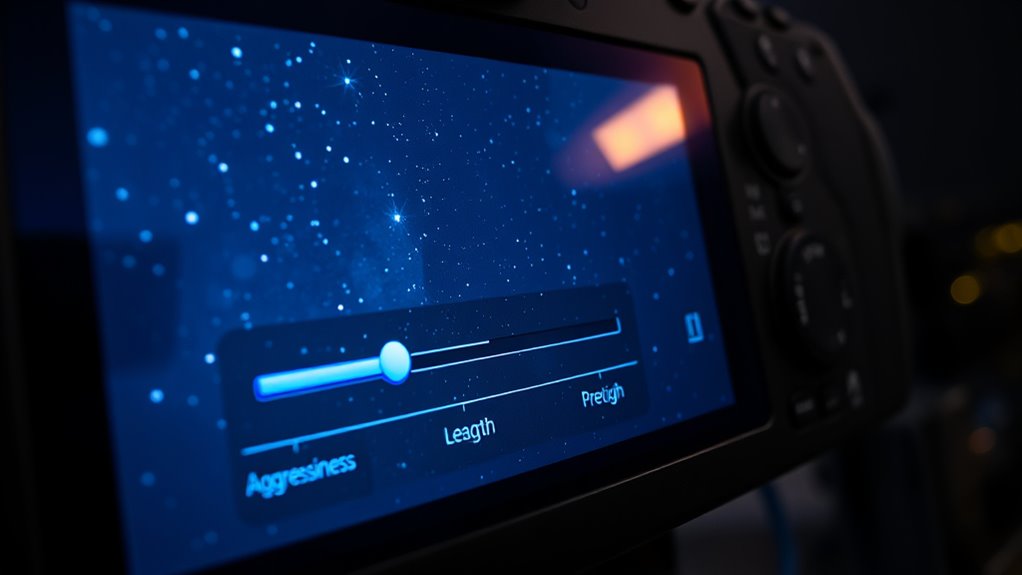
To optimize guiding settings, start by adjusting your aggressiveness to find a balance where corrections are effective but not jittery. Too high can cause oscillations, while too low allows star drift. Next, set the exposure length to around 2-3 seconds, enough to reduce noise but still responsive to mount movements. Fine-tuning these parameters improves star stability in your images. If you keep experimenting, you’ll discover the perfect combination for your setup.
Key Takeaways
- Start with moderate guiding aggressiveness; adjust based on star stability to prevent oscillations or drift.
- Use 2-3 second guide camera exposures to balance noise reduction and real-time correction accuracy.
- Fine-tune aggressiveness to achieve smooth, consistent star corrections without causing jitter.
- Longer exposures (3-5 sec) improve drift detection but may introduce lag on unstable mounts.
- Proper mount calibration and backlash correction enhance guiding responsiveness, optimizing aggressiveness and exposure settings.
To achieve sharp, streak-free astrophotographs, optimizing your guiding settings is essential. Proper autoguide calibration guarantees your mount tracks accurately, which is the foundation for clear images. When calibrating your autoguide system, pay close attention to backlash correction, as this can considerably impact guiding performance. Backlash occurs when the gear slack causes delays in response, leading to star trail streaks or drifts. During autoguide calibration, you should perform a thorough backlash correction routine, which involves moving the guide scope in both directions to measure and compensate for gear slack. This step helps your guiding software understand how your mount responds to corrections, minimizing lag and improving overall tracking accuracy. Additionally, ensuring your mount has been properly tuned for stability can significantly enhance guiding precision.
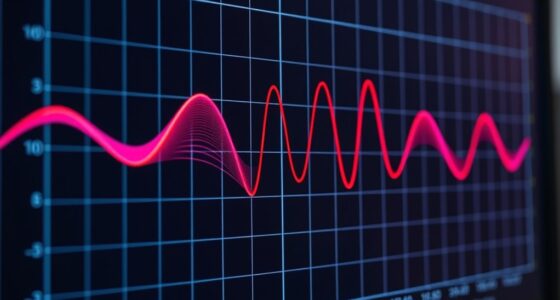
Once your autoguide calibration is complete and backlash is corrected, you need to fine-tune your guiding aggressiveness. Aggressiveness controls how strongly the guider responds to deviations from the target star. If your guiding is too conservative, small drift might go uncorrected, resulting in elongated stars over long exposures. Conversely, overly aggressive guiding can cause your mount to overcorrect, creating oscillations that produce jittery stars. Finding the right balance is key. Start with a moderate aggressiveness setting and adjust based on your results. If you notice persistent drift, slightly increasing aggressiveness can help keep stars pinpoint. If your stars start to wobble or jitter, dial it back. Remember, the goal is smooth, consistent corrections that keep your stars round and sharp.
Next, consider your exposure length for guiding images. Short exposures, like 1-2 seconds, provide quick feedback but can be noisy, especially if your mount or guiding camera isn’t very sensitive. Longer exposures, such as 3-5 seconds, reduce noise and give a clearer picture of drift, but may delay your corrections if your mount or software isn’t optimized for longer guide exposures. Experiment with different exposure lengths to find what works best for your setup. Typically, a balance of 2-3 seconds offers a good compromise, providing enough signal for accurate guiding without introducing excessive lag. Longer exposures may be suitable for highly stable mounts, but if your system is prone to slight movements, shorter exposures can result in more precise corrections.

Astromania Finder Scope Mount Universal Dovetail Base, Telescope Dovetail Base Compatible with Optical Telescope, Quick Release Aluminum Base Ideal for Installation of Red Dot Optical Finderscope
Drilled "but not threaded" to accommodate screws up to 5mm in diameter; center-to-center screw hole spacing on your…
As an affiliate, we earn on qualifying purchases.
As an affiliate, we earn on qualifying purchases.
Frequently Asked Questions
How Do Guiding Settings Affect Image Sharpness?
Guiding settings directly impact your image sharpness by ensuring your telescope tracks accurately. If your autoguider calibration is off, stars won’t stay pinpoint, causing blurriness. Adjusting guiding software compatibility, like setting the right aggressiveness and exposure length, helps correct tracking errors. Higher aggressiveness can improve sharpness during minor guide errors, but too much may cause oscillations. Find a balance to keep your images crisp and clear.
What Are the Signs of Incorrect Guiding Aggressiveness?
If your guiding aggressiveness is off, you’ll notice mount correction issues like star drift or oscillations. The guiding star selection becomes tricky, often resulting in overcorrection or undercorrection. You might see elongated or trailing stars in your images. Adjust aggressiveness gradually, monitor mount correction closely, and verify your guiding star is well-chosen. Proper settings help keep your guiding stable, reducing drift and improving image sharpness.
Can Exposure Length Influence Guiding Accuracy?
Your guiding accuracy is like a tightrope walk—exposure length can be your balancing pole. Longer exposures allow your autoguider calibration to gather more light, smoothing out guiding errors, but too long can cause star trailing if guiding software compatibility isn’t perfect. Conversely, short exposures might miss subtle drifts. Adjust exposure length carefully, matching your equipment’s capabilities to keep your celestial dance steady and precise.
How to Troubleshoot Guiding Errors During Long Exposures?
When troubleshooting guiding errors during long exposures, start by checking your autoguider calibration to verify accuracy. Confirm your polar alignment using precise techniques like drift alignment or software-assisted methods. If errors persist, reduce aggressiveness settings to prevent overcorrection and lower exposure length to improve correction stability. Regularly review calibration and alignment, and make adjustments as needed, ensuring your guiding system maintains consistency throughout extended imaging sessions.
Is There a Universal Guiding Setting for All Telescopes?
There’s no universal guiding setting for all telescopes because compatibility varies with different models and guiding software. You need to tweak parameters like aggressiveness and exposure length based on your specific setup, including your telescope’s mount and camera. Start with manufacturer recommendations, then test and adjust to find the best balance. Customizing your guiding settings ensures peak performance, regardless of your equipment brand or type.

SVBONY SV305C Astrophotography Camera, 2.1MP IMX662 Color Telescope Camera with Removable UV IR Cut Glass, 1.25" Electronic Telescope Eyepiece for Planetary Moon Astrophotography&EAA
SV305C is a color entry-Level telescope camera; which has good performance in planetary photography; lunar photography; and is…
As an affiliate, we earn on qualifying purchases.
As an affiliate, we earn on qualifying purchases.
Conclusion
By fine-tuning your guiding settings—balancing aggressiveness and exposure length—you can greatly improve your astrophotography results. Don’t you want sharper, more precise images without endless trial and error? Remember, the key is to experiment carefully, monitor your adjustments, and find what works best for your specific setup. With patience and attention to detail, you’ll discover the full potential of your guiding system. Are you ready to elevate your astrophotography to the next level?
mount backlash correction tool
As an affiliate, we earn on qualifying purchases.
As an affiliate, we earn on qualifying purchases.
guiding aggressiveness setting
As an affiliate, we earn on qualifying purchases.
As an affiliate, we earn on qualifying purchases.