
The most critical PHD2 settings to focus on are star mass, guiding mode, aggressiveness, and guide rate. Proper polar alignment and calibration are essential for accurate guiding, while refining these parameters helps prevent star elongation and drift. Avoid wasting time tweaking minor options like reject thresholds or dithering initially. Stay attentive to log files and graphs to identify issues early. If you want to optimize your guiding quickly, understanding these key settings will make a big difference—keep exploring to learn more.
Key Takeaways
- Focus on guiding parameters like aggressiveness, sensitivity, and star mass, as they significantly impact guiding accuracy and image quality.
- Prioritize proper polar alignment to reduce drift and simplify guiding adjustments, preventing star trails in long exposures.
- Regularly analyze log files and graphs to identify drift patterns and refine guiding settings effectively.
- Avoid spending excessive time on minor parameter tweaks; concentrate on calibration and mount stability.
- Set guide rate around 70-80% of maximum for optimal responsiveness without causing jitter.
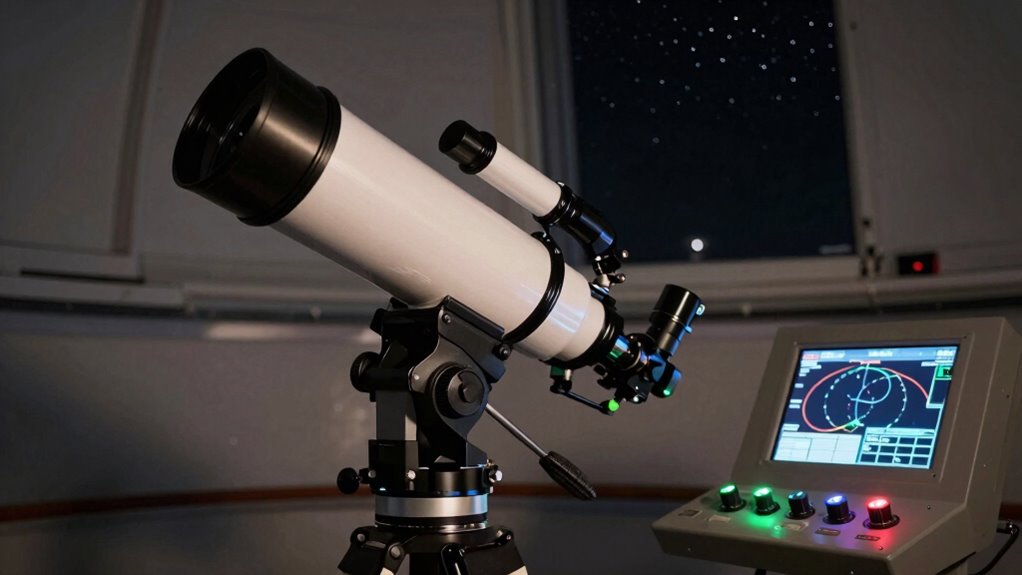
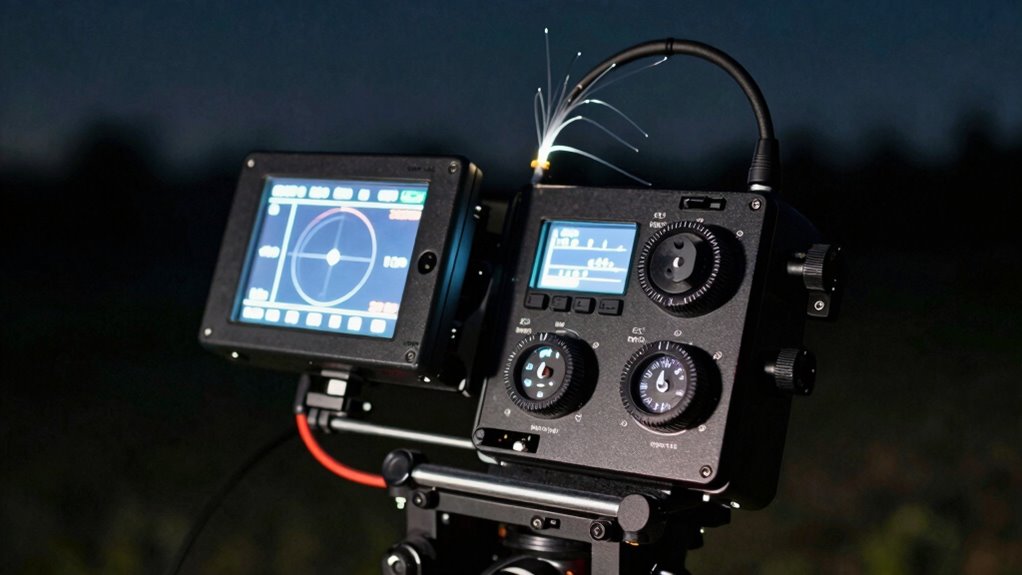
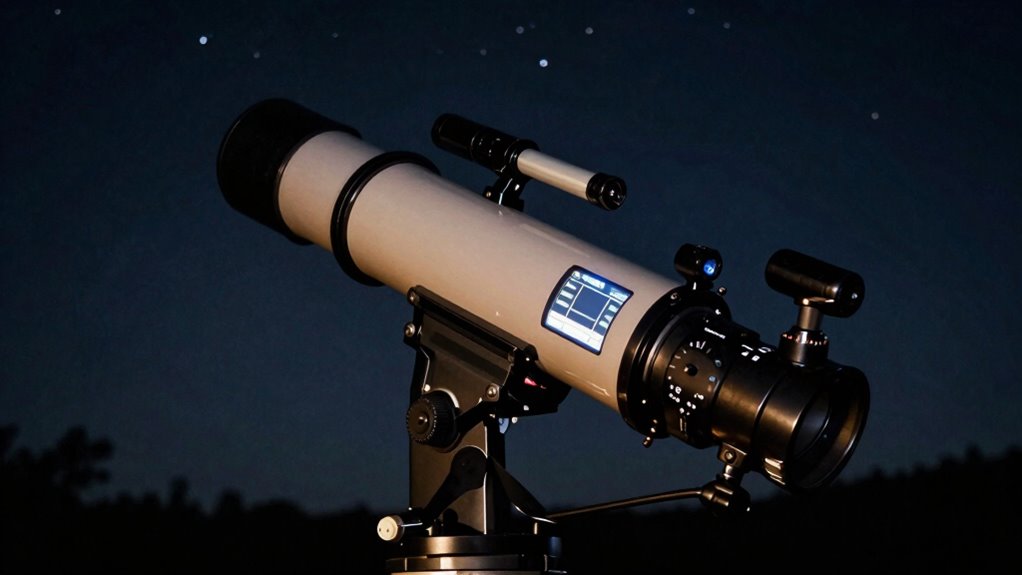
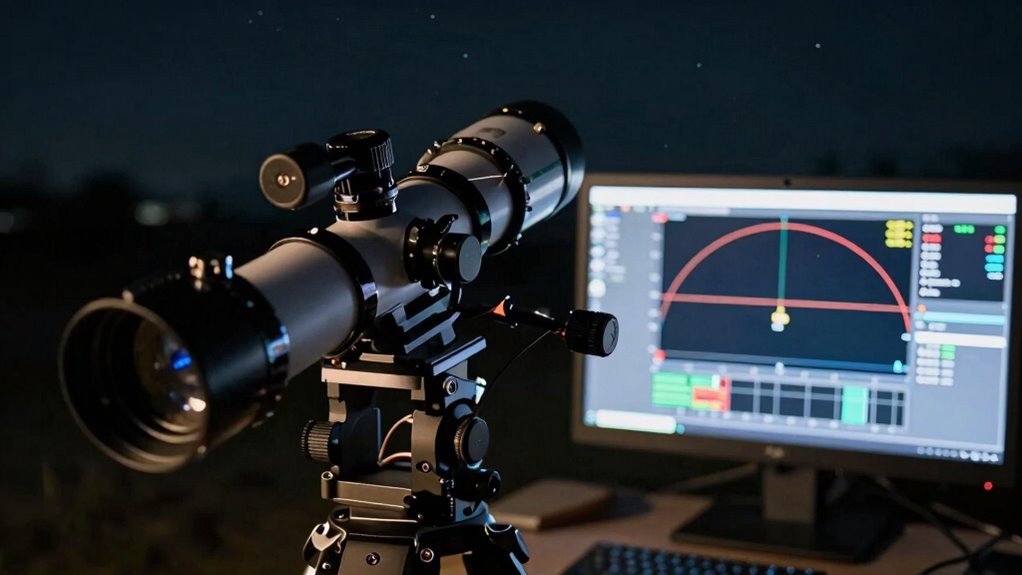
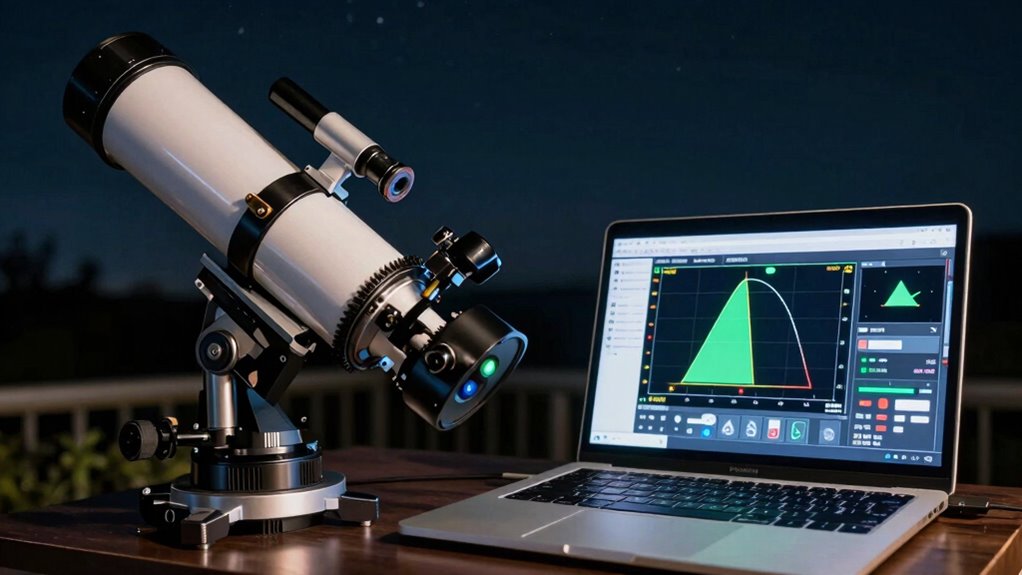
PHD2 guiding software for astrophotography
As an affiliate, we earn on qualifying purchases.
As an affiliate, we earn on qualifying purchases.
Why Focusing on the Right Guiding Parameters Matters
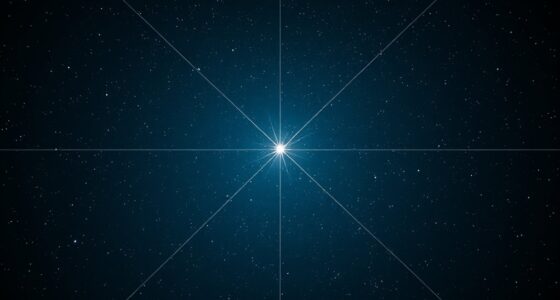
Understanding which guiding parameters truly impact your astrophotography results is essential because not all settings are equally influential. Star magnitude plays a critical role in guiding accuracy, as brighter stars provide clearer signals for guiding software to lock onto. When your guiding software can detect stars with ideal magnitude, it reduces errors and improves tracking precision. Focusing on parameters that influence star magnitude, such as exposure time and sensitivity, lets you fine-tune your guiding performance. Ignoring these key factors wastes time on less impactful adjustments. By honing in on the right guiding parameters, you ensure your system tracks accurately, minimizing star trails and maximizing image quality. Ultimately, understanding the significance of star magnitude and guiding software settings helps you achieve sharper, more consistent astrophotography results.
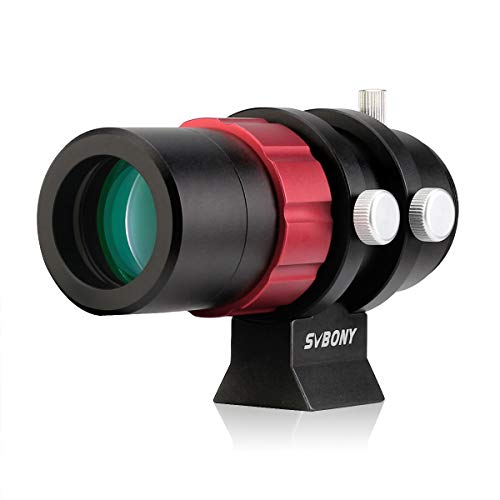
SVBONY SV165 Mini Guide Scope 30mm F4 Finder and Guide Scope for SV305C Pro, Compatible with Astronomy Telescope and ZWO QHY Orion Auto Guiding Cameras for Deep Sky Astrophotography
Compatible with mainstream auto guiding cameras; 1.25inch and M42 mount interface designed for compatible with SV305C Pro and…
As an affiliate, we earn on qualifying purchases.
As an affiliate, we earn on qualifying purchases.
Understanding the Role of Star Mass and Guiding Mode
Star mass and guiding mode are essential factors that directly influence the stability and accuracy of your astrophotography setup. The star mass you’re working with affects how your guiding system responds to movement; larger stars tend to be easier to guide because they provide more signal, reducing noise. Smaller stars can be more challenging but can still work well with proper guiding adjustments. Additionally, making smart eating choices can enhance your overall well-being, which is crucial for maintaining the focus and patience required in astrophotography. Your guiding mode also plays a crucial role—it determines how PHD2 tracks the stars. For example, the “Aggressive” mode responds quickly to drift, while “Gentle” mode smooths out corrections. Choosing the right guiding mode depends on your mount’s responsiveness and your star mass. Properly balancing these factors helps prevent drift and ensures sharper, more consistent images. Additionally, understanding content formats can enhance your overall astrophotography experience by providing insights into effective techniques and strategies.

Sky-Watcher Star Adventurer 2i Pro Pack – Motorized DSLR Night Sky Tracker Equatorial Mount for Portable Nightscapes, Time-Lapse and Panoramas – Wi-Fi App Camera Control – Long Exposure (S20512)
Portable nightscape tracking platform: Motorized portable tracking platform perfect for capturing incredible detail of the Milky Way, eclipses…
As an affiliate, we earn on qualifying purchases.
As an affiliate, we earn on qualifying purchases.
How to Set Proper Aggressiveness in PHD2
Setting the right aggressiveness level in PHD2 is essential for stable guiding. You need to balance sensitivity with stability, adjusting the aggressiveness to match your setup and conditions. Keep an eye on star drift to find the best setting that minimizes movement without causing oscillations. Additionally, understanding contrast ratio can enhance your overall guiding performance by ensuring better image quality during your astrophotography sessions. Using lightweight foundations can help you maintain a clear view when capturing images, as they ensure minimal obstructions from your setup. Furthermore, choosing the right styling cream can improve your overall setup by providing a natural appearance that complements your astrophotography aesthetics. As you adjust settings, remember that analytics cookies can provide insights into user interactions that may inform your guiding strategies. Implementing a methodical approach to your adjustments can also help ensure consistent results over time.
Balancing Sensitivity and Stability
Finding the right balance between sensitivity and stability in PHD2 is essential for effective guiding. When your star color appears too red or too blue, it signals that your guiding is either too aggressive or too conservative. Adjusting your sensitivity helps prevent overcorrecting, which can cause star elongation, or undercorrecting, leading to drift. Use focusing techniques to guarantee your star is sharp and well-defined, making it easier to judge guiding quality. If your star looks round and steady, your sensitivity is balanced. If it’s bouncing or elongated, tweak the settings to find that sweet spot where your guiding is responsive without causing instability. Proper balancing minimizes star movement and maximizes image clarity during your session. Additionally, incorporating landscaping techniques can enhance your overall setup and create a more enjoyable observing environment. Remember that inadequate maintenance of your guiding system can lead to decreased efficiency and performance.
Adjusting Aggressiveness Level
Adjusting the aggressiveness level in PHD2 is essential for fine-tuning your guiding response to drift and movement. This setting determines how quickly the guiding software reacts to star movements. If your star color indicates a red or orange hue, it suggests guiding corrections may be too aggressive, risking overcorrection. Lower aggressiveness can smooth out star movement but might allow drift to persist. Conversely, higher settings make PHD2 respond faster, which is useful in windy conditions or when tracking difficult objects. Finding the right balance prevents unnecessary oscillations or star elongation. Remember, the goal is to maintain stable guiding without overreacting to minor shifts. Adjust based on your star color and guiding performance, ensuring your system reacts appropriately to drift without causing jitter.
Monitoring Star Drift
How can you tell if your guiding system is responding appropriately to star movement? Watch for star drift—if stars slowly shift from their position over time, your guiding accuracy needs calibration. Proper monitoring involves tracking the star’s position on your guiding software’s graph or live image. If the drift is minimal and consistent, your guiding setup is well-tuned. Too much drift indicates your aggressiveness might be too low or too high, causing the system to under- or over-correct. Adjusting aggressiveness settings helps balance responsiveness and stability. Remember, the goal is to keep star drift to a minimum without causing oscillations. Regularly monitoring star movement ensures your guiding remains accurate, so you capture sharp, well-exposed images without wasting time on unnecessary tweaks. Additionally, understanding dream symbolism can provide insights into your guiding experiences and enhance your overall observational skills. Incorporating self-care practices can further improve your focus and decision-making during long observation nights. Moreover, having a solid grasp of media literacy can help you interpret and evaluate the information you encounter when researching astrophotography techniques. Being aware of effective email strategies can also help you communicate your findings and experiences more clearly with fellow astronomers.

Astromania Upgrated Guide Scope 70mm FMC with Double Helical Focuser, Deluxe Finder Guidescope Kit Compatible with 1.25 inch Eyepiece for Astronomy Telescope & Auto Guiding Camera for Astrophotography
400mm focal length: with bright; wide-field optics puts numerous potential guide stars in view so you'll never have…
As an affiliate, we earn on qualifying purchases.
As an affiliate, we earn on qualifying purchases.
Getting Calibration Right : The Foundation of Good Guiding
Getting calibration right starts with ensuring your mount is properly aligned and your polar alignment is precise. You should also perform consistent calibration checks to catch any issues early. These steps lay the groundwork for reliable guiding and better imaging results.
Proper Mount Alignment
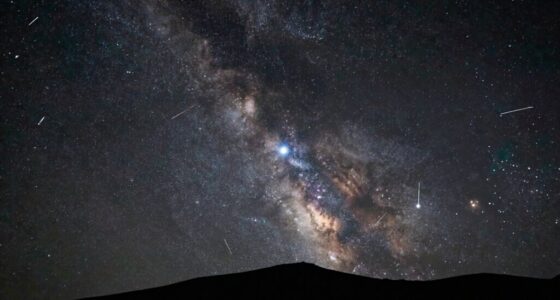
Proper mount alignment is the critical first step toward reliable guiding, as it guarantees your telescope’s tracking is accurate from the start. When you’re aiming to capture deep sky objects or avoid star trails, precise alignment ensures your mount moves smoothly with Earth’s rotation. Start by leveling your mount and aligning it with the celestial pole, either Polaris or the true celestial pole, depending on your location. This minimizes drift and allows your guiding software to correct minor tracking errors effectively. Good alignment reduces the workload on your guiding system, resulting in steadier images with fewer corrections. Remember, even small misalignments can cause star trails over long exposures, so take your time to get it right before proceeding with calibration. Proper mount alignment sets a solid foundation for successful astrophotography, as it mirrors the importance of effective psychological strategies in achieving long-term recovery from challenges.
Precise Polar Alignment
Achieving precise polar alignment is essential because even small deviations can considerably impact your guiding accuracy. When your mount isn’t accurately aligned, star trails become elongated, ruining your astrophotography. Proper equipment calibration ensures your mount tracks celestial objects smoothly, reducing drift and guiding errors. Use a polar scope or software-assisted methods to fine-tune your alignment, focusing on aligning the mount’s axis with the celestial pole. Remember, even slight misalignments can cause significant guiding errors over long exposures. Accurate polar alignment forms the foundation for steady guiding, leading to crisp star images and minimal star trail. Taking the time to get this step right pays off by simplifying subsequent calibration and guiding adjustments, making your entire astrophotography process more reliable and successful.
Consistent Calibration Checks
Sure! Here’s the revised content with the requested adjustments:
—
Once your mount is precisely aligned, the next step is to regularly verify and calibrate your guiding setup. Consistent calibration checks ensure you’re accurately tracking star mass and maintaining optimal guiding mode. To do this effectively:
- Recalibrate after major changes or if guiding becomes unstable.
- Verify calibration accuracy with star mass adjustments to prevent drift.
- Adjust guiding mode if you notice persistent errors, ensuring your setup aligns with the current sky conditions. Regularly reviewing your calibration also helps to maintain optimal performance in your imaging sessions. Additionally, proper skincare routines can enhance your focus and stamina during long imaging sessions. The use of AI-driven algorithms can further streamline the calibration process, providing real-time adjustments based on environmental conditions.
These steps keep your guiding precise, preventing drift and improving image sharpness. Regular calibration checks form the foundation for reliable guiding, especially when monitoring star mass effects or switching guiding modes. Staying consistent minimizes time wasted troubleshooting and maximizes your imaging success. Additionally, juice extraction techniques can enhance your focus and stamina during long imaging sessions.
—
Let me know if you need any further modifications!
Adjusting the Guide Rate for Better Tracking
Have you ever noticed your astrophotography images drifting or streaking despite stable mount setups? Adjusting the guide rate can considerably improve tracking accuracy. The guide rate determines how quickly your mount responds to guiding corrections, directly impacting star mass behavior in your images. If your guide rate is too high, your mount overreacts, causing jitter; too low, and it won’t correct enough, leading to drift. Find a balance that matches your mount’s capabilities and star mass. Typically, setting the guide rate around 70-80% of the mount’s maximum works well. Experimenting within this range helps optimize tracking. Here’s a quick guide:
| Guide Rate | Effect on Tracking | Suitable for |
|---|---|---|
| 70% | Stable, responsive | Most setups |
| 80% | Faster corrections | Bright stars |
| 60% | Less jitter | Heavy loads |
| 75% | Balanced | General use |
| 85% | Aggressive corrections | Fast-moving objects |
How Reject and Dither Settings Impact Guiding Precision
Adjusting your guide rate helps improve tracking, but fine-tuning your guiding accuracy also depends on how your guiding software handles data rejection and dithering. Reject settings determine which guiding data points get discarded, preventing anomalies from skewing your corrections. Proper reject thresholds avoid overreacting to temporary fluctuations. Dither strategies, on the other hand, add intentional small movements to prevent guiding lockup and improve calibration. To optimize guiding precision:
- Set reject thresholds high enough to ignore noise but low enough to catch real issues.
- Choose dithering patterns that distribute corrections evenly and avoid periodic errors.
- Adjust dither amplitude to prevent overcorrection while maintaining accurate star positioning.
Careful calibration of reject settings and dither strategies ensures more consistent, precise guiding results.
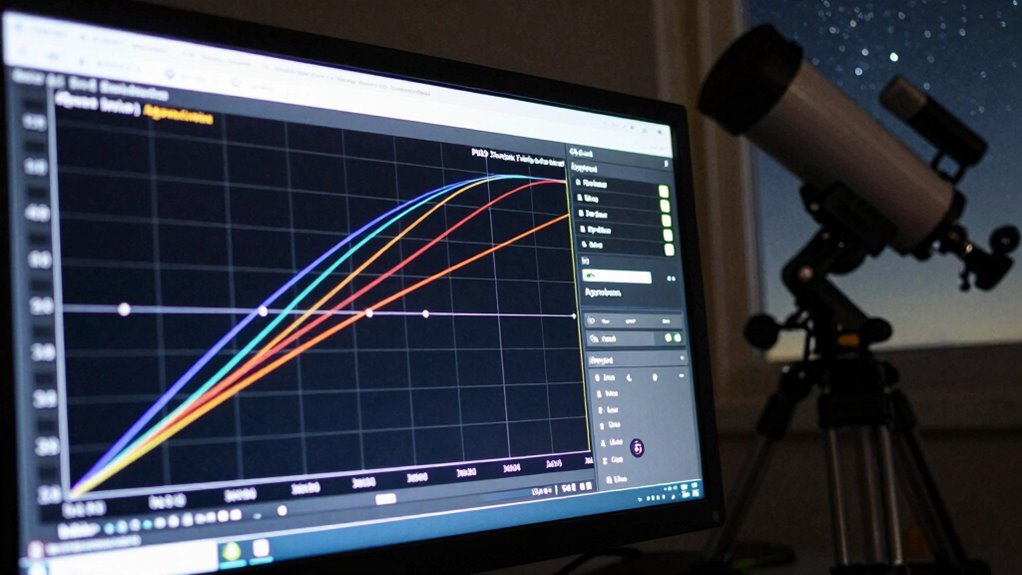
When and How to Use PEC for Improved Tracking
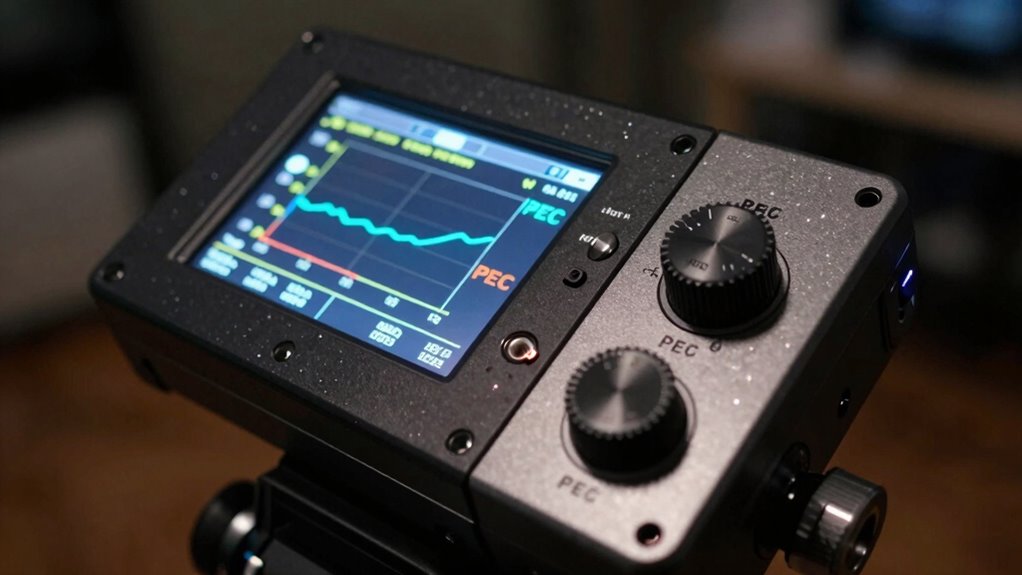
Knowing when to activate PEC is vital for better tracking, especially after your mount has settled. Properly adjusting PEC involves recording a clean calibration and fine-tuning it to match your guiding conditions. Mastering the timing and adjustments guarantees you get the most benefit from PEC without introducing new errors. Additionally, keeping an eye on filter sizing/flow can significantly enhance the overall system performance. Understanding emotional well-being can also improve your ability to make precise adjustments during this process. Exploring regional flavors in coffee and tea can also help you develop a more nuanced approach to the adjustments you make.
Optimal PEC Activation Timing
Timing is everything when it comes to activating PEC for ideal tracking. You want to activate PEC when your star color is stable and your equipment compatibility is confirmed. Proper timing guarantees PEC correction works seamlessly, preventing unnecessary adjustments or star smearing. To optimize activation:
- Monitor star color; switch PEC on once the star’s hue stabilizes, indicating consistent tracking. This ensures that you are fully aware of your emotional skills to better navigate any challenges during your observation.
- Confirm equipment compatibility; ensure your mount and camera interface are ready for PEC corrections.
- Activate PEC during periods of stable seeing conditions, avoiding rapid atmospheric changes that compromise accuracy.
Additionally, maintaining a stable environment is crucial, as portable oil radiators can help regulate temperature and minimize thermal fluctuations.
Proper PEC Adjustment Techniques
To effectively enhance your PEC performance, you need to understand the best moments and methods for making adjustments. Proper PEC adjustment techniques involve analyzing star mass and tracking behavior during your session. Typically, you should adjust PEC after a stable star pattern is established and tracking is consistent. Use PEC correction when you notice star elongation or drift that persists despite guiding.
Here’s a quick reference:
| Situation | When to Adjust PEC | How to Adjust |
|---|---|---|
| Star appears elongated | After initial calibration | Use PEC training to refine the curve |
| Drift persists | During tracking session | Re-train PEC with accurate star mass focus |
| Periodic error | When periodic error is detected | Re-calibrate PEC for improved correction |
| Consistent star shape | Regular maintenance | Periodically re-train PEC to maintain accuracy |
Common Mistakes That Waste Time When Guiding
Many guiding mistakes happen because beginners overlook small adjustments or assume that their setup is flawless from the start. Common errors include ignoring star color, which affects guiding accuracy, and neglecting focuser backlash, causing unnecessary corrections. To avoid wasting time:
Avoid guiding errors by paying attention to star color and focuser backlash to save time and improve accuracy.
- Don’t ignore star color shifts; they indicate guiding issues or calibration errors.
- Correct focuser backlash to prevent delays in response and unnecessary adjustments.
- Over-tweaking guiding parameters, like aggressive aggressiveness settings or RMS thresholds, often leads to instability.
These small oversights can cause constant re-calibration or chasing minor issues, wasting hours. By paying attention to star color and focuser backlash, you minimize guiding errors and improve overall efficiency, saving time and frustration during your imaging sessions.
Tips for Fine-Tuning Calibration and Reducing Re-Calibration
Fine-tuning your calibration process is essential for reducing the need for repeated re-calibrations and guaranteeing consistent guiding performance. When performing guide calibration, pay close attention to star mass; selecting the right star guarantees a more accurate calibration. Use a bright, steady star with minimal surrounding noise to improve calibration stability. Adjust the calibration parameters to match your mount’s characteristics, avoiding overly aggressive or conservative settings. Consistently use the same star and position during calibration to minimize variability. Proper guide calibration reduces drift and improves long-term accuracy, so re-calibration becomes less frequent. Regularly verify your calibration’s accuracy and make small adjustments as needed. These practices help maintain ideal guiding, saving time and reducing frustration during your imaging sessions.
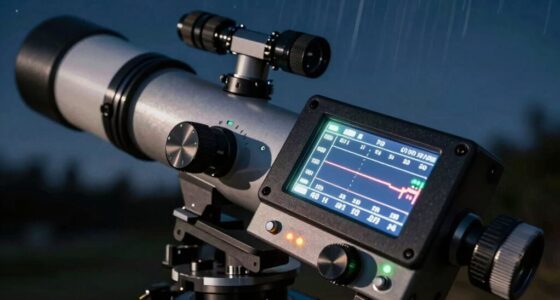
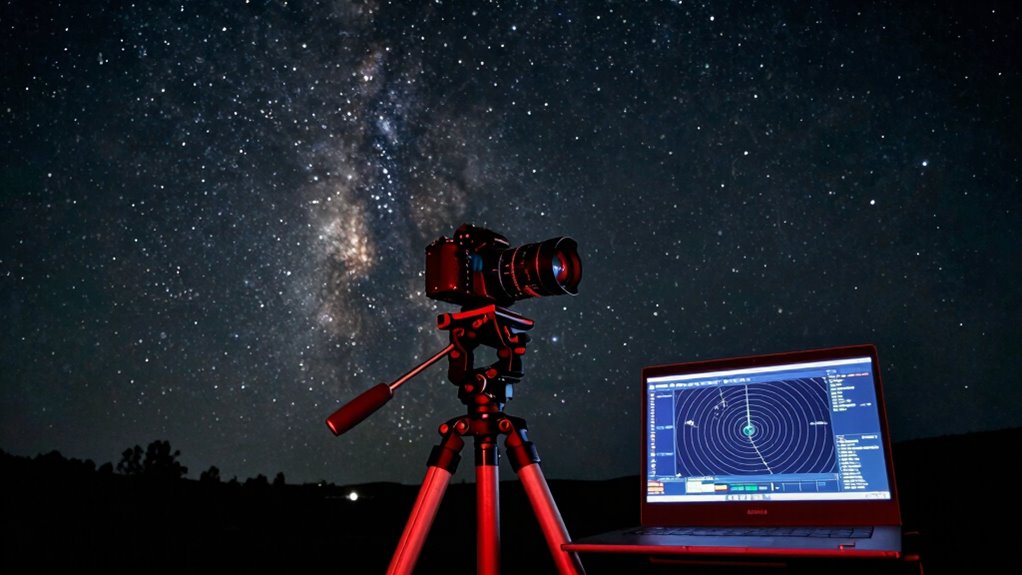
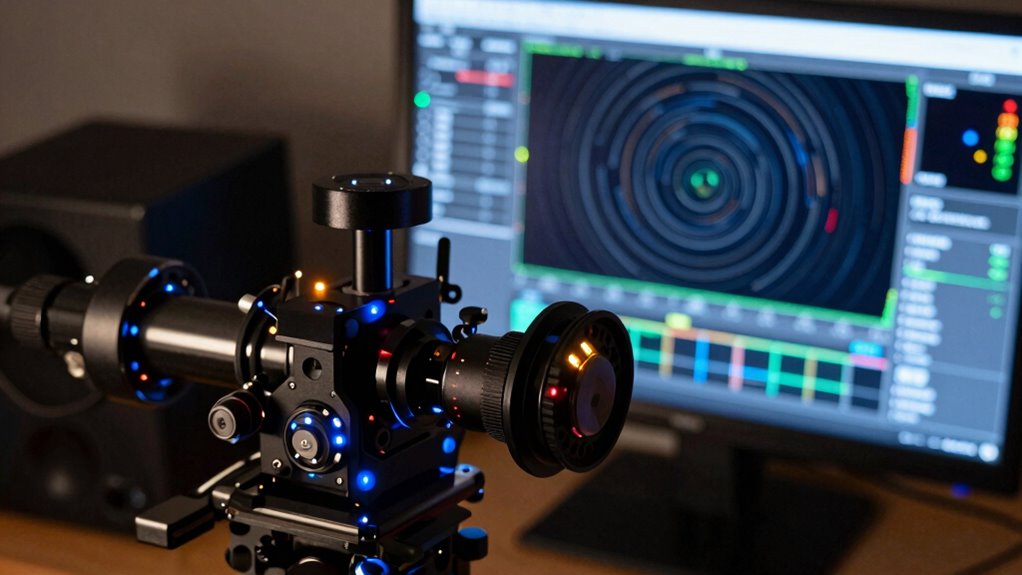
Using Log Files and Graphs to Optimize Your Guiding Settings
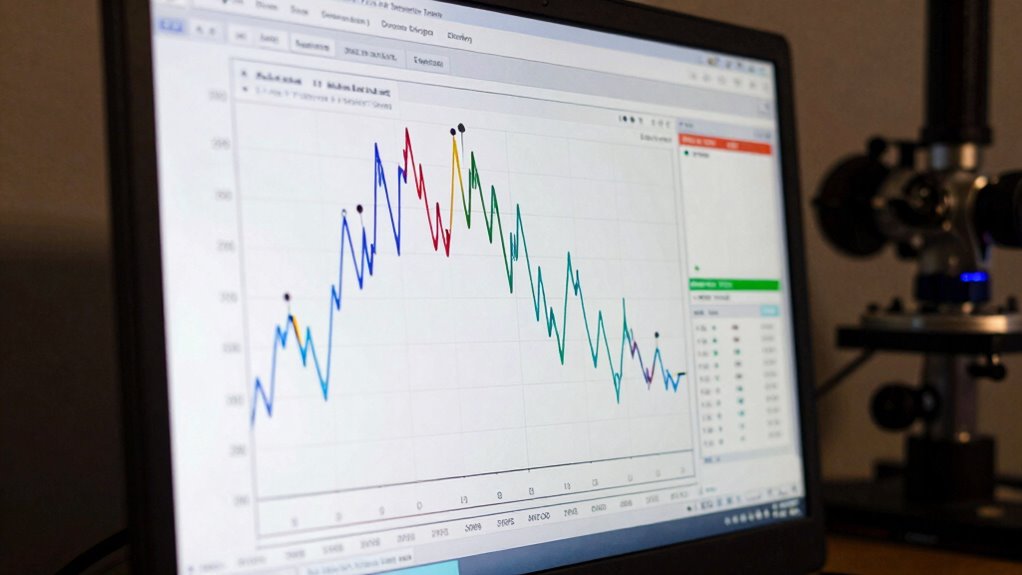
Using log files and graphs is a powerful way to identify and address guiding issues effectively. They reveal patterns that affect star mass and guiding mode performance. To optimize settings:
- Examine the RMS error over time to spot drift or periodic errors linked to star mass variations, adjusting calibration accordingly.
- Review the guiding graph for sudden spikes or oscillations, which often indicate suboptimal guiding mode choices or mount issues.
- Analyze the correlation between guide corrections and star position, helping you fine-tune parameters like aggressiveness and response time.
Frequently Asked Questions
How Often Should I Recalibrate My Guiding Setup?
You should recalibrate your guiding setup whenever you notice tracking issues or change your equipment, like camera calibration or mount alignment. Regularly checking these guarantees your guiding remains precise. If your mount’s been bumped or after major temperature shifts, recalibrate. Typically, every few months or after significant adjustments is enough. Staying vigilant helps prevent drift and keeps your images sharp, saving you time and frustration during astrophotography sessions.
Can Guiding Settings Affect Image Quality Directly?
Guiding settings are like the reins of a horse—if they’re too loose or too tight, your ride suffers. When calibration accuracy is off or mount stability falters, your images become blurry or streaked. Proper guiding guarantees your telescope stays steady, allowing stars to shine sharply. So, yes, guiding settings directly impact image quality, making it essential to fine-tune them for clear, detailed astrophotos.
What Are Signs of Poor Guiding That I Should Look For?
Signs of poor guiding include star elongation, sudden shifts, or inconsistent tracking, which indicate issues like improper guide star selection or mount periodicity problems. You’ll notice trails or blurring in your images, and your guiding graph may show irregularities or drift. Ensuring your guide star is well-chosen and your mount’s periodic error is minimized helps improve guiding stability, resulting in sharper, clearer astrophotos.
How Do Environmental Factors Influence Guiding Performance?
Imagine your telescope as a leaf floating on a turbulent stream—environmental factors like atmospheric turbulence and equipment stability directly influence guiding performance. When the air’s churning, your guiding struggles, causing stars to drift or twinkle. Unstable mounts or shaky setups amplify these issues. By minimizing vibrations and choosing nights with calm air, you improve guiding, ensuring your images stay sharp, and your equipment performs at its best.
Is It Necessary to Adjust Guiding Parameters for Different Telescopes?
Yes, you should adjust guiding parameters for different telescopes. Your guiding software needs to match your telescope’s compatibility, including its mount and optics. Different telescopes have unique guiding needs, so tweaking parameters like aggressiveness and calibration settings guarantees accurate tracking. Proper adjustments improve guiding performance, reduce errors, and produce sharper images, making your astrophotography sessions more successful. Always tailor settings to your specific telescope setup for ideal results.
Conclusion
Focusing on these key guiding settings will transform your astrophotography from a frustrating puzzle into a seamless, breathtaking experience. Don’t waste another second chasing after insignificant tweaks—master these essentials, and your images will look sharper and more stunning than you ever thought possible. Remember, optimizing guiding is the secret weapon that’ll uncover the universe’s beauty, turning your setup into a powerhouse of precision. Get these right, and watch your astrophotography reach astronomical heights!