You can skip guiding if your mount is stable, well-calibrated, and your exposures stay within 2-4 minutes, depending on your setup. Wide field of view and good atmospheric conditions help keep images sharp without guiding. However, if you’re aiming for longer exposures or have minor mount imperfections, guiding becomes essential to prevent star trails and blurriness. To discover more about optimizing unguided imaging and when it’s best to use guiding, keep exploring these tips.
Key Takeaways
- Short exposures (2–4 minutes) can often be captured unguided if the mount is stable and well-calibrated.
- Wide field of view reduces star trailing and makes unguided imaging more feasible without guiding.
- Higher sensor sensitivity and proper focusing improve image sharpness during unguided sessions.
- Longer exposures increase risks of star trails and mount drift, requiring guiding for sharp, detailed images.
- Proper planning, stable equipment, and favorable sky conditions maximize success when skipping guiding.

Astromania Anti Vibration Pads for Telescope Mount & Camera Tripod, Vibration Suppression Pads Telescope Accessory for NexStar 8SE, Telescope Stabilizer for Astronomy As Companion for Photo Adapter
These pads are sold in sets of 3 "one for each tripod leg" and fits under most tripod…
As an affiliate, we earn on qualifying purchases.
As an affiliate, we earn on qualifying purchases.
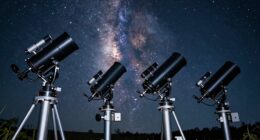
Is Unguided Astrophotography Right for You?

Is Unguided Astrophotography Right for You?
Deciding if unguided astrophotography is right for you depends on your goals and experience level. If you’re aiming for deep-sky objects or long exposures, high sensor sensitivity is essential, but it also makes your camera more vulnerable to light pollution. Light pollution can wash out faint details, making unguided shots harder to pull off without guiding. If your equipment has a highly sensitive sensor and you’re in a dark sky location, unguided imaging might work well, especially for shorter exposures. However, if you’re in an area with significant light pollution or want to capture detailed, long-exposure images, guiding can help compensate for tracking inaccuracies. Regular cleaning of brushes can also improve your overall imaging experience by ensuring your equipment remains in top condition. Assess your environment and equipment to decide whether unguided astrophotography aligns with your ambitions. Additionally, exploring experimental content formats can enhance your understanding of various imaging techniques and their effectiveness in different conditions. For optimal results, consider the importance of color accuracy in enhancing your astrophotography images. Understanding stain removal techniques can also be beneficial for keeping your equipment clean and in good working order.

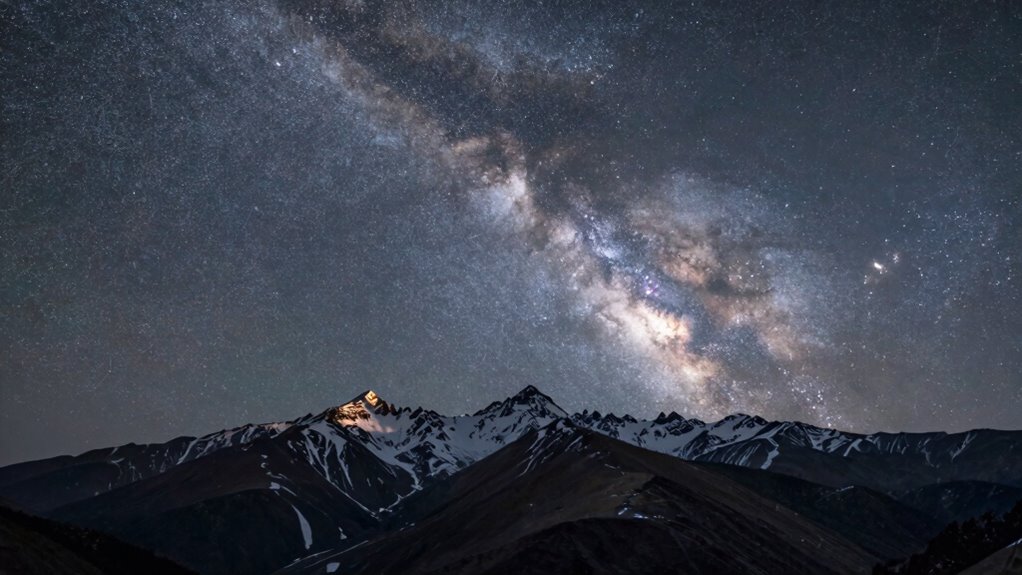
Wide-Field Astrophotography: Exposing the Universe Starting With a Common Camera
As an affiliate, we earn on qualifying purchases.
As an affiliate, we earn on qualifying purchases.
When Can You Skip Guiding and Still Capture Sharp Images?

You can skip guiding when your exposures are short enough to minimize star trailing, and your mount remains stable throughout the shot. A wide field of view also helps because it reduces the impact of slight tracking errors. Additionally, if your mount is well-built and remains steady, you have a better chance of capturing sharp images without guiding. Incorporating eco-friendly practices into your setup can also enhance the overall experience while minimizing environmental impact.
Short Exposure Benefits
Short exposures can be a game-changer when it comes to capturing sharp images without guiding, especially under certain conditions. By limiting exposure times, you reduce the risk of star trailing caused by tracking errors. Increased sensor sensitivity allows you to gather enough light quickly, making short exposures effective even in low-light situations. This approach also minimizes the effects of atmospheric turbulence, which can blur long exposures. To compensate for reduced light, you can use image stacking—taking multiple short exposures and combining them to improve detail and signal-to-noise ratio. This technique allows you to achieve sharp, detailed images without guiding, as long as you balance exposure length, sensor sensitivity, and stacking strategies effectively.
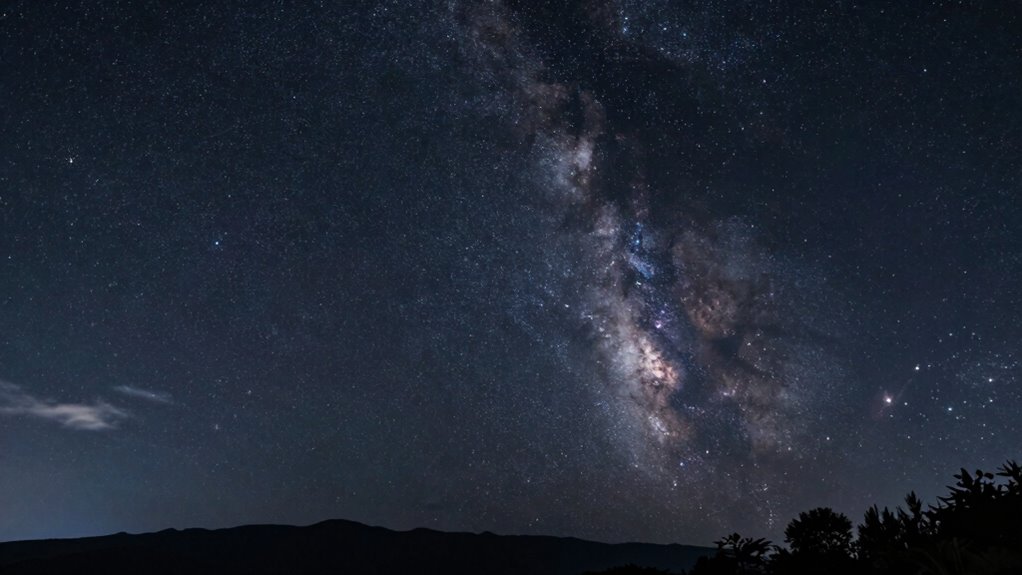
Wide Field of View
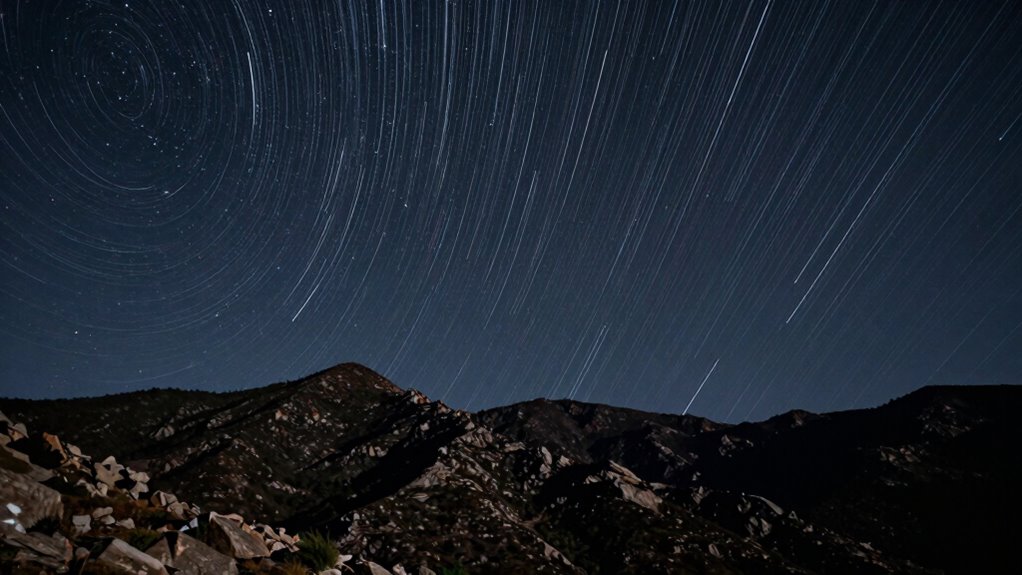
When capturing wide field images, the expansive view naturally reduces the impact of tracking errors, allowing you to skip guiding more often. Larger fields mean star trailing and lens flare are less noticeable, as the movement blurs over a broader area. Imagine this:
| Wide View | Star Trails | Lens Flare |
|---|---|---|
| Stars appear as points | Trails are minimal | Flare is spread out |
| Less sensitive to minor errors | Less streaking | Flare disperses |
| Easier to keep sharp | Less distortion | Less distracting |
Because of this, you can often get sharp images without guiding, especially for short exposures. Just remember, the wider the view, the more forgiving it is of small tracking hiccups, reducing star trailing and lens flare effects.
Stable Mounting Conditions
A stable mount considerably reduces the need for guiding by keeping your telescope precisely aligned throughout the exposure. When your mount is solid, your images stay sharp even without guiding, especially during shorter sessions. Proper sensor cooling helps minimize thermal noise, allowing you to shoot longer exposures without sacrificing image quality. Additionally, light pollution can affect your images’ clarity, but a secure mount ensures your target remains steady, reducing star trailing caused by mount instability. If your mount is well-maintained and stable, you can confidently skip guiding for certain shots, especially under stable atmospheric conditions. Just remember, in areas with high light pollution or when capturing deep-sky objects with long exposures, relying on guiding might still be necessary to achieve pinpoint star images.

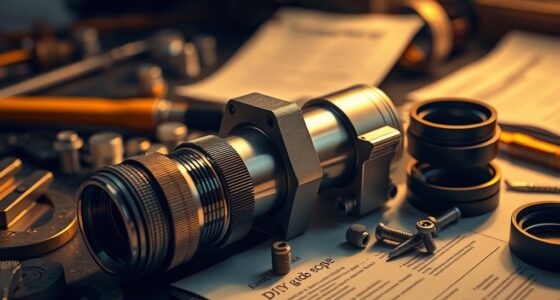
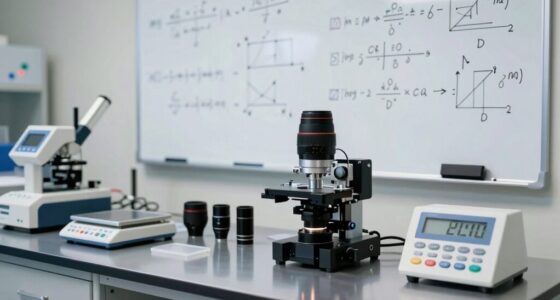
Astromania Upgrated Guide Scope 70mm FMC with Double Helical Focuser, Deluxe Finder Guidescope Kit Compatible with 1.25 inch Eyepiece for Astronomy Telescope & Auto Guiding Camera for Astrophotography
400mm focal length: with bright; wide-field optics puts numerous potential guide stars in view so you'll never have…
As an affiliate, we earn on qualifying purchases.
As an affiliate, we earn on qualifying purchases.
Limitations and Risks of Going Unguided
Going unguided might seem tempting for its simplicity, but it comes with significant limitations and risks that can compromise your imaging results. Without proper sensor stabilization, even minor mount imperfections or atmospheric disturbances can cause star trails or blurred images. Relying solely on software automation to correct tracking errors during post-processing isn’t foolproof and can lead to loss of detail or artifacts. Longer exposures increase the risk of mount drift, vibrations, or periodic error, making it harder to capture sharp images. Additionally, without guiding, you lack real-time correction, so any unforeseen issues during the session can ruin your shots. Understanding these risks helps you decide when unguided imaging is feasible and when it’s better to use guiding systems for ideal results. Furthermore, the debate surrounding universal basic income highlights how technological advancements, like AI, can affect economic stability and the resources available for enthusiasts.

Astrophotography on the Go: Using Short Exposures with Light Mounts (The Patrick Moore Practical Astronomy Series)
As an affiliate, we earn on qualifying purchases.
As an affiliate, we earn on qualifying purchases.
How to Achieve Sharp, Unguided Astrophotos
Achieving sharp, unguided astrophotos requires careful planning and technique, but it’s definitely possible with the right approach. Historically, astronomers relied on celestial navigation and precise calculations to keep their instruments aligned. You can adopt similar principles by understanding the sky’s movement and how your equipment tracks stars. Use star charts or software to plan your exposures around the apparent motion of celestial objects. Keep your mount well aligned with the celestial pole, minimizing the effects of polar misalignment. Selecting targets near the celestial equator reduces star trailing. Additionally, choose shorter exposure times to prevent movement from blurring your images. Combining these strategies with patience and practice will help you capture sharp, unguided astrophotos that rival guided images.
Equipment and Conditions That Support Unguided Imaging
To get the best results in unguided imaging, you need a stable mounting system that minimizes movement. Clear atmospheric conditions help reduce distortions and keep your images sharp. Additionally, optimizing your camera settings guarantees you capture quality data during your exposures.
Stable Mounting Systems
Stable mounting systems are essential for successful unguided imaging because even the slightest movement can blur your images. A sturdy mount prevents vibrations and shifts during long exposures, improving overall image sharpness. Confirm your mount is well-calibrated by performing sensor calibration regularly; this guarantees your camera’s alignment remains precise. The focal length of your telescope or lens also matters—longer focal lengths magnify any instability, so a rigid, well-supported mount is critical. Use high-quality, vibration-damping tripods or mounts designed for astrophotography. Secure all connections and avoid touching the setup during imaging sessions. When your equipment is stable and properly calibrated, you’ll maximize your chances of capturing sharp, detailed images without guiding.
Clear Atmospheric Conditions
Clear atmospheric conditions play an essential role in capturing sharp, detailed images during unguided astrophotography sessions. Stable, transparent skies reduce atmospheric turbulence, helping your sensor calibration stay accurate and your stars pinpoint. Minimize light pollution by choosing dark sky sites, as excessive artificial light can wash out faint details and complicate image processing. When the air is unobstructed, less scattered light enters your camera, allowing for better contrast and more precise tracking of celestial objects without guiding. Strong atmospheric steadiness ensures your camera’s sensor calibration remains consistent throughout the session, reducing the need for extensive post-processing. Overall, clear skies with minimal light pollution are critical for achieving successful unguided imaging, maximizing your equipment’s potential without the need for guiding corrections.
Optimal Camera Settings
Choosing the right camera settings is vital for successful unguided imaging, as they directly impact image quality and tracking accuracy. Start by guaranteeing proper sensor calibration; a well-calibrated sensor minimizes artifacts and guarantees consistent exposures. Use a low ISO to reduce noise, and set your aperture to balance brightness and sharpness. Focusing techniques are essential—preferably, use live view and a high magnification to achieve precise focus on a bright star or target. Manual focusing ensures stability during long exposures. Keep your shutter speed within the limits of your equipment’s tracking capabilities, often around 2-4 minutes, depending on conditions. These settings help maximize your camera’s performance, making unguided imaging more reliable and your images sharper.
Planning Tips for Successful Unguided Sessions

Planning your unguided imaging session carefully guarantees you get the best results without constant intervention. Start by ensuring your camera sensor is properly calibrated, which reduces errors during long exposures. Consider your focal length; longer focal lengths increase the risk of star trailing, so plan your exposures accordingly. Check your mount’s stability and balance to minimize vibrations that can ruin images. Map out your target’s position and plan your sessions around ideal sky conditions and moon phases. Use a star chart or app to determine the best time for your shoot. Remember, a well-thought-out plan helps you avoid surprises and maximizes your chances of capturing sharp, detailed photos without guiding.
- Verify sensor calibration before shooting
- Choose focal lengths suitable for unguided imaging
- Plan around weather and sky conditions
Common Mistakes to Avoid When Imaging Without Guiding
One common mistake to avoid when imaging without guiding is neglecting to account for the effects of long exposures on star movement. Without guiding, your deep sky images can suffer from star trailing, which blurs the fine details of your target. This is especially true during extended exposures needed for faint deep sky objects. For planetary imaging, long exposures aren’t as critical, but camera shake or mount instability can still introduce motion. Be sure your mount is stable and well-balanced, and consider shorter exposures or stacking techniques. Additionally, avoid assuming your equipment can handle long exposures without guiding; understanding your system’s limits helps prevent wasted time and blurry results. Proper planning and awareness of these pitfalls improve your chances of capturing sharp, detailed images.
Should You Use Guided Systems Instead? Deciding What’s Best for You
Deciding whether to use guided systems depends on your imaging goals, equipment, and experience level. Guided systems can improve accuracy, especially if you’re tackling complex targets or long exposures. However, they add guiding complexity and require compatible equipment. If you’re just starting out or working with equipment that isn’t fully compatible, unguided imaging might be simpler and more reliable.
Consider these factors before choosing:
- How comfortable you are with guiding setup and troubleshooting
- The complexity of your imaging targets
- Your equipment’s compatibility with guiding accessories
If you prefer a straightforward approach and your equipment supports it, unguided imaging can be effective. But for detailed, precise astrophotography, guided systems often deliver better results. Additionally, utilizing innovative digital tools can enhance your overall imaging experience and efficiency.
Frequently Asked Questions
What Environmental Factors Most Affect Unguided Imaging Success?
Environmental factors like light pollution and temperature fluctuations most affect unguided imaging success. Light pollution can cause unwanted glare and reduce contrast, making it harder to capture clear images. Temperature fluctuations lead to thermal expansion and contraction of your equipment, resulting in focus shifts and tracking errors. To improve results, shoot away from city lights and monitor temperature changes, allowing your gear to stabilize before imaging.
Can Beginners Safely Attempt Unguided Astrophotography?
As a beginner, you can safely try unguided astrophotography if you understand its limitations. Rely on autoguiding alternatives like shorter exposures or advanced equipment calibration to minimize star trails. Start with stable, well-calibrated equipment and choose nights with steady atmospheric conditions. Practice simple setups first, and gradually explore more complex techniques. This approach helps you learn without risking wasted time or effort on difficult shots.
How Does Weather Impact Unguided Imaging Quality?
Weather affects unguided imaging like wind shakes a tree—causing motion blur or star trails. Poor conditions, such as high humidity or strong winds, can disturb mount stability, leading to blurry images. Additionally, atmospheric turbulence can distort your sensor calibration, reducing image quality. To get the best results, shoot in stable, clear weather, and guarantee your mount is well-balanced, minimizing the impact of weather-induced vibrations.
Are There Specific Star Patterns That Facilitate Unguided Imaging?
Certain star patterns, especially those with well-defined constellation alignment, make unguided imaging easier. Look for stars that form stable, symmetrical patterns, which help your mount maintain consistent tracking. Avoid irregular or scattered star arrangements, as they can cause drift. By choosing targets with predictable, stable star patterns, you reduce the risk of star trailing, improving image quality without guiding.
What Post-Processing Techniques Enhance Unguided Astrophotos?
You can considerably improve unguided astrophotos with effective post-processing techniques. Image stacking reduces noise and enhances detail by combining multiple exposures, giving your images more clarity. Noise reduction software also helps remove graininess caused by long exposures or high ISO settings. By carefully stacking images and applying noise reduction, you’ll produce cleaner, sharper astrophotos, even without guiding. These techniques maximize the quality of unguided shots, revealing stunning celestial details.
Conclusion
Deciding between guided and unguided astrophotography depends on your passion, patience, and preparation. By understanding your equipment, environment, and experience, you can confidently choose the path that best suits your stargazing style. Remember, mastering the art requires mindfulness, method, and a bit of trial and error. Whether guided or unguided, your perseverance paves the path to stunning space shots. Embrace the journey, enjoy every exploration, and elevate your astrophotography adventure!