Many believe that simply widening your camera’s field of view improves coverage, but placement and environmental factors matter more. Relying on estimates instead of precise measurements can cause blind spots. You might think a larger FOV can fix poor positioning, but lens distortion and edge effects often distort scenes. Considering depth, user position, and customizing angles is essential. If you want to avoid these common mistakes, keep exploring for expert tips.
Key Takeaways
- Increasing FOV alone doesn’t improve coverage; proper sensor placement is essential to avoid blind spots.
- Wide-angle lenses cause distortion and peripheral vignetting, which can obscure details and mislead scene understanding.
- Relying on visual estimates for distance and angles leads to inaccuracies; calibrated tools improve measurement precision.
- Fixed FOV assumptions ignore how user position and movement impact visibility and engagement.
- Proper scene coverage depends on balancing both horizontal and vertical angles, not just maximizing FOV.

Xenocam CCTV Security Camera Lens 5-50mm Megapixel Manual Varifocal Lens Manual Zoom CMOS/CCD 1/3" CCTV Lens IR CS Mount CCTV Security Camera(No IR Filter)
*5-50mm Manual Iris Lens.
As an affiliate, we earn on qualifying purchases.
As an affiliate, we earn on qualifying purchases.
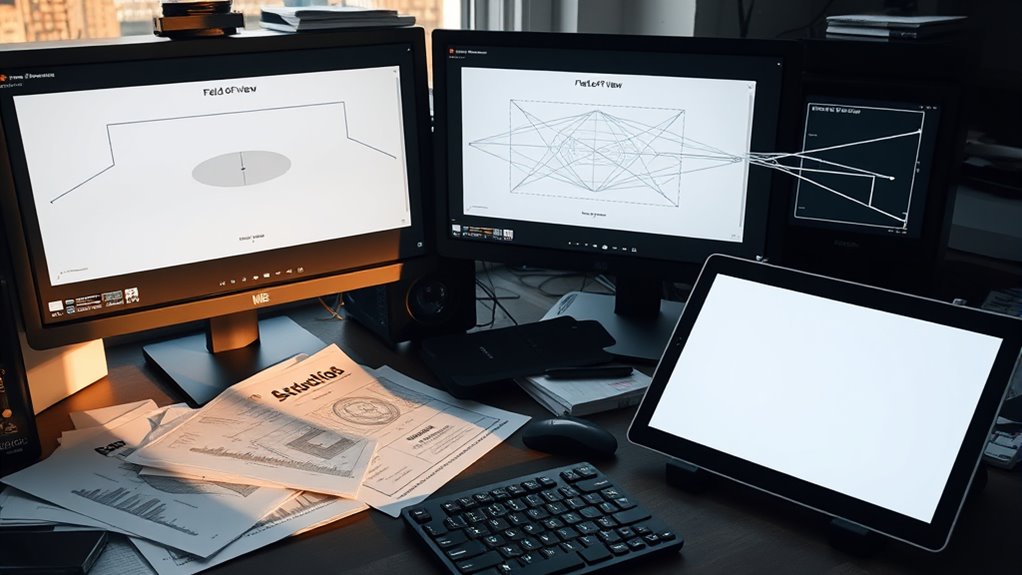
Assuming a Wider Field of View Always Means Better Coverage

Many assume that increasing your field of view automatically leads to better coverage, but that’s not always true. Proper sensor placement is essential; simply widening the view can create blind spots if sensors aren’t positioned correctly. Calibration techniques also play a critical role—they ensure sensors work together seamlessly and accurately. Without proper calibration, a wider FOV might introduce distortions or overlaps, reducing effective coverage. Remember, a broad view doesn’t guarantee comprehensive monitoring if sensors are misaligned or poorly calibrated. Instead, focus on strategic placement and precise calibration to maximize the benefits of a wider FOV. This approach guarantees you cover the intended area efficiently, avoiding gaps and overlaps that could compromise your system’s effectiveness. Additionally, understanding regional bank opening hours can help plan maintenance or upgrades to your surveillance system during off-peak times.

【122° Wide-Angle】 Outdoor Wired Security Camera System, Home Video Surveillance Systems, CCTV Cameras for Home, DVR Surveillance Kits
【Red & Blue Flashing LEDs】This outdoor wired security camera system features a red and blue strobe light that…
As an affiliate, we earn on qualifying purchases.
As an affiliate, we earn on qualifying purchases.
Overlooking the Impact of Obstructions and Environmental Factors

A wide field of view won’t help if obstacles block your sensors or environmental conditions interfere with their performance. Obstruction effects can create blind spots, reducing the effectiveness of your coverage. Even small objects, like branches or furniture, can cast shadows or cause false readings. Environmental influences, such as fog, rain, or dust, can degrade sensor accuracy and limit visibility. Ignoring these factors leads to gaps in your data and compromised safety. You might assume your sensors work flawlessly, but obstacles and environmental influences often cause unexpected blind spots or inaccuracies. To optimize field of view planning, consider environmental conditions and potential obstructions. Regularly assess and adjust your sensor placement, accounting for these influences to guarantee reliable, all-encompassing coverage. Additionally, understanding the sensor types and their limitations can help improve overall detection reliability.

JJC 7X Camera Sensor Loupe Magnifier CCD CMOS Sensor Inspection Device Cleaning Tool with Light for Canon Nikon Sony Fujifilm Panasonic Olympus DSLR Camera/Mirrorless Camera and More
7x magnification optical glass loupe designed for inspecting image sensors and identifying dust particles or other spots
As an affiliate, we earn on qualifying purchases.
As an affiliate, we earn on qualifying purchases.
Relying Solely on Visual Estimates Instead of Precise Measurements

Relying only on visual estimates can lead to biased perceptions and inconsistent judgments. Without precise measurements, you risk inaccuracies that could jeopardize your field of view planning. Accurate data is essential to ensure reliable and effective results. Incorporating measurement tools can significantly improve the accuracy of your assessments.
Visual Bias Risks
Visual bias can considerably compromise the accuracy of your field of view planning when you depend solely on visual estimates. Your peripheral awareness often misjudges distances and angles, leading to overconfidence in what you see. Color perception can also deceive you; subtle differences might seem insignificant but can impact how you interpret your surroundings. Relying on instinct instead of precise measurements causes blind spots and distorted spatial understanding. These biases skew your perception, causing you to underestimate or overestimate the space available. Without objective data, you risk misaligning your equipment or missing important details. Recognizing these visual biases is vital. Using tools to measure accurately helps counteract the natural tendency of your eyes and brain to deceive, ensuring safer and more reliable field of view planning. Incorporating understanding of contrast ratio can further improve your assessment of image quality and spatial clarity.
Inconsistent Judgments Occur
Depending solely on visual estimates can lead to inconsistent judgments about your field of view. Variations in lighting conditions, sensor calibration, and personal perception make it easy to misjudge distances and angles. This inconsistency can cause gaps or overlaps in coverage. To improve accuracy, consider these factors:
- Regularly calibrate sensors to ensure measurements remain precise.
- Adjust for changing lighting conditions that affect visibility and perception.
- Use measurement tools instead of relying on eye estimates.
- Cross-check visual assessments with actual measurements for better reliability.
- Be aware of automation’s impact on measurement consistency and accuracy.
Ignoring these points can result in flawed planning, with blind spots or excessive overlap. Relying solely on visual estimates introduces variability that undermines the consistency of your field of view, making precise measurement essential.
Measurement Accuracy Matters
While quick eye estimates might seem sufficient for planning your field of view, they often lead to inaccuracies that can compromise coverage. Relying solely on visual judgments ignores calibration challenges that affect measurement precision. Without precise measurements, your accuracy metrics may be off, resulting in blind spots or excessive overlap. Small errors in estimating distances or angles can considerably impact overall coverage. Using tools like laser rangefinders or calipers helps mitigate calibration challenges and ensures your measurements are more reliable. Accurate measurements allow you to set parameters confidently, avoiding costly adjustments later. Remember, measurement accuracy isn’t just about getting it right the first time — it’s about creating a dependable plan that maximizes coverage and minimizes gaps. Never underestimate the importance of measurement accuracy in field of view planning.

Carbon Monoxide Detectors – Hembisen CO Alarm Detector Monitor Battery Operated with Digital Display for House Kitchen Restaurant Hotel Office
【New Optimized Imported High-precision Sensors】Using electrochemical sensors, with more reliability, stability, responsiveness, to avoid the possibility of false…
As an affiliate, we earn on qualifying purchases.
As an affiliate, we earn on qualifying purchases.
Ignoring the Importance of Viewer or User Positioning

You might assume that a fixed field of view works for everyone, but your viewers’ positions can dramatically change what they see. To guarantee a clear and comfortable experience, you need to contemplate ideal viewing angles and how users move around. Adjusting your planning to account for these factors keeps the content accessible and engaging for all viewers. Additionally, understanding field of view planning can help optimize the visual experience based on viewer placement and movement.
Viewer’s Perspective Matters
Ignoring the viewer’s or user’s position can lead to a flawed field of view plan, because where someone stands dramatically influences what they see. Your eye dominance affects how you perceive images, while your color perception can change based on angle and distance. To optimize, consider these factors:
- Eye dominance: Ensure critical visuals align with your dominant eye for clarity.
- Viewing angle: Position screens or displays where your line of sight minimizes distortion.
- Color perception: Adjust lighting and contrast to account for how colors shift with perspective.
- User position: Remember that varying positions shift what’s visible, so plan for flexibility.
- Regular assessments: Incorporate quality assurance practices to evaluate how well your field of view plan accommodates different user positions and perceptions.
Ignoring these elements results in misjudged visibility and engagement, undermining your entire field of view strategy.
Optimal Viewing Angles
Ideal viewing angles are vital for ensuring that visuals are clear and engaging, but focusing solely on ideal angles without considering viewer or user positioning can lead to problems. To enhance your display, you need proper sensor calibration to accurately interpret angles and prevent distortions. Lighting conditions also play a key role; glare or poor illumination can obscure images even at perfect angles. Adjusting for supreme viewing angles involves balancing the device’s position with environmental factors, ensuring that screens are visible and colors are true. Ignoring these elements can result in misaligned visuals, reduced clarity, or viewer discomfort. Remember, the best angle isn’t just about geometry—it depends on calibrating sensors and managing lighting to deliver a consistently sharp, vivid experience. Additionally, understanding the natural materials used in the environment can help optimize placement for better visibility and comfort.
Adjust for User Movement
Adjusting for user movement is essential because static display setups can quickly become misaligned as viewers shift positions. If you ignore user movement, the field of view may no longer suit their perspective, reducing engagement and effectiveness. To guarantee an ideal experience, consider these key points:
- Use flexible mounts that allow quick field adjustment as users change positions.
- Incorporate sensors that detect user movement for dynamic realignment.
- Design displays with wider angles to accommodate natural user shifts.
- Train staff to regularly check and adjust displays based on user behavior.
- Recognize the importance of viewing angle in ensuring content remains accessible and effective for all users.
Believing That a Larger Field of View Compensates for Poor Placement
Many believe that increasing the size of your field of view can make up for poor placement of equipment or sensors. However, a larger field of view doesn’t fix fundamental issues caused by improper camera placement or environmental factors. When cameras are poorly positioned, they might miss critical areas or introduce blind spots, regardless of their viewing angle. Environmental factors like lighting, obstructions, or reflective surfaces also impact effectiveness, making a wide FOV less useful if the camera isn’t correctly placed. Instead of relying on a bigger view to cover shortcomings, focus on ideal placement that considers these factors. Proper positioning ensures the camera captures necessary areas, reduces distortions, and works effectively within the environment’s constraints. A tailored setup beats a broad but poorly executed view every time.
Underestimating the Influence of Lens Distortion and Edge Effects

Lens distortion and edge effects often go unnoticed but can considerably impact your camera’s performance. If you overlook these factors, your field of view planning might be off, leading to unexpected results. Here are four key points to contemplate:
- Distortion at the edges: Wide-angle lenses often create curved lines, skewing your intended framing.
- Peripheral compression: Objects near the edge may appear smaller or stretched, affecting spatial perception.
- Vignetting: Darkening around the edges can obscure important details in your shot.
- Inaccurate measurements: Relying solely on raw lens specs can underestimate how distortion impacts your actual field of view.
Neglecting the Role of Depth and Layering in FOV Planning

While understanding lens distortion helps you predict how your images may be warped, it’s equally important to contemplate how depth and layering influence your field of view. Recognizing layering complexity can lead you to misjudge spatial relationships, affecting depth perception. Properly accounting for different layers ensures you capture the full scene, avoiding gaps or overlaps. Consider this layered approach:
| Layer 1 | Layer 2 | Layer 3 |
|---|---|---|
| Foreground elements | Midground objects | Background scenery |
| Close objects | Mid-distance features | Distant background |
| Layering intricacy | Depth perception | Scene clarity |
This table highlights how depth perception depends on correctly recognizing layers. Overlooking this can distort your view, reducing scene accuracy and effectiveness in planning your shot. Prioritizing depth and layering creates a more comprehensive FOV.
Focusing Only on Horizontal or Vertical Angles Without Considering Both
Focusing solely on either horizontal or vertical angles can lead to a distorted perception of your scene, as neglecting the other dimension limits your understanding of the full field of view. When you only consider a side angle or vertical focus, you risk missing critical spatial relationships.
To improve your planning:
- Remember both horizontal and vertical angles shape the viewer’s experience.
- Ignoring vertical focus can skew perception of height and layering.
- Overlooking side angles might hide important spatial details.
- Balancing both angles ensures a thorough view that captures depth and dimension.
Using a One-Size-Fits-All Approach Without Customization
Adopting a one-size-fits-all approach to field of view planning often leads to poor results because it neglects the unique needs of each scene or project. Relying on generic solutions prevents you from addressing specific spatial constraints or aesthetic goals. Instead, you should focus on personalized solutions that consider the environment and purpose of your project. Adaptive strategies enable you to tailor the field of view to optimize visibility, immersion, and effectiveness. Customization ensures that every element aligns with your vision, rather than forcing a standard setup that may overlook critical details. By embracing flexible, personalized approaches, you improve overall outcomes and create more engaging, functional visual experiences. Avoid the trap of uniformity—adapt your planning to suit each unique situation.
Frequently Asked Questions
How Does User Behavior Influence Effective Field of View Planning?
Your user habits greatly influence effective field of view planning because they shape decision influence. When you understand how users typically interact with your space, you can tailor your layout to enhance visibility and accessibility. By observing their decision-making patterns, you can adjust angles and focal points, ensuring the view aligns with their natural behavior. This proactive approach results in a more intuitive, user-friendly environment that meets their needs seamlessly.
Can Technology Like AI Improve Accuracy in FOV Design?
You might think AI can perfectly optimize your FOV design, but it’s not a magic fix. AI optimization, combined with precise sensor calibration, actually improves accuracy markedly. Ironically, while technology claims to perfect everything, it’s your careful calibration and data input that truly make the difference. Embrace AI as a helpful tool, but don’t forget that human oversight remains essential for flawless field of view planning.
What Are the Best Tools for Precise FOV Measurements?
You should use tools like laser rangefinders and calibrated sensors for precise FOV measurements. Guarantee your equipment is properly sensor calibrated and follows measurement standards to guarantee accuracy. Software solutions like CAD and specialized FOV analysis programs also help refine your setup. By combining high-quality tools and strict calibration, you can achieve precise, reliable measurements, reducing errors and optimizing your field of view planning effectively.
How Do Environmental Lighting Conditions Affect FOV Effectiveness?
Environmental lighting conditions greatly impact your FOV effectiveness by influencing visibility factors. Poor or uneven lighting can obscure your view, making it harder to detect objects or hazards. Bright lights may cause glare, reducing contrast and clarity. To optimize your FOV, adjust lighting setups to guarantee consistent illumination, minimize glare, and enhance contrast, allowing you to see clearly and react promptly in varying lighting conditions.
What Are Common Mistakes in Positioning Sensors or Cameras?
You often make mistakes by not considering sensor blind spots or neglecting proper camera overlap. Position sensors too close to obstacles, creating blind spots, or too far apart, reducing coverage. For cameras, avoid gaps by ensuring sufficient overlap, which guarantees seamless monitoring. Proper placement is essential; think about angles, height, and potential obstructions to optimize coverage and prevent blind spots, ensuring your system works efficiently.
Conclusion
Don’t plunge into FOV planning blindly. By balancing breadth and barriers, you build better, brighter, and more accurate visuals. Remember, focusing on factors like precise positioning, proper measurements, and personalized setups prevents pitfalls and promotes perfection. Avoid assumptions about size and scope; instead, consider calibration, clarity, and context. With thoughtful theory and tailored tactics, you’ll transform your field of view from flawed to fantastic—fostering flawless focus and fantastic functionality.