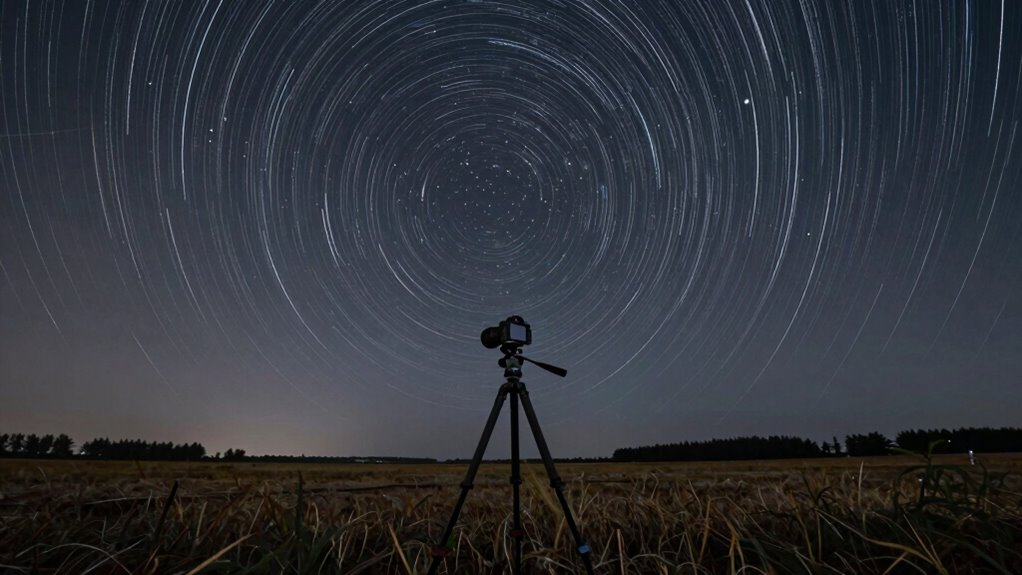
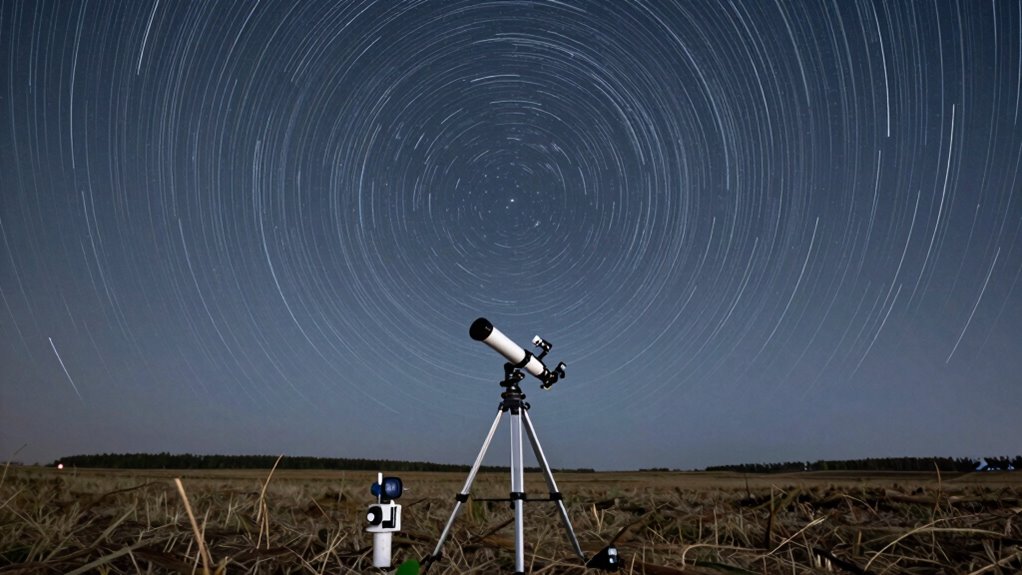
Field rotation happens in long-exposure astrophotography when your stars appear streaked or blurred because of Earth’s rotation. It’s mainly caused by equipment setup issues, especially if you’re using alt-azimuth mounts that don’t track the sky’s movement. To prevent this, use an equatorial mount and guarantee proper polar alignment. Sticking to these tips can help keep your stars sharp. If you want to learn more ways to avoid field rotation, there’s plenty to discover ahead.
Key Takeaways
- Field rotation occurs when the sky appears to spin due to Earth’s rotation, causing star trails in long-exposure images.
- Using an equatorial mount aligned with Earth’s axis helps counteract and minimize field rotation.
- Proper polar alignment ensures the mount tracks stars accurately, preventing star trails during astrophotography.
- Regularly maintaining and calibrating your equipment reduces mechanical issues that contribute to field rotation.
- Post-processing software can correct minor rotation issues, but prevention with proper setup is most effective.

Getting Started: Using an Equatorial Telescope Mount: Everything you need to know for astrophotography or visual use.
As an affiliate, we earn on qualifying purchases.
As an affiliate, we earn on qualifying purchases.
What Is Field Rotation and Why Does It Happen?
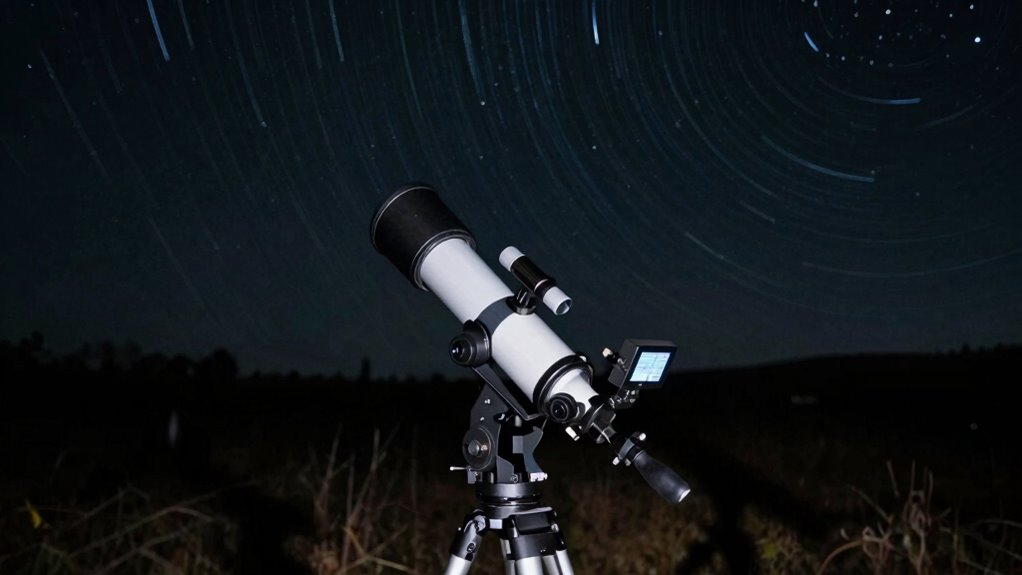
Have you ever noticed that the stars slowly shift their positions in the night sky over time? This movement is caused by field rotation, which happens because Earth’s rotation causes the sky to appear to spin. Your equipment’s sky conditions, like the stability of your mount and alignment, play a big role in how much this affects your images. If your equipment isn’t properly maintained, it can exacerbate field rotation, making stars look streaked or blurred during long exposures. To avoid this, guarantee your mount is well-calibrated and maintained regularly. Good equipment maintenance minimizes mechanical issues, helping you keep the sky steady and your images sharp. Recognizing why field rotation occurs is the first step toward capturing clear, detailed astrophotos. Additionally, understanding digital content formats can help you better present your astrophotography findings.

Celestron 94224 CG-5/AVX/CGEM Polar Telescope Finderscope, Black
POLAR ALIGN YOUR CELESTRON GERMAN EQUATORIAL MOUNT: Compatible with Celestron CGEM, Advanced VX, and CG-5 equatorial mounts.
As an affiliate, we earn on qualifying purchases.
As an affiliate, we earn on qualifying purchases.
How Field Rotation Affects Your Astrophotography Images
When field rotation occurs, it causes stars and other celestial objects to appear as streaks rather than points in your images. This blurs details and reduces image sharpness, especially during long exposures. Atmospheric distortion worsens this effect, making stars look warped or smudged. To understand how it impacts you:
- Your camera lens captures elongated star trails instead of crisp points. Additionally, high refresh rates can help in capturing more stable images if you are using a projector to display your results.
- Longer exposures amplify streaking, ruining the clarity of deep-sky objects.
- Atmospheric distortion causes uneven light bending, intensifying streaks.
- It becomes harder to stack images effectively, reducing overall image quality.
Without proper mitigation, your astrophotos can become unusable, wasting valuable time and effort. Recognizing these effects helps you plan better to minimize streaks and preserve stellar detail. Additionally, utilizing top car protection can enhance your overall shooting experience by safeguarding your equipment from the elements.

Sky-Watcher Star Adventurer 2i Pro Pack – Motorized DSLR Night Sky Tracker Equatorial Mount for Portable Nightscapes, Time-Lapse and Panoramas – Wi-Fi App Camera Control – Long Exposure (S20512)
Portable nightscape tracking platform: Motorized portable tracking platform perfect for capturing incredible detail of the Milky Way, eclipses…
As an affiliate, we earn on qualifying purchases.
As an affiliate, we earn on qualifying purchases.
Understanding Mount Types and Their Impact on Field Rotation
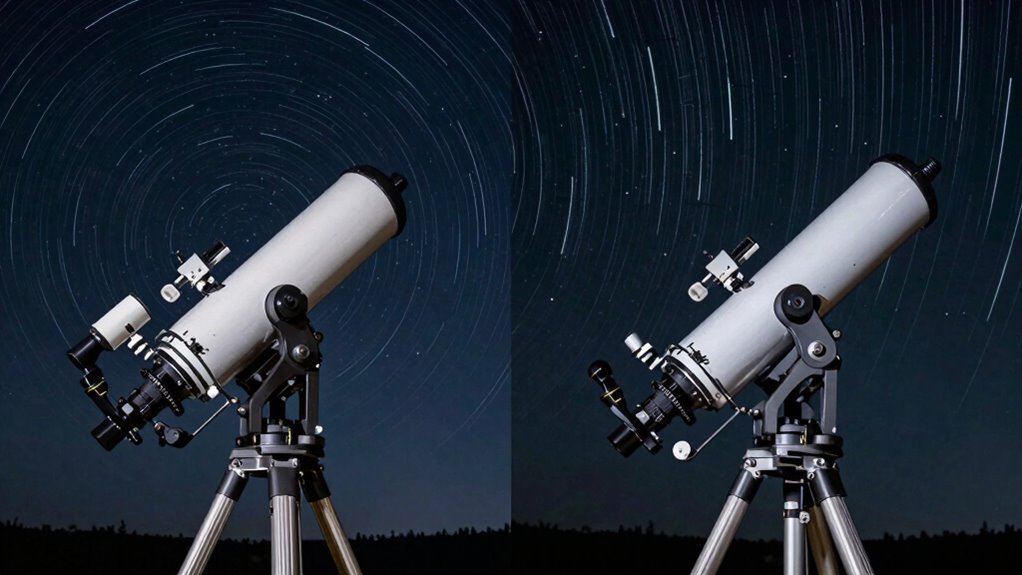
Understanding how your mount affects field rotation is essential for capturing sharp astrophotos. Different mount types influence how the sky’s rotation appears during your session. Equatorial mounts, for example, are designed to counteract Earth’s rotation, reducing field rotation and enabling longer exposures. Altazimuth mounts, on the other hand, move in two axes but don’t compensate for rotation automatically, which can cause star trails over time. Conducting field analysis helps you determine how your specific mount behaves during imaging sessions. Knowing your mount’s capabilities and limitations allows you to plan accordingly, minimizing field rotation effects. Selecting the right mount type for your setup and understanding its impact ensures you capture clear, professional-looking astrophotos with minimal star trailing. Additionally, using proper household products can enhance the safety and stability of your imaging setup, further improving your astrophotography experience. Implementing smart furniture solutions can also provide efficient ways to organize your equipment, ensuring everything is easily accessible during your sessions. Investing in high-quality lenses can also significantly improve image clarity, making your astrophotography endeavors even more rewarding. Understanding astrophotography fundamentals like exposure settings can also enhance your overall results. Incorporating effective blogging strategies can also help you share your astrophotography journey and connect with a wider audience.

GREEN.L 77mm ND100000 Filter, Slim 16.6-Stop Fixed Neutral Density ND Filter 77mm for Camera Lens
【77mm ND100000 filter】ND100000 is a neutral density filter with an extremely high density rating, designed to significantly reduce…
As an affiliate, we earn on qualifying purchases.
As an affiliate, we earn on qualifying purchases.
How Equatorial Mounts Help Prevent Field Rotation
Equatorial mounts help prevent field rotation by aligning closely with Earth’s axis, making polar alignment essential for accuracy. When properly aligned, they allow you to track celestial objects smoothly over long periods, reducing image blurring. This continuous tracking keeps your field of view steady, so your observations stay clear and precise. Additionally, using an equatorial mount enhances your ability to capture the Milky Way and other celestial phenomena with greater detail and clarity, ultimately improving your overall aerial imaging experience. Incorporating features like natural landscapes in your setup can further enhance the aesthetic and functional quality of your observations, allowing for a deeper appreciation of emerging trends in digital publishing. Furthermore, embracing inclusive casting in the design of your equipment can lead to innovative approaches and increased accessibility in the field.
Polar Alignment Accuracy
Have you ever noticed that stars seem to drift across your telescope’s view over time? That’s caused by imperfect polar alignment, which affects how well your equatorial mount tracks celestial objects. Accurate polar alignment is essential for minimizing field rotation. To improve your alignment:
- Use a polar scope to pinpoint the North Celestial Pole precisely.
- Adjust your mount until Polaris (or the relevant star) is centered in the reticle.
- Account for sky glow and atmospheric distortion, which can obscure your target and make alignment tougher. Understanding water chemistry principles can also enhance your nighttime viewing experience by ensuring clear skies.
- Regularly recheck your alignment, especially after changes in temperature or position.
Good polar alignment ensures your mount moves smoothly with the night sky, reducing field rotation and preventing star trails caused by tracking errors. Additionally, understanding color matching techniques can help you choose appropriate gear for your night sky observations.
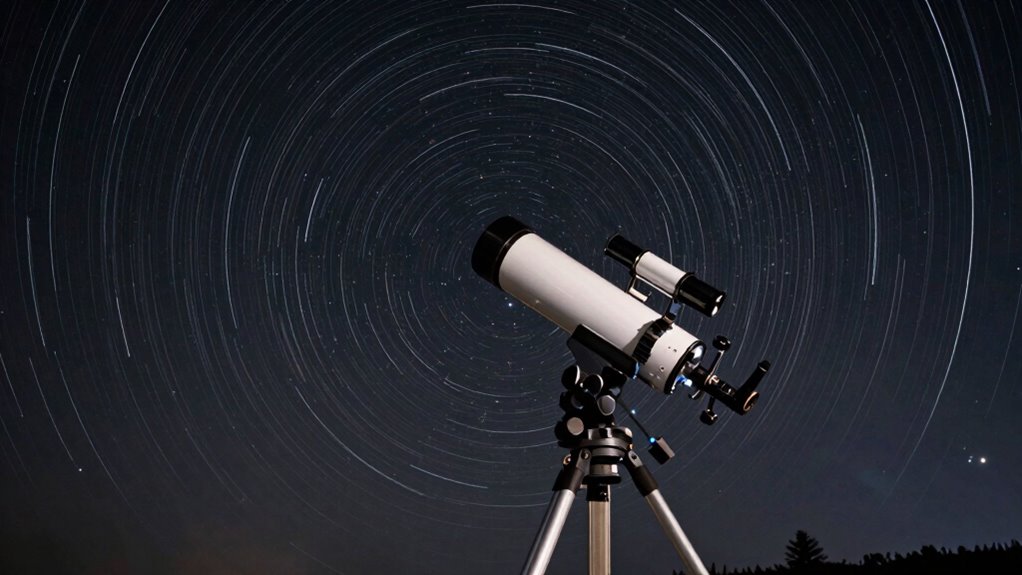
Continuous Tracking Benefits
When your mount is properly aligned, it can track celestial objects smoothly across the sky, keeping them centered in your field of view. This continuous tracking prevents star trails caused by Earth’s rotation, which can distort long exposures. Equatorial mounts, designed for celestial navigation, follow the stars’ apparent motion precisely, reducing field rotation. This means you can take longer exposures without the stars appearing as streaks, capturing more detail and clarity. Consistent tracking also simplifies astrophotography, allowing you to focus on composition rather than correcting for rotation. Plus, it helps maintain the correct orientation of your images, making post-processing easier. Overall, continuous tracking on an equatorial mount enhances your observing experience by providing stable, rotation-free images of the night sky. Additionally, the elegance of Victorian fashion can inspire your astrophotography setup, blending aesthetic appeal with functionality. The use of AI algorithms in processing astrophotography data can optimize image quality and enhance capturing techniques. Effective solar system design is crucial to ensure that your setup is safe and functional.
Techniques to Minimize Field Rotation During Observation
To effectively minimize field rotation during observation, you can use specialized mounting techniques that keep your camera aligned with the sky’s rotation. This helps tackle astrophotography challenges and ensures clearer images. Using the right telescope accessories can markedly reduce rotation effects. Here are some techniques:
Using specialized mounts and accessories minimizes field rotation for sharper astrophotography images.
- Equatorial Mounts – These mounts rotate along the Earth’s axis, counteracting rotation automatically.
- Field Derotators – Attach a field derotator to your telescope to physically rotate the camera in sync with the sky.
- Alt-Azimuth Mounts with Software – Use software solutions to adjust tracking and minimize rotation during long exposures.
- Polar Alignment – Properly aligning your telescope with the Earth’s axis ensures smoother tracking and less rotation.
Additionally, maintaining optimal air quality levels can enhance your overall observation experience, as it reduces atmospheric distortions that can affect image clarity. These methods help keep your images sharp and reduce the astrophotography challenges caused by field rotation.
Choosing Equipment to Prevent Field Rotation
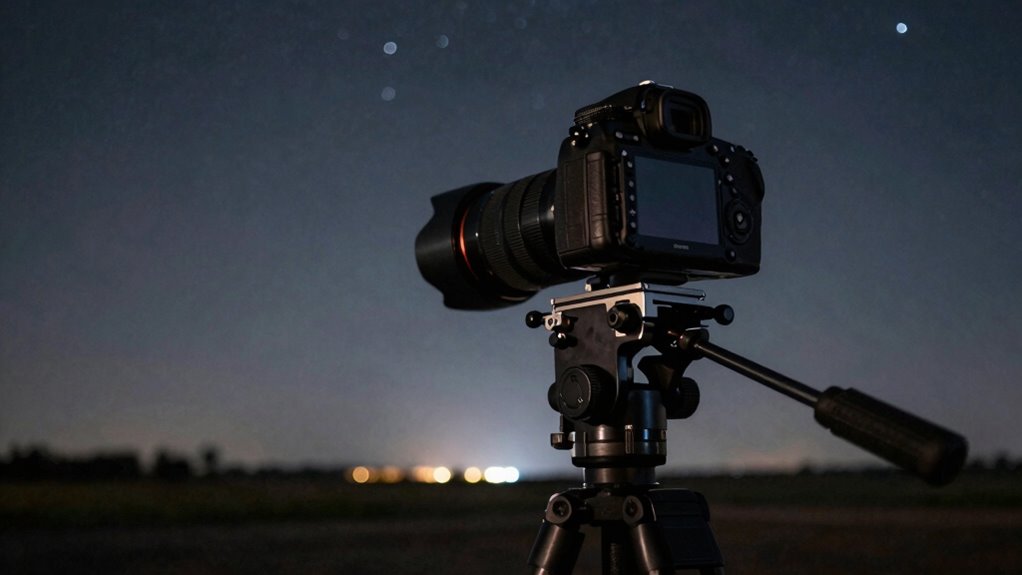
Choosing the right equipment plays a vital role in preventing field rotation during astrophotography sessions. To minimize issues like lens distortion, select high-quality lenses with minimal distortion, ensuring stars remain sharp across the frame. Equally important is considering your mount; an equatorial mount with accurate tracking helps keep the sky steady, preventing rotation. Light pollution can also affect your images, so use filters or choose locations with darker skies to reduce its impact. Using a sturdy tripod and properly balancing your gear prevents unwanted movements that could contribute to field rotation. Additionally, investing in a field rotator allows you to adjust your camera’s orientation, maintaining consistent framing. Proper equipment, combined with careful setup, makes it easier to capture clear, rotation-free astrophotos. Regular veterinary visits ensure that your equipment is in top condition, just as routine checkups are vital for a dog’s health. For optimal results, consider using high-quality paint sprayers that minimize overspray and enhance precision. Furthermore, utilizing effective filtration methods in your setup can safeguard your equipment against dust and debris. Moreover, understanding gelato culture can provide a unique perspective on the importance of quality in all artistic endeavors. Flavorful appetizers can also inspire creativity in your photography by encouraging you to capture vibrant colors and textures in your images.
Using Software to Correct Field Rotation in Post-Processing

Even with careful equipment setup, some field rotation may still appear in your astrophotos, but software tools can help correct it after the fact. Software correction uses post processing techniques to align your images and minimize rotation effects. To do this effectively:
- Use specialized astrophotography software like DeepSkyStacker or PixInsight.
- Identify reference stars to serve as alignment points.
- Apply rotation correction algorithms to stack and align your images.
- Adjust parameters to optimize the correction and preserve image details.
These post processing techniques allow you to salvage images affected by field rotation, producing clearer, sharper results. Proper software correction can save time and effort, especially when equipment setup can’t fully prevent rotation.
Common Mistakes That Cause Unwanted Field Rotation: and How to Avoid Them
Misaligned mounting techniques, incorrect sensor calibration, and neglecting proper field setup are common mistakes that lead to unwanted field rotation. These errors can cause your images to appear skewed or blurred, making post-processing more difficult. To avoid this, double-check your mount alignment, calibrate your sensors accurately, and follow proper setup procedures.
Misaligned Mounting Techniques
When you mount your camera or telescope improperly, it can introduce unwanted field rotation, making your images appear skewed or blurry over time. Misaligned mounting techniques are a common cause of this issue, especially when aiming to capture clear, sharp images of the night sky. To avoid this, make certain you follow these steps:
- Align your mount’s polar axis precisely with the celestial pole to match sky rotation.
- Secure your camera lens tightly to prevent any shifts during exposure.
- Use proper counterweights to balance your setup, reducing movement.
- Double-check that your mount is level, as an uneven setup can cause misalignment and rotation issues.
Correct mounting minimizes sky rotation and keeps your images sharp and accurate. Additionally, using a wood-fired pizza oven can provide an excellent setting for outdoor culinary photography that showcases your astrophotography gear in action.
Incorrect Sensor Calibration
Incorrect sensor calibration is a common mistake that leads to unwanted field rotation in your astrophotography. When your sensor isn’t properly calibrated, your images can shift or rotate during long exposures, ruining your results. Calibration accuracy is essential to confirm your camera’s sensors align correctly with your mount and optical system. If the calibration is off, your software may interpret star positions incorrectly, causing apparent field rotation. Always perform thorough calibration routines, including darks, flats, and bias frames, to minimize errors. Double-check your sensor’s alignment and ensure your calibration frames are taken under consistent conditions. Proper sensor calibration helps maintain stable star fields, preventing unnecessary field rotation and improving the overall quality of your astrophotography.
Neglecting Proper Field Setup
Neglecting proper field setup can easily lead to unwanted field rotation during your astrophotography sessions. To avoid this, guarantee your equipment is correctly calibrated and aligned. Here are key steps:
- Perform camera calibration to correct for sensor tilt and distortion, preventing misalignment that causes rotation.
- Adjust the aperture appropriately to optimize exposure without introducing vibrations that can affect tracking.
- Align your mount carefully with the celestial pole to minimize field rotation.
- Double-check your setup before imaging, verifying that all components are secure and properly balanced.
Frequently Asked Questions
Can Field Rotation Occur During Daytime Astronomy Observations?
Yes, field rotation can occur during daytime astronomy observations, especially when you’re using altazimuth mounts. As the Sun’s position changes due to celestial mechanics, your telescope’s field of view can slowly rotate. To avoid this, you may need to use a computer-controlled equatorial mount or a field derotator, which compensates for the Sun’s movement and keeps your images steady despite the shifting celestial mechanics.
Does Weather Impact the Degree of Field Rotation Experienced?
Weather impacts the degree of field rotation you experience, even if your polar alignment is perfect. Calm, clear nights minimize atmospheric turbulence, helping your mount follow celestial mechanics smoothly. However, wind, humidity, or clouds can cause vibrations or slight misalignments, increasing apparent field rotation. So, while weather doesn’t change the fundamental celestial mechanics, it influences how well your equipment maintains precise polar alignment, affecting the rotation you observe during your astronomy sessions.
Are There Specific Star Trackers That Help Reduce Field Rotation?
Yes, certain star trackers with higher accuracy can help reduce field rotation effects. Look for models with advanced star tracker precision and integrated calibration techniques, which guarantee precise tracking over time. Regular calibration, especially using known reference stars, minimizes errors caused by environmental factors. By choosing high-quality star trackers and performing consistent calibration, you can substantially reduce field rotation issues, resulting in smoother, more accurate astrophotography or navigation.
How Does Latitude Influence the Rate of Field Rotation?
Your latitude directly impacts the rate of field rotation because of celestial mechanics. At higher latitudes, the sky appears to rotate more slowly around the celestial pole, reducing field rotation. Proper polar alignment becomes essential, especially at different latitudes, to minimize this effect. As you move away from the equator, the sky’s apparent movement changes, so adjusting your tracking setup helps keep images sharp and minimizes field rotation.
Can Field Rotation Be Completely Eliminated With the Right Equipment?
No, you can’t completely eliminate field rotation due to equipment limitations and celestial mechanics. Even with the best equatorial mounts and tracking systems, tiny mechanical imperfections and the natural movement of celestial bodies cause some rotation. While advanced autoguiders and precise polar alignment reduce it considerably, complete elimination isn’t possible. So, understanding these limitations helps you plan better for long exposures and improved image quality.
Conclusion
Now that you understand field rotation, you’re armed with the tools to keep your images crisp and steady like a well-tuned orchestra. Think of your mount as the steady baton guiding your celestial symphony, preventing your shots from drifting into chaos. With the right equipment, techniques, and software, you’ll master the dance of the stars, capturing their brilliance without unwelcome spins. Soon, your astrophotography will shine as brightly as the night sky itself.