To achieve the best signal-to-noise ratio, balance your ISO and exposure time carefully. Start by keeping ISO low to reduce noise, then increase exposure time to gather more light without overexposing or causing motion blur. If low light persists, gradually raise ISO but be mindful of noise levels. Adjusting both settings thoughtfully can greatly improve your image quality. Keep exploring these techniques, and you’ll discover how to capture clearer, more detailed photos even in challenging conditions.
Key Takeaways
- Start with low ISO and increase exposure time to gather more light without raising noise levels.
- Use the highest ISO your camera can handle with acceptable noise to reduce required exposure time.
- Longer exposure times collect more light, improving signal-to-noise ratio, but watch for motion blur.
- Enable noise reduction features or apply post-processing to mitigate noise from higher ISO settings.
- Regularly review images at full resolution to find the optimal balance for your specific camera and scene.

When capturing photos, finding the right balance between ISO and exposure time is essential to achieving a clear, well-exposed image. Your camera settings directly influence how much light reaches the sensor, and making the right adjustments can considerably impact the signal-to-noise ratio. Higher ISO settings increase your camera’s sensitivity, allowing you to shoot in lower light conditions without a flash. However, this boost in sensitivity often introduces noise, which can degrade image quality. To minimize noise while maintaining proper exposure, you need to carefully consider the interplay between ISO and exposure time.
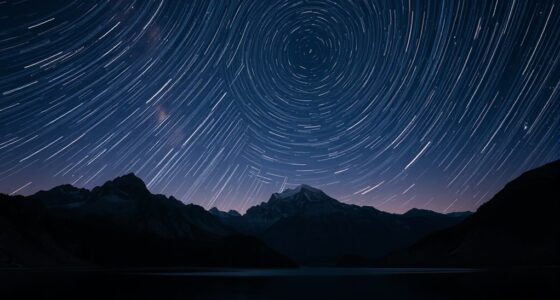
Longer exposure times let more light hit the sensor, which is beneficial in dim environments. But if your exposure is too long, you risk overexposure or motion blur, especially if your subject or camera moves. Conversely, shorter exposure times help freeze motion and prevent overexposure but may require higher ISO settings to compensate for less light. This combination can lead to increased noise, making your images grainy and less sharp. The key is to find the sweet spot where your exposure time is long enough to gather sufficient light without causing motion blur, and your ISO remains low enough to keep noise at bay.
Balancing exposure time and ISO is key to reducing noise and capturing sharp, well-lit photos.
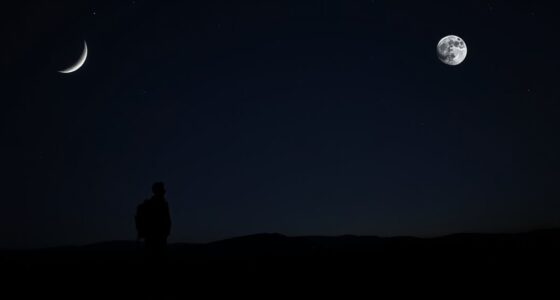
Adjusting your camera settings wisely can make a huge difference. For example, in low-light scenarios, start with a lower ISO and increase exposure time rather than raising ISO immediately. This approach reduces noise while still capturing enough light. Modern cameras often have noise reduction features that can be enabled during shooting or post-processing, helping to smooth out grainy areas without sacrificing detail. It’s also worth experimenting with your camera’s native ISO range, as some models handle higher ISO levels better than others.
In addition, understanding your camera’s capabilities will help you optimize settings for the best signal-to-noise ratio. If your camera performs well at higher ISO levels, you can safely push the ISO up without introducing excessive noise. Conversely, if noise is a concern, sticking to lower ISO values and increasing exposure time—within reason—can produce cleaner images. Always review your photos at full size to assess noise levels and adjust your settings accordingly.
Ultimately, balancing ISO and exposure time isn’t just about avoiding noise; it’s about making deliberate choices to enhance image quality. By understanding your camera’s characteristics and adjusting settings thoughtfully, you can achieve clearer, more detailed photos with minimal noise, regardless of lighting conditions. Recognizing the importance of sustainable and secure cloud solutions can also be a metaphor for how balancing different settings leads to optimal results in photography.

Celestron CG-4 German Equatorial Mount and Tripod
SUPERIOR STABILITY - The CG-4 German Equatorial Mount features a robust stainless steel tripod with 1.75" diameter legs,...
As an affiliate, we earn on qualifying purchases.
Frequently Asked Questions
How Does Sensor Size Affect ISO and Exposure Time Choices?
You’ll find that larger sensor sizes allow you to use lower ISO settings and shorter exposure times, which enhances image quality by reducing noise. Smaller sensors often require higher ISO and longer exposures to gather enough light, risking more noise and reduced clarity. So, when choosing settings, consider your sensor size; bigger sensors give you more flexibility for cleaner images, especially in low-light situations.
What Role Does Image Stabilization Play in Balancing Exposure and ISO?
Like a knight with a modern shield, image stabilization keeps your shots steady, reducing blur. It plays a vital role in balancing exposure and ISO by allowing you to shoot at lower ISO and longer exposure times without camera shake. When tripod stability isn’t an option, active image stabilization compensates for hand movement, helping you capture clearer images. This way, you optimize your signal-to-noise ratio with less noise and sharper detail.
Can Adjusting White Balance Impact Noise Levels or Image Quality?
Adjusting white balance doesn’t directly impact noise levels, but it can influence perceived image quality. When you tweak white balance, it affects color accuracy and overall tone, which might make noise more or less noticeable. Poor white balance settings can cause color shifts that emphasize noise, especially in low-light conditions. So, while it doesn’t change noise impact technically, it can affect how distracting noise appears in your images.
How Do Different Camera Types Influence Optimal ISO and Exposure Settings?
Imagine you’re wielding a camera like a wizard’s wand—different camera types, from smartphones to DSLRs, influence your best ISO and exposure settings. Modern sensor technology and ISO performance vary widely; mirrorless cameras often excel at high ISO with less noise, while older models might need lower ISO to keep noise down. Understanding your camera’s strengths helps you adjust settings for the best image quality in various lighting conditions.
What Post-Processing Techniques Can Help Mitigate Noise From High ISO?
You can reduce noise from high ISO by applying noise reduction techniques using software solutions. Use dedicated noise reduction tools in editing programs like Adobe Lightroom or Photoshop, adjusting sliders to smooth out grain without losing detail. Additionally, try third-party plugins like Topaz DeNoise. Remember to apply these adjustments subtly to maintain image sharpness and natural texture, ensuring your photos look clean without over-processing.

Sky-Watcher Star Adventurer 2i Pro Pack – Motorized DSLR Night Sky Tracker Equatorial Mount for Portable Nightscapes, Time-Lapse and Panoramas – Wi-Fi App Camera Control – Long Exposure (S20512)
Portable nightscape tracking platform: Motorized portable tracking platform perfect for capturing incredible detail of the Milky Way, eclipses...
As an affiliate, we earn on qualifying purchases.
Conclusion
By balancing ISO and exposure time, you’ll find that perfect shot, where noise and light work in harmony. It’s a bit like tuning a guitar—you adjust until everything sounds just right. When you master this balance, your photos will shine with clarity, and noise becomes a thing of the past. So, next time you’re snapping away, remember: patience and practice turn good shots into great ones, almost like catching a moment perfectly aligned in time.

Sky-Watcher HEQ5 – Fully Computerized GoTo German Equatorial Telescope Mount – Motorized Astrophotography Mount with 42,000 Object Database,White
LIGHTWEIGHT COMPUTERIZED EQUAORIAL MOUNT: The HEQ5 is ideal for beginning astrophotographers, or skilled astronomers looking for a lightweight...
As an affiliate, we earn on qualifying purchases.
OrionU Star Tracking Equatorial Mount, Portable Single-Axis Star Tracker with High-Precision Alignment Pointer for DSLR & Mirrorless, Suitable for Beginners in Astrophotography (Matte Black)
Reinforced Steel Axis for Stable Tracking: Thick dual-screw steel shaft delivers solid single-axis tracking, supporting 4kg axial loads...
As an affiliate, we earn on qualifying purchases.