
The accuracy needed in polar alignment depends on your desired exposure length. Small errors, like a few degrees, might allow a few minutes of exposure before star trails appear. For longer exposures, especially in deep-sky imaging, alignment needs to be within a fraction of an arcminute to prevent blurring. If your polar error is off, you’ll need to re-align or keep exposures short. Continue exploring to find out how to optimize your setup for clearer images.
Key Takeaways
- Small polar errors (under 1°) typically allow exposures of several minutes before star trails appear.
- Errors exceeding 2° usually limit exposures to under 30 seconds to prevent noticeable trail.
- Precise alignment within a fraction of an arcminute is essential for long, high-quality deep-sky exposures.
- Shorter exposures with stacking can compensate for larger polar alignment errors.
- Regular re-alignment ensures optimal accuracy, enabling longer exposures without star trailing.

Astromania Polar Alignment Scope for EQ-5, Quickly and Easily Align Your Equatorial Mount with The North Celestial Polar – The Foundations for Successful Astrophotography
Full metal; Good alignment of the mount with the North Celestial Pole can be achieved in a short…
As an affiliate, we earn on qualifying purchases.
As an affiliate, we earn on qualifying purchases.
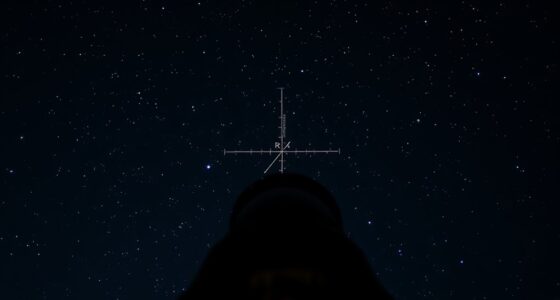
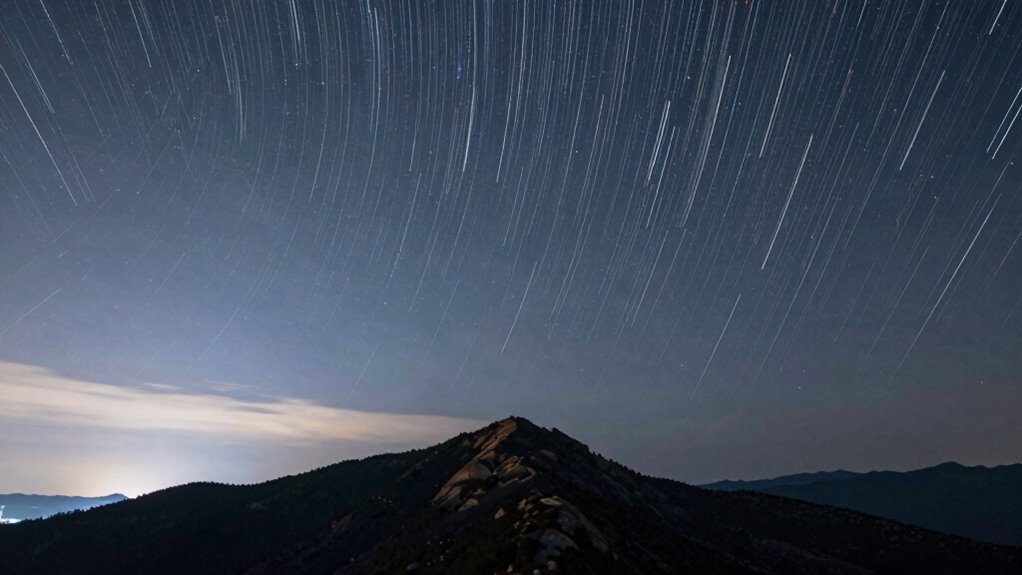
What Is Polar Alignment Error and Why Does It Matter?
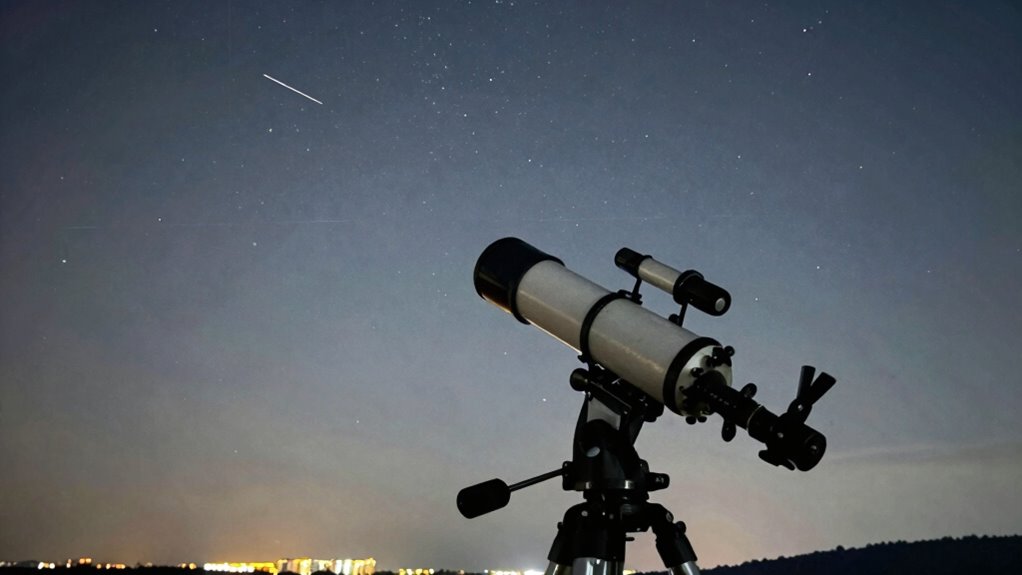
Have you ever noticed how stars seem to drift across the sky in long exposure photos? That movement results from polar alignment error. When you don’t align your telescope or camera mount precisely with the Earth’s axis, star trails appear instead of points. To fix this, you use a polar scope, which helps you locate the Polaris and set your mount correctly. Drift correction is essential here; it involves fine-tuning your alignment by observing star movement over time. Small errors can cause star trails, blurring your images and reducing accuracy. Proper polar alignment minimizes drift, ensuring stars stay pinpoint sharp during long exposures. Understanding and correcting polar alignment error is vital for high-quality astrophotography, helping you achieve clear, crisp images of the night sky. Additionally, imagination mobilizes mental potential, allowing photographers to envision creative compositions that highlight the beauty of the cosmos. Achieving this requires an understanding of color accuracy to ensure your images reflect the true hues of the night sky. Moreover, just as in risk management strategies for financial investments, consistent practice and education can significantly enhance your astrophotography skills. Furthermore, embracing AI-driven tools can streamline the process of achieving accurate polar alignment and enhance your overall photographic experience. Utilizing specialized equipment can further assist in improving your setup and ensuring precision.

FANAUE SkyGuider Pro Base Mount for Star Tracker Low Latitude Version, Precision CNC Aluminum Base, Stable Polar Alignment Platform for Astrophotography & Star Tracking
Designed for Low-Latitude Star Tracking: Specifically engineered for low-latitude regions, this base mount provides a more suitable adjustment…
As an affiliate, we earn on qualifying purchases.
As an affiliate, we earn on qualifying purchases.
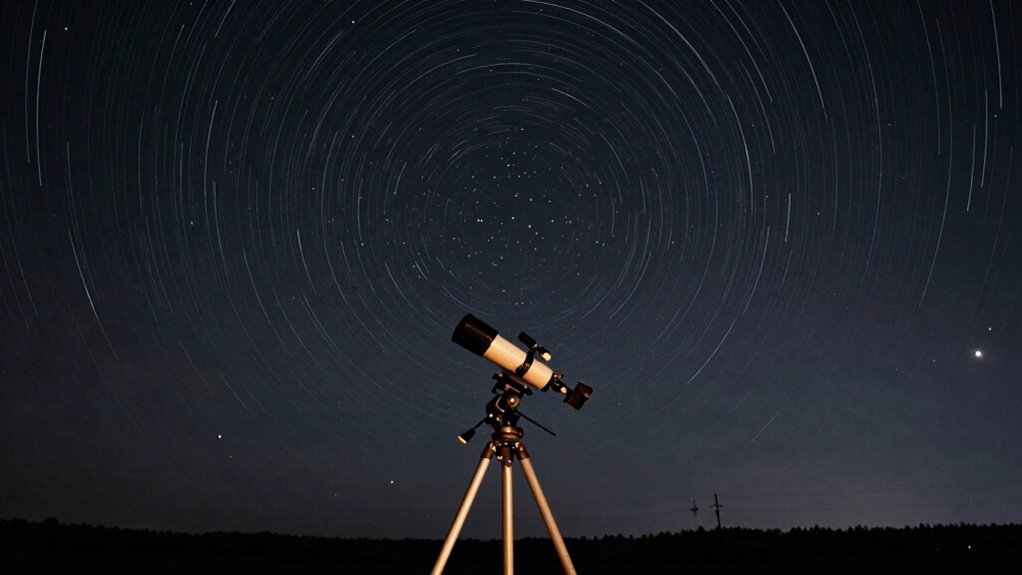
How Long Can You Expose With Different Levels of Polar Error?
The amount of time you can expose your camera or telescope depends heavily on how accurately your mount is aligned with the Earth’s axis. With minor polar error, you might manage exposures lasting a few minutes before star trails become noticeable. However, as polar error increases, calibration challenges grow, and longer exposures lead to significant star trailing, reducing image sharpness. Equipment compatibility also plays a role; some mounts are better at compensating for minor errors, allowing slightly longer exposures. If your polar alignment is off by a few degrees, expect to limit exposures to less than a minute without star trails. Achieving a good balance between calibration efforts and equipment capabilities helps maximize exposure times without compromising image quality. Additionally, understanding how digital concepts influence exposure can enhance your overall imaging experience.
drift correction star tracker
As an affiliate, we earn on qualifying purchases.
As an affiliate, we earn on qualifying purchases.
How Precise Does Your Polar Alignment Need to Be?
Achieving precise polar alignment is essential if you want sharp, streak-free astrophotographs. When your polar alignment is accurate, your star tracking becomes more reliable, reducing star trails and improving image quality. Slight misalignments can be tolerated for short exposures, but for longer sessions, even minor errors cause streaking. Proper equipment calibration ensures your mount tracks correctly, maintaining alignment throughout the session. The degree of precision needed depends on your exposure length and target resolution. For casual astrophotography, aligning within a few arcminutes may suffice. However, if you’re aiming for high-precision deep-sky images, you’ll need to be much more exact, often within a fraction of an arcminute. Additionally, utilizing proper paint straining techniques can help ensure that any equipment used is free from contaminants that might affect performance. Furthermore, investing in expert tips on equipment maintenance can enhance your overall astrophotography experience. Understanding the impact of softener brine on equipment performance is also crucial, as it can affect the longevity and efficiency of your gear. Additionally, using lightweight foundations can help improve your overall setup, ensuring that your equipment remains stable during long exposures. Proper maintenance of your equipment can significantly reduce the chances of window regulator failure, which ultimately affects your image quality. Ultimately, the better your polar alignment, the more consistent your star tracking and the higher your image quality.

DWARFLAB Dwarf 3 Smart Telescope – Portable Astrophotography Camera, Capture Astronomy/Wildlife/Panorama, AZ/EQ Mode, Built-in Processing, 4K Auto-Tracking, Ultra-Light 3lb, Ideal for All Ages
【Ultra-Light Design for All Adventures】Only 3lb/1.35kg – World's Most Portable Smart Telescope! Fits perfectly in standard backpack for…
As an affiliate, we earn on qualifying purchases.
As an affiliate, we earn on qualifying purchases.
Tips for Balancing Polar Alignment and Exposure Time
Tips for Balancing Polar Alignment and Exposure Time
Balancing polar alignment precision with appropriate exposure time is essential for capturing sharp astrophotographs. To achieve this, consider these tips:
- Regularly calibrate your equipment to minimize errors and improve tracking accuracy. Incorporating fire pits can also create a cozy atmosphere for nighttime photography sessions. Additionally, ensuring your indoor air quality is optimal can enhance your comfort during long shooting hours.
- Adjust exposure times based on your local light pollution levels to reduce star trailing.
- Use shorter exposures when your polar alignment isn’t perfect, stacking images later to enhance detail.
- Monitor your polar alignment periodically, especially during long sessions, and re-align if necessary. Incorporating affordable accessories can enhance your astrophotography setup without breaking the bank.
- Investing in quality outdoor gear can significantly improve your overall astrophotography experience.
When Should You Re-Align or Extend Your Exposure?
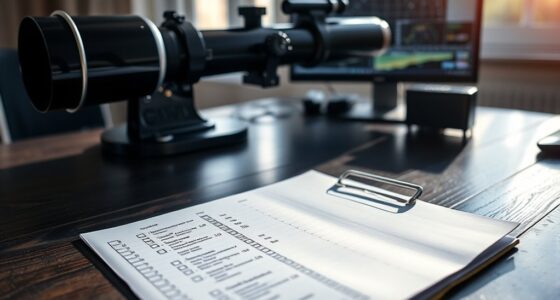
Ever wondered when it’s time to re-align your telescope or extend your exposure? If your star tracking shows signs of drift or your images start to blur, it’s a cue to re-calibrate your equipment. Extending exposure without proper alignment can worsen star trails and reduce image quality. Monitoring your target and equipment calibration helps determine if adjustments are needed. Use this table to assess your situation:
| Symptom | Action | Recommended Adjustment |
|---|---|---|
| Star trails | Re-align your mount and recalibrate | Perform star tracking calibration |
| Blurred stars | Extend exposure cautiously | Re-check equipment calibration |
| Consistent drift | Re-align or re-calibrate | Revisit initial polar alignment |
| Sudden image shift | Re-align and check tracking accuracy | Verify equipment stability |
| Long exposures | Re-assess alignment periodically | Extend only after calibration |
Proper star tracking and calibration ensure your exposures stay sharp.
Frequently Asked Questions
How Does Temperature Affect Polar Alignment Accuracy?
Temperature considerably affects polar alignment accuracy through thermal expansion, which causes telescope components to shift slightly. As it warms or cools, materials expand or contract, leading to misalignment. To counter this, you should use calibration techniques that account for temperature changes, like performing regular calibration sessions during your observing session. Keeping your equipment in a stable environment also helps minimize these thermal effects, ensuring more precise and consistent polar alignment.
Can Software Automatically Correct Polar Alignment Errors?
Did you know that about 60% of amateur astronomers rely on software for polar alignment corrections? Yes, software can automatically fix some errors, but calibration techniques are essential for precision. However, software limitations mean it can’t always account for subtle, real-time shifts. You should use it as a helpful tool, but manual adjustments are often necessary for perfect alignment, especially in challenging conditions.
What Are the Signs of Poor Polar Alignment During Imaging?
You’ll notice signs of poor polar alignment through star trails or elongated stars, especially near the edges of your images. Polar drift causes these issues, indicating that your mount isn’t tracking accurately. Poor alignment stability leads to inconsistent star shapes and increased tracking errors over long exposures. To fix this, recheck your polar alignment regularly, ensuring your mount remains stable and minimizes drift during imaging sessions.
How Often Should You Check and Re-Align Your Polar Scope?
You should check and re-align your polar scope regularly, ideally before each imaging session, to guarantee precise mount calibration and ideal star tracking. If you notice star trails or drifting during your session, it’s a sign to re-align. Frequent checks help maintain accuracy, especially during long exposures, reducing polar error. Consistent adjustments guarantee your mount tracks accurately, resulting in sharper astrophotography images with minimal star elongation.
What Equipment Improves Polar Alignment Precision?
To improve polar alignment precision, you should invest in quality equipment like a polar scope with illuminated reticles and a mount calibration tool. Using celestial navigation techniques and regularly verifying your mount’s calibration helps guarantee accuracy. Upgrading to a motorized or computerized mount can also reduce polar errors. These tools and methods allow you to achieve precise alignment, leading to better tracking and sharper astrophotography results.
Conclusion
In the world of astrophotography, finding the right balance is like walking a tightrope—too much error and your images drift into the abyss, too little and you waste valuable time. By understanding your polar alignment error and adjusting your exposure accordingly, you can capture stunning shots without losing your way in the night. Remember, mastering this dance between precision and patience makes your celestial journey not just successful, but truly cosmic.