
To create stunning time-lapse videos from stacked astrophotos, start by capturing images with a wide aperture (f/2.8 or wider), ISO between 800 and 1600, and short shutter speeds of 20-30 seconds to prevent star trails. Use manual focus on a bright star for sharp points. After stacking your images to emphasize star movement, compile them into a video that highlights celestial motion. If you continue exploring, you’ll discover how to optimize settings and software for the best results.
Key Takeaways
- Capture a sequence of astrophotos with consistent camera settings, focusing on sharp stars and minimal motion blur.
- Use manual focus on a distant bright star to ensure pinpoint stars across all images.
- Stack the images using astrophotography software to align stars and enhance star movement visibility.
- Import the stacked images into video editing software to create a time-lapse sequence with smooth transitions.
- Adjust playback speed and add motion effects to emphasize celestial movement in the final time-lapse video.

Capturing stunning time-lapse videos from stacked astrophotos allows you to showcase the night sky’s dynamic beauty in a single, mesmerizing sequence. When you focus on celestial motion, you’re highlighting the subtle shifts and sweeping movements of stars, planets, and other celestial objects over time. To do this effectively, understanding how to set your camera properly is vital. Your camera settings will directly influence the clarity, exposure, and overall quality of your final time-lapse.
Start with your exposure settings. You want a balance that captures enough light without overexposing the stars or introducing noise. Use a wide aperture (like f/2.8 or wider) to gather as much light as possible. Keep your ISO as low as you can while still capturing bright enough images—usually between 800 and 1600. Higher ISO can introduce noise, which might become more noticeable during stacking and editing. Shutter speed is also key; typically, you’ll want to keep it short enough to prevent star trails in single frames, usually around 20-30 seconds, depending on your lens focal length. This prevents star movement from blurring your images but still collects ample light.
Once your camera is set, focus becomes the next priority. Autofocus often struggles in low-light conditions, so switch to manual focus. Focus on a distant bright star or a distant light source, then zoom in on your camera’s live view to fine-tune the focus until stars appear as pinpoint dots. Proper focus ensures that when you stack your images, the stars align perfectly, creating a sharp and seamless starfield in your final video. Additionally, using specialized astrophotography software can help optimize the stacking process for better results, ensuring your final video captures the celestial motion smoothly.
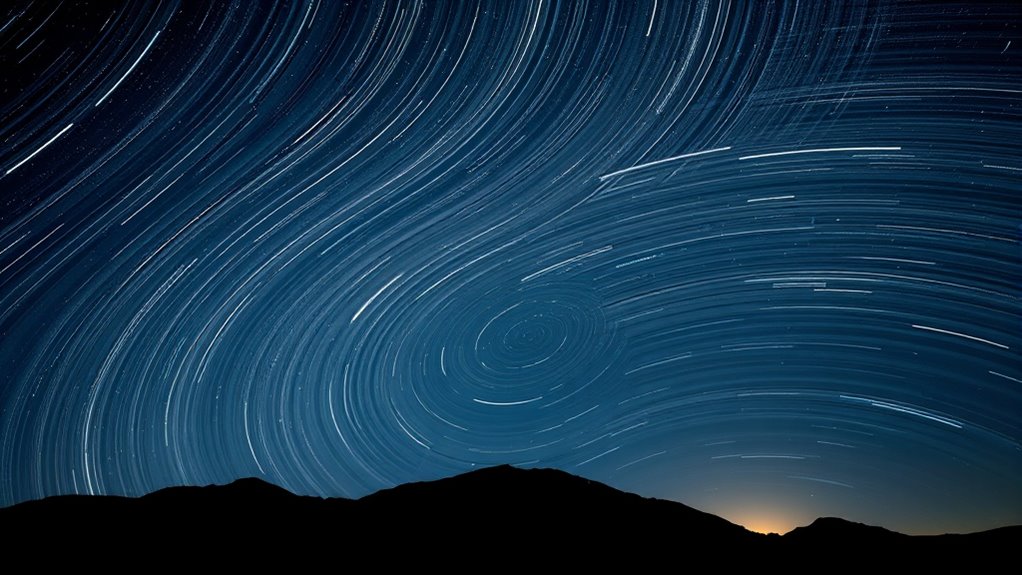
Celestial motion is subtle but powerful. Over the course of your shoot, you’ll notice stars gradually shift position due to Earth’s rotation. This movement appears as arcs or circles around the celestial pole. When you stack these images, this motion becomes more apparent, creating a dynamic background for your time-lapse. To enhance the effect, you might want to keep your camera mounted on a tracker that follows the stars, but even without one, stacking will emphasize the motion.

SVBONY SV105 Telescope Camera, 1.25" USB2.0 IMX307 CMOS Color Astrophotography Camera, Electronic Telescope Eyepiece for Telescope, Suitable for Astrophotography Beginners
SV105 planet camera is the basic method for starting astronomical imaging; you can use the SV105 electronic telescope…
As an affiliate, we earn on qualifying purchases.
As an affiliate, we earn on qualifying purchases.
Frequently Asked Questions
What Equipment Is Essential for Capturing Astrophotography Time-Lapses?
You need a sturdy tripod to guarantee camera stability during your astrophotography time-lapse. A camera with manual controls and a wide-angle lens are essential for capturing expansive night sky scenes. Use a remote shutter release or intervalometer to prevent vibrations and control your shots. Additionally, a star tracker can help follow celestial movement, resulting in sharper images. Proper equipment makes your time-lapses smoother and more enthralling.
How Do Weather Conditions Affect Astrophotography Time-Lapse Projects?
Weather conditions greatly impact your astrophography time-lapse projects. Cloud cover can obscure stars and celestial objects, ruining your shots, so check weather forecasts before shooting. High humidity levels cause dew on your lens or camera sensor, resulting in blurry images. Clear, dry nights with minimal humidity provide ideal conditions, ensuring your stacked images stay sharp and your time-lapse captures the stunning night sky without interruptions.
Can Beginner Photographers Successfully Create Astrophotography Time-Lapses?
Yes, beginner photographers can successfully create astrophotography time-lapses. Don’t let inexperience hold you back—start with simple star trail techniques and learn celestial alignment methods. These foundational skills help you capture stunning sequences, even if you’re just beginning. Practice regularly, experiment with different settings, and you’ll improve over time. Remember, patience and persistence are key to mastering astrophotography and producing mesmerizing time-lapse videos.
What Software Options Are Best for Editing Astrophotography Time-Lapse Videos?
You should consider software like Adobe Premiere Pro or DaVinci Resolve for editing astrophotography time-lapses because of their excellent software compatibility and powerful editing techniques. These programs let you adjust exposure, contrast, and color to enhance your footage. You can also stabilize shaky footage and add effects. Both are user-friendly for beginners and offer tutorials to help you master editing techniques, making your astrophotography videos look professional.
How Can I Minimize Star Trails While Capturing Time-Lapse Sequences?
To minimize star trails in your time-lapse sequences, focus on star trail mitigation by adjusting your exposure settings. Keep your exposures short, ideally under 30 seconds, to prevent star movement from creating trails. Use a wider aperture to gather more light without increasing exposure time. Additionally, consider using a tracking mount if available, which compensates for Earth’s rotation, resulting in sharper stars and smoother time-lapses.

Sky-Watcher Star Adventurer 2i Pro Pack – Motorized DSLR Night Sky Tracker Equatorial Mount for Portable Nightscapes, Time-Lapse and Panoramas – Wi-Fi App Camera Control – Long Exposure (S20512)
Portable nightscape tracking platform: Motorized portable tracking platform perfect for capturing incredible detail of the Milky Way, eclipses…
As an affiliate, we earn on qualifying purchases.
As an affiliate, we earn on qualifying purchases.
Conclusion
Now that you’ve learned how to create time-lapse videos from stacked astrophotos, you’re ready to turn your night sky captures into mesmerizing stories. Like a painter blending colors on a canvas, your images come alive with motion and magic. With patience and practice, you’ll craft celestial journeys that captivate and inspire. So, grab your camera, stack those stars, and let your astrophotos dance across the screen—turning the universe into your personal cinema.

Rokinon 14mm f/2.8 IF ED UMC Ultra Wide Angle Fixed Lens w/ Built-in AE Chip for Nikon
Lens not Zoomable
As an affiliate, we earn on qualifying purchases.
As an affiliate, we earn on qualifying purchases.
PixInsight User Guide:: The Visual Workflow Guide to Astrophotography Processing – Master Calibration, Stacking, Stretching, and Advanced Techniques Without the Overwhelm. PART1
As an affiliate, we earn on qualifying purchases.
As an affiliate, we earn on qualifying purchases.