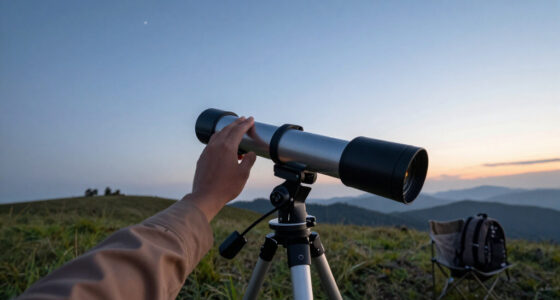
This guide explains how to choose, assemble, and use a portable astrophotography telescope for capturing clear images of the night sky. It is intended for amateur astronomers with some basic knowledge of telescopes and photography. Expect to spend between one and three hours completing setup and initial imaging. By following these steps, you will be able to take high-quality astrophotos with a lightweight, transportable telescope suitable for field use.

Dwarflab Dwarf 3 Smart Telescope, App-Controlled Astrophotography Camera
- ✔ Weight: 3 lb / 1.35 kg
- ✔ Imaging System: Dual lens (telephoto and wide-angle)
- ✔ Auto-Tracking: Yes
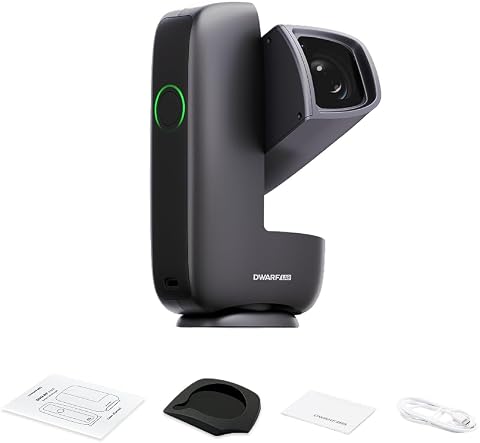
Dwarflab Dwarf Mini Smart Telescope – Portable Astronomy Telescope
- ✔ Weight: 1.85 lbs
- ✔ Sensor: Sony IMX662 1/2.8-inch, 2.9μm pixels
- ✔ Exposure Support: Up to 90 seconds
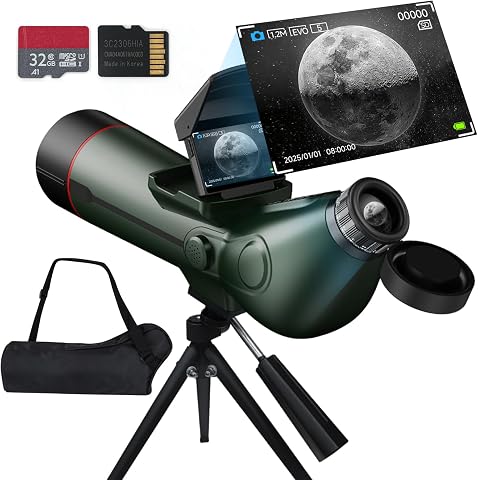
Smart Refractor Telescope with Auto-Focus and Digital Features
- ✔ Aperture: 80mm
- ✔ Focal Length: 300mm
- ✔ Magnification: up to 350X
Difficulty: Intermediate | Time: 1-3 hours
What You’ll Need
Tools & Materials:
- Portable astrophotography telescope with mount
- Camera compatible with telescope (e.g., DSLR or dedicated astro camera)
- Telescope mounting accessories
- Power supply (batteries or portable power bank)
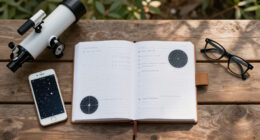
- Smartphone or tablet (for control and alignment)
- Tripod or stable platform
Knowledge:
- Basic understanding of telescope components and operation
- Fundamentals of astrophotography (exposure, focus, tracking)
Ensure your telescope is physically portable—ideally under 15 pounds—and that your camera is compatible or can be adapted. Fully charge all batteries before starting. Familiarize yourself with your telescope’s manual and control app if applicable.

DWARFLAB Dwarf 3 Smart Telescope, App-Controlled Astrophotography Camera
- Ultra-Lightweight Design: Only 3lb for portability and travel
- Dual Imaging System: Day and night dual lens for versatile imaging
- 4K Auto-Tracking: Professional auto-tracking for clear shots
As an affiliate, we earn on qualifying purchases.
Dwarflab Dwarf 3 Smart Telescope, App-Controlled Astrophotography Camera
<p>The <strong>Dwarflab Dwarf 3</strong> stands out for its dual-lens system, combining telephoto and wide-angle options that suit both landscape and astrophotography. Its smart auto-tracking and 4K resolution elevate it beyond basic portable scopes, making it suitable for users who want professional-quality images without lugging heavy gear. Compared to the smaller Dwarflab Dwarf Mini, this model offers more optical flexibility and advanced features, but it comes at a higher cost and slightly increased complexity.</p><p>While it excels in versatility, it lacks detailed optical specifications, which might concern purists. It relies heavily on app connectivity and cloud processing, which could be a drawback in areas with poor internet. Overall, this makes the most sense for users seeking a balanced mix of portability, imaging power, and ease of use in varied conditions.</p>
Pros:
- Highly portable and lightweight at just 3 pounds
- Dual lenses for multi-purpose imaging
- Smart auto-tracking with 4K image processing
- User-friendly app interface suitable for all skill levels
Cons:
- Limited detailed optical specifications
- Requires stable internet for cloud features
- Higher price point due to advanced features
Best for: Users seeking a versatile, all-around portable astrophotography device suitable for both day and night use.
Not ideal for: Those prioritizing ultra-lightweight travel or deep-sky astrophotography without internet dependence.
Bottom line: The Dwarflab Dwarf 3 offers a compelling blend of versatility and smart technology, ideal for users wanting an all-in-one portable astrophotography tool.
“The Dwarflab Dwarf 3 offers a compelling blend of versatility and smart technology, ideal for users wanting an all-in-one portable astrophotography tool.”

DWARFLAB Dwarf Mini Smart Telescope - 1.85lb Portable Astronomy Telescope
- Compact and Lightweight: Weighs only 1.85 lbs for portability
- Easy App Control: Setup in 3 minutes with intuitive app
- Built-in Sky Atlas: Interactive star map for easy navigation
As an affiliate, we earn on qualifying purchases.
Dwarflab Dwarf Mini Smart Telescope – Portable Astronomy Telescope
<p>The <strong>Dwarflab Dwarf Mini</strong> is the epitome of portability, weighing just 1.85 pounds and fitting in a pocket. Its compact size makes it ideal for hiking, camping, and spontaneous stargazing sessions. Despite its small stature, it offers advanced imaging features like long exposure support and cloud-based image processing. Its app-controlled interface with 360° rotation makes viewing angles flexible and intuitive, especially for beginners or casual astronomers.</p><p>Compared with the Dwarf 3, the Mini sacrifices some optical versatility and resolution for extreme portability. It’s not designed for deep-sky astrophotography or detailed terrestrial imaging but excels at quick observations and travel-ready use. It’s not suitable for fixed, stationary setups or deep-sky imaging at high magnifications, but it’s a standout for those who prioritize mobility.</p>
Pros:
- Incredibly lightweight and compact
- Easy to operate with app control and star mapping
- Supports long exposure and cloud image processing
- Full 360° rotation for viewing flexibility
Cons:
- Limited to portable use, not for deep observatory setups
- Requires a compatible smartphone or device for app control
- Learning curve for advanced features
Best for: Travelers, hikers, and outdoor enthusiasts seeking a lightweight, easy-to-carry astrophotography device.
Not ideal for: Users aiming for high-magnification deep-sky astrophotography or those needing a more robust setup for long-term use.
Bottom line: The Dwarflab Dwarf Mini is the best choice for travelers who want quick, portable astrophotography without sacrificing advanced imaging features.
“The Dwarflab Dwarf Mini is the best choice for travelers who want quick, portable astrophotography without sacrificing advanced imaging features.”
Smart Refractor Telescope with Auto-Focus and Digital Features
<p>The <strong>Smart Refractor Telescope</strong> offers a different approach, focusing on delivering bright, crisp images with a substantial 80mm aperture and 300mm focal length. Its dual-screen display allows real-time viewing, ideal for detailed planetary, lunar, and terrestrial observations, as well as astrophotography. Supporting high-capacity storage and long battery life, it’s suitable for extended sessions in the field or at home.</p><p>Compared with the Dwarflab options, this model emphasizes optical quality and real-time observation over extreme portability. Its bulkier setup and more complex operation make it less convenient for quick outdoor excursions but excellent for dedicated, high-resolution astrophotography or detailed sky viewing. It’s best suited for enthusiasts who prioritize image clarity and extended observation rather than ultra-lightweight travel.</p>
Pros:
- Bright, high-quality optics with up to 350X magnification
- Dual-screen display for real-time viewing
- Supports large external storage for photos and videos
- Long battery life with multiple auto shut-off options
Cons:
- Relatively complex operation for absolute beginners
- Heavier and less portable than smaller models
- Higher cost compared to basic telescopes
Best for: Users seeking high-quality optics, real-time viewing, and extended observation sessions in a portable package.
Not ideal for: Casual users or those who require the lightest possible setup for quick trips and hikes.
Bottom line: This refractor telescope is ideal for serious enthusiasts who want detailed images and extended observation, with portability as a secondary consideration.
“This refractor telescope is ideal for serious enthusiasts who want detailed images and extended observation, with portability as a secondary consideration.”
As an Amazon Associate we earn from qualifying purchases.
Before You Start
Perform a site check to ensure a clear, dark sky away from light pollution. Confirm all equipment is clean and in working order. Practice basic telescope setup indoors if unfamiliar with the model. Be aware of weather conditions—avoid high winds or rain. Prepare your camera settings and ensure your software or app for controlling the telescope is installed and functional.
Step-by-Step Instructions
Step 1: Select a suitable location outdoors
Choose a dark, level, and stable outdoor location with minimal light pollution. Set up your tripod or stable platform on solid ground to prevent vibrations. Ensure the area has a clear view of the sky with no obstructions like trees or buildings.
Tip: Use light pollution maps or apps to find darker sky spots. Avoid windy areas to reduce vibrations during imaging.
Check: You have a stable, level setup with an unobstructed view of the sky, ready for telescope installation.
Step 2: Assemble and position the telescope
Unpack your portable telescope and mount. Attach the telescope securely to the mount following the manufacturer’s instructions. Place the assembled telescope on your tripod or platform, ensuring stability. Point the telescope roughly toward a prominent celestial object, such as the Moon or a bright star, to verify orientation.
Tip: Check all screws and connections for tightness. Keep the telescope balanced to reduce motor strain during tracking.
Check: Telescope is securely mounted, roughly aligned with a bright object, and stable without wobbling.
Step 3: Power on the telescope and connect your camera
Turn on the telescope’s power supply. Connect your camera to the telescope’s eyepiece or optical port using the appropriate adapter or T-ring. If your telescope or camera uses control software, establish a wireless or wired connection according to the device instructions.
Tip: Ensure all cables are secured and not tangled. Use a power source with sufficient capacity for your planned imaging session.
Check: The telescope’s mount is powered on, and your camera is securely connected and recognized by control software.
Step 4: Align the telescope accurately
Use a star alignment procedure—typically via your telescope’s hand controller or app—by selecting a bright star or celestial object. Follow the on-screen prompts to align the mount so it tracks correctly. Perform a two- or three-star alignment if available, to improve accuracy.
Tip: Use a red flashlight to preserve night vision during alignment. Ensure the mount is level before alignment for better tracking.
Check: The mount is aligned with a known celestial object, and tracking accuracy is confirmed by the mount following the object smoothly.
Step 5: Focus the telescope for sharp images
Use the focusing controls or software to bring a bright star or object into sharp focus. Adjust slowly and carefully, monitoring the camera’s live view or focusing screen. Fine-tune until the object appears as a sharp point or the image is as clear as possible.
Tip: Use a Bahtinov mask or software autofocus if available for precise focusing. Slightly defocus initially to find the best focus point, then refine.
Check: The object appears as a pinpoint or sharply defined in your camera view, with minimal fuzziness or aberrations.
Step 6: Set camera exposure and capture test images
Configure your camera with appropriate exposure settings—start with 30 seconds to 2 minutes, ISO around 800-1600 depending on sky brightness. Take a test shot to verify image clarity and tracking. Adjust exposure or focus if necessary.
Tip: Use a remote shutter release or timer to prevent vibrations. Review images for sharpness and noise, adjusting settings accordingly.
Check: Test images show clear, focused celestial objects with minimal streaking or blurring, indicating proper tracking and focus.
Step 7: Begin astrophotography session
Start capturing a series of images, increasing exposure times gradually as your setup allows, while monitoring for tracking accuracy. Consider stacking multiple shorter exposures to improve image quality. Use software to automate capturing sequences if available.
Tip: Stay patient; longer exposures may require additional calibration frames like darks, flats, and bias. Keep the telescope stable during imaging.
Check: Multiple images of celestial objects are captured with consistent positioning and clarity, ready for post-processing.
Common Mistakes to Avoid
- Overexposing images, resulting in washed-out or blurry results. — Start with shorter exposures and gradually increase while reviewing results. Use histogram and exposure guides to avoid overexposure.
- Poor focus causing blurry astrophotos. — Use fine focus adjustments, live view, or focusing aids like a Bahtinov mask. Confirm sharpness on a bright star or object before proceeding.
- Mount misalignment leading to tracking errors. — Perform accurate alignment with multiple reference stars. Recheck alignment if images show streaking or drift.
- Vibrations during imaging causing blurred images. — Ensure stable mounting surface, avoid touching the setup during captures, and use vibration suppression pads if necessary.
Troubleshooting
Problem: Images are streaked or trailing.
Solution: Check mount alignment and tracking accuracy. Reduce exposure time or increase calibration frames to improve image quality.
Problem: Camera not recognized by software.
Solution: Verify cable connections, power supply, and driver installation. Restart software or device if needed.
Problem: Mount won’t track objects properly.
Solution: Re-align the mount, ensure correct setup, and verify that tracking is enabled in settings. Re-calibrate if necessary.
Problem: Focus remains elusive or inconsistent.
Solution: Use focusing aids, double-check camera and telescope optics, and ensure your focusing method is precise.
What Success Looks Like
The final images show distinct celestial objects with sharp detail, minimal streaking, and consistent exposure. The telescope tracks smoothly without significant drift over the exposure duration. You are able to capture multiple clean images suitable for stacking and post-processing.
Next Steps
Review and process your images with astrophotography software such as DeepSkyStacker or Photoshop. Revisit alignment and focusing techniques for improved results. Plan future sessions to target different objects or test longer exposures. Keep your equipment maintained and stored properly for easy setup next time.
Frequently Asked Questions
What is the best camera for portable astrophotography?
A DSLR or mirrorless camera with manual controls and high ISO capabilities works well. Dedicated astrophotography cameras with cooled sensors provide better noise reduction for longer exposures.
How long can I expose images with a portable telescope?
Exposure times depend on tracking accuracy and sky conditions. Typically, 30 seconds to 3 minutes per shot is effective; longer exposures require precise tracking and calibration.
Do I need special lenses or adapters?
Yes, you need a T-adapter or eyepiece projection adapter compatible with your camera and telescope. A Barlow lens can also increase magnification but may require additional focusing adjustments.
Can I use my smartphone for astrophotography?
Smartphones can be used with adapters and specialized apps, but they generally have limited sensor sensitivity and tracking capabilities. For best results, use a dedicated camera with your telescope.