
To stop guessing your polar alignment, use reliable methods like the polar scope, which helps you match Polaris with reticle markings for high accuracy, or the drift method, which involves observing star movement to refine your setup. You can also align with the North Celestial Pole using a spotter scope or employ smartphone apps that guide you step-by-step. Keep your mount steady and make small adjustments—if you’re enthusiastic to get it right, more tips below will guide you through the process.
Key Takeaways
- Use a polar scope with calibrated reticles for accurate, step-by-step alignment of the mount with the celestial pole.
- Locate Polaris precisely and fine-tune its position in the reticle or with a spotter scope for reliable alignment.
- Implement the drift method by observing star movement over time to refine and confirm accurate polar alignment.
- Ensure the tripod is level and stable, making small adjustments to counteract star drift and maintain alignment during sessions.
- Utilize smartphone apps and alignment tools to guide your setup, reducing guesswork and improving precision for beginners.

Astromania Polar Alignment Scope for EQ-5, Quickly and Easily Align Your Equatorial Mount with The North Celestial Polar – The Foundations for Successful Astrophotography
Full metal; Good alignment of the mount with the North Celestial Pole can be achieved in a short…
As an affiliate, we earn on qualifying purchases.
As an affiliate, we earn on qualifying purchases.
Understanding the Importance of Proper Polar Alignment
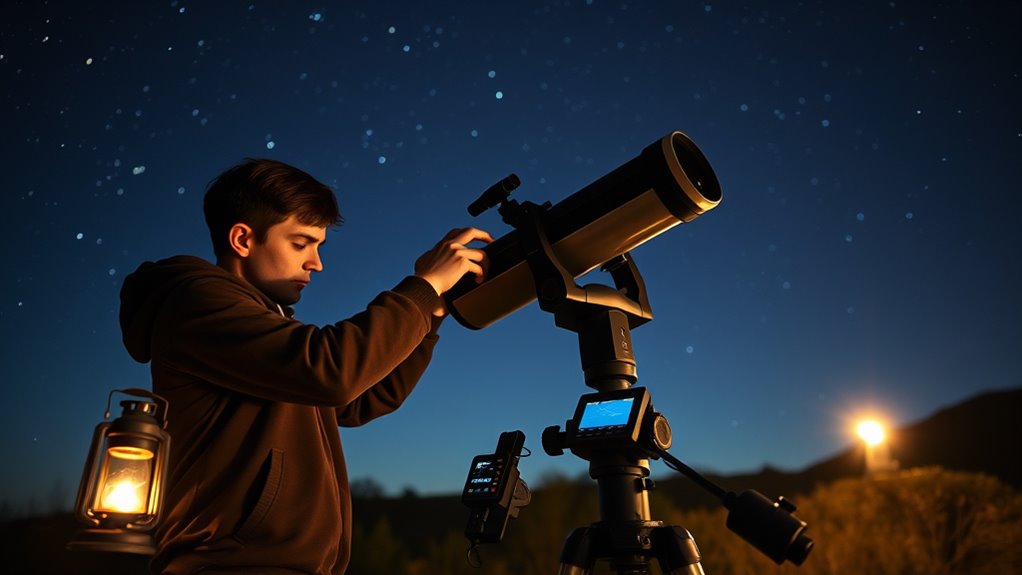
Understanding the importance of proper polar alignment is essential because it directly affects the accuracy of your astrophotography and celestial tracking. When you align your equatorial mount correctly, you simplify celestial navigation, making it easier to follow stars and planets as they move across the sky. Accurate polar alignment ensures your telescope’s axis points toward the celestial pole, reducing star trails and blurry images during long exposures. Without proper alignment, your images will suffer from star trailing, and tracking will become unreliable. As a beginner, mastering this step boosts your confidence and results. Remember, precise polar alignment is the foundation of successful astrophotography, allowing your equipment to work with the sky rather than fighting against it. It’s a critical skill that improves your overall experience. For enthusiasts interested in improving performance, exploring tuning techniques can optimize your equipment’s stability and accuracy.

Equatorial Mount Star Tracker with Ball-Head Gimbal for Astrophotography
The shell of the equatorial mount is made of PETG and carbon fiber (CF).
As an affiliate, we earn on qualifying purchases.
As an affiliate, we earn on qualifying purchases.
Using the Polar Scope: A Simple and Accurate Method

Using the polar scope is straightforward and highly accurate when you align the reticle correctly. You’ll find Polaris easily by matching it with the markings on the reticle, saving time and frustration. With some fine-tuning, you can achieve precise polar alignment for clear, sharp astronomical images. Proper alignment also benefits from understanding seasonal variations, ensuring your setup remains accurate throughout the year.
Aligning the Reticle Correctly
To align the reticle correctly, you need to guarantee the polar scope is properly centered and oriented. Start by performing reticle calibration to ensure the markings are accurate. Adjust the eyepiece for sharp focus, which improves visibility and precision. Proper orientation involves rotating the polar scope so the reticle lines up with the mount’s markings and the celestial pole. Use the table below to verify your setup:
| Step | Action | Tips |
|---|---|---|
| Center scope | Ensure reticle is centered in view | Use mounting screws carefully |
| Check calibration | Confirm reticle markings are accurate | Use star charts for reference |
| Adjust eyepiece | Focus until reticle is sharp | Avoid blurry images |
| Orient scope | Align reticle with mount markings | Use a steady hand |
| Final review | Recheck calibration and focus | Confirm stability before observations |
Locating Polaris Easily
Wondering how to find Polaris quickly and accurately? Using a polar scope simplifies the process and improves your mount calibration for better star tracking. First, set up your mount on a stable surface and align it roughly North. Look through the polar scope and locate the constellation Ursa Major, then identify Polaris within the reticle. The polar scope’s reticle is calibrated to match the night sky’s rotation, allowing you to position Polaris precisely without guesswork. This method guarantees your mount is correctly aligned, which enhances star tracking and minimizes star trails during long exposures. With practice, locating Polaris becomes quick and straightforward, giving you a reliable foundation for accurate polar alignment every time.
Fine-Tuning for Precision
Once you’ve roughly aligned your mount with Polaris, fine-tuning becomes essential for pinpoint accuracy. Using the polar scope simplifies this process by allowing you to verify and adjust your mount’s alignment precisely. Confirm your mount remains stable during adjustments to prevent any shifts that could compromise calibration procedures. Carefully rotate the mount, checking the Polaris position in the polar scope’s reticle. Minor tweaks to the azimuth and altitude adjustments can bring your polar alignment to perfection. Remember, a stable mount minimizes vibrations that could affect accuracy. Consistently verifying Polaris’s position helps you identify drift and correct it promptly. Proper calibration techniques are crucial for achieving optimal precision in polar alignment. With patience and attention to detail, your polar scope method ensures your setup is accurately calibrated, leading to sharper, more consistent astrophotography results.

Sky-Watcher Star Adventurer 2i Pro Pack – Motorized DSLR Night Sky Tracker Equatorial Mount for Portable Nightscapes, Time-Lapse and Panoramas – Wi-Fi App Camera Control – Long Exposure (S20512)
Portable nightscape tracking platform: Motorized portable tracking platform perfect for capturing incredible detail of the Milky Way, eclipses…
As an affiliate, we earn on qualifying purchases.
As an affiliate, we earn on qualifying purchases.
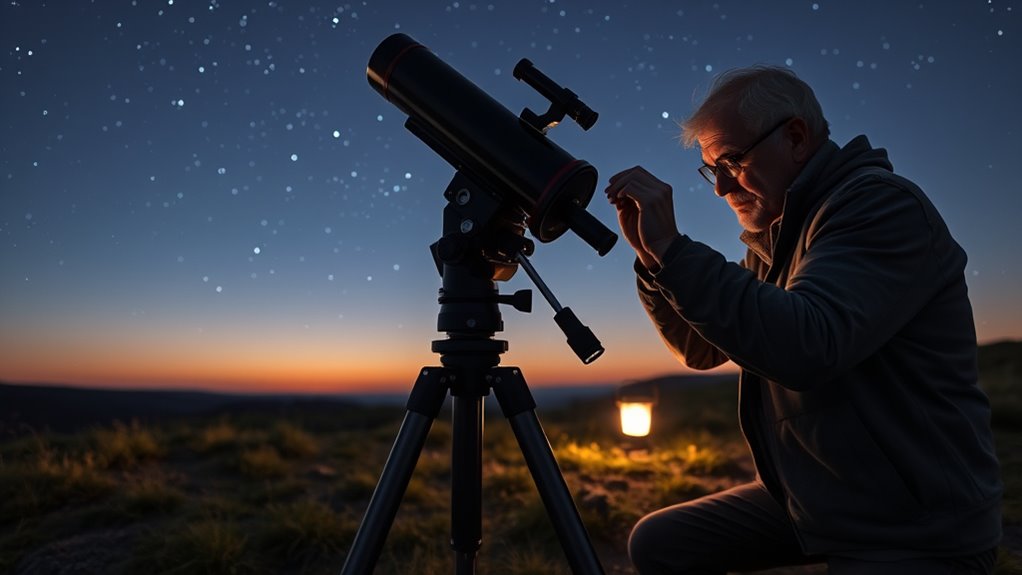
Aligning With the North Celestial Pole Using a Spotter Scope

Aligning your telescope with the North Celestial Pole using a spotter scope is a straightforward process that improves your overall tracking accuracy. First, set up your equatorial mount and locate Polaris, the North Star, which is close to the celestial pole. Attach your spotter scope to your main telescope or mount, then point it towards Polaris. Adjust the mount’s azimuth and altitude controls to center Polaris in the spotter scope’s crosshairs. This alignment ensures your telescope is accurately oriented for celestial navigation. Keep the mount steady as you make these adjustments. Once Polaris is centered, your polar alignment is nearly complete. This method provides a visual cue that simplifies the process, especially for beginners, making precise polar alignment more accessible and reliable. Accurate alignment is essential for long-exposure astrophotography and consistent tracking performance.
Knifemakers Tomahawk Eye Drift Mandrel Blacksmith Tool Blacksmith Hammer Eye Drift Axe Eye Drift Tool
【Application】Designed for blacksmith beginner or seasoned blacksmiths and Knifemakers to use to form (Drift) the hole needed to…
As an affiliate, we earn on qualifying purchases.
As an affiliate, we earn on qualifying purchases.
The Drift Method: A No-Equipment Technique for Beginners

With no special equipment, you can align your telescope by watching a star’s movement over time. Use the Polar Star as your reference point and monitor how the star drifts in the eyepiece. Then, you’ll adjust your mount’s position until the star stays steady, indicating proper polar alignment.
Using a Polar Star
Using a polar star for alignment is a straightforward method that requires no special equipment. You simply locate Polaris, the North Star, and use it as a reference point for celestial navigation. With an equatorial mount, you can adjust your telescope’s altitude and azimuth to match Polaris’s position. This method helps you align your telescope accurately, setting the stage for precise tracking. Here’s a quick guide:
| Step | Action |
|---|---|
| 1 | Find Polaris in the night sky |
| 2 | Adjust your mount’s altitude to match Polaris’s angle above the horizon |
| 3 | Slightly rotate the mount to center Polaris in the eyepiece |
| 4 | Confirm Polaris remains steady during tracking |
This simple process ensures your telescope stays aligned, making celestial navigation easier and more accurate. Additionally, understanding how to calculate the angle of Polaris can further improve your alignment accuracy.
Monitoring Star Movement
Monitoring star movement offers a practical way to check your polar alignment without any special equipment. By observing star tracking over time, you can identify if stars drift east or west, indicating misalignment. This method relies on celestial navigation principles, where steady star positions mean proper polar alignment. To perform this, pick a star near your celestial pole and keep it in view through your telescope or binoculars. Watch for any lateral movement over a period of 15-30 minutes. If the star drifts, your mount isn’t perfectly aligned, and adjustments are needed. This simple no-equipment technique helps you refine your polar alignment by visually confirming that stars stay fixed relative to the celestial pole, ensuring more accurate tracking during your astrophotography or stargazing sessions.
Adjusting Mount Position
If your star appears to drift east or west over time, adjusting your mount’s position can help correct the alignment. Start by ensuring your tripod is level; proper tripod leveling is vital for accurate mount adjustment. Next, observe the star’s drift direction. Then, follow these steps:
- Slightly move your mount east or west to counteract the drift, refining your mount adjustment.
- Recheck tripod leveling to ensure stability.
- Repeat the process until the star no longer drifts horizontally.
- Maintaining consistent polar alignment accuracy is essential for long-term stability and precise tracking.
This method relies on simple, precise adjustments without special equipment, making it perfect for beginners. Correcting your mount’s position guarantees your polar alignment stays steady, giving you clearer, more accurate night sky observations and astrophotography.
Smartphone Apps and Tools to Simplify Polar Alignment
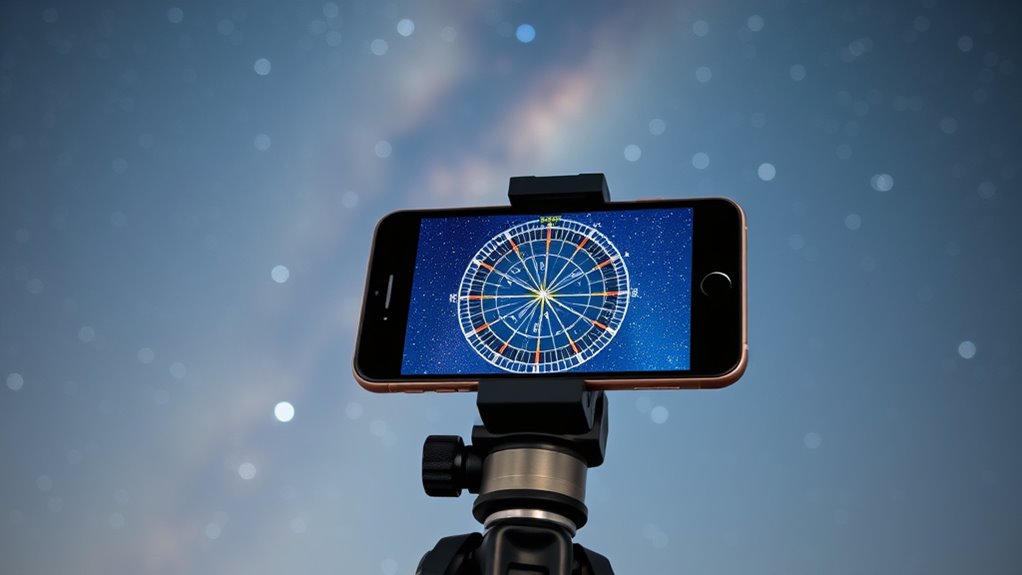
Smartphone apps and tools have made polar alignment much easier for beginners by providing real-time guidance and precise adjustments. These apps can automatically analyze your astrophotography gear and suggest *ideal* positioning, streamlining the process. They work well with various telescope mounting options, whether equatorial mounts or alt-azimuth setups, ensuring accurate alignment regardless of your equipment. Many apps use your phone’s sensors or camera to detect Polaris or other celestial targets, guiding you step-by-step to achieve proper polar alignment quickly. This reduces guesswork and increases your chances of capturing clear, sharp images. Additionally, some tools incorporate sustainable transportation principles by promoting efficient and eco-friendly practices, making astrophotography more accessible and environmentally conscious. With these tools, even those new to astronomy can confidently align their telescopes, saving time and frustration while improving overall results.
Tips for Maintaining Accurate Alignment During Your Observation Session
Maintaining accurate alignment throughout your observation session requires consistent attention and adjustments as needed. First, verify your mount remains stable; even slight vibrations can throw off your target. Second, monitor weather conditions, as wind or temperature shifts can affect mount stability and cause misalignment. Third, make small, periodic adjustments to your polar alignment, especially if you notice stars drifting. Keep an eye on your tripod and mount to prevent any movement, and be prepared to recalibrate briefly if conditions change. Additionally, regularly checking your polar alignment accuracy helps ensure sustained precision throughout your session. By staying alert and proactive, you’ll preserve your alignment and maximize your viewing experience. Remember, a steady mount and awareness of weather are your best allies in maintaining precise polar alignment during your session.
Frequently Asked Questions
How Often Should I Realign My Telescope During a Session?
You should realign your telescope as needed, especially if you notice star tracking drifting or image sharpness declining. During long sessions, check your autoguide calibration periodically and re-align when necessary to maintain precise tracking. Frequent realignments ensure accurate polar alignment, preventing star trails and blurry images. Typically, recheck alignment every hour or after significant telescope movement, so your star tracking remains reliable throughout your session.
Can Polar Alignment Be Performed Without Any Specialized Tools?
Think of polar alignment as orienting yourself by the stars—possible without tools but much easier with them. You can perform a manual alignment by eye, using your knowledge of the night sky, but smartphone apps make it simpler and more accurate. These apps help you locate Polaris and guide you through the process, reducing guesswork. While specialized tools improve precision, you can still achieve decent alignment without them if you’re patient and observant.
What Are Common Mistakes That Ruin Polar Alignment Accuracy?
You often ruin polar alignment by making common mistakes like neglecting equipment calibration, which leads to inaccurate polar miscalculations. Confirm your mount is properly calibrated before aligning, and double-check your polar scope and settings. Rushing through the process or ignoring subtle misalignments also causes errors. Taking the time to carefully verify each step helps you avoid these pitfalls and achieve precise polar alignment for better astrophotography or viewing.
How Does Altitude Affect Polar Alignment Procedures?
Think of altitude adjustment as tuning your telescope’s gaze to the sky’s hidden secrets. When you change altitude, it directly affects your polar alignment because it alters your latitude, impacting sky rotation. You need to adjust your mount’s altitude carefully to match your local latitude, ensuring accurate tracking. Ignoring this step causes misalignment, making your celestial observations drift, like a ship lost at sea. Proper altitude adjustment keeps your telescope steady and your stars on point.
Is Polar Alignment Necessary for Astrophotography or Just Visual Observing?
Polar alignment is essential for astrophotography because it guarantees your mount tracks celestial objects accurately over long exposures. For visual observing, precise polar alignment is less critical, but it still improves stability and ease of use. As a beginner, focus on good polar alignment tips to get the most out of your experience. While you can observe without perfect alignment, accurate polar alignment makes astrophotography much more successful and enjoyable.
Conclusion
Now that you know the right way to polar align, imagine the night sky unfolding perfectly above you, stars streaking smoothly through your eyepiece. With your newfound skills, every session becomes a journey into the cosmos, free from guesswork. But remember, even the tiniest misalignment can turn your celestial voyage into a challenge. Stay vigilant, fine-tune your setup, and soon, the universe’s secrets will be yours to reveal—just a perfect alignment away.