To set up off-axis guiding without tears, start by ensuring your mount is stable and your optical components are well-aligned. Attach the guider securely, focus the camera, and pick a bright, isolated guide star. Calibrate your system accurately, checking for tilt and focus issues. Regular maintenance and adjustments help keep guiding smooth and reliable. Follow these steps carefully, and you’ll discover the key to stress-free, precise astrophotography every time.
Key Takeaways
- Ensure precise alignment and focus of guide and main cameras for sharp, accurate star tracking.
- Verify mount stability and proper calibration to prevent drift during long exposures.
- Select a bright, isolated guide star and calibrate the guiding system regularly for consistent accuracy.
- Maintain clean, well-aligned equipment and update software to avoid guiding errors.
- Monitor guiding performance in real-time and make adjustments to optimize tracking stability.

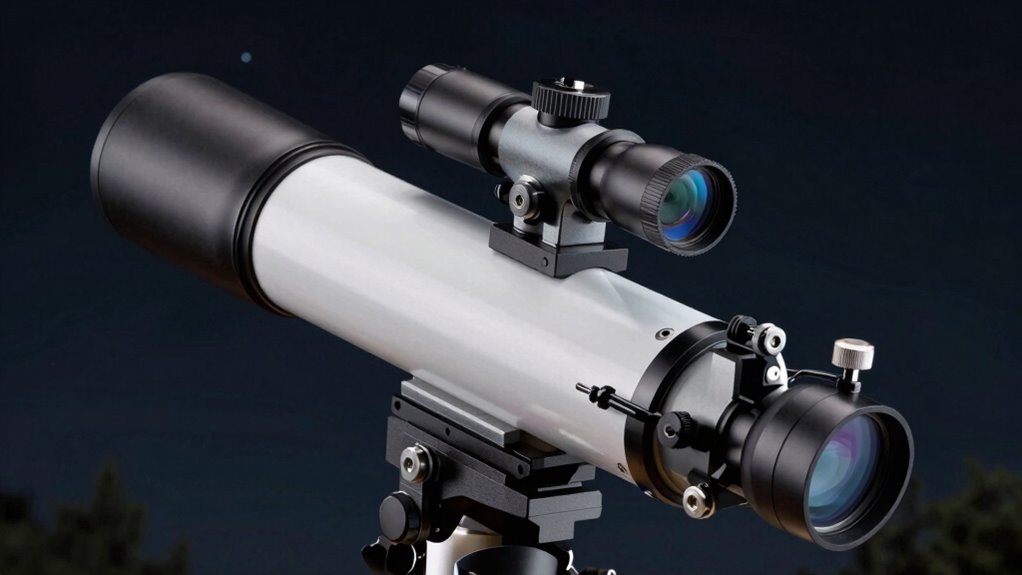
SVBONY Astrophotography Kit, SV545 Telescope Petzval Lens APO and SV238 Off-Axis Guider with M48 Filter Drawer, F4.5, 203mm Focal Length, Refractor Telescope Supports EAF (not Included)
Complete Astrophotography Kit: SV545 Telescope Petzval Lens APO with 203mm focal length and F4.5 fast aperture charges deep-sky…
As an affiliate, we earn on qualifying purchases.
As an affiliate, we earn on qualifying purchases.
How Does Off-Axis Guiding Work and Why Is It Important?
Off-axis guiding works by allowing you to keep your telescope precisely aligned with a target object while using a separate guide star located outside the main field of view. To do this effectively, your guiding system requires proper sensor calibration, ensuring it accurately detects star positions. As the telescope tracks the sky, star tracking algorithms monitor the guide star’s movement, detecting any deviations from perfect alignment. When the guide star shifts, the guiding system sends adjustments to keep the main target centered. This process minimizes drift and improves image sharpness during long exposures. Off-axis guiding is essential for astrophotography, especially when capturing detailed deep-sky objects, because it maintains precise tracking without requiring perfect polar alignment. Understanding digital concepts in guiding technology can further enhance your astrophotography experience, especially when considering color accuracy to improve overall image quality.
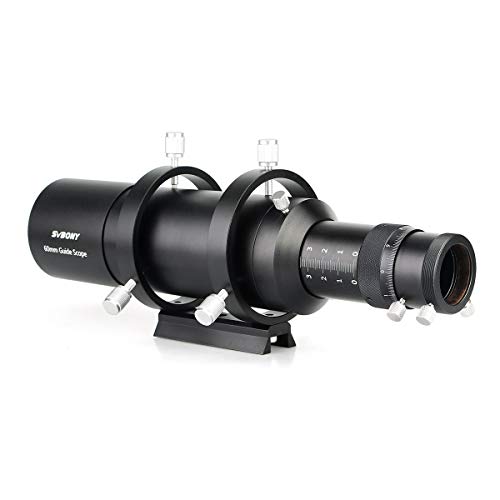
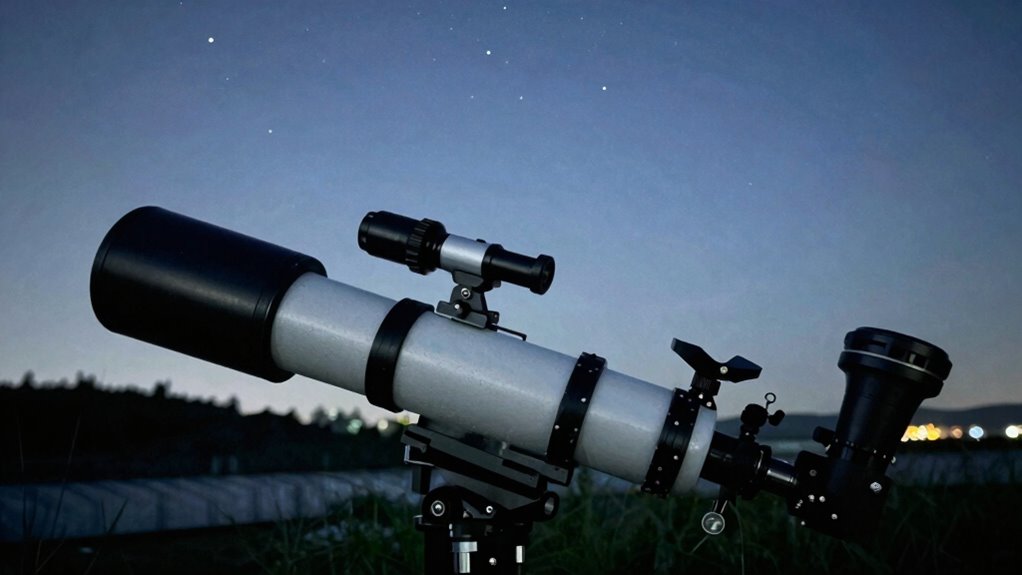
SVBONY SV106 Guide Scope with Helical Focuser Finder and Guide Scope Multi-Use for Astronomical Telescope (60mm)
Versatile 60mm aperture guide scope with a built-in helical focuser for precise focusing of potential guide stars; will…
As an affiliate, we earn on qualifying purchases.
As an affiliate, we earn on qualifying purchases.
How to Prepare Your Equipment for Off-Axis Guiding
Before starting off-axis guiding, make sure your optical components are precisely aligned to avoid errors. Next, calibrate your guide camera settings to ensure accurate tracking, and double-check that your mount is stable to prevent any movement during imaging. Proper preparation sets the foundation for smooth, tear-free guiding.
Align Optical Components Precisely
To guarantee your off-axis guiding system performs accurately, you need to carefully align your optical components. Start with precise lens calibration to ensure your guide scope and main telescope are focusing correctly. Proper optical alignment is vital; check that all lenses and mirrors are aligned along the same optical axis. Use a collimation tool or laser collimator for accuracy, adjusting elements until the light path is perfectly centered. Confirm that the guide scope is parallel to the main telescope, minimizing any tilt that could affect guiding. Small misalignments can cause guiding errors, so take your time to verify each component’s position. Well-aligned optics form the foundation for smooth, reliable off-axis guiding, reducing the need for constant adjustments during your imaging session.
Calibrate Guide Camera Settings
Properly calibrating your guide camera settings is essential to guarantee accurate and consistent guiding during your imaging session. Start by adjusting the guide camera sensitivity to ensure stars appear as bright points without saturation. Regular calibration ensures your guiding system responds correctly to star movements. Set a calibration frequency based on your observing conditions; more turbulent skies may require more frequent calibrations. Use the following table for guidance:
| Setting | Description | Recommended Practice |
|---|---|---|
| Guide camera sensitivity | Brightness of guide star | Adjust for clear star images |
| Calibration frequency | How often you calibrate | Calibrate before each session or as needed |
| Tracking stability | Guide star response | Confirm stability periodically |
Consistent calibration maintains guiding accuracy, preventing drift and ensuring sharp images. Additionally, using appropriate equipment can significantly enhance your guiding experience.
Check Mount Stability
Ensuring your mount is stable is essential for successful off-axis guiding because even minor vibrations or looseness can cause star drift and compromise image quality. Check the mount stability by gently nudging the setup, making sure it doesn’t move or wobble. Tighten all mounting screws and clamps, and verify that the tripod or pier is secure. Proper equipment calibration also plays a role; ensure the mount’s tracking is accurately aligned before guiding. Avoid over-tightening, which can distort the mount’s mechanics. Regular inspection helps identify loose parts or wear that could affect stability. Remember, a stable mount forms the foundation for precise guiding, so taking the time to secure everything correctly will save you time and frustration during your imaging sessions.

Celestron – NexImage 20 Solar System Camera – 20MP AR2020 Back-Illuminated CMOS Sensor – High-Resolution Imager for Lunar, Planetary & Solar Astrophotography, USB-C, ROI, Autoguiding
FAST, HASSLE-FREE IMAGING: Plug-and-play planetary camera connects easily to your telescope and computer so you can start capturing…
As an affiliate, we earn on qualifying purchases.
As an affiliate, we earn on qualifying purchases.
How to Choose the Right Off-Axis Guider for Your Setup
When selecting an off-axis guider, you’ll want to guarantee it’s compatible with your telescope to avoid mounting issues. Consider the magnification and brightness, as these factors impact guiding accuracy and image quality. Making the right choice means balancing these points to match your specific setup and observing goals.
Compatibility With Telescope
Choosing the right off-axis guider depends largely on your telescope’s specifications. Confirming compatibility involves checking camera compatibility and mount integration. Your guider’s camera must work seamlessly with your imaging setup, so verify sensor size, adapter requirements, and connection types. Mount integration is essential; make sure the guider fits your telescope’s mounting system without requiring adapters or modifications. Consider the telescope’s aperture and focal length, which influence the guider’s effectiveness. Compatibility issues can lead to vignetting, poor guiding, or mechanical conflicts. Before purchasing, review manufacturer specifications and user reviews to verify the guider’s compatibility with your specific telescope model. Taking these steps helps you avoid setup frustrations and guarantees reliable guiding during imaging sessions.
Magnification and Brightness
Magnification and brightness are key factors that determine how well your off-axis guider performs with your telescope setup. Higher magnification allows you to see guide stars more clearly, but too much can make finding and tracking stars harder. Aim for a balance that offers enough detail without sacrificing ease of use. Brightness is equally important; a brighter guide star provides a stronger signal, making guiding more accurate and reliable. Look for a guider that offers adjustable magnification to fine-tune your view as needed. Guarantee it also captures enough light to maintain good brightness even in less ideal conditions. By choosing a guider with appropriate magnification and brightness, you’ll improve guiding stability and enhance your astrophotography results.
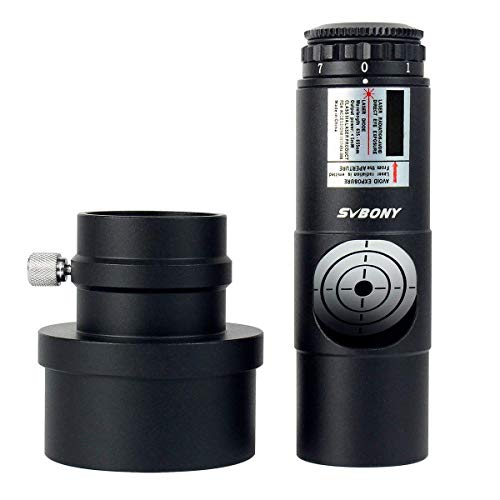
SVBONY Laser Collimator, for Newtonian Marca Telescope Alignment, 1.25/2"
Designed for calibrating reflecting telescopes; SVBONY laser collimator allows anyone easily collimate 1.25'' and 2'' reflector telescopes; come…
As an affiliate, we earn on qualifying purchases.
As an affiliate, we earn on qualifying purchases.
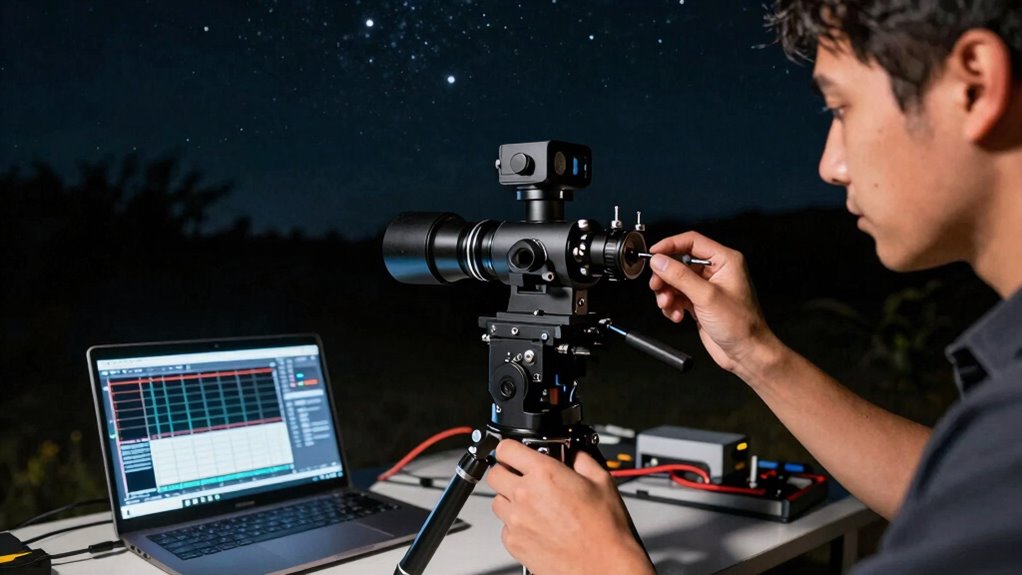
How to Install Your Off-Axis Guiding System
Installing your off-axis guiding system might seem intimidating at first, but with careful steps, it becomes straightforward. Start by attaching the off-axis guider to your telescope’s main mount, ensuring it’s secure. Next, align the camera so it points precisely at the guiding star area, focusing on camera alignment. Then, calibrate your mount by performing a few test movements to verify tracking accuracy. Make sure the guide camera is firmly mounted, and check for any obstructions. Finally, adjust the focus to get a clear image of the guide star. Proper mount calibration is essential for smooth guiding, and a solid camera alignment prevents errors during imaging sessions. With these steps, your guiding system will be ready to deliver accurate, reliable tracking.
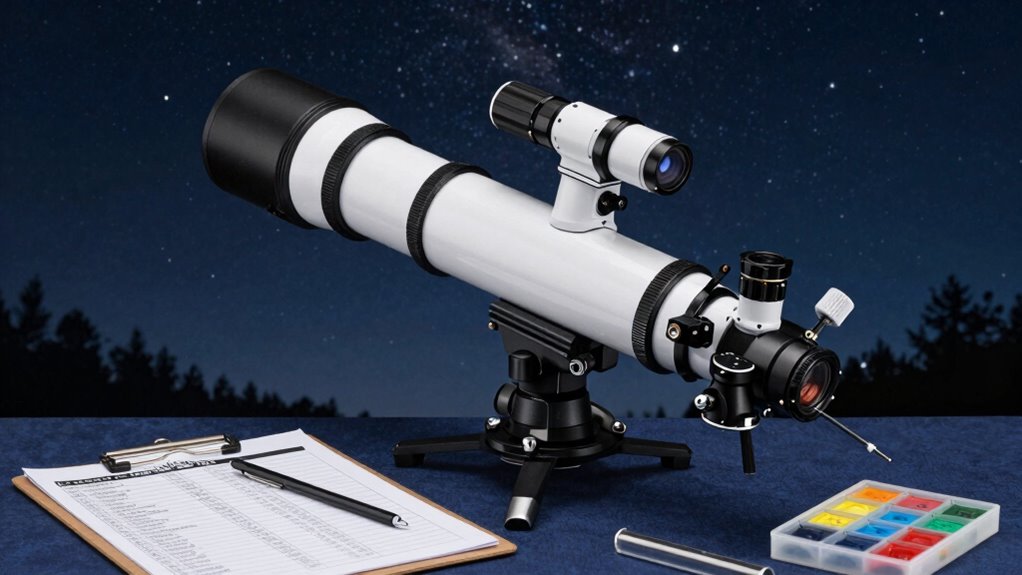
Securely attach and focus your off-axis guider for reliable, precise telescope guiding.
- Mount the off-axis guider securely
- Attach the guide camera firmly
- Focus the guide camera for clarity
- Check for obstructions in the optical path
- Verify camera alignment before calibration
How to Align Your Off-Axis Mask Precisely
Once your guide camera is focused and aligned, it’s time to guarantee your off-axis mask is precisely positioned. Proper alignment ensures accurate star tracking, minimizing guiding errors. Start by centering a bright star in your guide camera’s field of view. Then, adjust the off-axis mask until the star’s light passes cleanly through the designated aperture, ensuring minimal vignetting. Use your mount calibration routine to verify that the mount tracks smoothly without introducing drift. This process may involve slight adjustments to the mask’s orientation or position. Consistent star tracking confirms your off-axis mask is aligned correctly, reducing the risk of guiding irregularities. Precise alignment at this stage saves you hours of troubleshooting during imaging, providing a stable foundation for successful astrophotography.
How to Calibrate Your Off-Axis Guiding System
To get your off-axis guiding system working smoothly, you need to start by aligning the guide camera accurately. Next, you’ll calibrate your guide star to guarantee precise tracking. Proper calibration makes the difference between steady images and blurry results.
Aligning the Guide Camera
Before you begin calibrating your off-axis guiding system, it’s crucial to confirm your guide camera is properly aligned with your main imaging camera. Proper optical alignment ensures accurate guiding and sharp images. Start by securing the guide camera firmly and adjusting its position so it’s centered and parallel to the main camera’s optical axis. Use your mount’s adjustments to fine-tune the alignment, avoiding tilt or skew. Verify that the guide camera’s image is not distorted and that stars appear round and well-focused. This step minimizes guiding errors and guarantees your calibration is effective. Remember, a well-aligned guide camera simplifies subsequent calibration, making off-axis guiding more reliable.
- Check guide camera focus and clarity
- Confirm guide camera is parallel to main camera
- Ensure guide star images are round
- Adjust for minimal optical distortion
- Secure all mounting hardware tightly
Calibrating Your Guide Star
Calibrating your guide star is an essential step to guarantee accurate off-axis guiding, as it establishes the relationship between your guide camera’s movements and the main imaging camera’s field. Start by selecting a bright, isolated guide star that’s easy to keep centered. Once you’ve chosen it, perform a calibration by moving the guide star along the axes, noting the guide system’s response. Good guide star selection ensures stable calibration accuracy, minimizing errors during guiding. Precise movements during calibration help your system understand how shifts in the guide star translate to corrections in your mount’s position. Always double-check the calibration and ensure the guide star remains well-centered. Proper calibration is crucial for smooth, accurate guiding, leading to sharper images and more successful astrophotography sessions.
What Are Common Off-Axis Guiding Problems and How to Fix Them
Have you ever noticed your guiding system struggling to keep your target steady, resulting in star trails or elongated images? Common off-axis guiding problems include issues with color correction, focal length mismatches, and mount flexure. These can cause the guide star to shift, making it difficult to achieve precise tracking.
Guiding issues like mount flexure and focal mismatches can cause star trails and tracking problems.
- Poor alignment between the guide camera and main scope
- Inconsistent or unstable guide star due to atmospheric turbulence
- Improper calibration leading to drift
- Focal length differences causing guiding errors
- Lack of proper focus affecting guide star brightness and shape
Addressing these involves verifying proper alignment, ensuring your focal length is suitable, and adjusting for color correction. Fixing these issues helps improve guiding accuracy, making your astrophotography sessions smoother and more successful.
How to Maintain Consistent Off-Axis Guiding Performance
Maintaining consistent off-axis guiding performance requires regular attention to your setup and how you manage guiding conditions throughout your session. Start by routinely performing sensor calibration to guarantee your guiding camera provides accurate readings. Proper calibration helps prevent drift and improves guiding stability. Make sure your software integration is seamless; update firmware and guiding software regularly to avoid compatibility issues. Monitor guiding performance in real-time, adjusting parameters as needed to compensate for changing conditions. Keep your guiding scope and sensor clean to prevent errors caused by dirt or dust. Consistent checks and adjustments help maintain ideal guiding accuracy, reducing the risk of star elongation or image blur. Additionally, consider using high-quality car accessories to protect your equipment during transport, ensuring everything remains in optimal condition. This ongoing diligence ensures your off-axis guiding remains reliable, giving you sharper, more consistent astrophotos.
How Off-Axis Guiding Can Improve Your Astrophotography Workflow
Implementing off-axis guiding can considerably streamline your astrophotography workflow by providing more precise and reliable tracking. This technique has evolved from historical techniques that relied on manual adjustments to modern astrophotography trends emphasizing automation and accuracy. With off-axis guiding, you can reduce downtime caused by misalignments, ensuring sharper images and fewer re-takes. It simplifies the setup process by allowing you to correct tracking errors without moving your main telescope. As a result, you spend more time capturing and less time troubleshooting. Additionally, it helps maintain consistent tracking over long exposures, which is vital for high-quality astrophotography.
- Faster setup and adjustments
- Improved tracking accuracy
- Reduced need for post-processing corrections
- Compatibility with various mounts
- Keeps pace with current astrophotography trends
Final Tips for Stress-Free, Reliable Guiding

Achieving stress-free, reliable guiding hinges on attention to detail and proper setup. Confirm your guiding camera’s focal length matches your main scope for accurate tracking. Regularly check for proper color correction; inconsistent color can affect guiding precision. Using eco-friendly disposal methods for old gear can also help clear out clutter and maintain your workspace. Use a sturdy mount and verify all connections before imaging sessions. Keep your calibration routines consistent and revisit them if conditions change. Avoid over-tightening connections, which can introduce flex. Understanding time symbolism in dreams can also provide insights into your guiding process and help you navigate challenges more effectively.
| Tip | Why It Matters | Example |
|---|---|---|
| Match focal length | Ensures guiding accuracy | Use a guide scope with similar focal length |
| Proper color correction | Prevents misleading guide star signals | Use color filters or correct in processing |
| Secure connections | Maintains stability | Tighten all screws and cables |
| Consistent calibration | Reduces guiding errors | Recalibrate after setup or adjustments |
| Check mount stability | Avoids drift during guiding | Level mount and minimize vibrations |
Frequently Asked Questions
Can Off-Axis Guiding Be Used With All Types of Telescopes?
Off-axis guiding can be used with many telescopes, but your success depends on mounting compatibility and optical limitations. For example, some mounts may not support off-axis guides easily, and certain telescopes with small or complex apertures might introduce vignetting or aberrations. Always check your mount’s compatibility and guarantee your optical system can handle the off-axis guide setup without degrading image quality. Proper planning makes off-axis guiding effective across different telescope types.
How Does Temperature Variation Affect Off-Axis Guiding Accuracy?
Temperature variations can challenge your off-axis guiding accuracy more than you might expect. As thermal expansion shifts your telescope’s components, guiding becomes less precise. Meanwhile, atmospheric turbulence adds unpredictable movement, magnifying the effect. You’ll notice stars wobbling slightly or trails forming. To combat this, use temperature-compensated mounts and monitor weather conditions, ensuring your system adapts quickly. Staying vigilant helps you maintain sharp, accurate guiding despite the environmental chaos.
Is Off-Axis Guiding Suitable for Long Exposure Astrophotography?
Yes, off-axis guiding is suitable for long exposure astrophotography when you guarantee proper sensor calibration and mount stability. Accurate sensor calibration helps your guiding system detect real errors without false signals, while a stable mount minimizes vibrations and drift. With these factors in check, off-axis guiding provides precise corrections over extended exposures, reducing star trails and capturing sharper images of deep-sky objects.
What Are the Signs of a Misaligned Off-Axis Guiding System?
Signs of a misaligned off-axis guiding system include persistent guiding errors and noticeable star trails. You’ll see these when your polar alignment slips, causing the guide star to drift. If your images show elongated streaks or uneven star shapes, it indicates the system isn’t properly aligned. Regularly check your polar alignment and monitor guiding accuracy to prevent these issues, ensuring sharp, stunning astrophotos with minimal tears.
How Often Should I Recalibrate My Off-Axis Guider?
You should recalibrate your off-axis guider every few weeks or after significant changes to your setup, like repositioning your mount or lenses. Regular calibration guarantees your polar alignment remains accurate, helping guide precision. If you notice star trails or guiding errors, it’s a sign to recalibrate sooner. Consistent calibration frequency maintains ideal guiding performance, especially during long astrophotography sessions, so your images stay sharp and pinpoint.
Conclusion
Now that you’re equipped with this foolproof checklist, imagine capturing breathtaking images with minimal stress and maximum precision. As you fine-tune your setup and troubleshoot with confidence, the night sky’s secrets become more within reach. But don’t forget—every session is a new adventure, and even the best guidance can encounter surprises. Stay attentive, keep learning, and soon, you’ll be revealing the universe’s mysteries—one flawless shot at a time.