
TL;DR
The best way to reduce noise from a high-power rig isn’t foam or panels — it’s place it where it doesn’t bother you. A closet setup with proper ventilation keeps your space silent and your machine cool. Use strategic placement and simple DIY solutions for maximum effect.
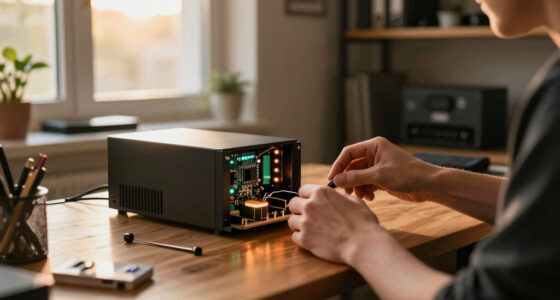
Imagine your powerful AI workstation — humming, whirring, and rattling away. Now picture your workspace, quiet as a library. That’s the power of smart placement and strategic acoustic treatment. Most folks jump straight to buying foam or soundproof panels, but the real game-changer is where you put the rig. Learn more about proper placement and acoustic treatment. Distance and ventilation often beat expensive gear every time.
In this guide, you’ll learn how to move your noisy, heat-spewing machine out of your way and into a closet or another room. Plus, we’ll cover the right way to treat small spaces without wasting money or effort on ineffective fixes. Ready to turn that loud, hot machine into a silent workhorse? Let’s do it.
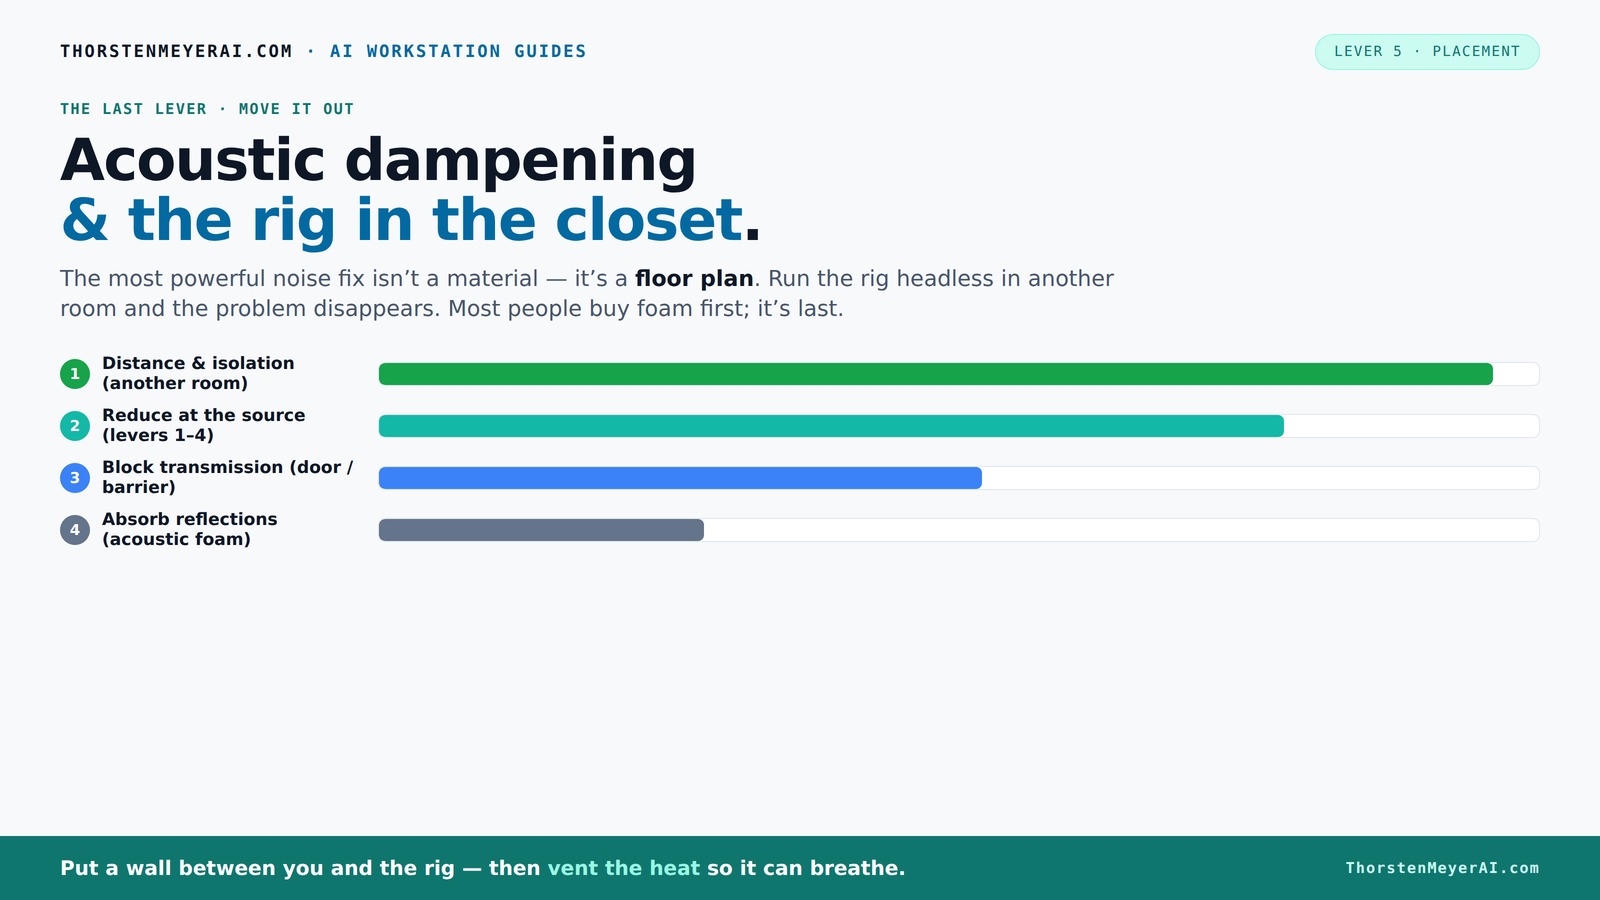
Acoustic dampening
& the rig in the closet.
The most powerful noise fix isn’t a material — it’s a floor plan. A rig you can’t hear because it’s in another room beats any amount of foam. Tap the approaches in Part 1 to see what actually works.
(another room)
(levers 1–4)
(door / barrier)
(acoustic foam)
Contain the noise, not the heat
Key Takeaways
- Always prioritize moving the rig into another room or closet before adding dampening materials.
- Ventilation is essential — a sealed closet traps heat, risking hardware damage.
- Place acoustic treatment at reflection points: behind the mic, side walls, ceiling, and door.
- Use blankets, foam, or DIY materials in combination for best absorption at low cost.
- Treat gaps around doors and corners to prevent sound leaks and low-frequency buildup.

TroyStudio Thickened 12 X 12 X 3 Inch Acoustic Foam Panels in Diffusion Pattern, 32 Pcs High Density Sound Absorbing Foam Diffuser, Soundproof 3D Wall Padding Tiles for Recording Studio Home Office
【SPECIFICATIONS】: Size - 12 X 12 X 3 inches, pack of 32; Coverage - 32 square feet; Weight...
As an affiliate, we earn on qualifying purchases.
As an affiliate, we earn on qualifying purchases.
Why Distance Trumps Foam: The #1 Noise Fix You’re Not Using
Distance really is your first, best tool. When you move your rig into another room or closet, the sound drops dramatically — sometimes by over 90%. Think of it like turning down a volume knob at the source. No amount of foam on your desk can compete with physically getting the noise away from your ears.
Why does this work so well? Sound diminishes as it travels through space, following the inverse square law. The farther you are from the source, the less intense the sound becomes. This means that even basic separation can significantly reduce perceived noise. But there’s a tradeoff: moving the rig away might mean less direct access or longer cable runs, which can introduce latency or complexity in your workflow. Also, some noise, especially bass frequencies, can still travel through walls or floors, so complete silence might require additional measures.
For example, a friend of mine put her gaming PC in the basement. The difference was night and day. Her tiny desk was silent, even with the GPU running full tilt. The sound was still there, but it was so far removed she barely noticed it. This approach is free, simple, and often overlooked, yet it can drastically improve your environment with minimal effort.
Plus, with modern AI rigs, you don’t need to sit next to the hardware. You can SSH into a remote server or connect over the network. The rig’s location no longer matters — just the connection does. This shift in workflow means you can prioritize quiet, cool spaces without sacrificing performance or accessibility.

RackChoice 2U Server case 6Gbps hot swap 8 x3.5 Bays M-ATX/Mini-ITX Depth 21.5" Support ATX PSU, Include Sliding Rail and Minisas to SATA Cables
M/B size: Micro-ATX 9.6 x 9.6 / mini-itx 6.7 x 6.7
As an affiliate, we earn on qualifying purchases.
As an affiliate, we earn on qualifying purchases.
The 'Rig in the Closet' Setup — How to Make It Work Without Burning Out
Placing your AI rig inside a closet or cabinet sounds perfect — quiet, out of sight, tucked away. But there’s a catch. Trapped heat can turn that closet into a sauna for your hardware, causing throttling or even damage. The key is understanding that simply enclosing your rig without proper ventilation is a recipe for overheating. Overheating reduces performance, shortens hardware lifespan, and can lead to unexpected shutdowns.
The secret is ventilation. You need a way for hot air to escape and cool air to flow in. This can be as simple as installing a passive vent or as complex as a thermostat-controlled exhaust fan with ducting. Commercial soundproof cabinets are engineered to do both: dampen noise and keep temps in check. But DIY solutions can be just as effective if you understand the tradeoffs: more ventilation means more noise from fans, but better cooling and safety for your components.
For example, one DIYer used a small computer fan connected to a thermostat inside a closet lined with blankets. It kept the temperature stable while muffling noise. The fan's noise was negligible compared to the rig's operation, and the thermostat prevented overheating. Just remember, sealed spaces trap heat — so ventilation isn’t optional. Proper airflow maintains hardware longevity and consistent performance, which is more important than trying to completely soundproof a space that’s prone to heat buildup.
Check out this guide for detailed ventilation solutions and how to implement them effectively, balancing noise reduction with cooling needs.
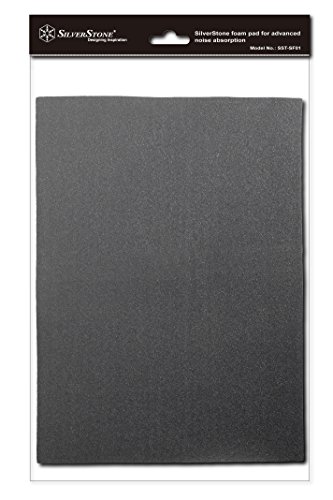
Silverstone 21-Inch x 15-Inch 4mm Thick 2-Piece Sound Dampening Acoustic EP0M Silent Foam SF01 (Black)
Great quality EPOM foam material for noise absorption
As an affiliate, we earn on qualifying purchases.
As an affiliate, we earn on qualifying purchases.
Where to Treat Your Closet for Best Sound Absorption
Acoustic dampening isn’t just about buying foam panels. It’s about placing the right materials where sound bounces and reflects, especially in small, enclosed spaces. The goal is to prevent sound reflections that can cause echo and muddiness, which interfere with clear audio recording or a comfortable listening environment. Understanding where sound travels and reflects helps you target your treatment effectively, avoiding wasted effort and expense.
The first spot to treat? Behind the microphone — where your voice hits the wall first. This is often the primary reflection point that can cause echo and reduce clarity. Learn more about acoustic dampening placement. Installing a foam panel or a thick blanket here helps absorb those initial reflections, improving your audio quality.
Next, focus on the side walls at the first reflection points. A simple trick: face a mirror along the wall, then sit at your desk and mark where the reflection hits. That’s where foam or blankets should go. Find out more about acoustic treatment placement. These reflection points can significantly reduce echo and comb filtering, leading to clearer recordings. The ceiling is often overlooked, but in tight closets, overhead reflections bounce right down on your mic, causing similar issues. Treating the ceiling with foam or hanging a blanket can help tame this problem.
Finally, treat the door and corners. Heavy blankets or bass traps in the corners reduce low-end buildup, which causes that boomy, muddy sound. See tips for treating corners and doors. Covering the door with a moving blanket helps block sound leaks, especially if it’s a flat, reflective surface. Proper placement of absorption materials at these strategic points minimizes unwanted reflections, enhances sound clarity, and prevents sound leakage, making your closet a more controlled environment for both work and recreation.
For a quick visual, check out [this placement map](https://thorstenmeyerai.com/reduce-heat-noise-ai-workstation/) that shows ideal spots for absorption in small rooms, helping you plan your DIY treatments more effectively.

AC Infinity Passive Ventilation Grille 17", White, for PC Computer AV Electronic Equipment Cabinets, Rooms, and Closets
Designed to be installed into doors, cabinets, and walls to help increase ventilation.
As an affiliate, we earn on qualifying purchases.
As an affiliate, we earn on qualifying purchases.
Materials Showdown: Foam, Blankets, and DIY Tricks
| Material | Absorption Effectiveness | Cost | Ease of Use | Best For |
|---|---|---|---|---|
| Open-cell foam panels | Good at mid-high frequencies | Moderate | Easy | Reflections, echo reduction |
| Moving blankets | Effective at all frequencies, especially low-end | Low | Very easy — hang or tape | Quick DIY booths, door treatment |
| Blankets + foam combo | Very effective | Variable | Moderate | Full room or closet treatment |
While foam panels are popular, blankets and DIY solutions often give the best bang for your buck. Heavy blankets absorb more sound across all frequencies, especially when layered. Combining foam and blankets can turn a closet into a surprisingly effective vocal booth. The key is understanding that different materials target different frequency ranges, so mixing them can optimize overall absorption. Foam tends to absorb higher frequencies effectively, reducing echo and sibilance, while blankets are better at dampening lower frequencies and preventing sound leakage. The tradeoff involves balancing cost, ease of installation, and effectiveness. For small, enclosed spaces, layering blankets over foam panels or directly on walls can provide a significant improvement in sound quality, making your setup more professional and less intrusive.
Common Mistakes That Make Your Closet Worse, Not Better
Many DIYers fall into traps that leave their space echoey or noisy. The worst? Treating only the corners or walls and leaving the door and ceiling untouched. Without sealing gaps or softening those flat surfaces, sound escapes and reflections bounce around, negating the benefits of treatment. Gaps around doors and poorly sealed edges can act as sound leaks, undermining your efforts. Additionally, over-treating or using too little material can lead to minimal improvements, wasting time and resources. Another frequent mistake is focusing only on aesthetics—covering walls with decorative panels that don’t absorb sound or sealing gaps with thin materials. Instead, prioritize functional placement, coverage, and sealing for real noise reduction. For example, one creator lined his closet with foam, but left gaps around the door. His voice sounded better, but outside noise still leaked in. Sealing and covering the door with a blanket made a huge difference, illustrating the importance of comprehensive treatment.
Understanding these common pitfalls helps you avoid ineffective setups, ensuring your DIY efforts genuinely improve sound quality and reduce noise leakage, rather than just looking good.
Your DIY Workflow: Build, Test, Adjust, Repeat
Creating a quiet, cool closet studio isn’t a one-and-done deal. Start with a simple layout: add foam or blankets to key reflection points — behind the mic, side walls, ceiling, door. Test the sound with your mic and listen for echoes or leaks. Recognize that initial setups rarely achieve perfection; the real improvement comes from iterative adjustments. Use your microphone’s pattern (cardioid, figure-8, etc.) to understand where reflections come from, which helps target your treatment more precisely. Small tweaks—adding more material, repositioning panels, sealing gaps—can lead to significant gains in sound clarity and noise reduction. Many creators share progress reports online, showing how they start with basic blankets, then incorporate bass traps and refine placement over time. Patience and continual refinement are essential for a professional-sounding setup. Remember, acoustic treatment is a process—your first attempt is just the beginning. Listening critically and adjusting accordingly will yield the best results over time.
Frequently Asked Questions
Is acoustic dampening the same as soundproofing?
No, acoustic dampening reduces echoes and reflections within a space but doesn’t block sound from leaving. Soundproofing involves barriers and sealing gaps to prevent sound transmission outside the room.
What’s the best material for a DIY closet booth?
Heavy blankets or moving blankets are excellent for quick DIY setups. They absorb sound effectively and are easy to hang or drape. Combining blankets with foam panels can improve overall sound quality.
Where should I focus my treatment first?
Start behind the microphone and at the first reflection points on side walls. Covering these areas reduces slap echo and improves recording clarity. Don’t forget to treat the door and corners for better isolation and bass control.
Can I use blankets instead of foam panels?
Yes. Heavy blankets or moving blankets are often more cost-effective and absorb sound across all frequencies better than foam in small spaces. They’re perfect for DIY closet booths.
Will a closet block outside noise entirely?
Not entirely. While a closet can reduce noise and echo significantly, some outside sound might leak in unless you seal gaps and add extra soundproofing. For complete isolation, consider combining treatment with external barriers.
Conclusion
Moving your noisy, hot rig out of your workspace and into a well-ventilated closet can cut noise by 90%. The real magic happens when you thoughtfully position DIY treatment at reflection points and seal gaps around doors. This approach costs less, works better, and makes your space a more controlled environment for both work and recreation.
So, next time your PC roars, ask yourself: can I get it out of sight? With a little ventilation and some smart placement, silence is just a closet away. Your workspace — and your ears — will thank you.