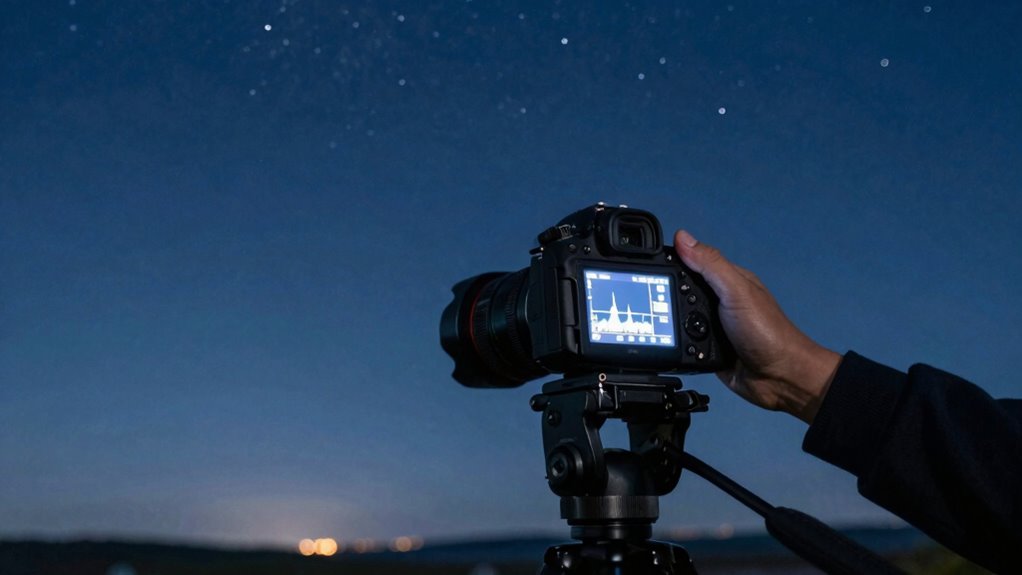
To pick the perfect exposure time, start by considering sky brightness, moon phase, and your camera’s sensitivity. Use a sturdy tripod and monitor your histogram to avoid overexposure or star trails. Shorter exposures capture crisp stars but limit faint details, while longer ones reveal more but risk trails and noise. Adjust based on conditions, and don’t forget to calibrate your equipment. Keep exploring, and you’ll discover tips to master any sky scene effectively.
Key Takeaways
- Use the histogram to ensure proper exposure, avoiding highlight clipping and preserving detail in bright areas.
- Adjust exposure time based on sky brightness, moon phase, and atmospheric conditions to prevent overexposure or star trailing.
- Employ shorter exposures for bright skies or urban light pollution, longer exposures for dark, clear conditions.
- Incorporate filters and bracketing techniques to balance dynamic range and capture details in varying brightness levels.
- Regularly calibrate your equipment and monitor real-time conditions to fine-tune exposure settings effectively.

K&F CONCEPT 64 inch/163 cm Camera Tripod,Lightweight Travel Outdoor DSLR Tripods with 360 Degree Ball Head Load Capacity 17.6 lbs/8 kg,Cellphone Clip for Smartphone Live Streaming Vlog O234A1+BH-36
【Lightweight and Portable】4 section leg can adjust tripod height from 20.4''/52cm to 64.1''/163cm; it can be folded to…
As an affiliate, we earn on qualifying purchases.
As an affiliate, we earn on qualifying purchases.
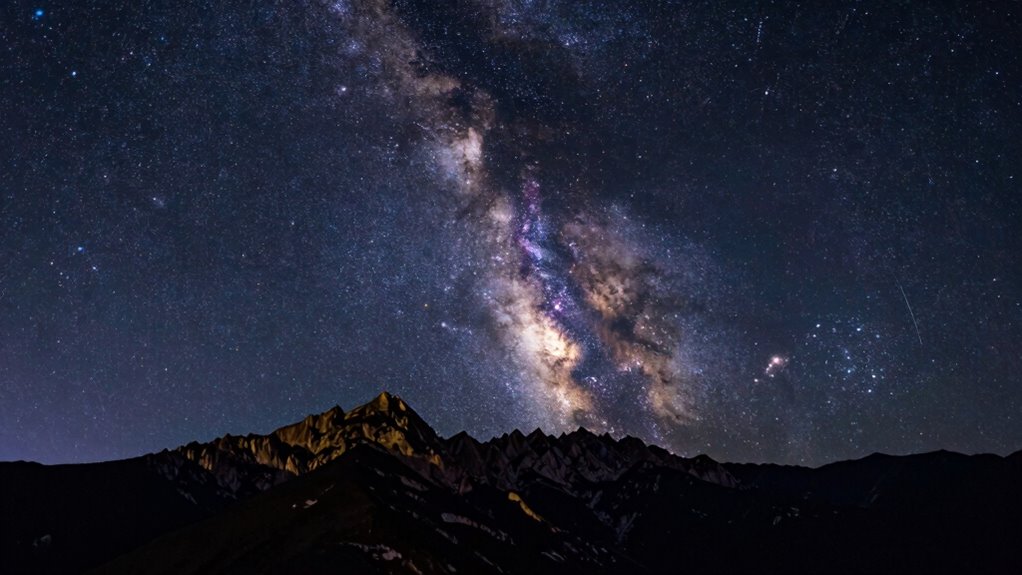
Why Exposure Time Is Key to Stunning Astrophotos
Because exposure time directly affects how much light your camera captures, it’s one of the most vital factors in astrophotography. Proper camera settings guarantee you gather enough light without overexposing the image. Adjusting exposure time allows you to balance capturing faint stars and reducing noise. Equipment calibration, like ensuring your camera’s sensor is clean and your lenses are properly aligned, is essential for sharp images. If your equipment isn’t calibrated, even ideal exposure times won’t produce clear results. The right combination of camera settings and calibration helps you maximize light intake during exposure, revealing more details of the night sky. Additionally, using an online tool can help you refine your writing about exposure times for clarity and effectiveness. Remember, the goal is to find that perfect exposure duration that captures enough starlight without introducing motion blur or noise. Additionally, exploring digital concepts can further enhance your understanding of how different variables affect your astrophotography results. A high contrast ratio in your images can help accentuate the details of celestial objects against the dark sky.

K&F CONCEPT 67mm Clear Natural Night Filter 28 Multi-Layer Coatings Light Pollution Reduction Filter for Night City Sky Star Shots, No Color Cast (Nano-X Series)
Reduces light pollution, creating Crystal clear night skies.
As an affiliate, we earn on qualifying purchases.
As an affiliate, we earn on qualifying purchases.
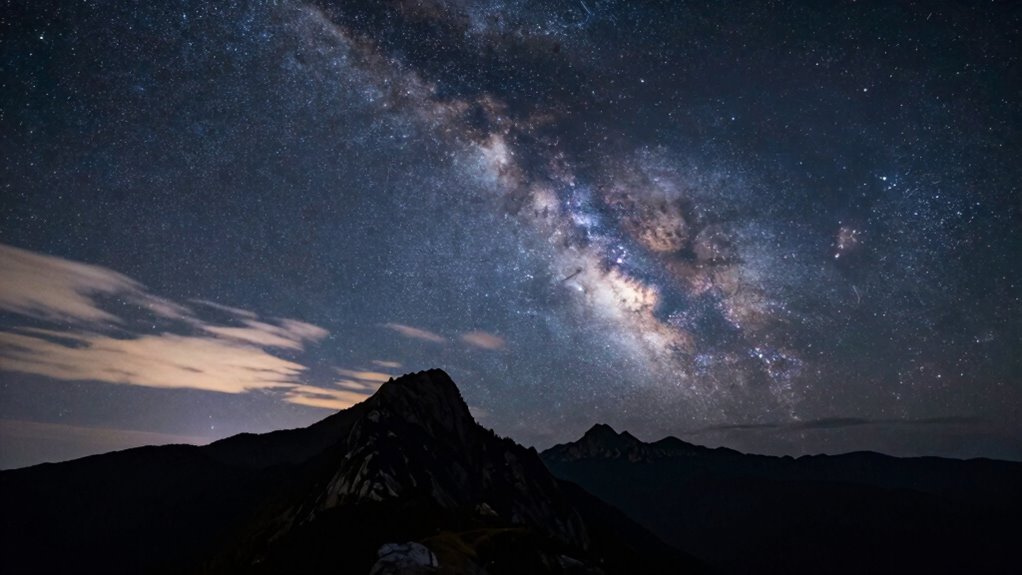
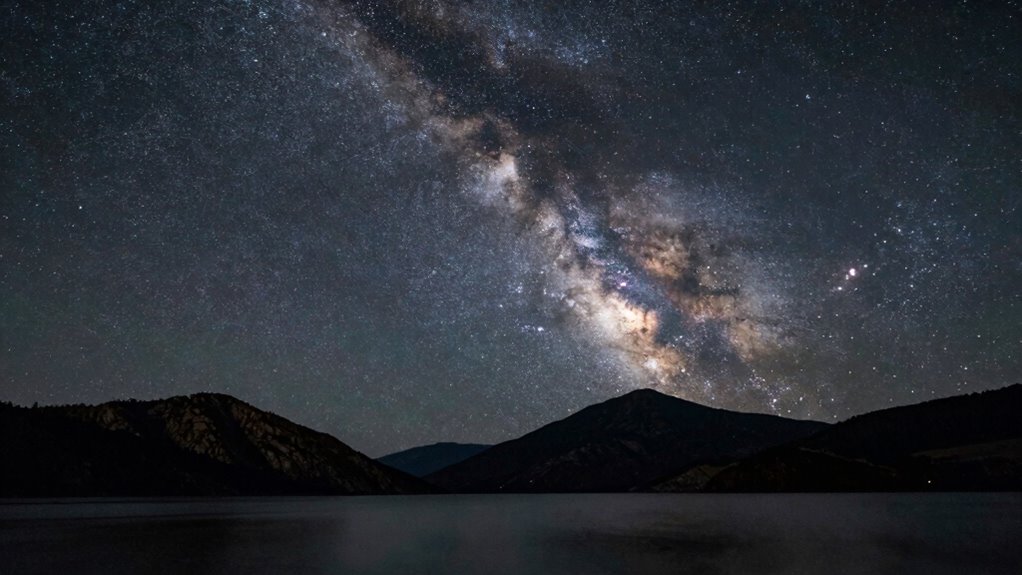
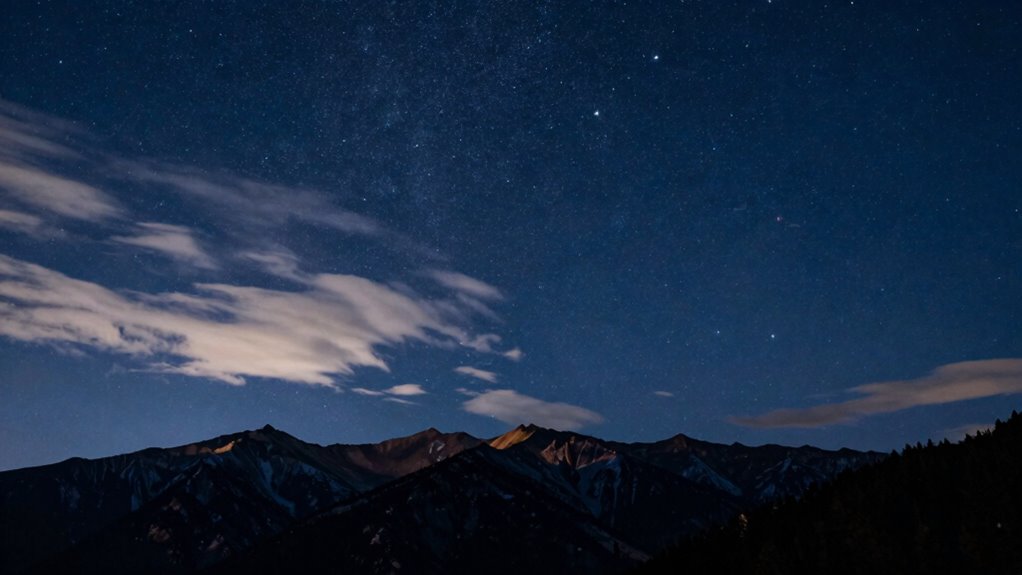
How Exposure Duration Affects Star Trails and Image Clarity
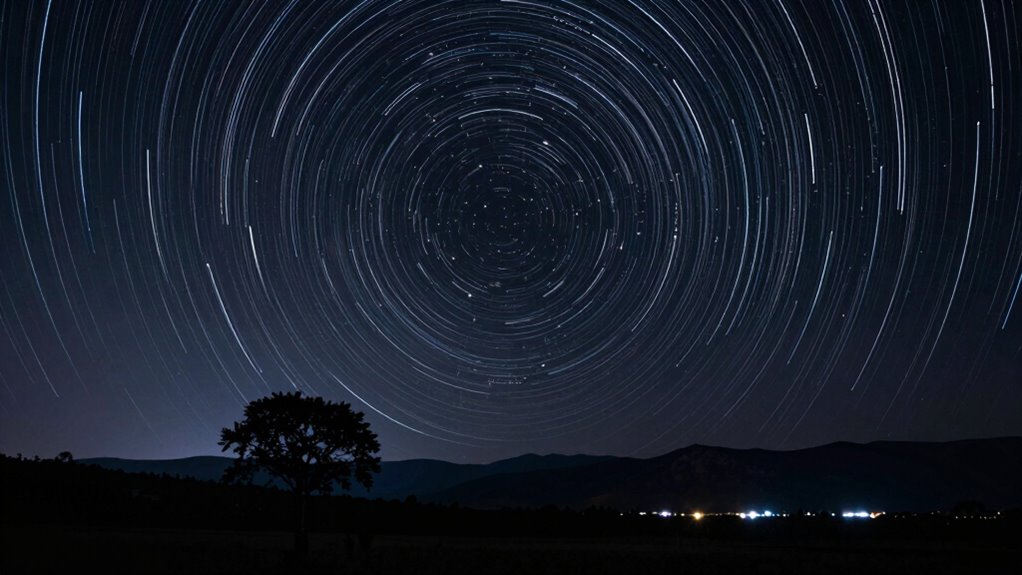
The duration of your exposure directly influences whether your astrophotos feature crisp stars or streaked trails. Longer exposures allow more light collection, making stars appear as trails due to Earth’s rotation. To capture crisp stars, you need shorter exposures and star trail techniques that limit trail length. Camera sensor sensitivity plays a vital role here: a highly sensitive sensor lets you use shorter exposures without sacrificing detail, reducing star trails. Conversely, lower sensitivity requires longer exposures, increasing trail length and potentially blurring star points. Striking the right balance ensures sharpness and minimizes star trail effects. Adjusting exposure times based on your camera’s sensor sensitivity helps you control trail length and achieve clear, detailed star images.

The Beginner's Guide to Astrophotography: How to Capture the Cosmos with Any Camera
As an affiliate, we earn on qualifying purchases.
As an affiliate, we earn on qualifying purchases.
Choosing the Best Exposure Time for Different Night Sky Conditions
Selecting the right exposure time depends heavily on the night sky conditions you’re observing. When solar activity is high, increased atmospheric glow can require shorter exposures to prevent overexposure. Light pollution from nearby cities also impacts your shot, meaning you may need to reduce exposure to avoid washed-out images. Conversely, on clear, dark nights with minimal light pollution, longer exposures can reveal faint celestial details. Pay attention to these factors:
- Elevated solar activity can cause brighter skies, requiring shorter exposures
- High light pollution levels demand shorter exposure times to prevent overexposure
- Ideal conditions include low light pollution and minimal solar activity for longer exposures
Adjust your exposure based on these conditions, balancing brightness and detail to capture stunning images.

FEELWORLD S55 V3 6 Inch DSLR Camera Field Monitor Bundle – FHD IPS Screen, 4K HDMI in/Out, Tilt Arm, Power Output, Battery & Carry Case Included
【Great Shooting Experience】The FEELWORLD S55 V3 enable the 6" 1920 x 1080 Resolution Display Screen with 160°viewing angle,…
As an affiliate, we earn on qualifying purchases.
As an affiliate, we earn on qualifying purchases.
Essential Tools to Set the Right Exposure Duration
Sure! Here’s the revised content following your instructions:
—
Have you ever wondered which tools can help you accurately set the right exposure duration for night sky photography? Camera stabilization is essential; using a sturdy tripod prevents motion blur and keeps your shots sharp during long exposures. A remote shutter release or intervalometer minimizes camera shake when pressing the shutter button. Lens calibration is equally important; ensuring your lens is properly calibrated guarantees accurate focus and prevents distortions that could affect exposure calculations. Many cameras have built-in tools or software for calibration, helping you fine-tune your lens for maximum clarity. Additionally, investing in quality gear can further enhance your photography experience. These tools work together to create stable, well-focused images, giving you confidence in your exposure settings and helping you capture stunning astrophotography with precision. Furthermore, understanding Milky Way visibility can guide your shooting schedule and enhance your overall results. Additionally, enhancing recovery through techniques like foam rolling can help you stay physically prepared for long nights of shooting.
Common Exposure Mistakes in Astrophotography and How to Avoid Them
Even experienced astrophotographers can fall into common exposure pitfalls that compromise image quality. One mistake is neglecting proper lens calibration, which can cause star trails or blurriness. Always confirm your lens is accurately calibrated to prevent this. Another issue is tripod stability—any movement can ruin sharpness; double-check your tripod is secure before shooting. Additionally, many forget to verify their tripod is level, leading to skewed images. Keep these in mind:
- Failing to calibrate your lens for astrophotography
- Using an unstable or unsteady tripod
- Overlooking the importance of keeping your setup level
Avoid these mistakes by taking the time to calibrate your lens correctly and ensuring your tripod is stable and level, which are essential for crisp, clear astrophotos. Additionally, leveraging AI tools can streamline your workflow and help you focus more on capturing stunning images rather than worrying about technical details.
How to Adjust Exposure Times for Moving Celestial Objects
When photographing moving celestial objects like planets or satellites, adjusting your exposure time is essential to capturing sharp, detailed images. To prevent motion blur, use tracking techniques such as a motorized equatorial mount or star tracker, which follow the object’s movement across the sky. Focal length considerations are also key: longer focal lengths magnify movement, requiring shorter exposure times to avoid streaking. Start with brief exposures—around 1-2 seconds for planets—and gradually increase if your tracking is accurate. Keep an eye on the object’s motion; if it begins to blur, reduce the exposure. Consistently test and refine your tracking setup and exposure duration to strike the perfect balance between brightness and sharpness.
Post-Processing Tips to Enhance Exposure and Detail
Post-processing is a crucial step in bringing out the full potential of your astrophotography images, especially when it comes to enhancing exposure and revealing fine details. Proper editing can amplify the impact of your shots while respecting night sky ethics. Use software like Photoshop or PixInsight to adjust contrast, reduce noise, and bring out subtle details hidden in your raw images. Remember to handle your images carefully, avoiding over-processing that can misrepresent the sky. Incorporate these tips to make the most of your astrophotography gear:
- Use layer masks to selectively enhance specific areas
- Apply gentle noise reduction to preserve detail
- Maintain natural colors to respect night sky ethics
These small adjustments can transform good shots into stunning images that honor the beauty of the universe.
Expert Tricks for Perfect Exposure in Any Sky Scene
To achieve perfect exposure in any sky scene, you need to master adjusting for sky brightness without guaranteeing detail. Balancing between capturing enough detail and minimizing noise is key, especially in high-contrast situations. Using the histogram effectively helps you make precise adjustments and ensures your shot is well-exposed from edge to edge.
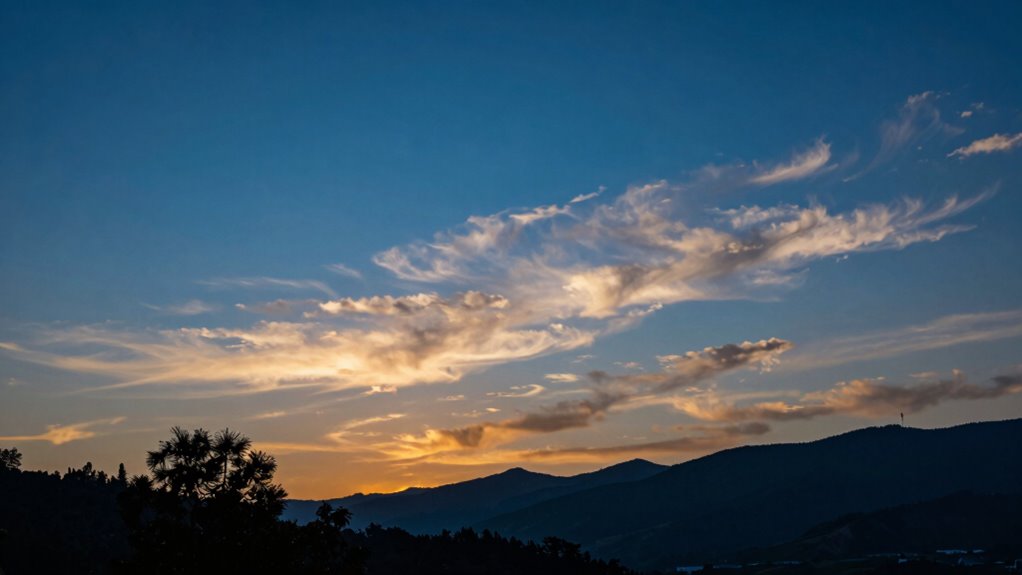
Adjusting for Sky Brightness
Have you ever struggled to capture a sky scene where the brightness varies dramatically across the frame? Adjusting for sky brightness requires quick thinking, especially when dealing with cloud coverage or changing moon phases. Here are expert tricks to handle it:
- Use graduated filters to balance the exposure between bright clouds and darker sky areas.
- Pay attention to moon phases; a full moon brightens the scene, needing shorter exposures, while a new moon calls for longer ones.
- Bracket your shots to capture multiple exposures, then blend them for a balanced image.
These techniques help you adapt to the sky’s changing brightness, ensuring your photos stay well-exposed regardless of cloud coverage or moonlight variations.
Balancing Detail and Noise
Balancing detail and noise is essential for capturing stunning sky scenes, especially when dealing with high-contrast elements like stars and dark skies. To achieve this, adjust your sensor sensitivity carefully—higher ISO boosts detail but introduces more noise. Proper equipment calibration, including focusing and sensor cleaning, guarantees clarity without unnecessary grain. Visualize your scene:
| Bright Stars | Dark Sky Background |
|---|---|
| Sharp, clear points | Deep, rich blackness |
| Minimal noise | No distracting grain |
| Sensor sensitivity | Equipment calibration |
| Higher ISO for detail | Precise focus and cleaning |
| Lower ISO for cleaner image | Consistent results |
Incorporating eco-friendly practices in your photography setup can also enhance the overall experience and preserve the beauty of your surroundings.
Utilizing Histogram Effectively
Mastering your camera’s histogram is the key to achieving perfect exposure in any sky scene. By understanding histogram interpretation, you can quickly assess if your image is properly exposed, avoiding overexposure or underexposure. Use the histogram to calibrate your exposure settings precisely, ensuring highlights aren’t clipped and shadows retain detail. Keep an eye on the graph’s shape: a balanced histogram indicates well-exposed shots, while a skewed one suggests adjustments are needed.
- Check for highlight clipping: Ensure the right side of the histogram isn’t touching the edge.
- Adjust exposure based on the histogram shape: Slight shifts can make a big difference.
- Use histogram as a real-time guide: Make exposure calibration on the fly for ideal sky detail.
Frequently Asked Questions
How Does Light Pollution Influence Optimal Exposure Times?
Light pollution, especially urban glow, increases sky brightness, making it harder to capture clear images. You should reduce your exposure times to prevent overexposure and loss of detail. Longer exposures allow more light in darker skies, but with increased sky brightness from light pollution, shorter exposures are necessary to maintain image quality. Adjust your exposure based on how much urban glow affects your sky, finding that sweet spot for the best results.
What Is the Impact of Lens Focal Length on Exposure Duration?
Your lens focal length affects exposure duration because longer focal lengths require longer exposure times to capture enough light, especially considering sensor sensitivity and lens aperture. With a longer focal length, you need to allow more light to reach the sensor, which often means increasing exposure time. Conversely, a wider lens lets in more light quickly, so shorter exposures suffice. Adjust your settings based on focal length, sensor sensitivity, and aperture for ideal results.
Can Automatic Settings Reliably Determine the Best Exposure Time?
Automatic settings can often reliably determine the best exposure time, especially in well-lit conditions. They adjust for sensor sensitivity and help prevent star trailing by optimizing exposure duration. However, in low-light or complex astrophotography scenarios, manual adjustments may be necessary to avoid star trails and achieve sharper images. Trust automatic settings as a good starting point, but be ready to tweak based on your specific sky conditions.
How Do Temperature and Weather Conditions Affect Exposure Choices?
Think of your camera sensor as a sailor steering stormy seas; temperature and weather conditions are the weather patterns influencing your journey. Cooler temperatures often stabilize atmospheric conditions, leading to clearer skies, while humidity and turbulence can cause instability, demanding shorter exposures. Adjust your sensor sensitivity accordingly, and monitor atmospheric stability to prevent overexposure or blurring. By staying adaptable, you’ll find the perfect exposure time regardless of weather chaos.
What Are the Signs of Overexposure or Underexposure in Astrophotography?
You’ll notice overexposure in astrophotography when your image shows excessive sensor noise or looks overly bright, losing detail in stars and the sky. Underexposure results in faint images with poor image clarity, making stars appear dim or absent. To avoid these issues, monitor your shots, adjust exposure times accordingly, and make sure your sensor isn’t overwhelmed, maintaining a balanced exposure that captures clear, detailed celestial scenes.
Conclusion
As you navigate the delicate dance of exposure, think of it as tuning an instrument to harmony. With patience and practice, you’ll find that perfect balance where stars shine with brilliance and the night whispers its secrets. Embrace each shot as a brushstroke on your celestial canvas, and over time, you’ll craft images that feel like glimpses into the universe’s soul. Trust your instincts, and let the night’s beauty guide your hand.