
TL;DR

Prime made for students and young adults
- Fast, free delivery for dorm and study essentials
- Prime Video and Amazon Music included
- Member-only deals
Astrophoto camera accessories range from mounts and filters to guiding systems, all crucial for capturing faint celestial objects. Recent tech advances make astrophotography more accessible, especially with smart mounts and sensitive sensors.
Getting stunning images of the night sky isn’t just about pointing a camera at stars. It’s about the gear you choose. The right accessories turn long, dark hours into breathtaking captures. But with so many options, how do you pick what really matters?
This guide cuts through the noise. You’ll learn what accessories are game-changers, the latest tech that’s making life easier for astrophotographers, and simple tips to get your setup ready for the night sky’s most elusive wonders.
Invest in a sturdy, well-aligned mount—tracking accuracy is key for long exposures.
Narrowband filters dramatically improve images in light-polluted areas, revealing nebulae in brilliant detail.
CMOS sensors now rival expensive CCDs, making high-quality astrophotography more affordable.
Guiding accessories and software automate tracking, reducing star trails and sharpening images.
Compatibility and weather resistance should guide your accessory choices—buy smart to avoid headaches.
What Camera Accessories Make Your Shots Clearer and Brighter
Astrophotography camera accessories are the secret ingredients that turn a decent shot into a masterpiece. Think of them as the spices in a recipe—tiny, but powerful.
Key accessories include specialized lenses and telescopes, mounts and tripods, filters, guiding accessories, and focuser adapters. Each plays a role—whether stabilizing your camera or boosting light collection.
For example, a wide-angle lens captures sprawling star fields, while narrowband filters cut through city light pollution to reveal nebulae in vibrant detail. A sturdy equatorial mount, with precise tracking, prevents star trails during long exposures, which can last from a few seconds to several hours.
Understanding why these accessories matter helps you prioritize your investments. For instance, a high-quality mount isn’t just about stability—it directly impacts your ability to take long, sharp exposures without star trailing. Similarly, filters aren’t just for aesthetic effects; they can dramatically improve contrast and detail, especially in light-polluted environments. Choosing the right accessories involves understanding their tradeoffs—more advanced gear often requires a learning curve but yields better results.
astrophotography mount with GPS Wi-Fi
As an affiliate, we earn on qualifying purchases.
As an affiliate, we earn on qualifying purchases.
The Latest Tech That’s Making Astrophotography Easier Than Ever
Recent advances are changing the game for enthusiasts. Camera sensors, especially CMOS, now offer incredible sensitivity with lower noise, meaning you need shorter exposure times for sharp images. This technological leap reduces the frustration of long wait times and complex setups, making astrophotography more accessible for newcomers and freeing up time for experimentation.
Smart mounts equipped with GPS, Wi-Fi, and app controls allow you to align and track stars with just a few taps. These features are revolutionary because they significantly cut down on the technical skills required—auto-calibration routines mean less time fiddling with polar alignment and more time capturing images. Filters have also improved—cost-effective narrowband options now let you photograph nebulae in stunning color, even in light-polluted skies, opening new possibilities for urban astrophotographers.
Guiding systems with enhanced algorithms are crucial for maintaining precise tracking during long exposures. They adapt to atmospheric turbulence and mechanical imperfections, ensuring your stars stay pinpoint sharp. Software like SharpCap or PHD2 automates focus, guiding, and stacking, which not only reduces manual work but also minimizes errors, turning hours of work into a few clicks. These innovations collectively lower the barrier to entry, allowing amateurs to produce professional-quality images with less hassle and equipment investment.
narrowband nebula filters for astrophotography
As an affiliate, we earn on qualifying purchases.
As an affiliate, we earn on qualifying purchases.
What You Need to Know Before Dropping Cash on Accessories
Choosing the right astrophoto accessories hinges on compatibility, ease of use, durability, and how well they fit your goals. For instance, a beginner might prioritize a versatile, easy-to-use mount and a good starter filter set. More advanced users might invest in cooled cameras or custom filter rigs.
Think of your gear like a toolkit—each piece should complement what you already have. Compatibility issues are common—check your camera’s sensor size, mount type, and power requirements before buying. For example, purchasing a filter that doesn’t fit your camera’s thread size or a mount incompatible with your tripod can lead to costly mistakes and wasted time. Fully understanding your existing setup helps you select accessories that integrate smoothly, saving money and frustration in the long run.
Durability matters too—weather-resistant gear ensures you can shoot under starry skies or chilly nights without worry. And budget? Many affordable options exist that deliver solid performance for entry-level astrophotographers. For example, a basic equatorial mount can cost under $500, yet provide reliable tracking for years. Investing in quality gear that balances performance and cost is essential—cheaper gear may save money upfront but could limit your progress or require frequent replacements, impacting your overall experience.
CMOS sensor astrophotography camera
As an affiliate, we earn on qualifying purchases.
As an affiliate, we earn on qualifying purchases.
How to Pick the Perfect Filters for Your Night Sky Shots
Astrophoto camera accessories like filters are your eyes’ best friends. They block unwanted light, enhance specific wavelengths, and reveal details hidden in plain sight. Choosing the right filter can mean the difference between a washed-out image and a stunning, detailed capture of nebulae or galaxies.
Here’s a quick step-by-step:
- Identify your target objects—nebulae, galaxies, planets. Understanding what you want to capture guides your filter choices, as different filters excel at different targets.
- Choose filters based on those targets. Narrowband filters (like H-alpha or OIII) excel at capturing nebulae, cutting through light pollution and revealing intricate structures that are otherwise invisible. These filters also help balance contrast, making faint objects stand out more distinctly.
- Match filter size to your camera or telescope—most common are 1.25” or 2” threaded sizes. Compatibility ensures a secure fit and optimal light transmission.
- Test different filters to see which enhances your favorite objects best. Experimentation is key—what works well in one environment might not in another, especially when considering light pollution levels and atmospheric conditions.
For example, if you want to photograph the Orion Nebula from a city balcony, a narrowband filter will dramatically improve contrast and color. It’s like giving your camera night vision—highlighting details that are usually obscured by city glow, and allowing you to capture impressive images even without dark skies.
Amazonauto-guiding system for telescopes
As an affiliate, we earn on qualifying purchases.
As an affiliate, we earn on qualifying purchases.
Compare the Best Mounts for Steady, Long-Exposure Shots
Mount Type Tracking Accuracy Ease of Use Price Range Best For Equatorial Mount High Moderate $500–$3000 Long exposures, deep-sky imaging Alt-Az Mount Lower, requires manual correction Easy $200–$1500 Quick setup, planetary shots GoTo Mount Very high, automated pointing Easy $1000–$5000 Automated star tracking, beginners to pros For serious deep-sky photography, an equatorial mount with precise tracking is king. It compensates for Earth’s rotation, allowing your camera to stay fixed on faint objects for hours without star trails. However, these mounts can be complex and require a learning curve, which is a tradeoff for their accuracy. Conversely, GoTo mounts simplify navigation and are user-friendly, making them ideal for beginners or those who prefer quick setup, but they might sacrifice some precision. Understanding these tradeoffs helps you choose a mount that aligns with your goals—whether you value ultimate accuracy or ease of use. Consider your budget, experience level, and the types of objects you want to photograph to make an informed decision that balances performance and practicality.
Prevent Star Trails: Easy Tips for Perfect Long Shots
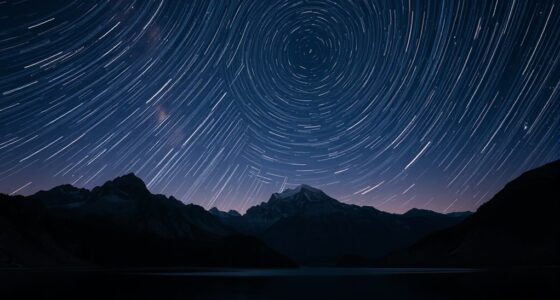
Star trails ruin long exposures if your mount can’t track properly. The fix? Use a stable, well-calibrated mount with accurate polar alignment. Add guiding accessories, and you’re set. Proper alignment and guiding are essential because even tiny misalignments can cause star trails over long exposures, blurring your images and losing detail. The process involves precise polar alignment—aligning your mount’s axis with Earth’s rotational axis—which minimizes tracking errors. Incorporating guiding accessories, like a guide scope and autoguider, helps correct small deviations in real-time, maintaining pinpoint star images during extended exposures. Selecting a dark, stable spot away from city lights further reduces atmospheric disturbances that can introduce star movement or blurring. Remember, patience and calibration are key—taking the time to set up correctly ensures your long exposures produce crisp, trail-free images that reveal the universe’s faintest features, like distant galaxies and nebulae, in stunning detail.
Frequently Asked Questions
Can I do astrophotography with just a DSLR and a tripod?
Yes, many beginners start with a DSLR on a sturdy tripod. For longer exposures and better results, a tracking mount is recommended, but you can still capture beautiful star trails and wide-field shots from your backyard.What’s the most affordable way to improve my astrophotography setup?
Start with a good mount and a few basic filters suited to your targets. Upgrading to a cooled CMOS camera later can dramatically boost your image quality without breaking the bank.How do I avoid light pollution ruining my images?
Use light pollution filters, choose darker observing sites, and shoot during new moon phases. Post-processing can also help enhance faint details in your images.Are auto-guiders necessary for capturing deep-sky objects?
They’re highly recommended for long exposures. Auto-guiders keep your stars pinpoints, preventing star trails and ensuring sharp images during hours of shooting.What’s the best way to start learning astrophotography accessories?
Begin with a stable, easy-to-use mount, a compatible camera, and some basic filters. Practice polar alignment and guiding, then gradually add advanced accessories as you gain experience.Conclusion
Astrophotography isn’t just about the camera. It’s about the right accessories, the latest tech, and knowing how to combine them. With smarter mounts, sensitive sensors, and filters that cut through light pollution, capturing the universe’s faintest wonders is easier than ever.
So, pick your gear wisely, practice patience, and let your camera do the heavy lifting. The stars won’t wait, but your perfect shot will be worth the wait.
COLUMBUS DAY / I Columbus Day / Indigenous Peoples' Day Picks
long weekend saleslong weekend sales
As an affiliate, we earn on qualifying purchases.
![Navier-Stokes – Tristan Buckmaster [Pdf]](https://astrophotographyhq.com/wp-content/uploads/2026/09/navier-stokes-tristan-buckmaster-pdf-featured-560x300.jpg)