To start beginner astrophotography with a DSLR and tripod, set your camera on a steady tripod to prevent movement. Use manual mode to adjust settings like a low ISO (100-200), a narrow aperture (f/8-f/11), and a shutter speed of 15 seconds or more for star trails. Use a remote shutter release or timer to avoid shakes. With some patience, you’ll soon capture beautiful night sky images and discover more tips to improve your shots.
Key Takeaways
- Use a sturdy tripod to ensure camera stability during long exposures of the night sky.
- Set your DSLR to manual mode for full control over exposure, focus, and ISO settings.
- Start with short exposures (15-30 seconds) to practice framing and focus before attempting star trails.
- Use a remote shutter release or timer to prevent vibrations and camera shake during shots.
- Capture in dark, clear skies away from light pollution to improve image quality and star visibility.

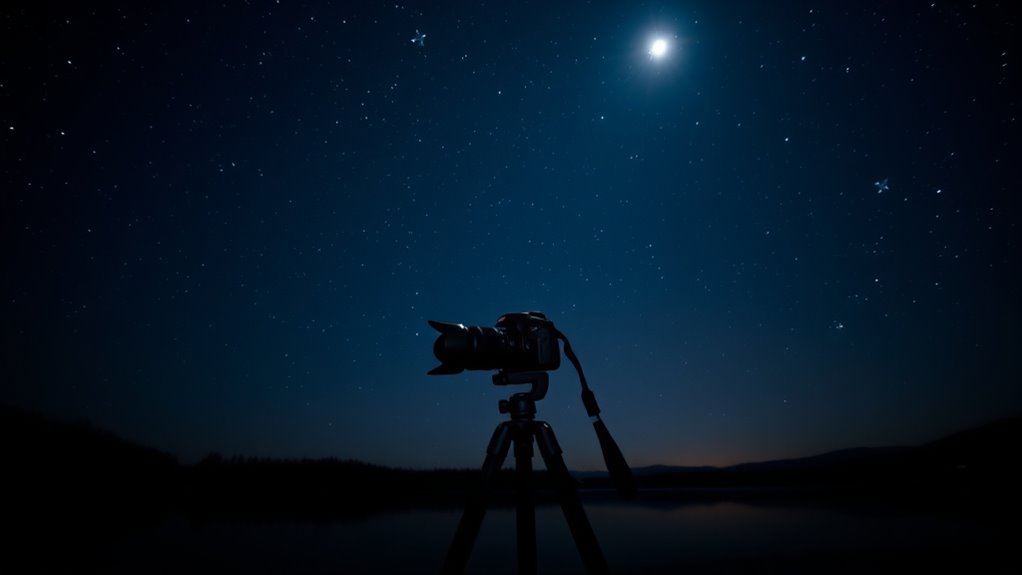
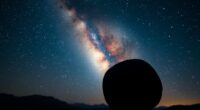
Getting started with astrophotography might seem intimidating at first, but with the right approach, anyone can capture stunning images of the night sky. One of the easiest ways to begin is by using a tripod and a DSLR camera. This setup allows you to experiment with different techniques and gradually improve your skills. When it comes to creating mesmerizing star trails, a steady tripod is essential. You’ll want to set your camera to a long exposure—anywhere from 15 seconds to several minutes—to let the stars’ movement create beautiful streaks across the sky. To do this effectively, keep your camera stable and avoid any vibrations that could blur your image. Use a remote shutter release or your camera’s timer to prevent shaking when pressing the shutter button. Additionally, understanding your camera’s sensor capabilities can help optimize your settings for better image quality.
Moon photography is another exciting aspect of beginner astrophotography. The moon is bright and easy to photograph, making it perfect for practicing your camera settings. For sharp, detailed images, use a narrow aperture like f/8 or f/11, and adjust your ISO to a low setting, such as 100 or 200, to avoid graininess. Set your shutter speed according to the moon’s brightness—usually around 1/125 to 1/250 seconds works well. As you gain confidence, you can experiment with different phases of the moon to capture its craters and details or try to include foreground elements for more dynamic compositions.
When shifting from moon photography to star trails, it’s helpful to understand your camera’s manual mode. Start with shorter exposures to get a feel for the light conditions, then increase exposure times for star trails. Keep your ISO low to prevent noise, and focus on infinity to keep distant objects sharp. Remember, patience is key. Star trails require multiple long exposures or a single very long exposure, and you’ll need to plan your shoot around clear, dark skies free of light pollution. Moreover, using a sturdy tripod helps ensure your camera remains perfectly still during extended exposures, which is crucial for high-quality astrophotography.

K&F CONCEPT 64 inch/163 cm Camera Tripod,Lightweight Travel Outdoor DSLR Tripods with 360 Degree Ball Head Load Capacity 17.6 lbs/8 kg,Cellphone Clip for Smartphone Live Streaming Vlog O234A1+BH-36
【Lightweight and Portable】4 section leg can adjust tripod height from 20.4''/52cm to 64.1''/163cm; it can be folded to…
As an affiliate, we earn on qualifying purchases.
As an affiliate, we earn on qualifying purchases.
Frequently Asked Questions
What Are the Best Settings for Astrophotography on a DSLR?
To get great astrophotography shots, set your camera to a wide aperture like f/2.8 or lower, and use a low ISO around 800 to 1600. Keep your shutter speed between 15-30 seconds to prevent star trails, or enable star tracking if your equipment supports it. Use manual focus, focusing on a bright star or distant light, and shoot in RAW for better post-processing results.
How Do I Focus My Camera on Distant Stars?
You might think focusing on distant stars is tricky, but with star tracking and proper focusing techniques, it’s straightforward. First, switch your camera to manual focus and set it to live view. Zoom in on a bright star, then slowly turn the focus ring until the star becomes a pinpoint. Use your camera’s focus peaking or magnification tools to guarantee crisp focus, and you’re ready for stunning astrophotos.
Can I Do Astrophotography Without a Remote Shutter Release?
Yes, you can do astrophotography without a remote shutter. Instead, use your camera’s built-in camera delay feature to minimize vibrations when pressing the shutter button. Set a delay of a few seconds, then press the shutter, allowing the camera to stabilize before capturing. This method helps you avoid camera shake and get sharper images, making remote shutters optional for beginner astrophotography.
What Lens Focal Length Is Ideal for Capturing the Night Sky?
Imagine holding the universe in your hands—your ideal lens is a wide-angle, 14-24mm focal length, capturing vast starry skies with ease. This focal length offers lens versatility, making it perfect for night sky shots. Your focal length choices should prioritize wide views to encompass constellations and celestial movements. With this setup, you can beautifully frame the night sky’s grandeur, turning your camera into a portal to the cosmos.
How Do Weather Conditions Affect Astrophotography Results?
Weather conditions profoundly impact your astrophotography results. Cloud cover can obstruct your view of stars and celestial objects, making it essential to shoot on clear nights. High humidity levels cause haze and reduce image clarity, so keeping an eye on weather forecasts helps you choose the best nights. Calm, dry conditions with minimal clouds and low humidity will give you sharper, more detailed astrophotos.

Camera Remote Control Wireless Shutter for Canon EOS RP, R6, ROS RP, Rebel T6, T7, T5, T3, SL2, 5D Mark II, 5d Mark iii, 5d Mark iv, 6D Mark II, 7d Mark ii, 7D Series, 5D Series; for Fujifilm X-T3
[Compatible cameras]: Compatible with Canon EOS RP,R,R1,Ra, R8, R100, R10, R6 II, R6,R5,R5 C,R3, R5 Mark II,M5,M6, 1D…
As an affiliate, we earn on qualifying purchases.
As an affiliate, we earn on qualifying purchases.
Conclusion
Getting started with astrophotography is easier than you might think, especially with just a tripod and a DSLR. Remember, the night sky is full of wonders, and even a basic setup can capture stunning images. Did you know that over 60% of amateur astrophotographers improve their skills within the first year? Keep experimenting, stay patient, and enjoy the journey—your best shots are just a few nights away. Happy shooting!
Night Photography: Pocket Guide: Camera Settings, Focusing Techniques, and Shooting Strategies for Night Photography (The Pocket Guide Series for Photographers, 43)
As an affiliate, we earn on qualifying purchases.
As an affiliate, we earn on qualifying purchases.

Canon EOS Rebel T7 DSLR Camera Double Zoom Lens Kit with EF-S 18-55mm and EF 75-300mm Lenses, 24.1 Megapixel CMOS (APS-C) Sensor, Full HD Videos, Wi-Fi, Beginner Photographers, Digital Camera, Black
Improved Dual Pixel CMOS AF and eye detection AF 24.1 Megapixel CMOS (APS-C) sensor with is 100–6400 (H:…
As an affiliate, we earn on qualifying purchases.
As an affiliate, we earn on qualifying purchases.