
To master sub exposure length tradeoffs in a weekend, focus on understanding how different shutter speeds affect light collection and motion clarity. Set your camera to manual mode and experiment with various exposure times in your typical lighting conditions. Monitor your results using histograms and real-time adjustments, balancing brightness and noise. Practice consistently across scenes and document what works best. Keep honing your skills, and you’ll strengthen your exposure control—more tips come if you continue exploring this guide.
Key Takeaways
- Practice adjusting shutter speed and ISO in various lighting conditions to understand their impact on exposure and noise.
- Use calibration tools to ensure sensor and equipment accuracy before experimenting with exposure tradeoffs.
- Monitor real-time feedback with histograms and waveforms to fine-tune exposure settings efficiently.
- Record and review footage daily to identify issues and refine your exposure control techniques.
- Study scene motion and brightness cues to develop quick judgment for optimal sub exposure lengths.

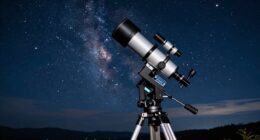
Celestron CG-4 German Equatorial Mount and Tripod
SUPERIOR STABILITY - The CG-4 German Equatorial Mount features a robust stainless steel tripod with 1.75" diameter legs,...
As an affiliate, we earn on qualifying purchases.
Understanding Exposure Lengths and Their Impact on Image Quality

Understanding exposure lengths is essential because it directly affects the sharpness and overall quality of your images. When you choose a longer exposure, your sensor sensitivity increases, capturing more light but also amplifying image noise. This extra noise can make your photos look grainy and reduce detail, especially in low-light conditions. Conversely, shorter exposures limit noise but may require higher ISO settings, which can introduce their own issues. By mastering the balance between exposure length and sensor sensitivity, you guarantee your images remain sharp and clean. Knowing how exposure times influence noise levels helps you make informed decisions, improving image quality without sacrificing detail or clarity. Additionally, understanding the tradeoffs involved allows you to optimize your settings for different scenarios and achieve professional results.

iEXOS-100-2 PMC-Eight Equatorial Tracker System Tripod and Mount for Astrophotography with WiFi and Bluetooth Compatible
Integrated Explore Scientific PMC-Eight system that transcends the industry standard single processor by utilizing eight CPUs that operate...
As an affiliate, we earn on qualifying purchases.
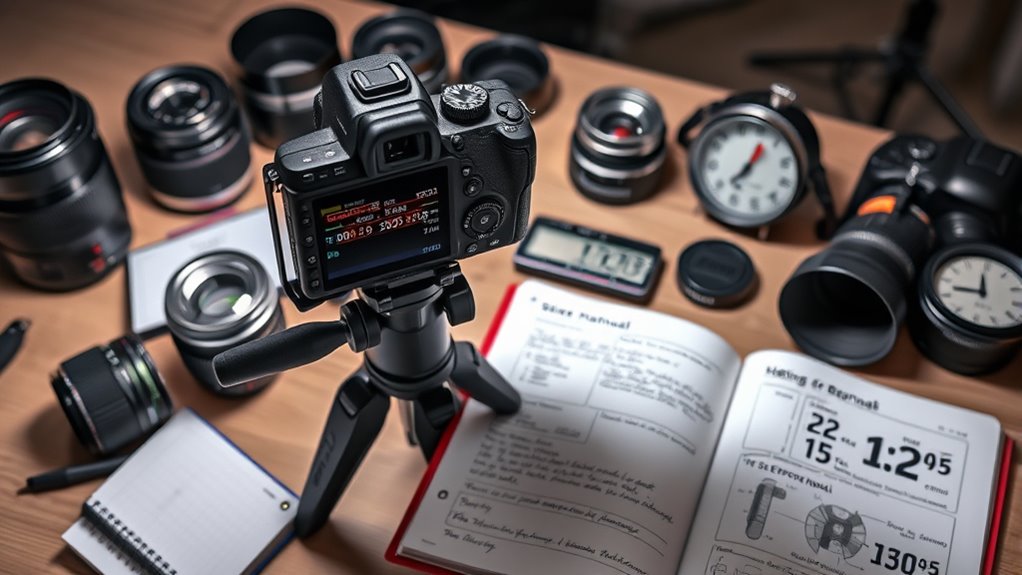
The Basics of Sub Exposure Length Tradeoffs
Balancing sub exposure lengths involves weighing the benefits of capturing enough light against the risks of introducing noise or motion blur. To do this effectively, you need to understand your camera’s sensor calibration, which guarantees accurate exposure measurements. Proper calibration helps prevent over- or underexposure, especially during short sub exposures. Lens compatibility also plays a role; some lenses perform better with specific exposure lengths, minimizing issues like vignetting or softness. Shorter sub exposures reduce noise and motion artifacts but may require precise calibration to avoid inconsistencies. Longer exposures gather more light, but increase the risk of blur and noise. Knowing your equipment’s limits and calibrating your sensor accordingly allows you to make smarter tradeoffs, achieving ideal image quality across different lighting conditions. Additionally, understanding Gold IRA rules and fees can help photographers plan their equipment investments more wisely, ensuring they maximize their resources for long-term stability.

Sky-Watcher HEQ5 – Fully Computerized GoTo German Equatorial Telescope Mount – Motorized Astrophotography Mount with 42,000 Object Database,White
LIGHTWEIGHT COMPUTERIZED EQUAORIAL MOUNT: The HEQ5 is ideal for beginning astrophotographers, or skilled astronomers looking for a lightweight...
As an affiliate, we earn on qualifying purchases.
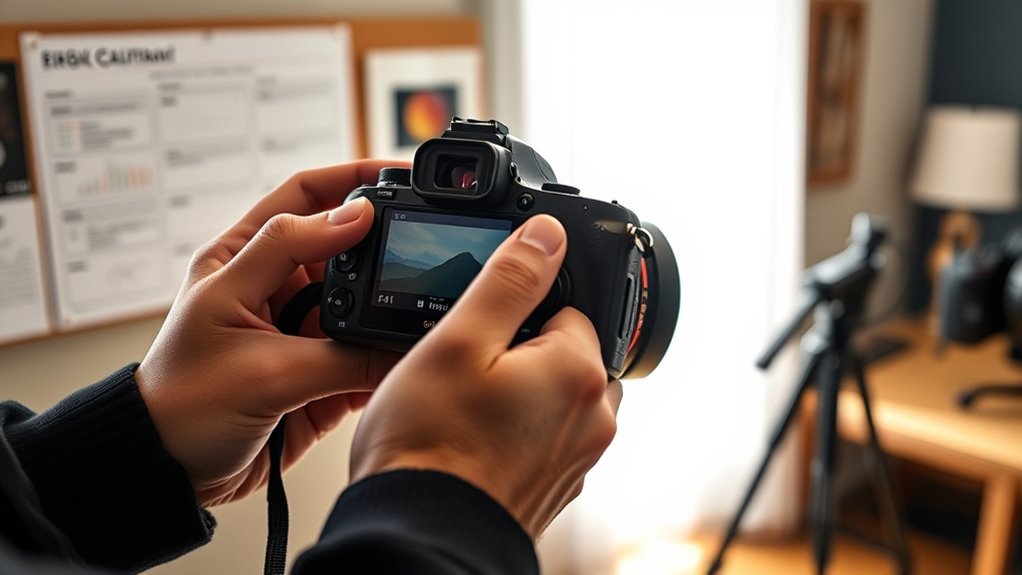
Setting Up Your Camera for Optimal Exposure Control

To get the best exposure control, you need to set up your camera properly. Adjust your ISO settings to match your lighting conditions, select the right aperture for depth of field, and switch to manual mode for full control. These steps make certain you can fine-tune your exposure precisely to achieve your desired results. Additionally, consider the bedroom setup to optimize your natural lighting and ambient conditions for better exposure.
Adjust ISO Settings
Adjusting your ISO settings is a crucial step in achieving the right exposure, especially when lighting conditions change rapidly. Proper ISO adjustments give you greater control over exposure, allowing you to adapt quickly without sacrificing image quality. When setting ISO for exposure control, increasing ISO in low light to brighten your shot without slowing down shutter speed is effective, while lowering ISO in bright conditions prevents overexposure and maintains detail. Use the lowest ISO possible for sharper images and reduced noise. Additionally, understanding how sensor sensitivity impacts image quality can help you make more informed ISO choices during your shoot.
Select Appropriate Aperture
Choosing the right aperture setting is essential for controlling your exposure and achieving the desired depth of field. Aperture control determines how much light enters your camera and influences the sharpness of your background and foreground. A wider aperture (smaller f-number) lets in more light, creating a shallow depth of field perfect for portraits or isolating subjects. Conversely, a narrower aperture (larger f-number) reduces light intake, providing a greater depth of field ideal for landscapes or scenes requiring everything in focus. Selecting the appropriate aperture depends on your creative intent and lighting conditions. Keep in mind that changing your aperture affects exposure, so adjust other settings accordingly. Mastering aperture control allows you to fine-tune your images and maintain ideal exposure balance in various shooting scenarios.
Use Manual Mode
Using manual mode puts you in full control of your camera’s exposure settings, allowing you to fine-tune each element to match your creative vision. With this control, you can experiment with exposure length to achieve desired effects, guaranteeing your images have perfect color calibration and sharpness. By adjusting ISO, shutter speed, and aperture manually, you create a balanced foundation for your shot. Keep these tips in mind:
- Prioritize your creative composition, adjusting exposure to emphasize subjects.
- Fine-tune shutter speed for motion blur or freeze action.
- Use manual focus to ensure sharpness for critical details.
- Understanding contrast ratio helps you better evaluate how your image will appear in different lighting conditions and how it affects overall image quality.
Manual mode empowers you to make deliberate adjustments, giving you the flexibility to master sub exposure length tradeoffs and produce visually compelling images.

Sky-Watcher EQ6-R – Fully Computerized GoTo German Equatorial Telescope Mount – Belt-driven, Motorized, Computerized Hand Controller with 42,900+ Celestial Object Database
PRECISE ACCURATE GOTO: Computerized, motorized GoTo German equatorial telescope mount capable of accurately tracking astronomical objects for both...
As an affiliate, we earn on qualifying purchases.
Recognizing When to Adjust Exposure Lengths During Shooting

As you shoot, keep an eye on motion blur to see if your subject appears sharp or smeared. Check the overall brightness to determine if your exposure needs adjustment for proper exposure levels. Also, watch for rapid subject movement that may require shortening the exposure to freeze motion effectively.
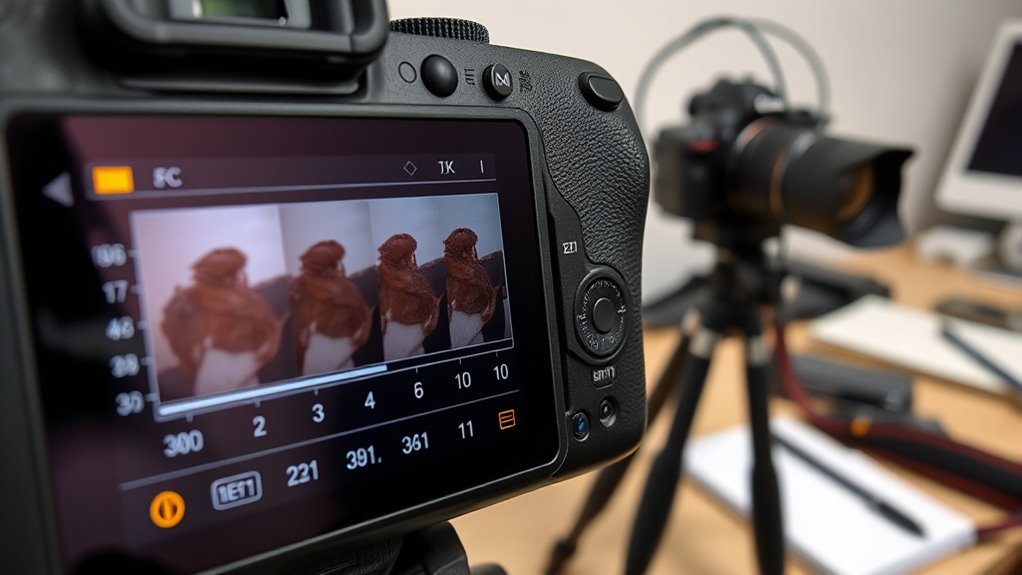
Monitor Motion Blur
Monitoring motion blur during shooting is essential for capturing sharp, professional-looking footage. When you notice excessive blur, it’s time to adjust your settings, especially shutter speed enhancement. Keep an eye on your footage for these signs:
- Smooth, blurry motion that obscures details
- Jittery or choppy movement
- Inconsistent sharpness across scenes
Regular sensor calibration helps ensure your camera’s readings are accurate, aiding precise exposure adjustments. When motion blur appears, increase shutter speed to freeze fast action or reduce it for a more cinematic feel. Recognizing these cues early allows you to maintain optimal exposure length tradeoffs. Adjustments made on the fly prevent footage from becoming unusable and save time in post-production. Monitoring motion blur is a key step in mastering exposure length tradeoffs during your shoot. Additionally, understanding necessary cookies can help improve your workflow by ensuring your camera equipment maintains consistent performance.
Assess Brightness Levels
To determine if you need to adjust your exposure lengths, you must evaluate the brightness levels of your footage in real-time. Use your camera’s histogram and waveform monitor to check exposure consistency and guarantee your sensor calibration is accurate, as miscalibration can skew brightness readings. Aim for proper brightness levels that preserve details in both shadows and highlights, maintaining good color accuracy. If your footage appears too dark or overly bright, adjust the exposure length accordingly to prevent clipping or underexposure. Regularly monitor your images during shooting, especially in tricky lighting conditions, to catch any deviations early. Precise assessment of brightness levels helps you maintain ideal exposure, ensuring the final footage has correct exposure and vibrant, true-to-life colors. Additionally, incorporating AI-powered tools can assist in real-time analysis and adjustment of exposure settings for optimal results.
Evaluate Subject Movement
When subject movement occurs during filming, it’s essential to adjust your exposure length promptly to maintain image quality. Recognizing when to do so depends on observing how motion appears in your footage. If you notice blurry or smeared motion, it’s a sign your shutter speed is too slow for the level of subject movement. To correct this, consider increasing your shutter speed to freeze fast action or reduce motion blur. Keep an eye out for:
- Rapid, unpredictable movement requiring faster shutter speeds
- Smooth, intentional motion that benefits from longer exposures
- Sudden changes in subject speed or direction needing quick adjustments
- Understanding the exposure tradeoffs involved helps balance motion clarity and overall image exposure.
Practical Techniques for Balancing Exposure and Brightness

Balancing exposure and brightness requires practical techniques that help you achieve a well-lit image without sacrificing detail. Start by calibrating your sensor to guarantee accurate exposure readings, minimizing errors caused by sensor inconsistencies. Adjust for lens distortion, which can skew brightness across the frame, by using lens correction profiles. Use the table below to visualize how different settings affect your shot:
| Setting Adjustment | Effect on Brightness | Impact on Detail |
|---|---|---|
| Sensor calibration | Accurate exposure | Preserves detail |
| Lens correction | Even brightness | Reduces distortion |
| ISO | Brightens image | Noise risk |
| Shutter speed | Controls exposure | Motion clarity |
| Aperture | Depth & brightness | Sharpness control |
These techniques ensure balanced exposure, keeping your images clear and true to life. Additionally, understanding the importance of proper image processing can further enhance your results.
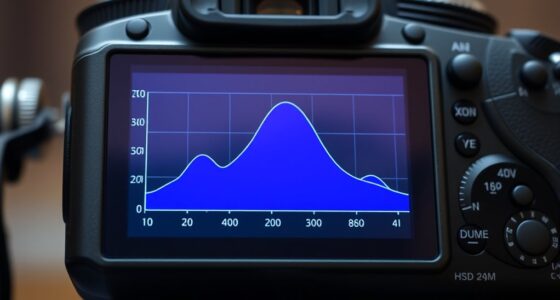
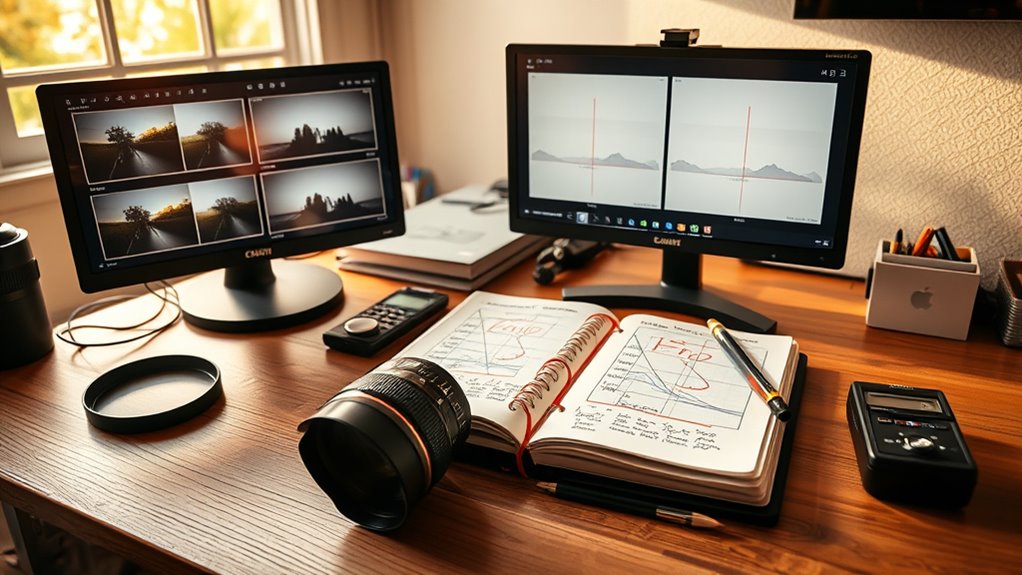
Using Histogram and Exposure Meters to Fine-Tune Settings
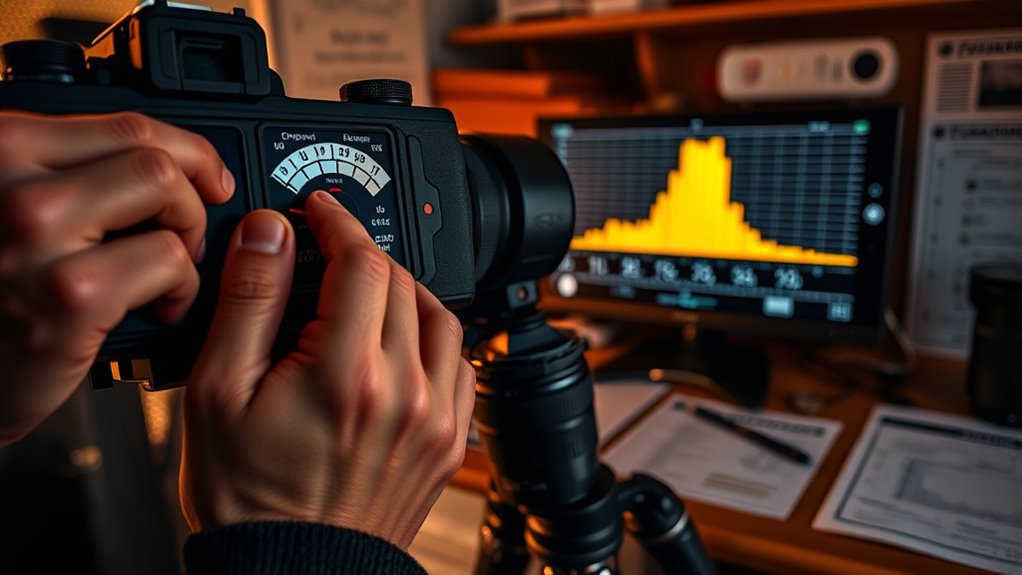
You can use the histogram and exposure meters to make precise adjustments to your camera settings. By interpreting histogram data, you’ll see how your image’s tonal range is distributed, helping you avoid overexposure or underexposure. Light meters then provide real-time feedback, guiding you to fine-tune your exposure for ideal results. Incorporating professional voice actors into your workflow can also elevate the clarity and impact of your visual storytelling, much like skilled narration enhances a documentary.
Interpreting Histogram Data
Interpreting histogram data is key to achieving perfectly exposed images. Your histogram reveals how light or dark your scene is, guiding you beyond sensor calibration or lens selection. Look for peaks and valleys—clipping on either end indicates overexposure or underexposure. A balanced histogram suggests proper exposure, but be mindful of intentional creative choices. Keep these tips in mind:
- Identify clipped highlights or shadows to avoid losing detail
- Use the histogram to adjust exposure length for ideal dynamic range
- Compare with your exposure meter to verify consistency
Adjusting Exposure Settings
After analyzing your histogram for signs of clipping or imbalance, the next step is to fine-tune your exposure settings. First, verify your sensor calibration to guarantee accurate readings; an uncalibrated sensor can mislead your adjustments. Use your exposure meter to check the scene’s brightness, adjusting shutter speed for proper exposure without overexposing highlights or losing detail in shadows. Shutter speed optimization helps balance motion and light, maintaining clarity while preventing underexposure. Make small, incremental changes, then review the histogram again to see if the adjustments improve the tone distribution. This iterative process allows you to refine your settings precisely, ensuring your exposure captures the scene accurately and maintains consistent quality across different conditions.
Using Light Metering
Light metering tools, such as histograms and exposure meters, provide critical feedback that helps you fine-tune your camera settings with precision. They reveal how well your sensor calibration aligns with your scene, ensuring accurate exposure. Use histograms to identify clipped highlights or shadows, which affect color grading later. Exposure meters guide you to balance brightness without sacrificing detail. Keep these tips in mind:
- Check histograms for even distribution, avoiding overexposure or underexposure.
- Adjust settings based on exposure meter readings to maintain proper sensor calibration.
- Use feedback from these tools to optimize your exposure for better color grading and overall image quality.
Mastering light metering enables you to control exposure length tradeoffs effectively, resulting in well-balanced photos ready for post-processing.
Experimenting With Exposure Lengths in Different Lighting Conditions

When experimenting with exposure lengths in different lighting conditions, it’s essential to adapt your camera settings to capture the scene accurately. Start by calibrating your sensor to guarantee consistent exposure results across various environments. This helps you recognize how your camera responds to different light levels. Lens selection also plays a crucial role; choose lenses with appropriate apertures to manage light intake effectively. In bright conditions, use a narrower aperture or faster shutter speed to prevent overexposure, while in low light, opt for wider apertures and longer exposures. Adjusting these settings based on lighting helps you find the right balance, giving you control over image brightness and detail. Practice this adaptability to master exposure length tradeoffs in any lighting scenario.
Troubleshooting Common Exposure Challenges
Encountering exposure challenges is common, but identifying their causes lets you correct them efficiently. When your footage looks noisy, check your exposure settings first—underexposure often amplifies noise, making noise reduction more difficult during post-production. Overexposed shots may lose detail, complicating color grading and reducing dynamic range. To troubleshoot effectively, consider these steps:
- Adjust exposure to balance brightness without sacrificing detail.
- Use proper noise reduction techniques in your editing software.
- Monitor your histograms to guarantee accurate exposure levels.
Maintaining Consistency in Exposure for Series and Projects

Maintaining consistent exposure across a series or project is essential to guarantee a cohesive visual narrative. Start by ensuring your camera’s sensor calibration is accurate; this minimizes exposure discrepancies caused by hardware inconsistencies. When shooting, stick to the same exposure settings and monitor your meter readings closely. After capturing, use color grading to match shots, but remember that proper exposure consistency in-camera simplifies this process. Adjustments should be minimal, preserving natural skin tones and scene details. Regularly review your footage side-by-side to catch any deviations early. Consistent exposure not only streamlines your workflow but also enhances the professional look of your project. By combining sensor calibration with disciplined shooting and careful post-production, you’ll maintain a uniform look throughout your series or project.
Developing a Routine for Ongoing Exposure Management Skills
Developing a routine for ongoing exposure management skills is essential to keep your footage consistent and professional over time. Regular practice helps you anticipate how exposure adjustments affect film grain and color grading, ensuring cohesive results. To stay sharp, consider:
- Reviewing your footage daily to identify exposure inconsistencies and how they impact film grain and color grading
- Setting aside time each week for experiments with different exposure lengths and their effects on final look
- Keeping detailed notes on your settings and results to refine your technique over time
This routine helps you recognize patterns, improve your judgment, and maintain the quality of your work. Consistency in exposure management ultimately ensures your projects look polished, with suitable film grain and color grading across all shots.
Frequently Asked Questions
How Do Weather Changes Affect Exposure Length Adjustments?
Weather impacts your exposure length adjustments by causing light variability, which can make your images either underexposed or overexposed. When weather changes, such as clouds moving in or out, you need to quickly adapt your exposure settings to maintain consistent image quality. Keep an eye on the sky, and be ready to lengthen or shorten your exposure to compensate for shifting light conditions, ensuring your photos stay well-exposed regardless of weather fluctuations.
Can Exposure Length Tradeoffs Improve Video Quality?
Think of exposure length tradeoffs as tuning a musical instrument—you can enhance video quality by adjusting them carefully. Yes, they can improve your footage by balancing brightness and detail. You should perform sensor calibration regularly and use exposure bracketing to manage different lighting conditions. This combination helps you optimize image clarity, reduce noise, and achieve more professional results, all while maintaining control over your footage’s overall quality.
What Accessories Assist in Maintaining Exposure Consistency?
You can maintain exposure consistency by using lens filters, such as ND filters, to control light levels and prevent fluctuations. Additionally, guarantee tripod stability with sturdy legs and a smooth head to keep your camera steady during shots. These accessories help you achieve uniform exposure, reducing flickering or variation, especially during long exposures or time-lapse sequences. Properly using filters and stabilizing your equipment makes your footage look professional and consistent.
How Does Sensor Size Influence Exposure Length Choices?
Sensor size impacts your exposure length choices because larger sensors have more sensor dynamics, allowing for longer exposures without sacrificing image quality. Smaller sensors require shorter exposure calibration to prevent noise and motion blur, making your adjustments more precise. By understanding your sensor’s characteristics, you can enhance exposure times effectively, ensuring consistent results across different settings. Mastering this balance helps you achieve ideal exposure, especially when fine-tuning your camera’s performance.
Are There Software Tools to Automate Exposure Tradeoff Management?
Yes, there are software solutions that automate exposure tradeoff management. These tools use automated adjustment features to analyze your scene and suggest ideal exposure settings. Some advanced camera apps and editing software even integrate AI to fine-tune exposure lengths based on your specific requirements. By using these software solutions, you can save time, reduce guesswork, and achieve consistent results, making maintenance easier and more efficient during your weekend mastering session.
Conclusion
Mastering sub exposure length tradeoffs isn’t just about technical skill—it’s about understanding how each adjustment reveals new creative possibilities. As you experiment and fine-tune your settings, you’ll find that small changes often lead to surprising, beautiful results. Keep practicing, stay curious, and soon, maintaining perfect exposure balance will feel natural. After all, the more you explore these tradeoffs, the more your images will tell compelling stories—often when you least expect it.