The Complete Coma and Field Curvature Explained FAQ Playbook helps you understand how these optical aberrations distort images, causing off-center points to look comet-like or edges to appear blurry. It explains what causes these issues, how to detect and measure them, and offers effective methods to correct and minimize their effects. By learning about equipment choice and adjustments, you can improve your image quality markedly. Keep exploring to discover essential tips for achieving sharper, more accurate visuals.
Key Takeaways
- Coma causes off-axis points to appear streaked like comets, while field curvature makes the image plane curved, blurring edges.
- Detection techniques include star tests, contrast analysis, and diffraction pattern examination to identify aberrations.
- Precise optical alignment, high-quality coatings, and post-processing corrections can minimize coma and field curvature effects.
- Choosing high-quality lenses with proper coatings and compatible sizes enhances image sharpness and reduces distortions.
- Adjusting aperture and maintaining proper equipment calibration are essential for optimal image clarity and aberration control.
What Are Coma and Field Curvature in Optical Systems?
Coma and field curvature are common optical aberrations that affect image quality in lenses and telescopes. Coma causes points off-axis to appear distorted, often resembling comets with tails, which can diminish the sharpness of stars and distant objects. Field curvature, on the other hand, makes the image plane curved instead of flat, causing parts of the image to be blurry if the focus is set for the center. These issues can worsen the effects of chromatic aberration, where colors blur together, and vignetting, where the edges of the image darken. Understanding these aberrations helps you recognize why images may look distorted or uneven across the field, and how they differ from other imperfections. Addressing coma and field curvature improves overall image clarity and accuracy in your optical systems. Recognizing these optical aberrations allows for better correction and optimization of your lenses and telescopes.
How Do Coma and Field Curvature Affect Image Quality?

When optical systems suffer from coma and field curvature, your images can become noticeably less sharp and more distorted. Coma causes points off-center to appear comet-like, while field curvature makes the edges of your field blurry compared to the center. You might notice these effects as uneven sharpness and unwanted color fringes caused by chromatic aberration. Astigmatism effects can also distort shapes, making circles appear as lines. To visualize:
| Center of Image | Edges of Image |
|---|---|
| Sharp, clear | Blurred, distorted |
| Minimal aberration | Increased chromatic aberration |
| Uniform focus | Unfocused, warped |
| True colors | Fringes and color shifts |
| Accurate details | Loss of fine details |
These issues reduce image quality, making your observations or photos less precise and more challenging to interpret. Additionally, understanding how visual aberrations impact your system can help in selecting appropriate corrective measures.
What Causes Coma and Field Curvature in Lenses and Telescopes?

Various design and manufacturing factors cause coma and field curvature in lenses and telescopes. One key factor is the lens material, as different materials bend light differently, affecting how well the lens focuses light across the entire field. Imperfections or inconsistencies in lens material can lead to aberrations like coma and curvature. Manufacturing tolerances also play a significant role; small deviations in lens shape, thickness, or alignment can introduce distortions. When lenses aren’t precisely crafted or assembled, the light rays don’t converge perfectly at the focal plane, creating off-center aberrations. These factors combine to produce the visual distortions you see at the edges of images, especially in fast or complex optical systems. Additionally, understanding how AI vulnerabilities can impact optical equipment development highlights the importance of rigorous testing and quality control in manufacturing processes.
How Can You Detect and Measure Coma and Field Curvature?

To detect and measure coma and field curvature, you need to observe how the image quality changes across the field of view. A star test is a practical method—by focusing on a bright star and examining the shape of its diffraction pattern at different positions in the field, you can spot asymmetries indicative of coma. For a more quantitative approach, MTF analysis (Modulation Transfer Function) helps measure how contrast varies across the image, revealing aberrations like field curvature. By comparing these measurements and star test results, you can gauge the severity of coma and curvature. This combination allows you to detect distortions accurately and prepare for subsequent correction techniques. Additionally, understanding optical aberrations and their effects can help you interpret these tests more effectively.
Techniques to Correct and Minimize Coma and Field Curvature

You can reduce coma and field curvature through precise optical alignment, ensuring each lens element is positioned correctly. Using advanced lens coatings also helps minimize aberrations by reducing reflections and improving image quality. Additionally, digital post-processing techniques allow you to correct residual distortions and enhance overall sharpness. Recent innovations in AI-driven optical calibration techniques further improve the accuracy of these corrections, leading to clearer images.
Precise Optical Alignment
Achieving precise optical alignment is essential for minimizing coma and field curvature in your optical system. Proper alignment ensures that light rays converge correctly, reducing distortions like chromatic aberration and vignetting that can worsen coma. Start by carefully aligning the optical elements, ensuring lenses are centered and perpendicular to the optical axis. Use calibrated tools such as collimators or laser colimators to verify alignment accuracy. Adjustments should focus on correcting tilt and decentering, which cause off-axis aberrations. Regularly check the system’s focus and alignment during setup and maintenance. Precise alignment not only minimizes coma but also sharpens the image across the entire field, preventing vignetting and improving overall image quality. Consistent, meticulous alignment is key to excellent optical performance. Understanding optical aberrations and their effects is crucial for achieving optimal results.
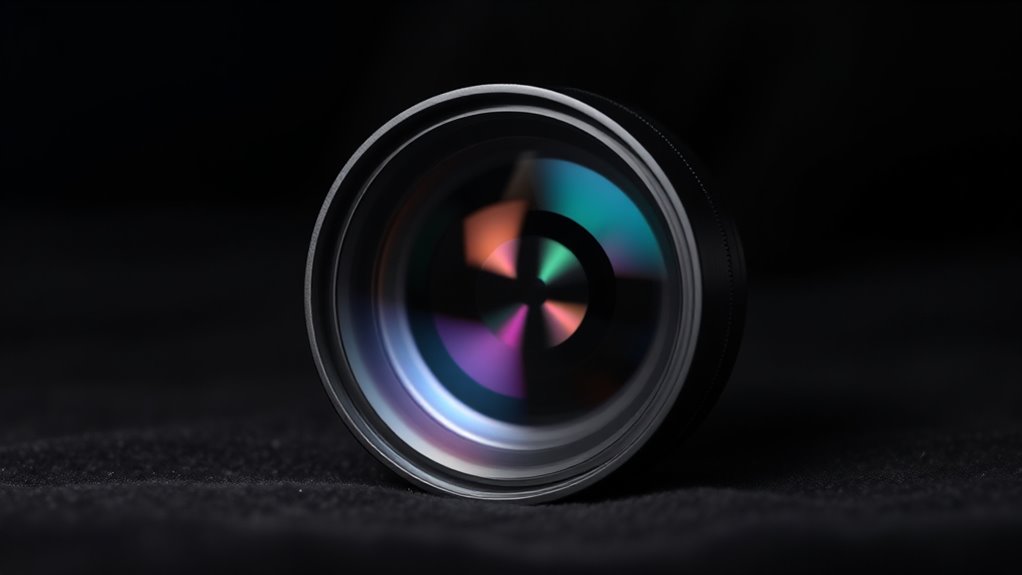
Advanced Lens Coatings
Advanced lens coatings play a crucial role in reducing coma and field curvature by minimizing unwanted light reflections and controlling how light interacts with lens surfaces. Anti-reflective coatings help improve contrast and sharpness, while polarization filters reduce glare and stray reflections that can distort images. These coatings enhance the effectiveness of other correction techniques, ensuring light passes cleanly through the lens. To understand their impact better, consider this table:
| Coating Type | Purpose | Benefit |
|---|---|---|
| Anti-reflective coating | Minimize reflections on lens surface | Increase image clarity |
| Polarization filters | Control polarized light | Reduce glare and improve contrast |
| Multi-layer coatings | Suppress multiple reflections | Enhance overall image quality |
Additionally, advances in lens coating technology have led to coatings that not only reduce reflections but also improve durability and resistance to scratches, further maintaining image quality over time.
Digital Post-Processing
Digital post-processing offers effective ways to correct and minimize optical distortions like coma and field curvature after capturing images. You can use software tools to adjust for lens distortion, straightening curved star trails and improving overall sharpness. Techniques such as deconvolution and perspective correction help reduce coma’s halo effects and restore point sources. Additionally, post-processing can address chromatic aberration, which often worsens toward the edges, by applying specific filters to suppress color fringing. While these methods can’t completely eliminate optical issues, they considerably improve image quality. Combining good post-processing with proper lens calibration enhances your results. Understanding the importance of projector calibration ensures you achieve optimal results in correcting optical distortions. Remember, the key is to understand your software’s capabilities and use targeted adjustments to bring out the clearest, most accurate images possible.
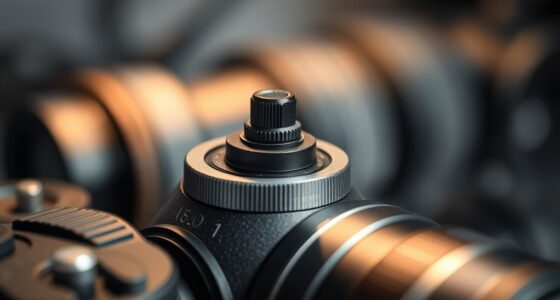
Tips for Choosing Optical Equipment With Better Image Performance

When choosing optical equipment, it’s crucial to emphasize lens quality to guarantee sharp images with minimal aberrations. You should also consider aperture size and brightness, as they impact your field of view and image clarity. Additionally, make sure the equipment’s size and compatibility fit your setup for maximum performance. Paying attention to data privacy challenges is essential to ensure your equipment meets modern security standards.
Lens Quality Matters
Choosing high-quality lenses is essential because they directly impact the clarity and sharpness of your images. Well-made lenses feature superior lens coatings that reduce reflections, glare, and chromatic aberrations, enhancing overall image contrast. Additionally, pay attention to manufacturing tolerances, as tighter tolerances guarantee consistent optical performance and minimize distortions like coma or field curvature. Cheaper lenses often have inconsistent coatings and looser tolerances, which can compromise image quality and introduce unwanted artifacts. Investing in quality optics means better image fidelity, sharper details, and more accurate color reproduction. Always check specifications for lens coatings and manufacturing standards to verify you’re getting a lens that performs reliably and delivers the crisp, clear images you desire. Good lens quality also plays a significant role in sound design as it ensures accurate capture of visual details that complement the audio, leading to a more immersive experience.
Aperture and Brightness
Opting for the right aperture and brightness settings can considerably improve your optical equipment’s image quality. Adjusting your lens aperture influences the amount of light entering, which directly impacts brightness and clarity. A wider aperture lets in more light, enhancing brightness and detail in low-light conditions, but it may introduce more aberrations. Conversely, a smaller aperture sharpens the image and reduces distortions but decreases brightness. Finding the ideal aperture brightness balance ensures better overall image performance. Remember, your lens aperture setting affects the depth of field and contrast, so tweak it according to your environment and subject. Properly managing aperture brightness helps minimize issues like coma and field curvature, resulting in crisper, more evenly illuminated images.
Compatibility and Size
Ever wondered how compatibility and size influence your optical equipment’s image quality? It all starts with lens compatibility—making sure your lens fits your telescope or camera properly prevents vignetting and distortion. Size considerations also matter; a larger lens or aperture can gather more light, improving image brightness and detail, but may add weight and reduce portability. Choosing equipment with compatible mounts and fittings ensures you won’t face frustrating mismatches or the need for extra adapters. Additionally, consider the size of your optics relative to your observing or imaging setup. Smaller, lightweight components are easier to handle, but might limit field coverage or light-gathering power. Balancing compatibility and size ensures ideal image performance without sacrificing convenience or functionality.
Frequently Asked Questions
Can Digital Image Processing Fully Compensate for Coma and Field Curvature?
Digital image processing can markedly reduce coma and field curvature, but it can’t fully compensate for them. You should combine digital correction with optical adjustments, like using high-quality lenses or corrector elements, to minimize aberrations at the source. While software can improve image quality after capture, perfect correction often requires a combination of precise optical design and digital techniques for the best results.
Are Certain Types of Lenses Less Prone to Coma and Field Curvature?
Sure, some lenses are less prone to coma and field curvature—think of them as the straight-A students of lens design. Prime lenses with advanced optical coatings and carefully optimized lens elements usually perform better. Their superior lens design minimizes aberrations, making your images sharper across the frame. So, if you want to dodge those pesky distortions, invest in high-quality lenses with premium optical coatings—your photos will thank you.
How Do Coma and Field Curvature Impact Astrophotography Differently?
Coma causes star images to appear stretched or comet-shaped, while field curvature makes the star focus shift across the image, leading to blurry edges. In astrophotography, coma distorts stars near the edges, and field curvature blurs entire sections, reducing sharpness. Chromatic aberration can worsen these effects, and vignetting may darken corners, making it harder to capture clear, detailed celestial images. Correcting these issues improves overall image quality.
What Role Does Sensor Size Play in Coma and Field Curvature Issues?
Think of your camera sensor as the canvas for your astrophotography masterpiece. Larger sensor size effects, like more coma and field curvature, are akin to adding more ripples to a pond. Sensor size considerations matter because bigger sensors often amplify these issues, requiring better optics or corrections. So, choosing your sensor size carefully can help you tame unwanted distortions, ensuring your night sky shots stay sharp and breathtaking.
Are Advanced Optical Coatings Effective Against Coma and Field Curvature?
Yes, advanced optical coatings can help reduce coma and field curvature, but they’re not a complete fix. These coatings improve light transmission and minimize reflections, enhancing image clarity. However, lens design plays a bigger role in controlling these aberrations. Combining high-quality coatings with thoughtful lens design offers the best results in reducing coma and field curvature, giving you sharper, more accurate images across the entire field.
Conclusion
Understanding coma and field curvature helps you choose and optimize optical systems for sharper images. Did you know that even high-end telescopes can experience these aberrations, reducing image quality by up to 20%? By recognizing their causes and applying correction techniques, you can markedly enhance your viewing experience. Keep these insights in mind to guarantee your equipment delivers the clearest, most accurate images possible. Better optics make your observations more enjoyable and scientifically valuable.