
To save detail when combining LRGB images, start with proper color calibration to guarantee accurate hues. Apply noise reduction early to minimize graininess without losing detail. Then, align and stack your images before adding the luminance channel last, which helps preserve fine details. Following this sequence prevents color cast issues, enhances sharpness, and keeps your astrophotos vibrant. Keep listening to discover more tips to perfect your LRGB workflow.
Key Takeaways
- Combine luminance after noise reduction to retain fine detail and prevent noise amplification.
- Start with proper color calibration to ensure accurate color alignment before combining.
- Apply noise reduction early on individual channels to avoid degrading detail during stacking.
- Perform alignment and calibration before combining to maintain sharpness and color accuracy.
- Follow the sequence: calibration, noise reduction, alignment, then LRGB combination for optimal results.
astrophotography LRGB image processing software
As an affiliate, we earn on qualifying purchases.
As an affiliate, we earn on qualifying purchases.
Why Correct LRGB Combining Order Is Critical for Detail
The order in which you combine LRGB images considerably impacts the detail and quality of your final astrophotograph. Correct sequencing guarantees effective color calibration, which aligns color channels accurately, preventing color cast issues. If you combine without proper color calibration first, your image may look off, reducing detail clarity. Noise reduction is also more effective when applied at the right stage; doing it too early can blur fine details, while doing it too late might leave noise unchecked. By combining luminance first, then refining color and noise reduction, you preserve the image’s intricate details. This careful order maximizes sharpness, minimizes artifacts, and results in a balanced, vibrant astrophotograph that truly captures cosmic details. Additionally, exploring new content formats can enhance how we perceive and process our astrophotographic creations.

DGK Color Tools Digital Kolor Pro 16:9 Large Color Calibration and Video Chip Chart, 2-Pack
SUPERIOR ACCURACY – Ensures precise color calibration with professional-grade chips, delivering consistent and reliable results for video production.
As an affiliate, we earn on qualifying purchases.
As an affiliate, we earn on qualifying purchases.
Key Steps in the LRGB Combining Workflow
To achieve a high-quality LRGB image, you need to follow a clear, step-by-step workflow that guarantees proper alignment, calibration, and combination of your images. Start with color calibration to guarantee accurate color reproduction across your luminance and color channels. Next, perform noise reduction on each image to minimize unwanted artifacts without sacrificing detail. Proper alignment is crucial; register your LRGB images precisely to prevent star trails or blurring. When combining, use an order that preserves detail, typically adding luminance last. Always verify your color calibration for consistency, and apply noise reduction carefully to avoid softening fine details. Following these key steps ensures your final image is sharp, true to color, and free of distracting noise.
![MixPad Free Multitrack Recording Studio and Music Mixing Software [Download]](https://m.media-amazon.com/images/I/71ltIxIuz1L._SL500_.jpg)
MixPad Free Multitrack Recording Studio and Music Mixing Software [Download]
Create a mix using audio, music and voice tracks and recordings.
As an affiliate, we earn on qualifying purchases.
As an affiliate, we earn on qualifying purchases.
How to Sequence Your LRGB Processing for Best Results

Sequencing your LRGB processing steps carefully can make a significant difference in the quality of your final image. Begin with color calibration to guarantee your color data aligns correctly, providing a solid foundation. Next, apply noise reduction to your luminance and color frames to minimize unwanted artifacts without sacrificing detail. Perform noise reduction early so that subsequent steps, like stretching or sharpening, don’t amplify noise. After noise reduction, combine your LRGB data, ensuring the process preserves detail and color balance. Finish with any additional fine-tuning, such as contrast adjustments or sharpening. Proper sequencing helps maintain data integrity and avoids reworking later stages, resulting in a cleaner, more vibrant image that accurately represents your target.
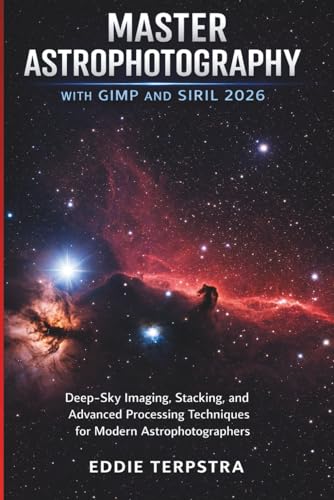
MASTER ASTROPHOTOGRAPHY WITH GIMP AND SIRIL 2026: Deep-Sky Imaging, Stacking, and Advanced Processing Techniques for Modern Astrophotographers
As an affiliate, we earn on qualifying purchases.
As an affiliate, we earn on qualifying purchases.
Common Mistakes in LRGB Combining and How to Avoid Them
Sure! Here’s your revised content with the requested changes:
—
Even when you follow the correct sequence for LRGB combining, certain common mistakes can still undermine your results. One major error is neglecting proper color calibration, which causes inaccurate hues and dull images. Failing to apply effective noise reduction before combining can introduce graininess, reducing detail. Overlooking these steps leads to compromised image quality. Additionally, ignoring the importance of consistent exposure levels across channels can cause color imbalances. In conclusion, rushing the process or skipping calibration frames results in less accurate color and noise control. To avoid these pitfalls, always ensure your color calibration is precise, perform noise reduction early, maintain consistent exposures, and use calibration frames diligently. These steps help preserve detail and produce vibrant, accurate astrophotos. Furthermore, understanding the significance of Frühwarnzeichen in image quality can enhance your overall results. Additionally, utilizing well-drained soil in your imaging setup can provide a more stable environment for your equipment. Proper maintenance of your equipment and regular cleaning can greatly improve performance and longevity.
—
Let me know if you need any further adjustments!
Tips for Sharp, Color-Accurate Astrophotos
Achieving sharp, color-accurate astrophotos requires attention to detail at every stage of your imaging process. Start with proper color calibration to confirm your colors are true to the celestial objects. Use reference stars or calibration frames to fine-tune your color balance, preventing cast or dull hues. Noise reduction is equally vital; it minimizes grain without sacrificing detail. Apply noise reduction techniques carefully, especially after stacking and before final processing, to preserve sharpness. Focus on capturing well-focused images and avoid over-processing, which can blur detail and distort colors. Consistently monitor your equipment and environment, adjusting as needed. Incorporating natural filtration systems can also help in maintaining the overall quality of your imaging setup. With precise color calibration and effective noise reduction, you’ll produce sharper, more vibrant astrophotos that accurately reflect the beauty of the night sky.
Frequently Asked Questions
Can LRGB Combining Be Automated With Software?
Yes, you can automate LRGB combining with software. Many astrophotography programs include features for automated processing, which handle color calibration and blend your LRGB data seamlessly. By setting up your workflow, you save time and reduce errors, ensuring consistent results. Software automation streamlines the entire process, from calibration to combining, so you can focus more on capturing images and less on manual editing.
How Does Noise Reduction Affect LRGB Detail Preservation?
Noise reduction naturally dulls delicate details, risking loss of luminous layers. When you apply noise suppression, you must strike a balance—suppress enough to smooth out speckles but preserve enough to keep key details intact. Properly executed, noise reduction enhances overall image clarity without sacrificing significant detail retention. You’ll find that thoughtful, targeted noise suppression allows your LRGB images to shine with sharpness and subtlety, elevating your astrophotography’s artistry.
What Are the Best Formats for Saving LRGB Images?
You should save your LRGB images in lossless formats like TIFF or FITS to preserve detail after color calibration and image stacking. These formats maintain high image quality, ensuring no data is lost during editing. Avoid compressed formats like JPEG, which can degrade details. Using a lossless format allows you to make adjustments later without sacrificing the integrity of your carefully calibrated, stacked images, keeping your astrophotography sharp and vibrant.
How Do Different Telescope Types Impact LRGB Processing?
You might think different telescope types don’t affect LRGB processing, but spectral filtering and color calibration reveal their true impact. Refractors, with their sharp optics, demand precise calibration to preserve detail, while reflectors may introduce more aberrations, complicating color balance. Understanding your telescope’s optical qualities helps you adjust processing steps accordingly, ensuring your final image maintains accurate color and detail, regardless of the telescope type you use.
Is LRGB Combining Suitable for Planetary Imaging?
Yes, LRGB combining is suitable for planetary imaging because it allows you to capture detailed color information. You should focus on precise image alignment to guarantee each channel lines up perfectly, preventing color fringing. Additionally, perform accurate color calibration to maintain true-to-life colors. By carefully aligning images and calibrating colors, you preserve detail and achieve vibrant, high-quality planetary images with balanced, realistic hues.
Conclusion
By mastering the correct order of LRGB combining, you’ll unveil the celestial details hidden within your images. Think of your workflow as a delicate dance, where each step preserves the starry tapestry’s richness and depth. When you sequence your processes thoughtfully, your astrophotos transform into vibrant, sharp vistas of the cosmos. Embrace these techniques, and watch your images shine brighter, revealing the universe’s intricate artistry with clarity and stunning color.