For a versatile dedicated camera, I’d start with the SVBONY SV605CC: its cooled IMX533 sensor is a strong fit for deep-sky imaging, while the SVBONY SC571CC offers a larger APS-C sensor for broader framing. For planetary and lunar work, the ZWO ASI662MC is a more focused choice, and smart telescopes such as the DWARFLAB Dwarf 3 trade manual control for a simpler all-in-one setup. Choosing among astronomy cameras for astrophotography means balancing sensor size, cooling, target type, setup effort, and the rest of your imaging system. Keep reading for the full comparison and guidance on matching a camera to your targets and experience.

Prime made for students and young adults
- Fast, free delivery for dorm and study essentials
- Prime Video and Amazon Music included
- Member-only deals
Key Takeaways
- Cooled cameras lead the dedicated deep-sky picks: the SV605CC and SC571CC are better aligned with long-exposure targets than the uncooled planetary and entry-level models.
- Sensor size changes framing and cost of complexity: the SC571CC’s APS-C sensor captures a wider field, while the SV605CC’s IMX533 format can suit buyers prioritizing a more compact square frame.
- Planetary cameras solve a different problem: the ASI662MC and SV705C favor fast capture and bright targets rather than cooled, long-exposure deep-sky imaging.
- Standalone smart telescopes reduce setup work, not every limitation: the Dwarf 3, Seestar S30 Pro, and Dwarf Mini bundle optics and imaging, but offer less flexibility than a separate camera and telescope.
- Some low-cost or specialized models have narrower roles: guide cameras, solar-system imagers, and wireless eyepiece cameras should be chosen for their specific jobs, not treated as all-purpose deep-sky cameras.
| SVBONY SV305C 2.1MP IMX662 Color Astrophotography Camera |  | Best Value for Planetary and Lunar Imaging | Sensor: IMX662 back-illuminated CMOS | Resolution: 2.1 MP | Pixel size: 2.9 µm | VIEW LATEST PRICE | See Our Full Breakdown |
| ZWO ASI662MC USB 3.0 Color Astronomy Camera |  | Best for High-Speed Planetary Video | Sensor: Sony IMX662 CMOS | Resolution: 1920 × 1080 (2.1 MP) | Pixel size: 2.9 μm | VIEW LATEST PRICE | See Our Full Breakdown |
| SVBONY SC571CC Cooled Color Astronomy Camera with IMX571 APS-C Sensor |  | Best for Deep-Sky Imaging | Sensor: IMX571 APS-C BSI CMOS | Resolution: 26 MP | Sensor area: 23.4 × 15.7 mm | VIEW LATEST PRICE | See Our Full Breakdown |
| SVBONY SV205 7.05MP Telescope Camera |  | Best for Laptop-Based Lunar Imaging | Sensor: 7.05 MP IMX415 CMOS | Sensor size: 1/2.8 inch | Pixel size: 1.45 × 1.45 µm | VIEW LATEST PRICE | See Our Full Breakdown |
| SVBONY SV905C Guide Camera for Telescope, 1.23MP CMOS, 1.25-Inch |  | Best for Autoguiding | Sensor: 1/3-inch CMOS, 1280 × 960 | Resolution: 1.23 megapixels | Pixel size: 3.75 microns | VIEW LATEST PRICE | See Our Full Breakdown |
| SVBONY SV105 Telescope Camera with IMX307 CMOS Sensor |  | Best for Beginners and Bright Solar-System Targets | Sensor: 1/2.8-inch IMX307 color CMOS | Maximum resolution: 1920 × 1080 | Maximum frame rate: 30 fps | VIEW LATEST PRICE | See Our Full Breakdown |
| SVBONY SV305C Pro 2MP Telescope Camera with IMX662 Sensor |  | Best for High-Speed Planetary Capture | Sensor: 2MP IMX662 CMOS | Maximum video resolution: 1920 × 1080 | Maximum frame rate: 107 FPS | VIEW LATEST PRICE | See Our Full Breakdown |
| SVBONY SV605CC Cooled Color Astrophotography Camera, 9 MP IMX533 |  | Best for Cooled Deep-Sky Imaging | Sensor: 1-inch IMX533 color | Resolution: 9 MP; 3008 × 3008 | Pixel size: 3.76 μm | VIEW LATEST PRICE | See Our Full Breakdown |
| SVBONY SV705C IMX585 USB 3.0 Astronomy Camera |  | Best Versatile Cooled-Free Camera | Sensor: IMX585 back-illuminated | Sensor frame: 1/1.2 inches | Maximum resolution: 3856 × 2180 | VIEW LATEST PRICE | See Our Full Breakdown |
| DWARFLAB Dwarf Mini Smart Telescope |  | Best Compact App-Controlled Astrophotography System | Weight: 1.85 lbs (840 g) | Mount: Altazimuth and equatorial | Sensor: Sony IMX662, 1/2.8-inch, 2.9 μm pixels | VIEW LATEST PRICE | See Our Full Breakdown |
| Celestron NexImage 20 Solar System Imager Camera |  | Best for High-Resolution Planetary Capture | Sensor: 20 MP AR2020 BSI CMOS | Resolution: 5240 × 3840 | Pixel size: 1.4 microns | VIEW LATEST PRICE | See Our Full Breakdown |
| Telonixium 4K Wireless Telescope Eyepiece Camera | 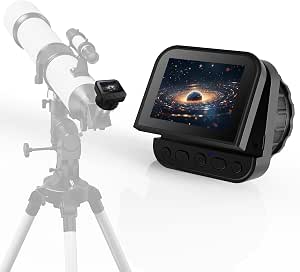 | Best for Screen-Based Casual Viewing | Sensor: 8 MP CMOS | Video resolution: 4K | Maximum image resolution: 64 MP | VIEW LATEST PRICE | See Our Full Breakdown |
| ZWO Seestar S30 Pro Smart Telescope |  | Best Beginner Smart Telescope for Deep-Sky Imaging | Mount: Alt-azimuth; supports equatorial mode | Focus: Autofocus and manual focus | Focal length: 160 mm | VIEW LATEST PRICE | See Our Full Breakdown |
| DWARFLAB Dwarf 3 Smart Telescope |  | Best for Multi-Use Portable Imaging | Mount: Altazimuth | Focus: Autofocus | Objective lens diameter: 35 mm | VIEW LATEST PRICE | See Our Full Breakdown |
| astronomy cameras for astrophotography | Sensor | Weight | Pixel size |
|---|---|---|---|
| SVBONY SV305C 2.1MP IMX662 Col | IMX662 back-illuminated CMOS | — | 2.9 µm |
| ZWO ASI662MC USB 3.0 Color Ast | Sony IMX662 CMOS | 15.68 oz | 2.9 μm |
| SVBONY SC571CC Cooled Color As | IMX571 APS-C BSI CMOS | 1.31 pounds | 3.76 µm |
| SVBONY SV205 7.05MP Telescope | 7.05 MP IMX415 CMOS | 9.6 ounces | 1.45 × 1.45 µm |
| SVBONY SV905C Guide Camera for | 1/3-inch CMOS, 1280 × 960 | 8 ounces | 3.75 microns |
| SVBONY SV105 Telescope Camera | 1/2.8-inch IMX307 color CMOS | — | — |
| SVBONY SV305C Pro 2MP Telescop | 2MP IMX662 CMOS | — | — |
| SVBONY SV605CC Cooled Color As | 1-inch IMX533 color | 1.6 kg | 3.76 μm |
| SVBONY SV705C IMX585 USB 3.0 A | IMX585 back-illuminated | — | — |
| DWARFLAB Dwarf Mini Smart Tele | Sony IMX662, 1/2.8-inch, 2.9 μm pixels | 1.85 lbs (840 g) | — |
| Celestron NexImage 20 Solar Sy | 20 MP AR2020 BSI CMOS | — | 1.4 microns |
| Telonixium 4K Wireless Telesco | 8 MP CMOS | — | — |
| ZWO Seestar S30 Pro Smart Tele | — | 3.64 lb | — |
| DWARFLAB Dwarf 3 Smart Telesco | — | 2.28 kg | — |
More Details on Our Top Picks
SVBONY SV305C 2.1MP IMX662 Color Astrophotography Camera
The SVBONY SV305C is a focused entry point for capturing the Moon and planets, rather than an all-purpose deep-sky camera. Its back-illuminated IMX662 sensor, 128 MB buffer, and ROI controls suit video capture, where selecting a smaller region can help raise capture rates and preserve sharp frames during moments of steady seeing. The built-in UV/IR cut filter also simplifies color imaging, though it cannot be removed independently of the protective glass. Compared with the ZWO ASI662MC, it offers the same sensor resolution and pixel size but uses USB 2.0 rather than USB 3.0, so the ZWO is the stronger choice when its listed high-speed full-resolution capture matters. The SV305C makes more sense for buyers who value adjustable capture modes and a buffered workflow over maximum speed. Its specialized use limits its appeal for wide-field deep-sky imaging.
Pros:- Back-illuminated IMX662 sensor with improved red-band sensitivity
- 128 MB buffer helps maintain stable frame capture
- ROI and 2×2 binning allow capture settings to be adjusted
- Built-in UV/IR cut filter supports straightforward color imaging
Cons:- USB 2.0 is a slower connection than the USB 3.0 ZWO ASI662MC
- UV/IR cut filter is not independently removable
- Specialized planetary and lunar design is not suited to cooled deep-sky imaging
Best for: Beginners focused on lunar, planetary, or electronic-assisted telescope imaging who want ROI and binning controls.
Not ideal for: Deep-sky imagers seeking a cooled, large-sensor camera, or planetary imagers who prioritize USB 3.0 capture speeds.
- Sensor:IMX662 back-illuminated CMOS
- Resolution:2.1 MP
- Pixel size:2.9 µm
- Full well capacity:38 ke
- Image buffer:128 MB DDRIII
- Connection:USB 2.0
- Mount interface:1.25-inch astronomical interface; CS interface
- Capture functions:ROI and 2×2 binning
Our verdict“Choose the SV305C for buffered, adjustable lunar and planetary capture if you can accept USB 2.0 and a fixed UV/IR filter.”
ZWO ASI662MC USB 3.0 Color Astronomy Camera
The ZWO ASI662MC earns its place for planetary imagers who want to record many frames quickly and select the sharpest later. Its listed rate of up to 102.6 fps at full resolution, paired with a USB 3.0 connection, gives it a speed advantage over the USB 2.0 SVBONY SV305C. The shared 2.1 MP IMX662 format and 2.9 μm pixels make the choice less about resolution and more about capture throughput and workflow. Infrared sensitivity can help reveal planetary detail with appropriate filters, while zero amp glow supports cleaner output. This is a specialized camera, not a cooled solution for long deep-sky exposures like the SVBONY SC571CC. It also depends on a USB-connected setup, so it is less appealing to anyone seeking a standalone camera or a broad-field deep-sky system.
Pros:- Up to 102.6 fps at full 1920 × 1080 resolution
- USB 3.0 supports high-throughput video capture
- Infrared sensitivity can support planetary imaging with suitable filters
- Zero amp glow and low read noise support cleaner captures
Cons:- Specialized planetary camera rather than a cooled deep-sky imaging option
- Requires a USB-connected setup for operation
- Its 2.1 MP resolution is modest compared with the 26 MP SVBONY SC571CC
Best for: Planetary imagers with a laptop-based setup who want high frame rates at full HD resolution.
Not ideal for: Deep-sky photographers seeking a cooled large-format sensor, or anyone who needs a standalone camera without a USB-connected computer.
- Sensor:Sony IMX662 CMOS
- Resolution:1920 × 1080 (2.1 MP)
- Pixel size:2.9 μm
- Maximum frame rate:Up to 102.6 fps at full resolution
- Sensor size:1/2.8 inch
- Connection:USB 3.0
- Special features:Infrared sensitivity and zero amp glow
- Weight:15.68 oz
Our verdict“Pick the ASI662MC if rapid planetary video capture matters more than deep-sky versatility or a standalone workflow.”
SVBONY SC571CC Cooled Color Astronomy Camera with IMX571 APS-C Sensor
For deep-sky work, the SVBONY SC571CC is the clear step up from the planetary cameras in this group. Its 26 MP APS-C sensor gives a much wider imaging area and more resolution than the SVBONY SV305C or ZWO ASI662MC, while dual-stage TEC cooling helps manage sensor heat during long exposures. A 16-bit ADC and up to 14 stops of dynamic range give imagers more room to handle faint nebulae and bright stars in the same processing workflow. The front-window heater is a practical addition for damp nights, and the 512 MB buffer supports USB 3.0 transfers. That capability comes with a more involved setup: cooling, compatible software, and supporting astrophotography equipment are part of the package. It is overbuilt for casual lunar video and less suitable for someone starting with a simple telescope camera.
Pros:- 26 MP APS-C sensor captures a broad field with substantial resolution
- Dual-stage TEC cooling helps control noise during long exposures
- 16-bit ADC and up to 14 stops of dynamic range support demanding processing
- Front-window heater helps limit dew, and the 512 MB buffer supports data transfer
Cons:- Cooling and software requirements add setup complexity
- Requires compatible astrophotography equipment rather than a simple eyepiece-camera setup
- Less suited to high-speed planetary video than the ZWO ASI662MC
Best for: Dedicated deep-sky imagers with a tracking mount and software workflow who want a cooled APS-C color camera.
Not ideal for: Casual planetary or lunar observers seeking a simple, lightweight camera with minimal setup.
- Sensor:IMX571 APS-C BSI CMOS
- Resolution:26 MP
- Sensor area:23.4 × 15.7 mm
- Pixel size:3.76 µm
- Cooling:Dual-stage TEC, up to 35°C below ambient
- ADC:16-bit
- Dynamic range:Up to 14 stops
- Connection and buffer:USB 3.0 Type-C; 512 MB DDR3 buffer
- Weight:1.31 pounds
Our verdict“Choose the SC571CC for cooled, high-resolution deep-sky imaging if you already have the mount, software, and patience for a more involved rig.”
SVBONY SV205 7.05MP Telescope Camera
The SVBONY SV205 suits buyers who want a straightforward telescope camera for live viewing and recording on a computer. Its 7.05 MP IMX415 sensor offers more still-frame resolution than the 2.1 MP SVBONY SV305C and ZWO ASI662MC, but the trade is lower video speed at its highest listed resolution: 15 FPS at 3264 × 2160 in uncompressed YUV, or 30 FPS at 1080p in MJPG. That makes it a practical fit for lunar detail and general telescope video, not the strongest choice for fast planetary capture where frame rate can help freeze atmospheric distortion. The included 1.25-inch adapter and USB cable make the basic connection accessible, and it works with Windows, Linux, and macOS through Astroamx Capture. It still needs a laptop or PC, and it cannot connect directly to Apple phones or tablets.
Pros:- 7.05 MP sensor provides more resolution than the 2.1 MP IMX662 cameras
- USB 3.0 supports computer-based live viewing and recording
- Includes a 1.25-inch adapter and 1.2 m USB cable
- Compatible with Windows, Linux, and macOS using Astroamx Capture
Cons:- Maximum listed rate is 15 FPS at 3264 × 2160, limiting high-resolution planetary capture speed
- Requires a laptop or PC for live viewing and recording
- Not compatible with Apple phones or tablets
Best for: Telescope owners who want higher-resolution lunar or terrestrial video and plan to capture through a laptop or desktop.
Not ideal for: Planetary imagers prioritizing very high frame rates, or phone and tablet users seeking direct camera connection.
- Sensor:7.05 MP IMX415 CMOS
- Sensor size:1/2.8 inch
- Pixel size:1.45 × 1.45 µm
- Connection:USB 3.0
- Frame rates:30 FPS at 1920 × 1080 (MJPG); 15 FPS at 3264 × 2160 (YUV)
- Mount interface:1.25-inch adapter
- Operating systems:Windows, Linux, macOS with Astroamx Capture
- Weight:9.6 ounces
Our verdict“Pick the SV205 for computer-based lunar and general telescope video when higher resolution matters more than fast planetary frame rates.”
SVBONY SV905C Guide Camera for Telescope, 1.23MP CMOS, 1.25-Inch
The SVBONY SV905C has a different job from the imaging-focused SVBONY SV205 and SV305C: its strongest role is helping a telescope track accurately through long exposures. The ST4 guide port, 1.25-inch fit, and compatibility with software such as PHD2, NINA, and MDL make it a practical guide-camera option, with planetary imaging as a secondary use. Its 1.23 MP sensor is far smaller than the 26 MP SVBONY SC571CC, so it is not a substitute for a primary deep-sky camera. Peak quantum efficiency of up to 80% and low read noise are useful for detecting guide stars, while the snap ring and scale marks help repeat focus and positioning. The main workflow limitation is the lack of ASI AIR compatibility, and driver installation adds a setup step.
Pros:- ST4 guide interface supports telescope autoguiding
- Up to 80% peak quantum efficiency and low read noise support guide-star detection
- Compatible with PHD2, MDL, NINA, and SKY-X
- Snap ring and scale marks aid repeatable focus and positioning
Cons:- Not compatible with ASI AIR
- Requires driver software installation
- 1.23 MP resolution is limited for use as a primary deep-sky imaging camera
Best for: Astrophotographers building a computer-controlled mount setup who need a dedicated guide camera with an ST4 connection.
Not ideal for: Buyers seeking a high-resolution primary camera for deep-sky imaging, or users whose workflow depends on ASI AIR.
- Sensor:1/3-inch CMOS, 1280 × 960
- Resolution:1.23 megapixels
- Pixel size:3.75 microns
- Peak quantum efficiency:Up to 80%
- Connection:USB 2.0
- Guide interface:ST4
- Mount compatibility:1.25-inch
- Software compatibility:PHD2, MDL, NINA, SKY-X
- Weight:8 ounces
Our verdict“Choose the SV905C as a dedicated autoguiding camera if your software supports it and you do not need a high-resolution main imager.”
SVBONY SV105 Telescope Camera with IMX307 CMOS Sensor
The SV105 is a straightforward entry point for recording the Moon, planets, and terrestrial subjects through a telescope. Its 1080p color capture at 30 fps is suited to learning basic video capture and stacking, while the standard 1.25-inch barrel and filter thread make it easy to fit into many telescope setups. Compared with the SV305C Pro, it offers a lower frame rate and fewer advanced capture features, so it is less suited to freezing fine planetary detail under changing atmospheric conditions. Its advantage is simplicity: plug-and-play operation avoids driver setup, although supported computers still need capture software. The small sensor and bright-target focus also make it a poor choice for faint deep-sky objects, where the cooled SV605CC is the more purpose-built option.
Pros:- Plug-and-play operation without a driver
- Full HD color video capture at up to 30 fps
- Standard 1.25-inch mount with filter thread
- Supports lunar, planetary, and terrestrial imaging
Cons:- 30 fps is less capable for high-speed planetary capture than the SV305C Pro
- Best suited to bright targets rather than faint deep-sky objects
- Capture software must be downloaded, and iOS devices are unsupported
Best for: First-time telescope imagers who want to record the Moon, bright planets, or terrestrial views with a standard 1.25-inch focuser.
Not ideal for: Deep-sky imagers and iPhone or iPad users; it is aimed at bright targets and does not support iOS devices.
- Sensor:1/2.8-inch IMX307 color CMOS
- Maximum resolution:1920 × 1080
- Maximum frame rate:30 fps
- Mount:1.25-inch (31.75 mm)
- Filter thread:M28.5 × 0.6
- Connection:USB 2.0
- Field of view:1.5 degrees
- Compatibility:Windows, Linux, Android, and macOS; not iOS
Our verdict“Choose the SV105 for accessible lunar and planetary video capture, but move to the SV305C Pro for faster frame rates or the SV605CC for cooled deep-sky imaging.”
SVBONY SV305C Pro 2MP Telescope Camera with IMX662 Sensor
The SV305C Pro earns its place for planetary imagers who want to capture many frames quickly and select the sharpest ones later. It records 1080p at up to 107 FPS, substantially faster than the SV105’s 30 fps, which can help collect usable frames during brief moments of steady seeing. Its 0.7e- readout noise, USB 3.0 connection, and 128MB buffer support low-light capture and sustained data flow; the ST4 port also gives it a role in guiding setups. This is a more capable capture tool than the beginner-oriented SV105, but it asks more of the buyer: a computer is required, and an iPad is not supported. For deep-sky work, its planetary-focused high-speed strengths do not replace the cooled sensor in the SV605CC.
Pros:- Captures 1920 × 1080 video at up to 107 FPS
- Low 0.7e- readout noise supports low-light planetary capture
- USB 3.0 and 128MB DDR buffer support continuous data transfer
- Includes an ST4 guiding interface
Cons:- Requires a computer and does not support iPad connection
- Its high-speed planetary focus is less suited to cooled deep-sky imaging than the SV605CC
Best for: Planetary imagers with a computer who want high-frame-rate video, low readout noise, and an ST4 guiding connection.
Not ideal for: Tablet-only users or deep-sky photographers seeking a cooled camera; this model requires a computer and is geared toward fast capture.
- Sensor:2MP IMX662 CMOS
- Maximum video resolution:1920 × 1080
- Maximum frame rate:107 FPS
- Readout noise:0.7e-
- Interface:USB 3.0 and ST4 guiding
- Buffer:128MB DDR
- Eyepiece size:1.25 inches
- Focus type:Manual
Our verdict“Pick the SV305C Pro over the SV105 when high frame rates and computer-based planetary capture matter more than simple setup.”
SVBONY SV605CC Cooled Color Astrophotography Camera, 9 MP IMX533
For deep-sky work, the SV605CC stands apart from the faster planetary cameras in this group. Its 1-inch, 9MP IMX533 sensor produces square 3008 × 3008 frames, a useful format for flexible cropping and framing different nebulae and galaxies. Semiconductor cooling can lower sensor temperature by up to 30 °C below ambient, helping control sensor-related noise during longer imaging sessions. Compared with the SV705C, which spans planetary, EAA, and entry-level deep-sky use, this camera is more directly built around cooled imaging rather than broad versatility. The tradeoff is a more specialized, heavier setup at 1.6 kg; it is less convenient for grab-and-go planetary sessions than the SV305C Pro. Buyers should also plan around computer-based astronomy-camera workflows rather than casual phone imaging.
Pros:- Cooled IMX533 sensor can reach up to 30 °C below ambient
- Square 3008 × 3008, 9MP image format supports flexible framing
- 1-inch color sensor is designed for astronomy imaging
- USB 3.0 connectivity
Cons:- Specialized astronomy equipment is less suited to casual everyday imaging
- At 1.6 kg, it adds substantial weight compared with compact planetary cameras
- Less portable and less straightforward for bright-target video than the SV305C Pro
Best for: Deep-sky imagers who want a cooled color camera and a square sensor for longer exposures and flexible framing.
Not ideal for: Travel-first observers or planetary beginners seeking a lightweight, simple video camera; the SV605CC is specialized and weighs 1.6 kg.
- Sensor:1-inch IMX533 color
- Resolution:9 MP; 3008 × 3008
- Pixel size:3.76 μm
- Quantum efficiency:Up to 80%
- Cooling:Double-layer semiconductor refrigeration; up to 30 °C below ambient
- Connectivity:USB 3.0
- Weight:1.6 kg
- Dimensions:6.5 × 6.3 × 8.46 inches
Our verdict“Choose the SV605CC if cooled deep-sky capture is your priority; favor the lighter SV305C Pro for fast planetary sessions.”
SVBONY SV705C IMX585 USB 3.0 Astronomy Camera
The SV705C suits buyers who want one camera to span planetary imaging, EAA, lucky imaging, and a first step into deep-sky photography. Its back-illuminated IMX585 sensor records at 3856 × 2180, with high near-infrared sensitivity and peak quantum efficiency of about 90%. Dual-gain HCG is intended to reduce read noise while retaining dynamic range, giving this model broader use than the bright-target SV105. Unlike the SV605CC, however, the SV705C is not presented as a cooled deep-sky camera; its deep-sky role is entry-level, so long-session noise control is not its distinguishing strength. The CS port with C-CS adapter ring also differs from the 1.25-inch telescope-camera format used by the SV105 and SV305C Pro, so check your optical setup before choosing it.
Pros:- 3856 × 2180 back-illuminated IMX585 sensor
- High near-infrared sensitivity and about 90% peak quantum efficiency
- Dual-gain HCG is designed to reduce read noise while retaining dynamic range
- Supports planetary imaging, EAA, lucky imaging, and entry-level deep-sky use
Cons:- Deep-sky use is described as entry-level rather than a cooled-camera role like the SV605CC
- CS port and C-CS adapter ring may not suit setups expecting a 1.25-inch camera mount
- Does not offer the SV605CC’s sensor cooling
Best for: Observers who want a high-resolution camera for planetary imaging and EAA, with the flexibility to try entry-level deep-sky photography.
Not ideal for: Dedicated deep-sky imagers who prioritize sensor cooling, or buyers whose telescope setup requires a standard 1.25-inch camera mount.
- Sensor:IMX585 back-illuminated
- Sensor frame:1/1.2 inches
- Maximum resolution:3856 × 2180
- Image area:11.2 × 6.3 mm
- Diagonal:12.85 mm
- Full well capacity:38 ke⁻
- Peak quantum efficiency:About 90%
- Interface and mount:USB 3.0; CS port with C-CS adapter ring
Our verdict“Choose the SV705C for broad planetary and EAA use with some deep-sky flexibility, but select the SV605CC for dedicated cooled deep-sky imaging.”
DWARFLAB Dwarf Mini Smart Telescope
The DWARFLAB Dwarf Mini takes a different route from the SVBONY camera bodies: it combines optics, tracking, and phone control in a compact 840 g system. Its app-based sky atlas and automated target tracking lower the setup burden, while equatorial mode and exposures up to 90 seconds give it a path to portable deep-sky imaging. Built-in light-pollution filtering and cloud processing add convenience that a camera such as the SV705C does not provide on its own. That convenience comes with less flexibility: the 30 mm objective and 2.45-degree field of view define a compact, wide-field instrument rather than a camera intended to attach to a buyer’s existing telescope. Focus may need manual adjustment, and operation depends on a smartphone. It is the travel pick, not the choice for interchangeable telescope-camera setups.
Pros:- Compact 840 g system with battery power
- App control, interactive sky atlas, and automated target tracking
- Equatorial mode supports exposures up to 90 seconds
- Includes light-pollution filtering and cloud processing
Cons:- Smartphone is required for app control
- Manual-and-auto focus may need user adjustment
- Integrated 30 mm optics offer less flexibility than pairing a camera such as the SV705C with an existing telescope
Best for: Traveling beginners who want an integrated, battery-powered smart telescope with app-guided targeting and automated tracking.
Not ideal for: Astrophotographers who already own a telescope and want a standalone camera, or anyone unwilling to rely on a smartphone for control.
- Weight:1.85 lbs (840 g)
- Mount:Altazimuth and equatorial
- Sensor:Sony IMX662, 1/2.8-inch, 2.9 μm pixels
- Focal length:150 mm
- Field of view:2.45 degrees
- Objective lens diameter:30 mm
- Maximum single-frame exposure:90 seconds
- Compatible devices:Smartphone
Our verdict“Choose the Dwarf Mini for portable, app-guided imaging in an integrated package; choose a standalone camera if you want to use your own telescope.”
Celestron NexImage 20 Solar System Imager Camera
The NexImage 20 is the clearest fit here for telescope owners who want a dedicated camera for the Moon and planets rather than an all-in-one smart telescope. Its 20 MP sensor records detailed frames, while Region of Interest cropping can prioritize a smaller part of the sensor to raise frame rates and reduce file sizes—useful when recording changing atmospheric conditions. Unlike the ZWO Seestar S30 Pro, it relies on your telescope, computer, and capture setup instead of handling target finding and tracking itself. The camera can also serve as an autoguider, giving it a secondary role in deep-sky imaging. The tradeoffs are a Windows-PC-dependent workflow and manual exposure control; solar work also needs a separate filter. Its small 1.4-micron pixels reward careful focusing and steady tracking, so this is less of a point-and-shoot choice.
Pros:- 20 MP CMOS sensor provides substantial resolution for lunar and planetary captures.
- Region of Interest cropping can improve frame rates and limit file sizes.
- Can double as an autoguider for deep-sky imaging.
- Includes iCap capture software and a USB-C cable.
Cons:- Requires a separate solar filter for solar imaging.
- The specified compatible-device information calls for a Windows PC.
- Manual exposure and a separate telescope setup demand more operator involvement than the Seestar S30 Pro.
Best for: Telescope owners with a Windows PC who want high-resolution lunar or planetary capture and may also need an autoguiding camera.
Not ideal for: Beginners seeking a self-contained, phone-controlled imaging setup, or anyone wanting to image the Sun without buying a separate solar filter.
- Sensor:20 MP AR2020 BSI CMOS
- Resolution:5240 × 3840
- Pixel size:1.4 microns
- Sensor dimensions:7.3 × 5.4 mm
- Connectivity:USB-C; USB-A to USB-C cable included
- Mount compatibility:1.25-inch telescope eyepiece holder or C-thread adapter
- Maximum shutter speed:30 seconds
- File formats:JPG, PNG, BMP
Our verdict“Choose the NexImage 20 for detailed Moon and planet imaging through your own telescope if you are comfortable managing a computer-based capture workflow.”
Telonixium 4K Wireless Telescope Eyepiece Camera
The Telonixium is a screen-and-app eyepiece camera for people who want to record what a telescope shows without building a conventional astrophotography rig. Its rotatable 2.8-inch display makes framing possible at the telescope, while WiFi remote viewing lets others follow along from nearby. The 23–60 mm mount range gives it broader eyepiece fit than a camera that needs a dedicated 1.25-inch holder, such as the Celestron NexImage 20. But its 8 MP CMOS sensor and advertised 64 MP still-image output are not the same proposition as a purpose-built planetary camera’s high-resolution sensor and ROI capture workflow. The stated 4K video and 16x zoom may suit casual records and sharing, though manual focus and the absence of detailed low-light performance data leave serious imaging results less predictable. It is a convenient viewing accessory, not the strongest choice for demanding astrophotography.
Pros:- Built-in rotatable 2.8-inch IPS screen supports direct framing at the telescope.
- WiFi remote viewing works from up to 32 feet away.
- Universal mount fits eyepieces measuring 23–60 mm.
- Accepts microSD cards up to 512GB and includes a rechargeable battery.
Cons:- The 8 MP sensor and advertised 64 MP still output provide less clarity about image detail than a dedicated camera specification.
- Manual focus requires user adjustment rather than autofocus.
- Its eyepiece-camera workflow is less suited to advanced capture than the Celestron NexImage 20.
Best for: Casual observers who want a built-in screen, remote viewing, and simple recordings through eyepieces measuring 23–60 mm.
Not ideal for: Astrophotographers seeking a dedicated high-frame-rate planetary camera, precise computer capture controls, or clearly documented sensor performance for faint targets.
- Sensor:8 MP CMOS
- Video resolution:4K
- Maximum image resolution:64 MP
- Display:Rotatable 2.8-inch IPS
- Eyepiece compatibility:23–60 mm
- Battery:2000mAh lithium polymer, included
- Storage support:microSD cards up to 512GB
- Connectivity:WiFi; remote viewing up to 32 ft
Our verdict“Pick the Telonixium for accessible screen-based viewing and casual recording, not for a rigorously specified astrophotography workflow.”
ZWO Seestar S30 Pro Smart Telescope
The Seestar S30 Pro earns its place by combining the telescope and imaging workflow in one compact, app-controlled unit. Automatic targeting and tracking reduce the setup burden for newcomers, while one-tap modes and AI image processing make deep-sky capture more approachable than attaching a separate camera, such as the Celestron NexImage 20, to a conventional telescope. Its filters are aimed at improving deep-sky imaging under light-polluted skies, and equatorial mode offers another tracking option. This convenience comes with a firm subject boundary: the S30 Pro is designed for deep-sky targets and is not intended for planetary observation. Its 30 mm objective and 160 mm focal length also make it a different kind of instrument from a standalone planetary camera. It needs a stationary setup during imaging, so the compact form is travel-friendly but not something to move while a capture is underway.
Pros:- Automatic GoTo targeting and tracking simplify deep-sky sessions.
- One-tap capture modes and AI image processing reduce manual workflow demands.
- Light-pollution filters support imaging from urban locations.
- Compact, battery-powered design includes anti-dew protection.
Cons:- Not intended for planetary observation.
- Must remain stationary during deep-sky imaging.
- App-based operation depends on a compatible smartphone or tablet.
Best for: Beginners and mobile observers who want app-guided deep-sky imaging with automatic target finding, tracking, and processing.
Not ideal for: Planetary imagers, or users who want a standalone camera for an existing telescope rather than an integrated smart telescope.
- Mount:Alt-azimuth; supports equatorial mode
- Focus:Autofocus and manual focus
- Focal length:160 mm
- Field of view:4.6 degrees
- Objective lens diameter:30 mm
- Weight:3.64 lb
- Power:Battery powered; one battery included
- Compatible devices:Smartphones and tablets
Our verdict“Choose the Seestar S30 Pro if you want an approachable, portable deep-sky system and do not need planetary imaging or a camera for another telescope.”
DWARFLAB Dwarf 3 Smart Telescope
The Dwarf 3 stands out for buyers who want a portable imaging device that can handle more than night-sky targets. Its telephoto and wide-angle imaging system extends its use to wildlife and landscape photography, giving it broader daytime utility than the deep-sky-focused ZWO Seestar S30 Pro. At night, 4K tracking, autofocus, automatic object locating, and app-based processing reduce the amount of manual camera work. That flexibility makes this a better fit for trips where one compact system needs to serve several purposes, rather than for someone assembling a dedicated planetary rig like the Celestron NexImage 20. The compromise is reliance on a phone or computer for app control, plus an altazimuth setup that may not suit every advanced imaging workflow. The supplied weight is 2.28 kg, so its portability comes with more heft than the compact dimensions alone suggest.
Pros:- Combines telephoto and wide-angle imaging for night and daytime subjects.
- 4K tracking and automatic object locating simplify framing and following targets.
- Autofocus and cloud-powered app processing reduce manual adjustments.
- Includes a carrying bag, magnetic filters, and USB-C cable.
Cons:- Requires a smartphone or computer for app control.
- Listed weight is 2.28 kg, which may be substantial for a travel-first setup.
- Its multi-use smart-telescope design is less specialized for planetary capture than the Celestron NexImage 20.
Best for: Travelers and outdoor photographers who want one app-controlled device for astrophotography, wildlife, and landscape subjects.
Not ideal for: Planetary specialists seeking a dedicated telescope camera, or users who prefer computer-independent operation and a clearly lightweight kit.
- Mount:Altazimuth
- Focus:Autofocus
- Objective lens diameter:35 mm
- Features:4K tracking, Auto GOTO, EQ mode
- Compatible devices:Smartphone, laptop, personal computer
- Battery:One lithium-ion battery included
- Dimensions:2.56 × 8.74 × 5.59 in
- Weight:2.28 kg
Our verdict“Choose the Dwarf 3 if you value a portable, multi-purpose imaging system more than a dedicated planetary camera or a computer-free workflow.”
How We Picked
I ranked these options by how well their design fits real astrophotography goals: deep-sky imaging, planetary and lunar capture, guiding, or beginner-friendly automated observing. I weighed sensor format and type, cooling where applicable, capture workflow, compatibility with a telescope-based setup, and how much additional equipment or technical work a buyer may need. A larger or cooled sensor can help with long exposures, but it does not automatically make a camera the right choice for fast planetary video or a portable all-in-one rig.
The order gives priority to versatility and imaging potential for the target use, then accounts for setup demands and limits. Dedicated cooled cameras rank ahead for deep-sky work; planetary models rank for bright, high-frame-rate targets; and smart telescopes are judged as self-contained systems rather than direct substitutes for a camera alone. Specialized guide and solar-system devices sit lower for general use, even when they may be the better fit for their narrower task.
Factors to Consider When Choosing Astronomy Cameras For Astrophotography
Before choosing a camera, decide what you want to photograph and what equipment you already own. A camera’s sensor is only one part of the imaging chain: telescope focal length, mount tracking, software, power, and processing all affect the result. These broader checks can prevent a mismatch that no specification sheet will fix.
Match the camera to the target, not the headline resolution
Deep-sky nebulae and galaxies usually call for long exposures and a camera that works well with a tracked mount; bright planets and the Moon favor short video captures and high frame rates. Resolution alone does not tell you how much detail you will record, since seeing conditions, telescope aperture, focus, and sampling also matter. A common mistake is buying a planetary camera for faint galaxies because its megapixel count looks attractive. For wide nebulae, field of view may matter more than pixel count, while small planets often benefit from a different sensor scale. Pick a primary target first, then compare camera format and capture mode against it.
Check sensor size against your telescope’s field of view
A larger sensor records a wider portion of the sky with the same telescope, which can help frame extended targets and reduce the need for mosaics. It can also reveal vignetting or optical aberrations near the edges that a smaller sensor would avoid. Before paying for a larger format, use a field-of-view calculator with your telescope’s focal length and the camera’s sensor dimensions. Also check whether your focuser, adapters, and corrector can illuminate that sensor adequately. The useful choice is the sensor that frames your targets cleanly, not simply the largest one you can attach.
Understand what cooling can and cannot do
Sensor cooling reduces thermal noise during long exposures and can make a repeatable imaging workflow easier, especially when capturing many frames over a session. It does not replace a stable mount, careful calibration, or good sky conditions. Cooled cameras also add power needs, weight, cable management, and setup steps, so they may be inconvenient for grab-and-go sessions. If most of your imaging is short-exposure lunar or planetary video, cooling may add little practical benefit. For deep-sky work, weigh the cleaner long-exposure workflow against the extra equipment and operating demands.
Budget for the imaging system around the camera
A dedicated camera may need a tracking mount, adapters, a computer or controller, capture software, storage, and possibly filters or a field flattener. Those parts can shape results as much as the camera itself, so compare the total setup rather than the camera body in isolation. Confirm the connection type, back focus requirements, driver support, and power needs before ordering accessories. Beginners often underestimate how much time goes into focusing, polar alignment, calibration frames, and post-processing. A bundled smart telescope can reduce those tasks, but it also limits upgrades and manual control compared with a modular rig.
Choose automation or flexibility deliberately
Smart telescopes combine optics, camera, mount, and software, which can make first images easier to capture and share. Their convenience comes with constraints: the included optics and sensor set the field of view, and users have less freedom to pair the camera with a different telescope or mount. A separate astronomy camera takes more planning but can move between compatible optical systems and support more specialized workflows. Consider where and how you will observe: a compact automated unit can suit travel or quick sessions, while a modular camera makes more sense for a permanent or upgradeable rig. Do not assume automation removes the need to check focus, weather, framing, and image quality.
Treat guiding and solar imaging as separate jobs
A guide camera monitors a guide star to help a mount track accurately; it is not necessarily designed to produce attractive finished images of deep-sky objects. Solar-system imagers and wireless eyepiece cameras also target particular capture styles, so their convenience or resolution labels should not be read as proof of broad astrophotography performance. For solar work, use appropriate certified solar filtration on the telescope; a camera alone does not make observing the Sun safe. Confirm that the intended software supports the camera’s capture format and that its connection fits your telescope. Buying for a defined task avoids expecting a specialized device to replace a general-purpose imaging camera.
Frequently Asked Questions
Should I choose a cooled camera or a planetary camera first?
Let your main target decide: cooled models are aimed at long-exposure deep-sky imaging, while planetary cameras are built around fast capture of bright objects such as the Moon and planets. If you want to image both, consider which target you will pursue most often and whether you can manage separate workflows. Cooling adds power and setup needs, but it can help control thermal noise during longer sessions. A planetary camera may be easier to start with for short video captures, yet it is not a direct substitute for a cooled deep-sky camera. Check your mount and telescope capabilities before choosing either route.
Can I use a smart telescope camera with my existing telescope?
Usually, a smart telescope is a complete imaging system rather than a standalone camera intended to attach to another optical tube. Its sensor, optics, mount, and control app are designed to work together, which is part of its convenience. If you want to use your current telescope or change equipment over time, a separate astronomy camera is generally the more flexible path. Check each product’s stated connection and supported workflow rather than assuming a camera-like device can be detached. The tradeoff is simpler operation with a smart telescope versus broader system choices with a dedicated camera.
Will a larger sensor automatically give me better astrophotographs?
No. A larger sensor can capture a wider field, but the telescope must illuminate it well and the target must suit that framing. If your optics produce vignetting or soft edges, you may need additional correction or cropping. Pixel size, telescope focal length, tracking accuracy, focus, and atmospheric conditions also affect recorded detail. Use a field-of-view calculator to check framing before choosing a format. For a small planet, a large sensor may offer little practical advantage over a camera better matched to high-speed capture.
What equipment do I need beyond a dedicated astronomy camera?
At minimum, plan for a compatible telescope, secure adapters, and a way to capture data, such as a computer or supported controller. Deep-sky imaging commonly also calls for a tracking mount, suitable power, storage, and processing software; guiding and filters depend on the scope and target. Planetary imaging may use a different capture workflow and does not always need the same long-exposure tracking setup. Verify connection standards, focus travel, back focus, driver support, and power requirements before buying. A camera that fits the budget can still become a poor match if the rest of the system cannot support it.
Is a guide camera a sensible first camera for astrophotography?
Only if your immediate goal is guiding a mount or you already have a separate imaging camera. Guide cameras are selected to monitor stars for tracking corrections, so they may not offer the sensor features or workflow you want for finished deep-sky images. A beginner aiming to photograph targets should choose a camera suited to that target class instead. If your mount’s tracking is the main problem, a guide camera can be a useful part of a larger setup, but it also requires guiding software and compatible connections. Check whether your mount and imaging software support that workflow before buying.
Conclusion
For a dedicated deep-sky setup, my best overall choice is the SVBONY SV605CC, with the SC571CC a stronger fit when APS-C framing is the priority. I’d call the SV305C the best value for a straightforward camera-based starting point, while buyers new to imaging who want the simplest bundled workflow should look at the Dwarf 3 or Seestar S30 Pro. The SC571CC is the best premium-style pick here for its larger sensor format, provided the rest of the optical system can support it. For planets and lunar video, choose the ASI662MC or SV705C; for guiding, choose the SV905C; and for solar imaging, the NexImage 20 is the more targeted option. Start with your main targets and existing equipment, then choose the camera whose workflow you can realistically support.
Halloween Picks
halloween
As an affiliate, we earn on qualifying purchases.