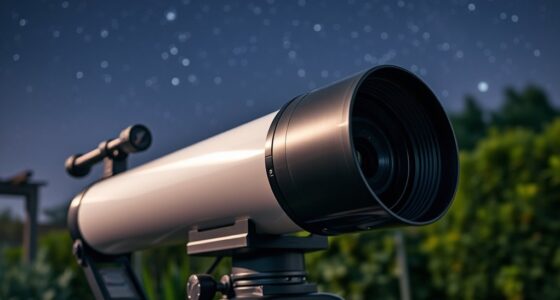
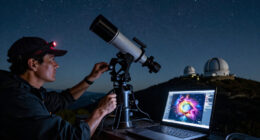
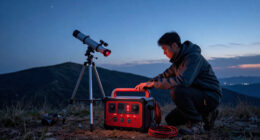
This checklist is for astrophotographers planning sessions around light pollution, from choosing a site to preparing gear for a night under the stars. It can help you think through what to check before heading out, whether you are setting up close to home or traveling to a darker location.

Prime made for students and young adults
- Fast, free delivery for dorm and study essentials
- Prime Video and Amazon Music included
- Member-only deals
The sections follow a practical planning flow: assess sky conditions, consider filtering and night-friendly lighting, orient yourself, review dark-sky locations, and prepare portable power. Some slots have a named pick, while others are advice only because no product was provided.
Use each section to match the item or planning step to your imaging setup and observing conditions. Check fit and compatibility before buying, and treat maps and planning aids as parts of a broader site plan rather than guarantees about the sky.
Sky Quality Meter
A sky quality meter can add a consistent measurement to your site assessment. It is useful to think of it as one input alongside the location, date, weather, and the direction you plan to image. Since this checklist has no product pick for this slot, focus on what you need the reading to tell you and how you will use it when comparing observing locations.
A common planning mistake is to treat a single measurement as a promise of what the whole sky will look like. Conditions can vary across the sky and change during a session, so consider whether your intended target and framing are affected by nearby sources of light. Before choosing a meter, check its operating approach, display readability at night, and whether the information it provides is practical for your routine. Avoid exposing yourself to bright displays while preserving night adaptation.
Keep notes from repeated visits to the same locations so readings have useful context. Compare like with like, and pair the measurement with your own observations of the horizon and target area. The goal is a repeatable planning reference, not a substitute for checking conditions on site.
What to look for:
- A measurement approach you can use consistently
- A display that is manageable during night sessions
- Controls that are easy to operate in the dark
- A way to record readings with location and session notes
- Information relevant to comparing your intended observing sites
Light Pollution Filter
The named pick is the Optolong L-Ultimate 2-Inch Dual-Bandpass Light Pollution Reduction Ima. A filter is a system component, so the key question is whether its format and use fit your imaging train and intended targets. The product name identifies a 2-inch dual-bandpass filter, but it does not establish compatibility with every camera, adapter, telescope, or target.
A frequent buying mistake is choosing a filter based on the phrase “light pollution reduction” alone. Check how the filter attaches to your setup, whether your imaging train accepts the specified size, and whether you can maintain secure, square connections. Consider your camera and optical configuration together: adapters, filter holders, and spacing can affect whether the part fits into the imaging train as intended. Confirm the product’s exact specifications before purchase, especially because the supplied name is truncated.
Also consider how you will use the filter in your workflow and whether it suits the subjects you plan to photograph. Filters do not replace site planning or careful capture decisions. Verify the complete listing and your equipment details before committing to this dual-bandpass option, then keep a record of the configuration that works for your setup.
What to look for:
- A complete product name and current specifications
- Confirmed 2-inch compatibility with your filter holder or imaging train
- Adapters and spacing that fit your camera and optical setup
- Suitability for your intended astrophotography targets
- A secure installation method that keeps the filter properly seated
Optolong L-Ultimate 2-Inch Dual-Bandpass Light Pollution Reduction Imaging Filte

The Optolong L-Ultimate is a dual-bandpass astrophotography filter with 3 nm bandwidths that isolate H-alpha and O III emission lines. It reduces light pollution and bright sky background to improve nebula contrast, and is designed to minimize halos around bright stars.
Pros:
- Isolates H-alpha and O III nebula emission lines
- Reduces light pollution and darkens the sky background
- Improves nebula contrast
- Designed to minimize halos around bright stars
Cons:
- Not suitable for fast-ratio systems
- Not water resistant
Best for: Imagers whose optical train accepts a 2-inch filter
Not ideal for: Setups that cannot accommodate the listed filter format
Bottom line: Confirm the complete specifications and imaging-train fit before choosing this filter.
Red LED Flashlight
The named pick is the Red Light Therapy Mask for Face & Neck, Wireless LED Face Mask, 4 Mode. Its product name describes a face-and-neck mask, not a flashlight, so it does not match this checklist slot as written. For an astronomy checklist, the intended item would be a red LED flashlight suited to handling equipment and reading notes while preserving night vision as much as possible.
A common mistake is to assume that any product with “LED” in its name serves the same purpose. Check the product type, how it is powered, and whether it provides a controllable red light appropriate for use at an observing site. Consider the controls: you should be able to operate them without introducing unnecessary bright light, and the light should be practical for the tasks you expect to do. If you use gloves or need to keep both hands free, include that in your fit and handling assessment.
Because the supplied pick is a mask, verify the listing rather than treating it as a flashlight recommendation. Choose a purpose-matched light and check its operating instructions and controls before bringing it into your night-sky routine. Keep any illumination directed where you need it, especially when others are observing nearby.
What to look for:
- A product explicitly identified as a flashlight or astronomy light
- A red light suitable for use during night observing
- Controls that are easy to operate in the dark
- A power method that fits the length of your sessions
- A shape and grip that work with your observing tasks
Red Light Therapy Mask for Face & Neck, Wireless LED Face Mask, 4 Modes

The INTEO wireless LED mask provides full‑coverage red light therapy for the face, neck and chest with 680 silicone‑encased beads. It offers four wavelength modes (red, blue, amber, near‑infrared) and a rechargeable 2000 mAh battery with adjustable timer settings for convenient at‑home skincare.
Pros:
- Full facial and neck coverage with 680 light beads for even illumination
- Wireless, magnetic battery eliminates messy cords
- Four therapeutic wavelengths address multiple skin concerns
- Adjustable timer and long‑lasting rechargeable battery
Cons:
- Battery life may require frequent recharging if used daily
- No built‑in eye protection beyond the mask’s design
Best for: Readers who can verify a purpose-built red observing light
Not ideal for: Anyone seeking a flashlight based on the supplied mask listing
Bottom line: The named product is a face mask, so confirm or replace it with a red flashlight.
Astronomy Planisphere
A planisphere can support orientation and planning by helping you relate the date and time to the visible sky. This checklist provides no product pick, so consider what kind of reference will make it easiest to locate the region you intend to image and understand what is rising or setting during your session.
A common mistake is selecting a planisphere without checking that it is appropriate for your observing location. Confirm that its sky coverage matches your latitude and that its date and time markings suit the way you plan sessions. Also consider whether you can read and adjust it under dim red light. A reference that is difficult to handle in the dark may slow setup, while a large format may be less convenient to carry. Check the scale and labeling against the level of detail you need; a broad orientation aid and a detailed chart serve different purposes.
Use the planisphere as a guide to general sky orientation, then verify the target’s position with your chosen planning resources. Keep it accessible but protected from dew and handling during the session. Since there is no specific pick here, prioritize location fit, legibility, and a format that works with your field routine.
What to look for:
- Sky coverage suited to your observing latitude
- Date and time markings that match your planning needs
- Labels legible under dim red illumination
- A size that is practical to carry and use outdoors
- A format that complements your other target-planning references
Dark Sky Map
A dark sky map helps you consider where to observe before packing for a session. No specific map is named here, so evaluate the map or mapping resource by how clearly it supports your travel and site-selection decisions. A useful resource should help you assess candidate locations in relation to your route and intended observing area.
One buying and planning mistake is relying on a map as if it guarantees current conditions at a site. A map can guide your shortlist, but access, weather, local light sources, and conditions on the night still need attention. Check what geographic area the map covers, how its information is presented, and whether it can be used offline if you expect limited connectivity. Consider the scale: a broad overview can help compare regions, while a more detailed view may be needed to plan the final approach. Make sure place names and boundaries are clear enough to avoid confusion while traveling.
Use the resource early to identify options, then verify practical details before departure. Keep a backup way to navigate and make notes about the site you choose. A dark-sky map is most useful when it is part of a wider plan that includes route, access, and target visibility.
What to look for:
- Coverage that includes your observing region and route
- A map scale suited to both regional comparison and site planning
- Clear place names and geographic references
- Offline access or a practical backup for limited connectivity
- Information that can be checked against current site conditions
Portable Power Station
The named pick is the Jackery HomePower 3600 Plus Portable Power Station with Two 200W Solar. Portable power can support a field setup, but the product name alone does not show whether its capacity, outputs, or charging options match your equipment and session length. Start by listing the devices you intend to power and checking the exact requirements for each one.
A common mistake is choosing a station based on a single headline specification without reviewing the connections and total load. Confirm the outputs your mount, camera, computer, and accessories need, including any adapters. Think about how long you expect to run them and which devices must stay powered throughout the session. Verify the complete product listing because the supplied name ends after “Solar,” and it may omit details needed to assess configuration. Also consider transport: check the unit’s dimensions and handling needs against your vehicle, storage space, and observing location.
The name mentions two 200W solar panels, but confirm exactly what is included and how recharging is handled before relying on them in your plan. Compare the station’s documented capabilities with your own gear list, and plan for a power reserve rather than assuming conditions will match an ideal charging scenario.
What to look for:
- Documented output types compatible with your equipment
- Capacity appropriate to your expected session and device load
- A complete listing that clarifies the included solar components
- Dimensions and handling suited to your transport plan
- A practical charging and backup plan for field use
Jackery HomePower 3600 Plus Portable Power Station with Two 200W Solar Panels, 3

This portable power station provides 3584Wh of capacity and 3600W of output, with expandable capacity and support for 120V and 240V operation when connected in parallel. It offers AC, solar, gas-generator, and hybrid charging, plus a wheeled design with a telescopic handle for easier transport.
Pros:
- High 3600W output and 3584Wh capacity for backup power
- Expandable capacity and multiple charging options
- Wheeled design with a telescopic handle
- Manufacturer claims 6,000 battery cycles and a 10-year lifespan
Cons:
- At 77.2 pounds, it may be difficult to lift
- Power station and solar panels may arrive separately
Best for: Field imagers who need portable power for multiple devices
Not ideal for: Setups whose power needs or connections are still unknown
Bottom line: Check the full specifications, included components, and device requirements before relying on this station.
Plan purchases in a practical order: first clarify your site and target-planning needs, then confirm any filter or power requirements against your actual equipment. Add a red observing light that matches the flashlight slot, and treat the supplied mask listing as a mismatch until its product identity is confirmed. Choose reference tools based on your location and how you work in the field.
You do not need to solve every planning detail at once. Start with the next session’s location, gear, and power needs, then refine your checklist as you learn what works for your setup. Careful preparation makes it easier to focus on the night sky when it is time to image.