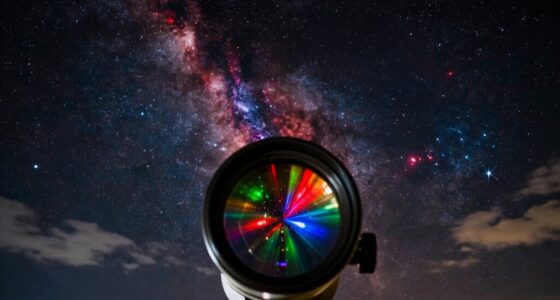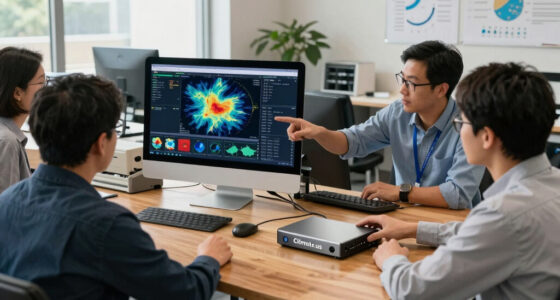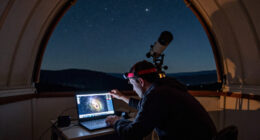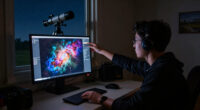
Use astrophotography editing software to turn a set of night-sky exposures into a clear, natural-looking image. This guide is for photographers who can manage files and make basic image adjustments, and who want a repeatable workflow for stacking and refining a deep-sky target. Allow 1–3 hours for processing, depending on the number of exposures and your computer. You will finish with an exported image that shows the target against a dark sky without clipped stars or harsh color.

Prime made for students and young adults
- Fast, free delivery for dorm and study essentials
- Prime Video and Amazon Music included
- Member-only deals

Astrophotography Image Processing Software on 16GB USB Drive for Windows
- ✔ Storage capacity: 16 GB
- ✔ Interface: USB
- ✔ Operating system: Windows 10 or 11, 64-bit

Astrophotography Processing Made Easy: A Beginner’s Guide to Editing Deep-Sky Images with Open-Source Software
- ✔ Format: Guide
- ✔ Skill level: Beginner
- ✔ Subject: Deep-sky image editing

Astrophotography Software Integration Handbook: N.I.N.A., PHD2, PixInsight, Siril, and Automated Deep-Sky Imaging Workflows
- ✔ Format: Handbook; further format details not provided
- ✔ Software: N.I.N.A., PHD2, PixInsight, and Siril
- ✔ Subject: Automated deep-sky imaging workflows
Difficulty: Intermediate | Time: 1–3 hours, plus capture time
What You’ll Need
Tools & Materials:
- A computer with enough free storage and memory for your image files
- Astrophotography editing software that can calibrate and stack images, such as Siril, PixInsight, or an equivalent tool
- A general image editor for final adjustments, if your stacking software has limited finishing tools
- Light frames of the target and, if available, matching dark, flat, and bias or dark-flat calibration frames
- A backup copy of the original camera files
Knowledge:
- Basic file and folder management
- How to identify light frames and calibration frames
- Basic understanding of exposure, focus, and image brightness
Keep the original files unchanged. Sort each capture session into clearly named folders before importing. Use calibration frames captured with settings that match the lights: darks should match exposure time, sensor temperature, and gain or ISO; flats should match the optical setup and focus; and bias frames or dark flats should match the calibration method supported by your software. If you have only light frames, you can still stack and edit them, but gradients, hot pixels, and vignetting may be harder to correct.
Astrophotography Image Processing Software on 16GB USB Drive for Windows
For buyers who want tools that act directly on image files, this is the most fully specified choice in our roundup. Its described workflow reaches from calibration, alignment, and stacking through background extraction, color calibration, deconvolution, and noise reduction. FITS and common camera formats, plus frame sorting and rejection algorithms, make it relevant to both deep-sky and planetary work. That breadth is why we place it ahead of the beginner guide: the guide promises instruction, while this product describes actual processing functions.Its convenience comes with a firm platform boundary. We need a 64-bit Windows 10 or 11 PC, and the supplied USB drive contains an installer rather than images or astrophotography equipment. The product lists 8 GB of RAM as recommended, while cautioning that large image stacks may benefit from more. Compared with the integration handbook, it spells out more direct editing capabilities; compared with the beginner guide, it does less to establish how approachable the learning curve is. Buyers should also confirm the software and workflow meet their needs before relying on the listed feature set.
Pros:
- Covers calibration, alignment, stacking, and multiple image-processing stages.
- Supports FITS and common camera formats.
- Includes scripts for automating standard processing workflows.
- Installer is supplied on a USB drive, so a software download is not required for installation.
Cons:
- Requires a 64-bit Windows 10 or 11 PC.
- Images and astrophotography equipment are not included.
- Large stacks may benefit from more RAM than the recommended 8 GB.
Best for: Windows astrophotographers who want a described collection of calibration, stacking, and processing functions in one software package.
Not ideal for: Mac or Linux users, anyone without a compatible Windows PC, or beginners who primarily need step-by-step instruction.
Bottom line: We rank this first for its broad, explicitly described processing toolkit, provided our computer meets its Windows requirements.
“We rank this first for its broad, explicitly described processing toolkit, provided our computer meets its Windows requirements.”
Astrophotography Processing Made Easy: A Beginner’s Guide to Editing Deep-Sky Images with Open-Source Software
This guide is the most clearly beginner-oriented option here. Its subject is editing deep-sky astrophotography images with open-source software, giving newcomers a defined learning target instead of asking them to infer a workflow from a list of tools. If we are still learning what processing involves, that teaching focus may be more useful than immediately choosing a software bundle like the Windows USB option, which specifies functions but does not promise beginner instruction.The scope is also narrower. The description does not identify the particular software, detail the lessons, or say whether the guide covers planetary processing, acquisition, or equipment setup. The integration handbook names N.I.N.A., PHD2, PixInsight, and Siril, so readers wanting a broad explanation of coordinated imaging tools may find that a closer match. We would choose this guide when learning deep-sky editing is the priority, while treating its exact coverage as something to verify from the book’s full details. It is a learning resource, not a substitute for processing software itself.
Pros:
- Explicitly aimed at beginners.
- Focuses on deep-sky image editing.
- Uses open-source software as its subject.
- Offers a learning-focused alternative to the USB bundle’s feature-led software description.
Cons:
- The description does not name the software covered.
- The lesson structure and depth are not specified.
- The stated focus is deep-sky editing, with no confirmed planetary coverage.
Best for: New astrophotographers seeking an introduction to editing deep-sky images with open-source software.
Not ideal for: Experienced processors seeking advanced technical reference, buyers who need editing software itself, or planetary-imaging specialists.
Bottom line: We recommend this as the clearest learning-first pick, while checking its detailed contents if we need specific software or techniques covered.
“We recommend this as the clearest learning-first pick, while checking its detailed contents if we need specific software or techniques covered.”
Astrophotography Software Integration Handbook: N.I.N.A., PHD2, PixInsight, Siril, and Automated Deep-Sky Imaging Workflows
This handbook is the lineup’s workflow specialist. It covers N.I.N.A., PHD2, PixInsight, and Siril in the context of automated deep-sky imaging workflows, making it the most relevant choice when our challenge is understanding how multiple tools fit into one imaging process. The emphasis on integration distinguishes it from the beginner guide’s editing lessons and the USB bundle’s in-package processing functions. It may suit readers who already have software and want to coordinate their imaging setup more effectively.For a buyer focused strictly on editing, however, its fit is less certain. The description does not say what format the handbook takes, how extensive its instructions are, or which parts of the workflow receive the most attention. Naming PixInsight and Siril does not by itself establish detailed editing coverage. The Windows USB bundle gives clearer evidence of specific processing operations, while the beginner guide states its teaching audience and editing subject more directly. We rank this third for editing-specific buying because its strongest stated value is integration. Before choosing it, we should confirm that its contents explain the software versions and workflow steps we need.
Pros:
- Covers four named astrophotography programs.
- Focuses on integration across tools rather than a single application.
- Addresses automated deep-sky imaging workflows.
- Could complement the processing focus of the Windows USB bundle.
Cons:
- Format and scope are not specified in the provided details.
- The amount of step-by-step image-editing instruction is unclear.
- The description does not identify software versions or system requirements.
Best for: Astrophotographers assembling an automated deep-sky workflow across capture, guiding, and image-processing software.
Not ideal for: Buyers who need a clearly defined beginner editing course or a specified software package with documented processing functions.
Bottom line: We would choose this for coordinating a multi-tool deep-sky workflow, after confirming its editing depth and practical scope.
“We would choose this for coordinating a multi-tool deep-sky workflow, after confirming its editing depth and practical scope.”
As an Amazon Associate we earn from qualifying purchases.
Before You Start
Work from a copy of the original files and keep all frames from the same camera setup together. Do not mix files with different rotations, filters, exposure settings, or major focus changes in one stack unless your software supports grouping them. Stacking can take several minutes or longer, so connect a laptop to power and keep the working folder on a drive with enough free space. Use a monitor with moderate brightness; an overly bright screen can make a correctly dark sky look too dim after export.
Step-by-Step Instructions
Step 1: Organize the image files
Create one project folder with separate subfolders for light frames, dark frames, flat frames, and bias or dark-flat frames. Copy the original files into those folders and keep a separate backup. Remove obvious accidental frames, such as images with a lens cap on, severe blur, or a bright obstruction, but do not delete borderline frames until you inspect them at full size.
Tip: Use consistent filenames and do not rename files in a way that removes camera or capture details your software uses.
Check: Each frame type is in its own folder, the original capture is backed up, and the lights show the same target and general camera framing.
Step 2: Create a project and load the frames
Open your stacking software and create a new project in the working folder. Load the light frames into the lights section, then load each available calibration set into its matching section. Check the file count and preview several frames, including the first and last in the sequence, to confirm they open and show the expected target.
Tip: If the software rejects a file, check whether it supports your camera’s RAW format. Convert only a copy to a supported format if needed, and preserve the original files.
Check: The project lists the expected number of lights and calibration frames, and sample previews are not blank, corrupted, or from a different target.
Step 3: Calibrate the light frames
Select the calibration command and assign the matching darks, flats, and bias or dark flats according to the software’s workflow. Apply only the frame types you actually captured. Review any warnings about mismatched exposure, gain, temperature, or dimensions before proceeding; correct the file selection if a warning points to an accidental mismatch.
Tip: Do not apply a flat set captured with a different filter, camera orientation, focus, or optical configuration. A mismatched flat can make the image look worse than using no flat at all.
Check: The software completes calibration without a mismatch warning, and a calibrated preview retains the target while showing fewer sensor artifacts or uneven illumination.
Step 4: Register and stack the exposures
Run star registration so the software aligns the frames, then inspect the alignment results. Exclude frames with failed alignment or obvious trails, clouds, or severe focus problems. Choose a stacking method recommended by the software for your data, such as average with rejection, and start the stack. Save the resulting image as a high-bit-depth working file, such as 16-bit or 32-bit TIFF or the software’s native format.
Tip: Keep the rejection settings moderate when you have few exposures. Aggressive rejection can remove faint signal or distort stars.
Check: The stack opens as one image, stars appear aligned rather than doubled, and the image contains more consistent detail than a single frame.
Step 5: Inspect the stacked image before stretching
View the image at a fit-to-window scale and at 100 percent. Check the corners and center for gradients, vignetting, color casts, hot pixels, star trails, and stacking artifacts. If the image is monochrome or unusually tinted, confirm that the correct color mode and debayer setting were used for a one-shot color camera.
Tip: A linear stack often looks nearly black in a normal preview. That is expected; do not judge its detail until you apply a controlled stretch.
Check: You can identify the target, the star shapes, and any defects that need correction before making strong brightness or color changes.
Step 6: Stretch the image gradually
Use the software’s histogram or curves tools to raise the faint signal. Make several small adjustments, checking the background and bright stars after each one. Keep the black point just below the darkest useful sky data, and avoid pushing the brightest star cores to pure white. If the software supports previews or undo history, use them to compare each change with the unstretched image.
Tip: Stretching too far makes the background noisy and can turn stars into large, featureless blobs. Stop when the target is clear, even if some faint signal remains subtle.
Check: The target is visible against a dark background, midtones retain structure, and the brightest stars still have visible color or core detail.
Step 7: Correct gradients and color
Use a gradient or background extraction tool if the sky has a broad brightness or color shift. Place sample points only on empty background areas, away from the target, bright stars, and faint nebula. Then adjust color balance or channel weights until the background is neutral or naturally tinted and stars retain distinct colors. Make small corrections and compare before and after.
Tip: Do not sample across the target when fitting a background model. The tool may treat faint astronomical detail as unwanted sky and erase it.
Check: The background looks reasonably even, the target’s faint outer structure remains visible, and stars do not all share an artificial single color.
Step 8: Reduce noise and refine detail
Apply noise reduction gently, preferably to the background with a mask that protects the target and stars. If you sharpen, use a low amount and inspect at 100 percent to avoid bright halos around stars. Remove isolated remaining artifacts only when they are clearly defects, and keep a saved copy before applying destructive edits.
Tip: Noise reduction cannot replace more good exposures. If fine detail smears or the background becomes waxy, undo the change or lower its strength.
Check: The background is smoother without losing small target features, and stars have clean edges without obvious halos or blocky artifacts.
Step 9: Save and export the finished image
Save the editable working image in the software’s native format or a high-bit-depth TIFF. Export a separate JPEG or PNG for sharing, select the intended color profile if offered, and choose a sensible image size. Reopen the exported file in an image viewer to check that the colors, crop, and brightness match the working image.
Tip: Keep the high-bit-depth master. A JPEG is convenient for sharing but loses editing latitude and may introduce compression artifacts.
Check: The export opens correctly, shows the full target without unexpected color shifts, and the editable master remains available for later changes.
Common Mistakes to Avoid
- Mixing calibration frames that do not match the lights or optical setup. — Check exposure, temperature, gain or ISO, dimensions, filter, focus, and camera orientation before assigning each calibration set.
- Stretching until the sky becomes bright gray and the stars lose their color. — Raise the signal in small increments, watch the histogram endpoints, and inspect star cores and the background after each adjustment.
- Removing faint target detail during background extraction. — Place background samples only on clear sky and exclude the target, bright stars, and faint surrounding structure.
- Editing only the exported JPEG and overwriting the working image. — Save an editable high-bit-depth master before export and keep the original capture files backed up.
Troubleshooting
Problem: The stacked image is blank, monochrome, or strongly tinted.
Solution: Confirm that the light frames were loaded correctly and that the camera’s RAW data was debayered with the correct color pattern. Recheck color mode and channel settings, then rebuild the stack from the original files if needed.
Problem: Stars appear doubled or elongated after stacking.
Solution: Review registration results and remove frames with failed alignment, clouds, or excessive trails. Check that the images have matching dimensions and rerun registration before stacking.
Problem: The image has bright or dark corners after calibration.
Solution: Check that the flats match the session’s optical setup and that the correct flat calibration method was selected. If the flats are mismatched or uneven, rebuild without them and compare the result before choosing a correction.
Problem: The target disappears when correcting the background.
Solution: Undo the extraction, move sample points farther from the target and faint outer detail, and use a gentler model with fewer sample points. Compare the result with the uncorrected version.
What Success Looks Like
Your finished image should show the intended target clearly, with stars that remain mostly round, a background that is reasonably even, and color that looks natural rather than heavily clipped or oversaturated. Check the image both at fit-to-window scale and at 100 percent. Confirm that the exported file opens correctly and that you have retained an editable high-bit-depth master and the original capture files.
Next Steps
Record the software version, calibration frames used, stacking settings, and major editing choices in a short project note. Keep the working master and a backup in separate locations. For your next session, capture additional exposures if the final image is noisy or lacks faint detail; more clean integration time often helps more than stronger noise reduction. Revisit the edit on a monitor with reliable brightness before printing or sharing it widely.
Frequently Asked Questions
Can I edit astrophotography images without calibration frames?
Yes. You can register and stack light frames without calibration frames. Expect more hot pixels, vignetting, and uneven background illumination, and use artifact and gradient corrections carefully.
Do I need to stack images before editing them?
For deep-sky imaging, stacking several aligned exposures usually improves the signal-to-noise ratio and reveals faint detail. You can edit one exposure, but noise and limited detail may restrict how far you can stretch it.
Why does my stacked image look almost black?
Most stacking software saves a linear image whose faint values are compressed near black for display. Apply a gradual histogram or curve stretch to reveal the data; do not increase exposure destructively before saving a working master.
Which file format should I use while editing?
Use the software’s native project format or a high-bit-depth TIFF for the working master. Export JPEG or PNG copies for sharing, while retaining the master and original camera files.
How can I keep star colors from becoming white?
Avoid pushing the brightest values too far during stretching and color adjustment. Make smaller changes, inspect star cores at 100 percent, and back off if the channels clip or the stars lose their color.