To create Hubble Palette images from narrowband data, you start by calibrating and aligning your emission-line images, often capturing elements like hydrogen, oxygen, and sulfur. Next, assign specific colors: SII to red, H-alpha to green, and OIII to blue, following the classic Hubble Palette. You then adjust contrast and brightness to highlight faint structures. Continuing with the process reveals how careful processing transforms raw data into stunning, scientifically meaningful images—learn more about each step as you explore further.
Key Takeaways
- Collect and calibrate narrowband images for each element (SII, H-alpha, OIII) to ensure accurate data.
- Assign specific colors to each element based on the Hubble Palette: SII as red, H-alpha as green, OIII as blue.
- Precisely align and combine the calibrated images to create a cohesive, multi-element composite.
- Adjust contrast, brightness, and vibrancy to highlight faint structures while maintaining scientific accuracy.
- Finalize the image by balancing artistic enhancement with data integrity to produce a visually striking, scientifically meaningful Hubble Palette image.

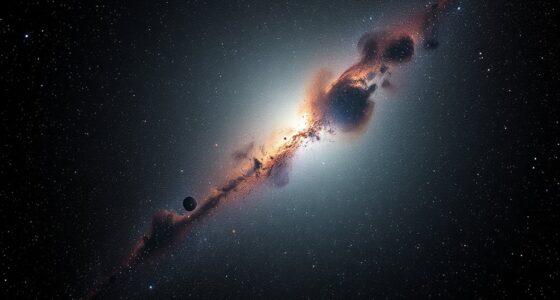
Ever wondered how astronomers transform raw telescope data into stunning, colorful images? The process begins with collecting narrowband data, which captures specific wavelengths emitted by elements like hydrogen, oxygen, and sulfur in nebulae. These data sets are not immediately visually appealing, so scientists rely on a combination of color mapping and image processing techniques to create the iconic Hubble Palette images you see. Color mapping involves assigning particular colors to each narrowband filter in a way that highlights the physical and chemical properties of the celestial objects. For example, oxygen emissions are often mapped to blue or teal, hydrogen to green or red, and sulfur to red or yellow. This systematic approach allows you to visualize the complex structures and compositions of nebulae in a way that’s both scientifically meaningful and artistically compelling.
The key to transforming raw data into these vibrant images lies in meticulous image processing. First, you calibrate the data to correct for instrumental artifacts and background noise, ensuring that what remains truly reflects the celestial scene. Next, you align the different narrowband images precisely, since slight shifts can occur during data acquisition. This step is vital for accurate color mapping because each element’s emission must be correctly overlaid. Once aligned, you assign specific colors to each filter, based on your chosen palette. The Hubble Palette, for instance, traditionally uses the SII filter mapped to red, H-alpha to green, and OIII to blue, creating a striking, almost surreal visual effect. Proper calibration ensures the scientific integrity of the final image and enhances its clarity.
During this process, you may also enhance the contrast and adjust brightness levels to bring out faint structures, revealing details that might otherwise go unnoticed. The goal is to produce a balanced, vibrant image that emphasizes both the beauty and scientific richness of the nebula. The combination of precise image processing and thoughtful color mapping allows you to craft images that are not only visually captivating but also serve as powerful tools for understanding the universe. By carefully orchestrating these steps, you turn raw, monochromatic data into stunning, colorful representations of cosmic phenomena that both educate and inspire. This meticulous process highlights the artistry behind astrophotography while honoring the scientific integrity of the original data.
Top picks for "creat hubble palette"
Open Amazon search results for this keyword.
As an affiliate, we earn on qualifying purchases.
Frequently Asked Questions
How Do I Choose the Best Narrowband Filters for Hubble Palette Imaging?
You should focus on filter selection and wavelength selection to get the best Hubble Palette images. Choose narrowband filters centered on specific wavelengths like H-alpha, SII, and OIII to highlight different nebula features. Opt for filters with tight bandwidths to reduce light pollution and enhance contrast. Matching your filter choices with the target’s emission lines guarantees vibrant, accurate colors, resulting in stunning, detailed Hubble Palette images.
Can I Create Hubble Palette Images With DSLR Cameras?
You can create Hubble Palette images with a DSLR camera, but your success depends on sensor sensitivity and proper image stacking. Use a camera with a sensitive sensor to capture enough detail in narrowband wavelengths. Take multiple exposures and stack them to improve signal-to-noise ratio. This process helps you emulate the vibrant colors of the Hubble Palette, even with consumer-grade equipment, though dedicated astrophotography gear yields better results.
What Software Is Recommended for Processing Narrowband Data Into Hubble Palette Images?
You should use software like PixInsight or AstroPixelProcessor for processing narrowband data into Hubble palette images. These tools excel at photo editing and image stacking, allowing you to combine multiple exposures seamlessly. They offer advanced algorithms to enhance detail and color accuracy, making your Hubble palette images vibrant and detailed. With these programs, you can efficiently process your narrowband data and create stunning astrophotography results.
How Do I Calibrate Narrowband Images for Accurate Color Rendering?
Imagine your images are a culinary masterpiece needing perfect seasoning. To calibrate narrowband images, start with flat field correction to remove uneven illumination and sensor quirks. Then, use color balancing to ensure the hues match reality, much like tasting and adjusting a dish. This step guarantees your Hubble palette images boast accurate, vibrant colors, transforming your data into cosmic art that’s as stunning as the universe itself.
Are There Specific Telescope Specifications Needed for Optimal Hubble Palette Imaging?
You don’t need specific telescope specifications for ideal Hubble Palette imaging, but a larger aperture helps gather more light, improving detail and signal-to-noise ratio. Make sure your camera sensor has good sensitivity to narrowband wavelengths like H-alpha, S-II, and O-III. A stable mount and precise tracking are also essential to capture sharp images. While specialized equipment isn’t mandatory, quality optics and sensors enhance your results greatly.
Conclusion
Now that you’ve learned how to create Hubble Palette images from narrowband data, you’re ready to bring stunning celestial visuals to life. Remember, a picture is worth a thousand words, and with patience and practice, you’ll capture the universe’s beauty in vivid detail. Keep experimenting and refining your techniques—perseverance is key. As the saying goes, “The sky’s the limit,” so let your passion for astrophotography reach new heights.