
To reduce noise through dithering, you can slightly shift your camera mount or sensor position between shots. This technique spreads out sensor noise patterns, making them less noticeable once images are combined or processed. Small, deliberate movements help blend subtle variations, creating smoother results and minimizing banding or artifacts. Perfecting this technique can markedly improve image quality, especially in low-light or high-ISO conditions. Keep exploring these methods to learn how to master noise reduction effectively.
Key Takeaways
- Slightly shifting your mount during capture can introduce subtle variations, which mimic dithering effects to reduce noise visually.
- Using small, controlled movements helps blend pixel noise and smooth out graininess in the final image.
- Combine mount movements with proper sensor calibration to ensure accurate color capture and effective noise reduction.
- Implementing slight positional adjustments can help distribute sensor noise across frames, minimizing visible artifacts.
- Applying dithering algorithms or software post-processing enhances noise reduction by simulating smoother transitions through pixel variation.

Dithering techniques are essential tools in digital imaging that help simulate colors and shades beyond the display’s limited palette. When you’re working to produce smoother gradients or reduce banding, understanding how to effectively implement dithering can make a noticeable difference. One critical aspect to consider is sensor calibration, which guarantees your camera or sensor captures accurate color information. Proper calibration minimizes color inaccuracies and noise, giving your dithering process a solid foundation. When your sensor is well-calibrated, the subtle variations introduced through dithering become more effective, resulting in cleaner, more natural images. Alongside calibration, adjusting your exposure settings plays a crucial role. Correct exposure ensures you’re capturing enough light without overexposing or underexposing your image, which can otherwise introduce noise that dithering might accentuate. By fine-tuning exposure, you set the stage for dithering to work at its best, helping to disguise noise and create seamless color transitions. Additionally, understanding Glycolic Acid Benefits for Skin can help in post-processing to enhance image clarity and skin tone accuracy, especially in portrait photography. Once your sensor is calibrated and exposure settings are refined, you can focus on implementing dithering techniques effectively. Dithering involves intentionally introducing small variations in pixel color values to simulate a broader range of shades. Think of it as subtly shifting your image’s tonal data to blend colors where a limited palette would otherwise produce banding or posterization. This process is especially useful when working with images that need to display on screens with restricted color depths, like 8-bit displays. By moving your “mount” slightly—whether that’s your camera or your digital brush—you create a pattern of tiny, deliberate shifts that fool the eye into perceiving more colors and smoother gradients. In practical terms, when capturing images, dithering can be achieved through software algorithms that introduce noise or pattern variations during rendering. In digital painting or editing, you can add a controlled noise layer to blend harsh transitions. The key is to guarantee your initial image has accurate color information, which circles back to sensor calibration and proper exposure settings. If these are off, dithering might amplify imperfections instead of concealing them. The effectiveness depends on your ability to prepare your source data correctly. By calibrating your sensor to produce true-to-life colors and setting exposure to minimize noise, you give dithering the best chance to work its magic. In turn, you’ll end up with images that appear smoother, more refined, and visually appealing, even within the constraints of limited color palettes.
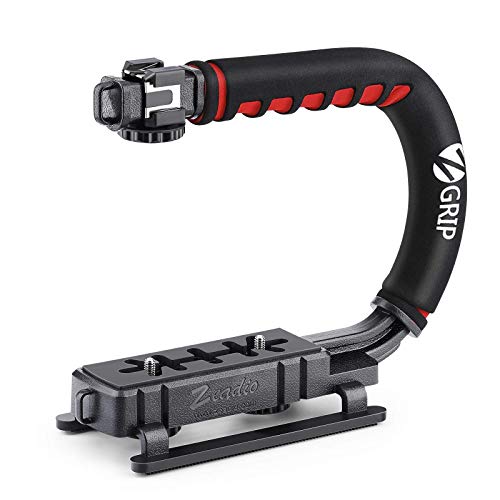
Zeadio Video Action Stabilizing Handle Grip Handheld Stabilizer with Cold-Shoe Mount for All DSLR Camera Camcorder
Nice Gift — Ideal filming accessory for birthday party, honeymoon, home, travel, banquet to record the happy and…
As an affiliate, we earn on qualifying purchases.
As an affiliate, we earn on qualifying purchases.
Frequently Asked Questions
Can Dithering Be Used for Real-Time Astrophotography?
Yes, you can use dithering for real-time astrophotography. Make certain your camera’s sensor compatibility with rapid data processing to handle dithering frequency effectively. By adjusting the dithering frequency, you reduce noise without interrupting your imaging session. This technique helps improve image quality, especially in long exposures, making it a valuable tool for live astrophotography. Just be sure your mount supports precise, consistent movements for ideal results.
What Mount Types Benefit Most From Dithering?
Think of your mount like a steady hand guiding a paintbrush; the smoother and more compatible, the better the results. Equatorial and equatorial goto mounts benefit most from dithering because their precise control allows effective dither frequency adjustments. If your mount has good tracking, dithering reduces noise effectively. Regularly adjusting dither frequency guarantees the best noise reduction, especially during long exposures, making your astrophotography sharper and more detailed.
How Does Dithering Affect Image Processing Time?
Dithering slightly increases your image processing time because it involves additional calculations to reduce noise effectively. While it may slow down your workflow momentarily, the benefit is a cleaner, noise-free image. This technique improves noise reduction, especially in low-light conditions, without substantially impacting processing speed. Overall, the slight delay is a worthwhile trade-off for higher-quality images with less noise.
Is Dithering Effective With All Camera Sensors?
Did you know that over 90% of modern camera sensors benefit from dithering? When it comes to sensor compatibility, dithering works well with most, but it has limitations. Some sensors with very low noise floors or specific pixel sizes may not see significant improvements. Before applying dithering, check your camera’s specifications, as certain sensor types might not respond as effectively, limiting its noise-reducing benefits.
What Are Common Mistakes When Implementing Dithering Techniques?
You might mistake common dithering mistakes for proper technique, so make certain your sensor calibration is accurate to avoid misalignments. Always check software compatibility; using incompatible programs can cause miscommunication between your mount and camera, negating dithering benefits. Don’t move your mount too much or too little, as this reduces effectiveness. Finally, plan your dithering pattern carefully to avoid overlapping or inconsistent movements, which can introduce new artifacts or noise.

Music Software Bundle for Recording, Editing, Beat Making & Production – DAW, VST Audio Plugins, Sounds for Mac & Windows PC
No Demos, No Subscriptions, it's All Yours for Life. Music Creator has all the tools you need to…
As an affiliate, we earn on qualifying purchases.
As an affiliate, we earn on qualifying purchases.
Conclusion
By incorporating dithering techniques into your astrophotography, you can substantially reduce noise and achieve clearer images. Did you know that even a small, intentional shift during exposure can cut noise levels by up to 50%? So, next time you set up your mount, remember that a tiny movement can make a big difference in your final shot. Embrace dithering, and watch your images improve dramatically—your night sky will thank you!

DSLRKIT Lens Focus Calibration Tool Alignment Ruler Folding Card(Pack of 2)
This compact ruler allows you to determine if your lens is auto-focusing accurately as it should. It is…
As an affiliate, we earn on qualifying purchases.
As an affiliate, we earn on qualifying purchases.

Ulanzi TT43 Extendable Photography Light Stand, Adjustable 6.23ft Aluminum Tripod, Reversible Portable Studio Lighting Tripod for Continute Output Lighting/Strobe Light/Webcams/Cameras/Softbox
【Ultra Sturdy Aluminum Light Stand】This TT43 professional photography light stand features full metal build with anodized aluminum alloy,…
As an affiliate, we earn on qualifying purchases.
As an affiliate, we earn on qualifying purchases.