To calibrate your guiding software with PHD2, start by choosing a guide star near the celestial equator. Center the star in the guide scope and then click “Calibration” to begin. During calibration, you’ll move the scope in small, controlled steps in RA and Dec, ensuring the mount responds smoothly. After the process, review the calibration graph for consistency. Following these steps carefully helps you optimize guiding performance, and you’ll find more tips to improve your setup ahead.
Key Takeaways
- Select a suitable guide star and center it in PHD2 for calibration.
- Initiate calibration and allow PHD2 to move the mount in RA and Dec during the process.
- Ensure the calibration pattern completes without interruption, confirming the software has learned mount response.
- Verify calibration accuracy by checking if the guide star remains centered after calibration.
- Fine-tune backlash and calibration settings if guiding deviations or drift are observed during guiding.

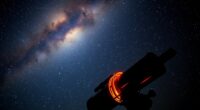
Calibrating guiding software is a critical step to guarantee your telescope tracks celestial objects accurately. When you set up your guiding system, ensuring precise polar alignment is essential. Proper polar alignment aligns your telescope’s axis with the Earth’s rotational axis, reducing the need for excessive corrections during tracking. Take the time to level your mount and align it with Polaris or use drift alignment techniques to achieve a solid polar alignment. The more accurate your initial setup, the smoother and more precise your guiding will be, minimizing deviations over long exposures.
Ensuring precise polar alignment is essential for accurate telescope tracking and high-quality astrophotography.
Once your mount is polar aligned, you can focus on calibrating your guiding software, like PHD2. Calibration involves telling the software how your mount responds to small corrections. During this process, you’ll be prompted to select a guide star, then move the scope slightly in RA and Dec. This helps PHD2 learn how your mount reacts, enabling it to make accurate corrections during tracking. Proper calibration reduces the need for excessive backlash corrections later, which can cause guiding errors and star trails. Be patient during calibration, ensuring your guide star stays well-centered, and avoid moving the mount manually during the process.
Backlash correction is another essential aspect of guiding calibration. Backlash occurs when the gears in your mount have slack, causing delays or inaccuracies when changing directions. To minimize backlash effects, adjust the backlash settings within your guiding software or mount control panel. This way, when PHD2 issues a correction, it accounts for gear slack, leading to more precise adjustments. It’s especially helpful during long exposures, where small inaccuracies can blur your images. Proper backlash correction ensures your guiding corrections are smooth and responsive, reducing star elongation and improving image quality. Additionally, keeping your mount well-maintained and periodically lubricated can help maintain gear responsiveness.
As you finish calibration, verify your guiding performance by observing the guiding graph. A steady, flat line indicates good guiding, while significant deviations suggest issues to address. If you notice erratic movements, revisit your polar alignment, calibration process, or backlash settings. Regularly checking and fine-tuning these parameters ensures your guiding remains accurate over multiple sessions. Keep in mind that environmental factors like temperature changes can affect gear slack and alignment, so periodic recalibration is beneficial. Proper telescope setup and consistent maintenance are key to achieving optimal guiding accuracy.

Telescope Camera 4K, 8MP Astrophotography Camera - 1.25" Telescope Electronic Eyepiece Camera with IR Filter, Plug & Play for Astronomy, Planetary Imaging, Compatible with Windows/Mac/Linux
✅【Plug & Play Multi-OS Support】 No drivers needed! Automatically recognized by Windows 10/11, macOS 12+, and Linux via...
As an affiliate, we earn on qualifying purchases.
Frequently Asked Questions
How Often Should I Recalibrate My Guiding Software?
You should recalibrate your guiding software, like PHD2, whenever you notice a decline in guiding accuracy or after major changes to your setup. Regular autoguide alignment and calibration frequency depend on environmental conditions and equipment stability. Typically, recalibrate every few weeks or after significant mount adjustments, new equipment, or changes in observing conditions. This guarantees your autoguide remains precise, helping you capture sharp, well-tracked astrophotographs.
Can Calibration Be Done During Cloudy Nights?
Don’t worry about cloudy calibration; you can calibrate your guiding software during cloudy nights without issue. While clear skies are ideal, calibration timing isn’t strictly limited to perfect conditions. Cloudy calibration helps guarantee your system stays accurate, especially if you notice guiding issues later. Just remember to avoid heavy clouds or fog, as they can interfere with the calibration process. Keep practicing, and your guiding will stay precise regardless of the weather.
What Are Common Signs of Poor Calibration?
You’ll notice poor calibration signs when guiding accuracy drops, causing star trails or inconsistent tracking. Calibration errors often show up as uneven corrections or oscillations in your guiding graph. If your stars don’t stay pinpoint or if guiding corrections seem erratic, your calibration might be inaccurate. Regularly checking and refining your calibration helps ensure smooth, precise tracking, preventing errors that can compromise your astrophotography quality.
Does Guiding Software Calibration Affect Image Quality?
Yes, guiding software calibration directly influences your image quality. When you properly perform mount calibration, it guarantees software accuracy, reducing errors like star drift or elongation. Inaccurate calibration causes poor tracking, which results in blurry or streaked images. By carefully calibrating your guiding software, you improve tracking precision, leading to sharper, more detailed astrophotos. This process is essential for achieving high-quality images and maximizing your equipment’s potential.
Can I Calibrate Multiple Mounts With One Setup?
Sure, you can calibrate multiple mounts with one setup—if you enjoy chaos and frustration. Each mount calibration requires precise software adjustments tailored to its unique quirks. Trying to reuse one calibration across different mounts often results in poor guiding and star trails. So, unless you’re into astrophotography roulette, it’s best to calibrate each mount individually, ensuring your guiding software gets accurate data for sharp, pinpoint images.

SVBONY SV905C Guide Camera, 1.23MP CMOS Sensor, 1.25" USB2.0 Astrophotography Camera with AR-Coated, for Autonomous Navigation and Astrophotography
SV905C Guide Camera; compact and highly sensitive 1.23-megapixel color camera with 1/3” CMOS 1280x960 sensor perfect for autoguiding...
As an affiliate, we earn on qualifying purchases.
Conclusion
Now that you’ve mastered the calibration process with PHD2, you’re just a step away from perfect tracking. But don’t relax just yet—there’s always room to fine-tune and improve your setup. What hidden challenges might still be lurking, waiting to throw off your guiding? Stay alert, keep practicing, and prepare to liberate even sharper images. Your journey to flawless astrophotography isn’t over—are you ready to take it to the next level?

Telescope Camera, 1080P Astronomy Camera, 1.25 inch Telescope Eyepiece Camera with UV IR Filter, Plug & Play Astrophotography Camera for Win/Mac/Linux, USB Digital Eyepiece for Planetary Observation
🔭 Universal Compatibility & Plug and Play: This telescope camera offers a seamless "plug and play" experience without...
As an affiliate, we earn on qualifying purchases.

SVBONY SC715C Telescope Planetary Camera, 1.45μm Micro Pixel IMX715 Color Astronomy Camera, 512MB DDR3 Cache, Low Readout Noise, Electronic Eyepiece for Moon Planetary Astronomical Photography
Equipped with a 1.45μm small pixel sensor; delivering stunning details in 4K resolution; Ideal for capturing planetary objects;...
As an affiliate, we earn on qualifying purchases.