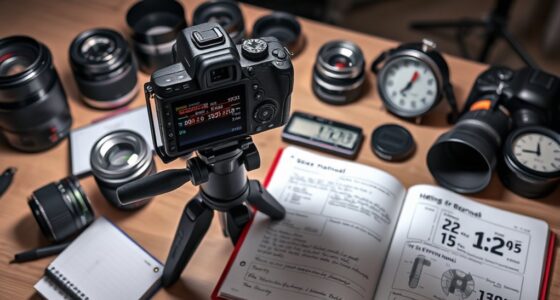

To achieve tack-sharp stars at night, switch to live view and zoom in on your brightest star. Use focus peaking or manually turn the focus ring slowly until stars appear as tiny, pinpoint dots. Stabilize your camera with a sturdy tripod and consider using a flashlight or LED to illuminate distant objects for fine-tuning. Practice patience and fine adjustments; mastering these techniques will help you capture crisp, stunning night sky images. If you continue, you’ll discover more expert tips to perfect your focus.
Key Takeaways
- Use live view mode with focus peaking to accurately identify when stars are sharp and well-defined.
- Enable manual focus and slowly adjust until stars appear as tiny, pinpoint dots without any blurring.
- Use a stable tripod and a flashlight or LED to illuminate distant objects for better focus accuracy.
- Take test shots, zoom in to check star sharpness, and fine-tune focus as needed for pinpoint precision.
- Calibrate your lens beforehand to ensure focus adjustments correspond accurately to actual focus points.
Have you ever struggled to get sharp, clear photos in low light? If so, you’re not alone. Many photographers find that autofocus limitations become a major obstacle when shooting at night. Cameras rely heavily on autofocus systems to quickly lock onto subjects, but in dim conditions, they often falter, hunting back and forth or failing to focus altogether. That’s where manual focus becomes essential. By taking control yourself, you eliminate the guesswork and gain the precision needed for night photography, especially when capturing stars or other distant points of light.
However, manual focus isn’t always as straightforward as it seems. One of the biggest hurdles is guaranteeing your lens is properly calibrated. Even high-quality lenses can have slight discrepancies, where the focus point in the viewfinder or on the live screen doesn’t perfectly match the actual focus plane. This misalignment can make your stars appear slightly blurry or misshapen, defeating the purpose of manual focusing. To avoid this, it’s vital to perform lens calibration, often called back-focus adjustment, on your camera and lenses. Doing so guarantees that when you turn the focus ring to what appears to be the sharpest point, it’s truly in focus.
When focusing manually at night, use a combination of techniques to improve accuracy. First, switch your camera to live view mode, if available. This allows you to see a larger, more detailed image on your screen, and many cameras offer focus peaking—highlighting the areas that are in sharp focus. Use a sturdy tripod to keep your camera steady, preventing any movement that could blur your shot when you’re fine-tuning focus. Dial in your lens to the approximate focus point, then slowly make small adjustments. Pay close attention to the stars, adjusting until they appear as tiny, pinpoint dots rather than fuzzy blobs. Additionally, understanding the importance of lens calibration can significantly enhance your night photography results.
Lighting conditions can make focusing more challenging, but using a bright flashlight or a small LED light can help illuminate distant objects or a test target, making it easier to achieve precise focus. Always double-check your focus by taking a quick test shot and zooming in to examine the stars’ sharpness. If they’re not perfectly pinpoint, re-calibrate your lens or refine your focus until you get the desired result. Remember, patience and practice are key—manual focusing at night might take a few tries, but once you master it, you’ll be able to capture stunning, tack-sharp stars that stand out vividly against the night sky.
Frequently Asked Questions
What Lens Is Best for Manual Focus at Night?
You should choose a lens with excellent manual focus capabilities, like a prime lens with wide apertures, such as a 24mm f/1.4. Make certain it’s compatible with your camera body. Use focus peaking to help you achieve precise focus on stars. These features make it easier to manually focus accurately in low-light conditions, resulting in tack-sharp night sky photos. Always test focus in advance for the best results.
How Do I Prevent Focus Drift in Low Light?
Focus drift in low light can seem like a sneaky ninja, constantly shifting just when you think you’ve nailed it. To prevent this, avoid focus breathing by using focus rings with minimal breathing, and don’t rely on autofocus, which has serious limitations in darkness. Instead, zoom in at maximum magnification, tweak your focus carefully, and lock it down with a tripod. This keeps your stars sharp, no matter how sneaky focus drift tries to ruin your shot!
Can Autofocus Be Effective for Night Sky Photography?
Autofocus is generally ineffective for night sky photography due to its limitations in low light and lack of contrast. You’re better off using manual focus techniques, like focusing on a distant bright star or distant light, then switching to manual to lock in your focus. This ensures your stars stay tack-sharp, preventing focus drift and giving you precise control over your shot in dark conditions.
What Settings Optimize Manual Focus Accuracy at Night?
Getting your manual focus just right is no walk in the park, but with the right settings, you can hit the mark. Use live view and zoom in on a bright star, adjusting focus until it’s pin-sharp. Turn on star tracking to stabilize your shots, and shoot during nights with minimal light pollution for clarity. Remember, patience is key—sometimes, the tiniest tweak makes all the difference.
How Do I Focus on Distant Stars Without a Focus Assist?
To focus on distant stars without focus peaking, first enable star tracking to keep stars steady. Use live view and zoom in on a bright star; then, gently turn your focus ring until the star appears as a tiny, sharp point. If your camera has focus peaking, activate it to highlight in-focus edges, making it easier to achieve perfect focus. Practice these steps to get tack-sharp stars every time.
Conclusion
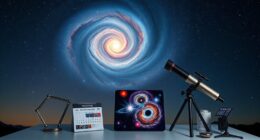
Mastering manual focus at night might seem tricky, but with patience, you’ll capture stunning, crisp stars every time. Imagine you’re in a remote countryside, trying to photograph the Milky Way. By carefully adjusting your focus and taking a few test shots, you finally see those sharp, sparkling stars in your viewfinder. That feeling of achievement makes all the effort worthwhile. Keep practicing, and soon, night photography will become your favorite way to create breathtaking celestial images.