TL;DR

Prime made for students and young adults
- Fast, free delivery for dorm and study essentials
- Prime Video and Amazon Music included
- Member-only deals
Portable astrophotography telescopes come in two main types: smart, app-controlled systems for quick setup, and traditional rigs for greater control. Your choice hinges on targets, portability, and how much you want to learn about astrophotography workflows.
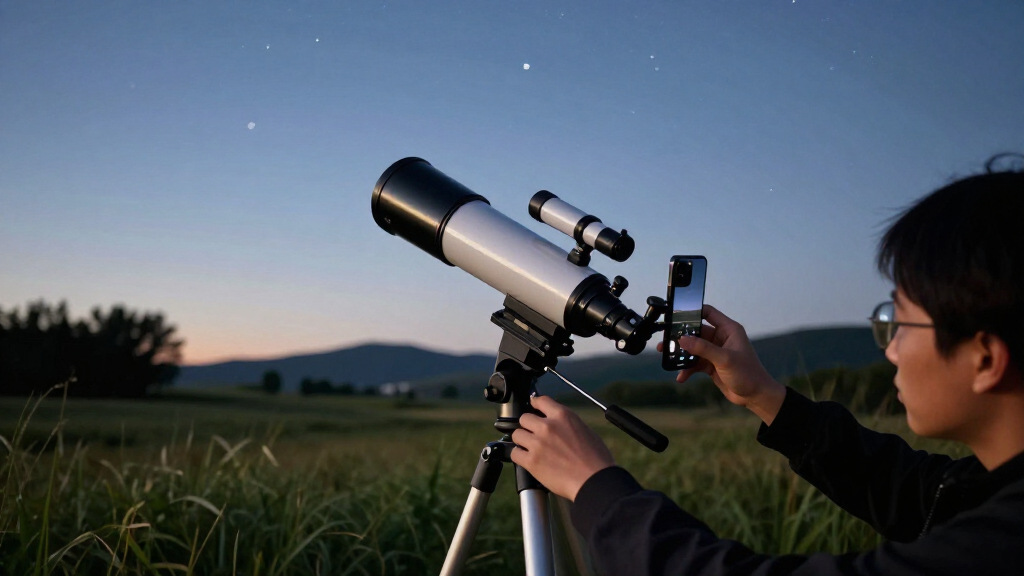
Imagine capturing detailed images of distant galaxies or shimmering nebulae, all while standing in your backyard or even on a mountain trail. Portable astrophotography is no longer just for professionals—it’s accessible, flexible, and surprisingly easy to start.
Whether you’re a weekend stargazer or an aspiring astrophotographer, understanding the differences between compact smart systems and traditional travel rigs can help you pick the right gear. This guide breaks down what you need to know to make that decision and get the most out of your next night under the stars.
Smart telescopes offer quick setup, automation, and portability, making them perfect for beginners and quick trips.
Traditional travel rigs provide greater control, upgrade options, and potentially higher image quality, suitable for dedicated enthusiasts.
Choosing your system depends on your target type, portability needs, and willingness to learn astrophotography workflows.
Trackers and mounts are the backbone—accurate tracking is often more important than aperture size for long exposures.
Always consider total system weight, target fit, power options, and data access before buying.
What Makes a Portable Astrophotography Telescope Truly Portable?
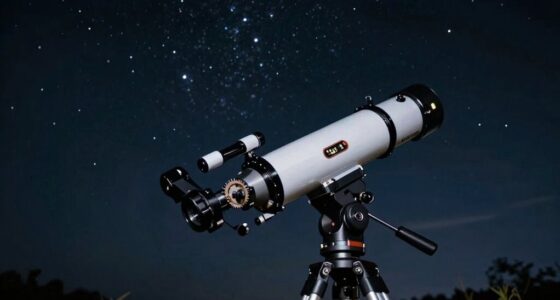
Portability isn’t just about weight. It’s about how the entire system fits into your life. Consider the weight of the telescope, mount, tripod, batteries, cables, and protective case together. Can it slip into your carry-on bag? Will it survive a bumpy car ride? A smart telescope often wins here, with a compact design that can be carried easily in a backpack or small case.
For example, a ZWO Seestar weighs just under 5 pounds, fitting comfortably on a plane’s overhead bin. Meanwhile, a travel rig with a small refractor, mount, and camera might tip the scales at 15 pounds but offers more control and flexibility. The key is to think about what you’ll actually carry, set up, and store after a night of imaging.
portable astrophotography telescope
As an affiliate, we earn on qualifying purchases.
As an affiliate, we earn on qualifying purchases.
Why the Mount is the Heart of Your Portable Setup
Ever try to take a long exposure shot on a shaky camera? That’s what poor tracking does to astrophotography. The mount’s job is to follow the sky’s rotation so your images stay sharp. For deep-sky targets, a good equatorial mount is essential, especially for long exposures.
Many smart telescopes use alt-azimuth mounts. They’re quick to set up but introduce field rotation in long shots. Software can compensate for that, but it’s a compromise. Traditional rigs often use equatorial mounts with precise tracking, allowing for longer, more detailed images.
For example, an astronomer planning to image faint galaxies will prioritize a stable, accurate mount over a fancy telescope tube. A beginner might opt for a smart system with a built-in tracking feature to simplify the process.
smart astrophotography telescope for beginners
As an affiliate, we earn on qualifying purchases.
As an affiliate, we earn on qualifying purchases.
Choosing the Right Aperture and Focal Length for Your Targets
Think of aperture as your telescope’s ‘light bucket.’ A bigger aperture gathers more light, revealing fainter objects. But a larger tube is heavier and less portable. For quick trips, a 80mm to 100mm refractor strikes a good balance—light enough to carry, powerful enough for many targets.
Focal length shapes what you see. Short focal lengths (around 400-600mm) give wide views—perfect for star fields and large nebulae. Longer focal lengths (over 1000mm) zoom in on planets and small galaxies, but demand precise tracking and stability.
For example, capturing the Orion Nebula (M42) is easier with a short focal length, while detailed Jupiter shots need a longer, high-speed setup. Remember: aperture isn’t everything—weight and tracking are equally critical.
As an affiliate, we earn on qualifying purchases.
What Sensor and Camera Quality Really Matters
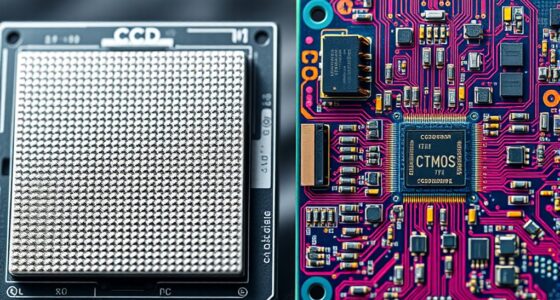
Your camera’s sensor is the eye of your setup. Larger sensors capture more of the sky at once, but smaller sensors can be better for high-magnification planetary shots. Pixel size is crucial: bigger pixels gather more light, reducing noise.
High resolution isn’t always better—more pixels mean heavier data, slower processing. Focus on sensor sensitivity, read noise, and cooling options. Dedicated cooled astronomy cameras outperform smartphone or uncooled smart-telescope cameras during long sessions, especially in warm weather or light-polluted skies.
For instance, a ZWO ASI2600 offers a large, cooled sensor with excellent sensitivity, making it a favorite for deep-sky imaging. In contrast, many smart telescopes use integrated CMOS sensors that excel in quick captures but may struggle with noise over long exposures.
equatorial mount for astrophotography
As an affiliate, we earn on qualifying purchases.
As an affiliate, we earn on qualifying purchases.
Optical Design: Refractors, Reflectors, or Catadioptrics?
Small, portable systems often use apochromatic refractors because they’re compact, stable, and deliver crisp images. For example, a 70mm or 80mm refractor is lightweight and ideal for travel. Doublets are lighter and less expensive, but triplets offer better color correction for sharper images.
Reflectors pack more aperture for less weight, but need collimation—aligning mirrors—regularly. Catadioptrics, like compact Maksutovs or Schmidt-Cassegrains, are versatile but can be slower and heavier.
Imagine a traveler using a tiny refractor to capture wide star fields or bright emission nebulae, versus someone with a small Maksutov aiming to photograph planets in detail. Your target choice influences the optical design that best suits your needs.
Automation and Software: How Tech Simplifies Your Night
Modern systems can automatically locate objects, focus, track, and even stack images—all with minimal user input. Apps handle target finding through plate solving, which means your telescope ‘knows’ where it’s pointed and can correct itself.
For example, an app can automatically find the Andromeda Galaxy, center it in your frame, and capture dozens of short exposures. Then, software stacks those images, reducing noise and enhancing details.
While automation saves time and frustration, it’s worth checking how well the system’s firmware and app are supported. Some brands offer raw data export, giving you control over processing and sharing your images later.
Power Up: Battery Life and Connectivity for Field Imaging
Imagine running a long session in a remote dark-sky park or mountain summit. Your setup depends on batteries—internal or external—and how long they last. Most portable systems run between 4-8 hours, but heavy use of dew heaters or high-power cameras can cut that short.
Look for systems supporting external power sources, standard USB charging, and operation without internet. Some smart telescopes can continue imaging if Wi-Fi drops, but others rely heavily on app connectivity.
For example, a portable rig with a 10,000mAh power bank can run all night, provided you turn off unnecessary features. Always carry spare batteries or a power pack if you plan a long session in the wilderness.
Light Pollution and Target Choices: Make the Most of Your Skies
Astrophotography from city lights is tougher but still possible—especially with emission nebulae and bright star clusters. Under light-polluted skies, broadband filters help, but they don’t fix all issues. Narrowband or dual-band filters can improve contrast against artificial glow.
For example, capturing the Orion Nebula from a suburban backyard is feasible with a dual-band filter and a short exposure, but faint galaxies like Sculptor remain out of reach without dark skies.
Choosing targets suited to your sky conditions maximizes your chances. Bright objects, large nebulae, and star clusters are your best bets when light pollution is high.
What Your Telescope Should Be Able to Do—and What It Can’t
Understanding target suitability prevents frustration. Portable, short-focal-length systems excel at wide-field views and bright targets. They’re less effective for tiny, faint galaxies or high-res planetary images.
For example, imaging the Orion Nebula is straightforward with a 80mm refractor, but capturing Jupiter’s cloud bands requires a longer focal length and specialized camera. Deep-sky targets need hours of exposure, while planets often need rapid video capture and processing.
Set realistic expectations: your portable system is a tool for broad, bright targets. Fine lunar detail or faint, distant galaxies demand larger, more stable setups.
How Long Should You Image? The Power of Stacking and Exposure Time
Deep-sky images improve with more exposure. Stacking many short frames reduces noise and reveals faint detail. Usually, doubling the signal-to-noise ratio requires quadrupling the total exposure time.
For instance, stacking 30-minute sessions over several nights can produce stunning images of galaxies like Andromeda. Shorter exposures help avoid star trailing and tracking errors but need enough total time to build detail.
In practice, plan for multiple sessions—especially if weather or equipment issues interrupt. Patience pays off in astrophotography.
Weather and Conditions: How They Impact Your Night of Shooting
Even the best portable system can’t fight nature. Clouds, wind, turbulence, and dew all threaten your imaging plans. A clear, stable sky with minimal wind and humidity is ideal.
For example, a cold night with calm air yields sharper stars and better data than a humid, breezy evening. Dew shields and heaters are often essential, especially in humid environments.
Be prepared: check weather forecasts, carry dew prevention gear, and plan your targets accordingly. Flexibility is your best friend in field astrophotography.
Recent Trends: What’s New in Portable Astrophotography?
From mid-2020s, the focus has been on automation, smaller mounts, and computational imaging. Brands like Unistellar and Vaonis have brought compact, fully automated systems to more users. They offer quick setup, live stacking, and app-controlled target selection.
Advances include better raw-data export, integrated control systems, and wider support for solar imaging and mosaics. These innovations make astrophotography more accessible but still demand understanding sky conditions and target limitations.
For example, new models support automated mosaics, letting you stitch together multiple images for larger targets—something once exclusive to expensive setups.
Smart Telescopes vs. Traditional Travel Rigs: Which Fits Your Style?
Smart telescopes are like your smartphone—quick, simple, and ready to go. They set up in minutes, often with just a few taps, and handle target finding, focusing, and stacking automatically.
Traditional rigs are more like a DSLR with a sturdy tripod—more setup, but also more control. They demand some learning but can be upgraded, repaired, and tailored to specific targets.
Here’s a quick comparison:
| Consideration | Smart Telescope | Traditional Travel Rig |
|---|---|---|
| Setup | Fast, automated | More assembly, calibration |
| Control | App-driven, limited customization | Manual, extensive options |
| Image Quality | Good for bright targets | Potentially very high |
| Upgradeability | Limited | Extensive, parts replaceable |
| Learning Curve | Low | Moderate to high |
Choose based on how much control you want, your patience for setup, and your target ambitions.
Key Factors to Consider Before Buying Your Portable System
Start by identifying your main targets—nebulae, galaxies, planets—and match your gear accordingly. Think about total weight, so you can carry everything comfortably. Check if your favorite targets fit within the system’s field of view without mosaics.
Next, consider tracking modes: do you prefer quick setup alt-azimuth, or more precise equatorial tracking? Ensure you can export raw data if you want to process images later. Battery life, app support, and weather resistance are also critical.
For example, a city-based amateur prioritizing quick trips might choose a smart system with built-in filters and long battery life. Someone heading to remote dark skies may prefer a modular rig with an equatorial mount and upgrade options.
Common Misconceptions That Could Trip You Up
Many think that more megapixels automatically mean better images. Not true—sensor quality, optics, and tracking matter more. Larger telescopes aren’t always better—they’re heavier and harder to move.
Filters won’t fix bad skies—light pollution filters help but can’t replace dark skies. Stacking improves images but can’t fix focus errors or clouds. And a smart telescope isn’t a magic box—learning the basics still helps.
For example, a beginner might buy an 8-inch reflector, expecting detailed images from city lights. Instead, they need a smaller, faster refractor with filters and patience.
Your Top Questions Answered: The Real Deal on Portable Astrophotography
What is the best portable astrophotography telescope for a beginner? A small refractor with a good mount and easy app control is ideal. Look for lightweight, with simple setup and decent optics.
Should I buy a smart telescope or build a rig? If you want quick results with minimal fuss, go smart. For more control, flexibility, and learning, a traditional rig suits better.
How much aperture do I need? For bright nebulae and star clusters, 80-100mm is enough. Deep-sky and faint galaxies benefit from larger apertures, but more weight and setup time.
Can I do both deep-sky and planetary imaging with one setup? Usually not. Deep-sky needs wider fields and longer exposures, while planets require high-speed video and different optics.
Will a small telescope collect enough light from faint targets? For many bright targets, yes. Faint galaxies need longer exposures, better tracking, and darker skies.
Conclusion
Portable astrophotography is a game of tradeoffs. A smart telescope can deliver stunning images with minimal setup, but a traditional rig unlocks more control and potential. Think about what excites you most—quick capture or long-term mastery—and choose accordingly.
In the end, the sky’s the limit. Your perfect setup is the one that inspires you to keep exploring, night after night, under the vast, glittering canvas above.
Fall Picks
fall essentials
As an affiliate, we earn on qualifying purchases.