

To accurately diagnose tilt and spacing issues, start with a visual inspection for uneven gaps or tilted surfaces. Use measurement tools like digital calipers or laser distance meters, ensuring they’re calibrated correctly. Follow step-by-step adjustment procedures, making small changes and verifying results often. Recognize signs like vibration or uneven wear to catch problems early. By applying these methods, you’ll confidently identify issues faster—keep going, and you’ll discover how to fix them effectively.
Key Takeaways
- Conduct regular visual inspections to identify uneven gaps, tilted surfaces, and off-center elements early.
- Use properly calibrated measurement tools like laser meters and calipers for accurate tilt and spacing assessment.
- Monitor equipment vibrations and wear patterns to detect misalignment or tilt issues promptly.
- Adjust components incrementally after calibration, ensuring secure connections and proper lubrication for precision.
- Follow systematic troubleshooting and maintenance routines to prevent guesswork and maintain optimal alignment.

Digital Caliper, Adoric 0-6" Calipers Measuring Tool – Electronic Micrometer Caliper with Large LCD Screen, Auto-Off Feature, Inch and Millimeter Conversion
Precise measurement: Measurement range: 0 – 6''/0 – 150 mm; Resolution: 0.01”/0.1 mm; Accuracy: +/- 0.2 mm/0.01”. Perfect…
As an affiliate, we earn on qualifying purchases.
As an affiliate, we earn on qualifying purchases.
Understanding the Basics of Tilt and Spacing Issues

Understanding tilt and spacing issues is essential for recognizing when your text isn’t looking right. To do this, you need to grasp the alignment fundamentals, which involve how your text lines up on the page. Basic terminology includes terms like “alignment,” “spacing,” and “tilt.” Alignment refers to how the text lines up horizontally and vertically, while spacing covers the gaps between letters, words, and lines. Tilt describes the angle at which your text is positioned—whether it’s straight or skewed. Knowing these basics helps you identify when something’s off, such as uneven spacing or tilted text, so you can correct it early. For example, being familiar with water parks can help you understand that proper spacing and tilt are crucial for a smooth experience. Mastering these fundamental concepts makes troubleshooting much easier and ensures your documents look professional and polished.

MILESEEY S50 Green-Beam Laser Distance Measure – 400ft Laser Measure, P2P, Side-Laser Alignment, Rechargeable, 2.4" IPS Backlit Display, Area/Volume Measurement, 8 Units, Indoor&Outdoor
4× Brighter Green-Beam Laser – Experience a laser dot 4x brighter than standard red laser. Powered by Green-beam…
As an affiliate, we earn on qualifying purchases.
As an affiliate, we earn on qualifying purchases.
Recognizing the Signs of Misalignment in Your Equipment

You can spot misalignment by performing visual checks to see if components are straight and level. Look for uneven wear patterns on belts or gears, which often indicate shifting. Additionally, unusual vibrations or noises during operation are clear signs that something’s off. Ensuring that your equipment’s connections are secure and properly paired with devices can also prevent operational issues stemming from misalignment.
Visual Alignment Checks
How can you tell if your equipment is misaligned just by looking at it? Start by observing the visual cues. Look for uneven gaps or inconsistent spacing, which can signal misalignment. Use color theory principles—notice if colors appear distorted or uneven, indicating skewed angles. Ergonomic design cues also help; screens or controls that seem tilted or off-center suggest misalignment. To clarify, check this table:
| Sign | Visual Indicator |
|---|---|
| Gap consistency | Uneven spaces between components |
| Color distortion | Colors don’t match or appear faded |
| Tilted surfaces | Equipment appears slanted or off-angle |
| Off-center elements | Controls or screens not aligned properly |
Regular visual checks with these tips help keep your equipment properly aligned, improving functionality and comfort. Additionally, proper maintenance can prevent further misalignment issues over time.
Uneven Wear Patterns
Uneven wear patterns are clear signs that your equipment may be misaligned. By conducting regular wear pattern analysis, you can detect early signs of imbalance or tilt that affect performance. Look closely at the contact surfaces; uneven or excessive wear in specific areas indicates misalignment issues. Recognizing these signs promptly helps prevent further damage and reduces downtime. Incorporate wear pattern analysis into your maintenance scheduling to catch problems early. Addressing misalignment quickly ensures your equipment runs smoothly and extends its lifespan. Don’t wait until the wear becomes severe; proactive detection through careful inspection saves you time and money. Consistent monitoring of wear patterns is a simple yet effective way to keep your equipment properly aligned and operating at peak efficiency. Additionally, understanding the importance of contrast ratio can help you assess the overall image quality and performance of your projector.
Mechanical Vibration Signs
Have you noticed unusual or persistent vibrations during equipment operation? These vibrations often indicate misalignment issues. Pay attention to the vibration frequency—if it matches the machine’s rotational speed or shows specific harmonic patterns, misalignment could be the cause. Resonance analysis helps identify whether certain vibration frequencies are amplifying, signaling potential problems. Consistent, high-amplitude vibrations, especially at specific frequencies, suggest that components aren’t properly aligned, causing uneven load distribution. By monitoring these vibration signs closely, you can detect misalignment early, reducing wear and preventing costly breakdowns. Regular vibration analysis, focusing on vibration frequency and resonance behavior, offers a reliable way to diagnose alignment issues before they escalate. Incorporating protective styling benefits from textile techniques can also contribute to maintaining proper equipment conditions. Addressing these signs promptly keeps your equipment running smoothly and efficiently.

ANGSO-AUTO ADAS Calibration Tool Kit Compatible with Honda Toyota Kia Ford ADAS Radar Aiming Calibration Tool,Post with 0-30 Centimeter Scale,Corner Reflector Target with Billet Aluminum Stand
Universal Compatibility: Fit for Honda, Toyota, Kia, and Ford vehicles,Whether you're a professional mechanic or a DIY enthusiast,…
As an affiliate, we earn on qualifying purchases.
As an affiliate, we earn on qualifying purchases.
Gathering the Necessary Tools for Accurate Diagnosis
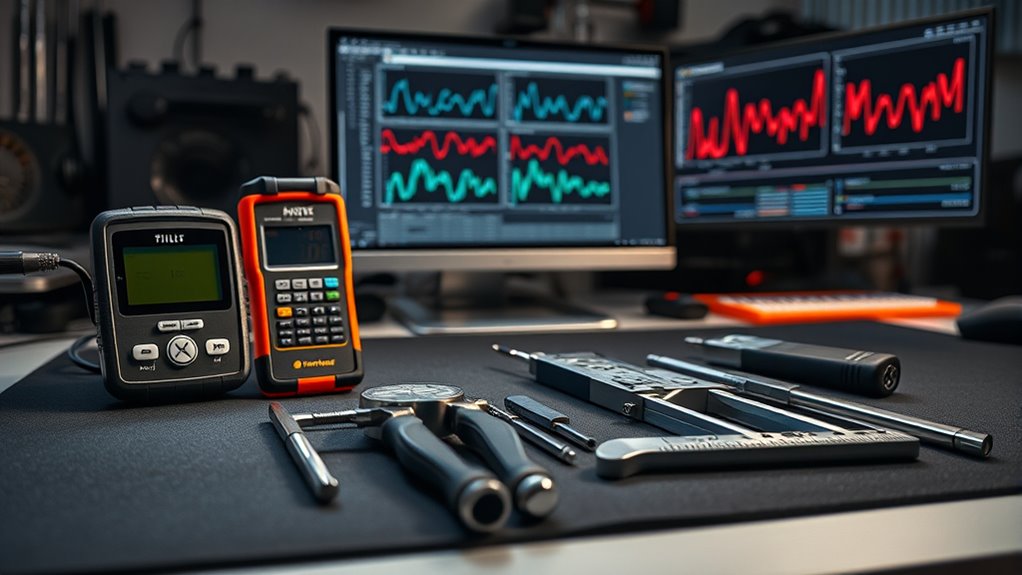
To accurately diagnose tilt and spacing issues, you need to gather the right tools that can provide precise measurements. Start with a reliable digital caliper or laser distance meter to assess spacing accurately. Ensure your measurement tools are correctly calibrated; sensor calibration is essential to avoid errors. A calibrated sensor guarantees your readings are consistent and trustworthy, which is critical for making informed adjustments. Additionally, consider tools for lubrication optimization, such as grease analyzers or lubrication testers, to ensure components operate smoothly. Proper lubrication reduces friction and wear, helping maintain correct spacing and tilt. By combining precise measurement devices with calibration and lubrication tools, you set a solid foundation for accurate diagnosis and effective correction of tilt and spacing issues.
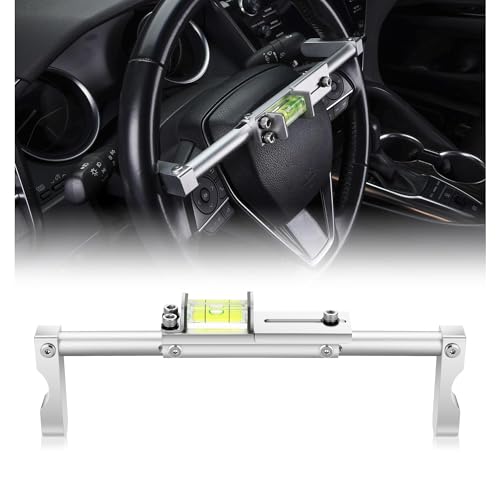
mocsenber Aluminum Steering Wheel Level Alignment Tool Suitable for Most Vehicles, Car Alignment Tool Kit, Alignment Tools Automotive
Universal Fit Compatibility – Fit steering wheels with internal diameters from 10.5" (270mm) to 13.4" (340mm), making it…
As an affiliate, we earn on qualifying purchases.
As an affiliate, we earn on qualifying purchases.
Visual Inspection Techniques for Spotting Common Problems

When inspecting for common problems, start by checking the alignment for consistency across the entire structure. Look for signs of tilt, such as uneven gaps or leaning surfaces, that indicate issues. Recognizing these symptoms early helps you address problems before they worsen. Additionally, consider the overall bedroom layout to ensure it maintains a cohesive farmhouse theme, which can also reveal subtle structural concerns.
Check Alignment Consistency
Checking alignment consistency through visual inspection is one of the simplest yet most effective ways to identify common spacing and tilt issues. It helps you spot inconsistencies that may be masked by alignment myths, which often lead to misdiagnosis. To improve accuracy, use calibration techniques like lining up edges or grids to verify uniformity. Pay close attention to how elements line up across different areas. For example:
| Area | What to Check | Common Issue |
|---|---|---|
| Top Margin | Consistent spacing | Uneven gaps |
| Sidebar | Vertical alignment | Tilted sections |
| Footer | Horizontal consistency | Misaligned text |
This visual method simplifies the process, making it easier to detect subtle misalignments without guesswork.
Identify Tilt Symptoms
Identifying tilt symptoms through visual inspection requires keen attention to detail and a systematic approach. Start by examining the equipment’s position, looking for uneven or skewed alignments. Check if the gear calibration appears off—misaligned gears often indicate tilt issues. Use software diagnostics if available; they can reveal subtle deviations or error codes related to tilt. Look for uneven spacing between components or inconsistent contact points, which suggest imbalance. Observe the overall setup for any warping or leaning that could affect performance. Ensuring proper biodiversity in the environment around the equipment can also prevent structural issues that contribute to tilt. Combining a visual check with software diagnostics allows you to spot tilt symptoms early. Accurate identification ensures you can address issues before they escalate, maintaining proper operation and preventing costly damage.
Using Measurement Tools to Assess Spacing and Tilt

Using measurement tools is vital for accurately evaluating the spacing and tilt of teeth. Proper measurement calibration ensures your tools provide precise readings, which is essential for effective diagnosis. When selecting a tool, consider accuracy, ease of use, and suitability for the specific measurements you need. Digital calipers and periodontal probes are common choices; choose one that offers clear, consistent results. Before starting, calibrate your tools according to manufacturer instructions to avoid errors. Accurate measurements help you identify subtle spacing issues and tilt deviations that might be missed visually. Keep your tools clean and handle them carefully to maintain their precision. Additionally, understanding air purifier features can help in selecting tools with integrated measurement capabilities for enhanced accuracy. By using well-calibrated tools and selecting the right ones, you’ll confidently assess the condition of teeth and make informed decisions about next steps.
Step-by-Step Procedures for Precise Adjustment

To achieve accurate adjustments of tooth tilt and spacing, you need to follow a systematic, step-by-step process. Begin by ensuring your tools are properly calibrated—perform calibration procedures to confirm measurements are accurate. Next, apply proper lubrication techniques to your adjustment devices, reducing friction and ensuring smooth, precise movements. Start with small adjustments, checking measurements after each step, and avoid rushing. Always verify your calibration before making adjustments to prevent errors. Use consistent pressure and technique, maintaining a steady hand. Record each change carefully to track progress. Revisit calibration procedures periodically to maintain accuracy. Additionally, utilizing passive voice detection tools can help identify and correct unclear or awkward phrasing in your instructions. By following these steps diligently, you’ll ensure your adjustments are precise, effective, and consistent, leading to better outcomes in tilt and spacing correction.
Troubleshooting Common Causes of Tilt and Spacing Errors

When tilt and spacing errors occur, they often stem from common issues with your tools or techniques. One frequent cause is incorrect sensor calibration, which can lead to inaccurate measurements and misalignment. Regularly check and calibrate your sensors to guarantee precision. Software troubleshooting also plays a critical role; glitches or outdated firmware can cause errors in how measurements are interpreted. Resetting or updating your software can resolve many issues. Additionally, verify that your calibration procedures follow manufacturer guidelines and that no hardware connections are loose. Ensuring proper filtering and pump protection is also essential, as clogged filters or pump issues can indirectly affect measurement accuracy. By systematically addressing sensor calibration and performing thorough software troubleshooting, you can identify and fix the root causes of tilt and spacing errors, ensuring your setup maintains consistent accuracy.
Implementing Preventative Measures to Maintain Proper Alignment

Regularly maintaining your equipment and following proper procedures can prevent tilt and spacing errors before they happen. Implementing effective lubrication strategies reduces friction and wear, keeping components aligned. Consistent operator training ensures everyone understands correct handling and adjustment techniques, minimizing mistakes. Establish a routine maintenance schedule to check alignment and lubrication levels. Use the following table to visualize key preventative measures:
| Preventative Measures | Benefits |
|---|---|
| Regular lubrication checks | Reduces component friction and misalignment |
| Operator training sessions | Ensures correct procedures and awareness |
| Visual inspections | Detects early signs of tilt or spacing issues |
| Scheduled maintenance | Maintains best equipment performance |
When to Seek Professional Assistance for Complex Diagnoses

Complex tilt and spacing issues often require professional expertise, especially when standard troubleshooting steps don’t resolve the problem. If you find yourself stuck after basic adjustments, it’s time to contemplate expert help. Professionals utilize advanced calibration techniques and software diagnostics to identify underlying issues. You should seek assistance when:
- Adjustments don’t improve tilt or spacing after multiple attempts
- The problem persists despite recalibrations or hardware checks
- Software diagnostics reveal errors or inconsistencies
- You’re unsure how to safely perform advanced calibration procedures
Professional technicians can analyze complex data, perform precise calibrations, and ensure your equipment functions correctly. Recognizing these signs ensures you get the right help before further damage occurs.
Frequently Asked Questions
How Often Should I Check My Equipment for Tilt and Spacing Issues?
You should check your equipment for tilt and spacing issues regularly, ideally following your calibration schedules and maintenance routines. Typically, inspecting weekly or bi-weekly helps catch problems early, ensuring peak performance. Always stay attentive after any equipment move or maintenance, and document your checks. Consistent monitoring keeps your system aligned and prevents costly errors, so make it a habit to inspect and recalibrate as part of your routine maintenance.
Can Environmental Factors Cause Misalignment Over Time?
Environmental effects, especially temperature fluctuations, humidity, and vibrations, can cause misalignment over time. These factors impact equipment, inducing subtle shifts that lead to tilt and spacing issues. Ignoring environmental impact risks long-term effects like degraded performance and costly repairs. To maintain precise alignment, you should regularly check your equipment, account for environmental influences, and implement protective measures, ensuring consistent accuracy and avoiding avoidable problems down the line.
Are There Specific Brands or Models More Prone to Tilt Problems?
Certain brands and models are more prone to tilt problems due to brand susceptibility and design differences. You should pay attention to the reputation of the brand and specific model reviews, as some tend to have higher failure rates or manufacturing inconsistencies. By researching model differences, you can identify which options are more reliable, reducing your chances of encountering tilt issues and ensuring better long-term performance.
What Are the Safety Precautions During Adjustment Procedures?
While adjusting tilt and spacing, safety is your top priority. Always wear protective gear like gloves and safety glasses to prevent injuries. Follow emergency protocols, such as turning off the machine and unplugging it if something goes wrong. Keep the workspace clear and communicate with others nearby. Just as precision matters in adjustments, safety precautions guarantee you avoid accidents, turning potential hazards into safe, controlled procedures.
How Do I Document and Track Changes After Adjustments?
You should document and track changes by updating your maintenance records and adjustment logs promptly after each adjustment. Record details like the date, specific adjustments made, tools used, and any observed effects. This systematic approach helps you monitor progress, identify patterns, and guarantee consistency. Regularly reviewing these logs allows you to make informed decisions, maintain accuracy, and improve your overall diagnosis process effectively.
Conclusion
Now that you know how to spot and fix tilt and spacing issues, you’ll be better equipped to keep your equipment running smoothly. Regular checks and adjustments can prevent small problems from snowballing into bigger headaches. Think of it as tightening the reins before things get out of hand—staying proactive guarantees your setup stays on point. When in doubt, don’t hesitate to call in the pros; it’s better to be safe than sorry.