To plan a time-lapse capturing meteors, satellites, and the Milky Way, start by checking celestial event calendars and moon phases for ideal viewing, aiming for new moon nights. Choose dark, open locations with minimal light pollution, and prepare your gear in advance. Use apps to track celestial movements and schedule your shoot during peak activity times. Focus on your composition and camera settings, then proceed with confidence—there’s plenty more to discover for stunning night sky sequences.
Key Takeaways
- Research celestial event timings and moon phases to schedule optimal time-lapse shoots for meteors, satellites, and the Milky Way.
- Choose dark, unobstructed locations with minimal light pollution and clear horizons for better visibility and framing.
- Use wide-angle lenses with fast apertures and stable tripods to capture broad, sharp night sky scenes effectively.
- Plan camera settings: manual focus, ISO 1600-3200, and shutter speeds around 20-30 seconds, adjusting for trail or starry sky effects.
- Incorporate tracking mounts and celestial apps to enhance precision in capturing moving objects like meteors and satellites within the time-lapse.
Rokinon FE14M-C 14mm F2.8 Ultra Wide Lens for Canon (Black)
SUPERIOR IMAGE QUALITY – Experience exceptional sharpness and clarity with 14 elements in 10 groups, designed to deliver…
As an affiliate, we earn on qualifying purchases.
As an affiliate, we earn on qualifying purchases.
How to Identify the Best Celestial Events for Your Time-Lapse
Wondering how to choose the perfect celestial events for your time-lapse? Start by researching celestial event prediction sources to identify upcoming opportunities like meteor showers, satellite passes, or the Milky Way’s visibility. Pay attention to moon phase considerations, as a new moon offers darker skies, making faint objects more visible. Conversely, a full moon can wash out dimmer stars and meteors. Timing is essential—plan your shoot around events when the sky is clear and the celestial activity peaks. Check local weather forecasts and astronomical calendars to guarantee ideal viewing conditions. By focusing on accurate predictions and moon phases, you’ll increase your chances of capturing stunning, high-quality celestial sequences that truly stand out in your time-lapse. Additionally, exploring digital concepts can enhance your understanding of how to effectively present your time-lapse results.

Equatorial Mount Star Tracker with Ball-Head Gimbal for Astrophotography
The shell of the equatorial mount is made of PETG and carbon fiber (CF).
As an affiliate, we earn on qualifying purchases.
As an affiliate, we earn on qualifying purchases.
Choosing the Perfect Location and Setting Up Your Equipment
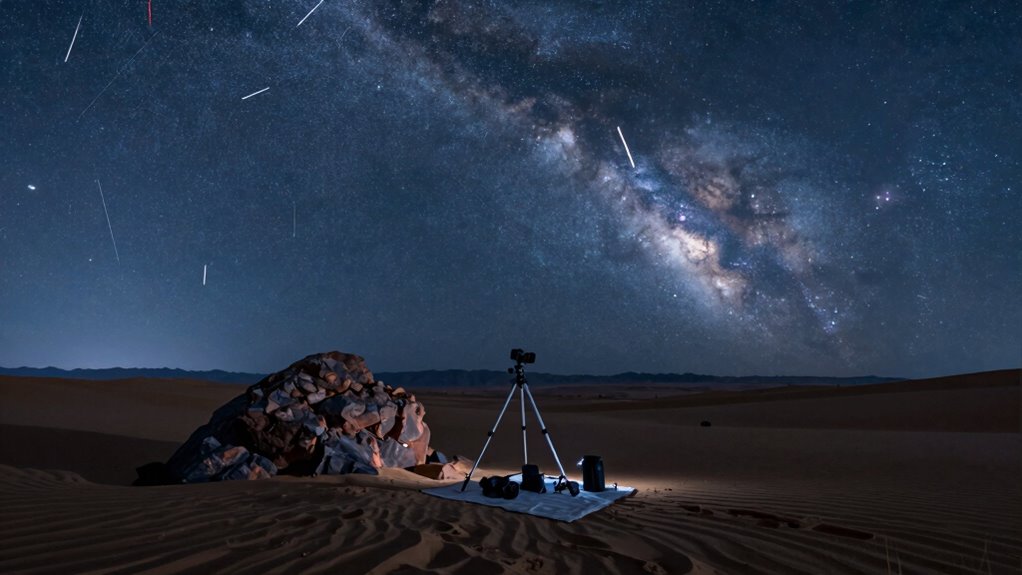
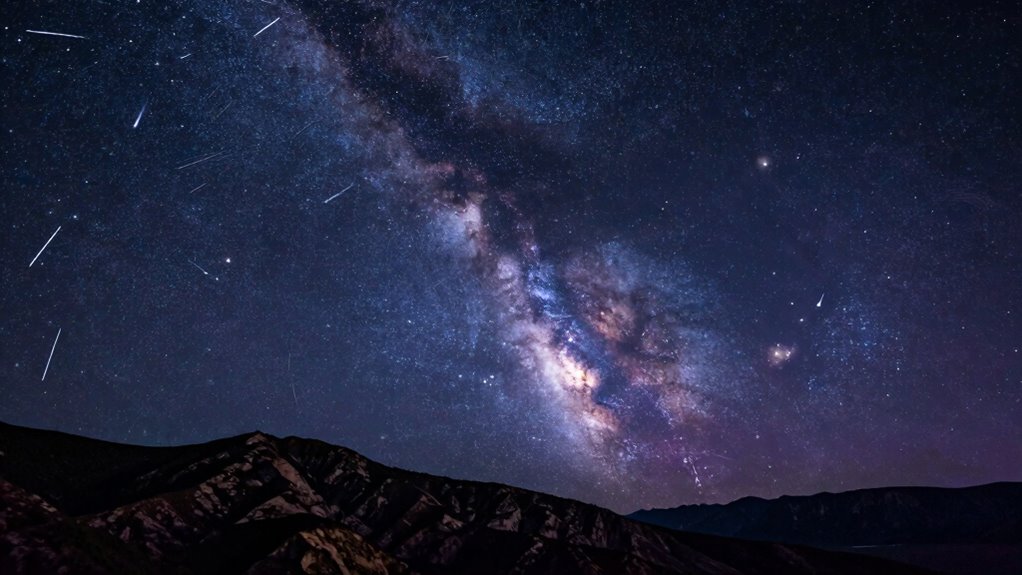
Selecting the right location is essential for capturing stunning celestial time-lapses, as a dark, unobstructed sky enhances visibility and image quality. You want a spot away from city lights, with minimal light pollution, to see the solar wind’s subtle effects and star trails clearly. Find a high vantage point with a clear view of the horizon, avoiding trees and buildings that could block your shot.
- A remote hilltop with minimal artificial glow
- An open field free of obstructions
- A location with stable ground for equipment stability
- A spot with little to no moonlight interference
Setting up in such a place allows you to capture the movement of satellites, meteors, and the Milky Way’s intricate star trails, making your time-lapse truly breathtaking. Additionally, consider incorporating eco-friendly natural pools into your backyard design for a unique viewing experience. This optimal setup can also enhance color accuracy in your images, ensuring that the celestial bodies are vividly represented.

Celestron – Heavy Duy Alt-Azimuth Tripod – Sturdy Extendable Aluminum Tripod – Use for Spotting Scope, Binocular, Camera, and Small Telescope – Slow Motion Handles for Smooth Small Adjustments
IDEAL SUPPORT FOR YOUR OPTICS: Use your spotting scope, binocular, camera, or small telescope for extended viewing sessions…
As an affiliate, we earn on qualifying purchases.
As an affiliate, we earn on qualifying purchases.
What Equipment and Camera Settings Are Best for Astrophotography?
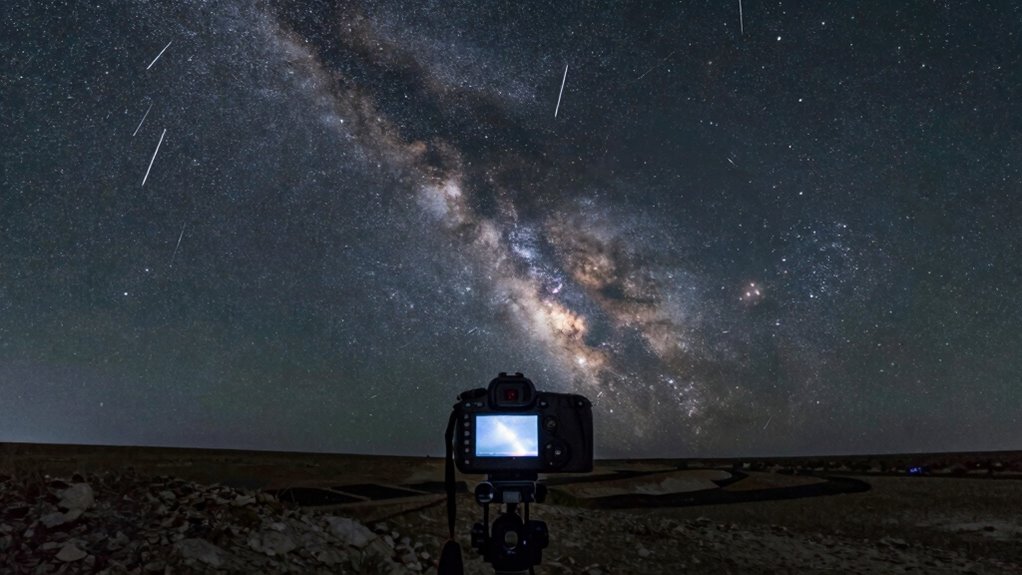
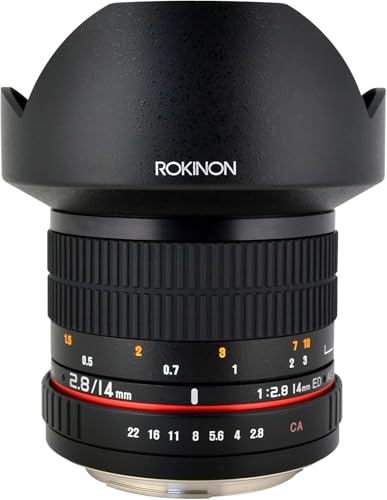
Choosing the right equipment and camera settings can make or break your astrophotography time-lapse. Lens selection is essential; a wide-angle lens with a fast aperture (f/2.8 or lower) captures more light and broadens your field of view, perfect for star trails and the Milky Way. Consider weather considerations—clear, dry nights with minimal humidity reduce haze and improve image quality. Use manual focus to guarantee sharp stars, and set your ISO between 1600 and 3200 to balance brightness with noise. Keep your shutter speed around 20-30 seconds to avoid star trails, unless intentionally capturing them. A sturdy tripod and remote shutter release help prevent vibrations. Adjust settings based on your specific scene and weather, always prioritizing stability and clarity.

LoneStar Tracking Hidden GPS Tracker Device Yabby3 – 4G/5G Weatherproof Car, Trailer, Vehicle & Asset Tracking, Anti-Theft Satellite Tracking, Real-Time Location & Security(Low Cost Subscription Plan)
HIDDEN CAR TRACKER DEVICE WITH EXCEPTIONAL BATTERY LONGEVITY: Our Vehicle GPS Tracker, powered by a mere 3 AAA…
As an affiliate, we earn on qualifying purchases.
As an affiliate, we earn on qualifying purchases.
When and How to Schedule Your Night Sky Shoot
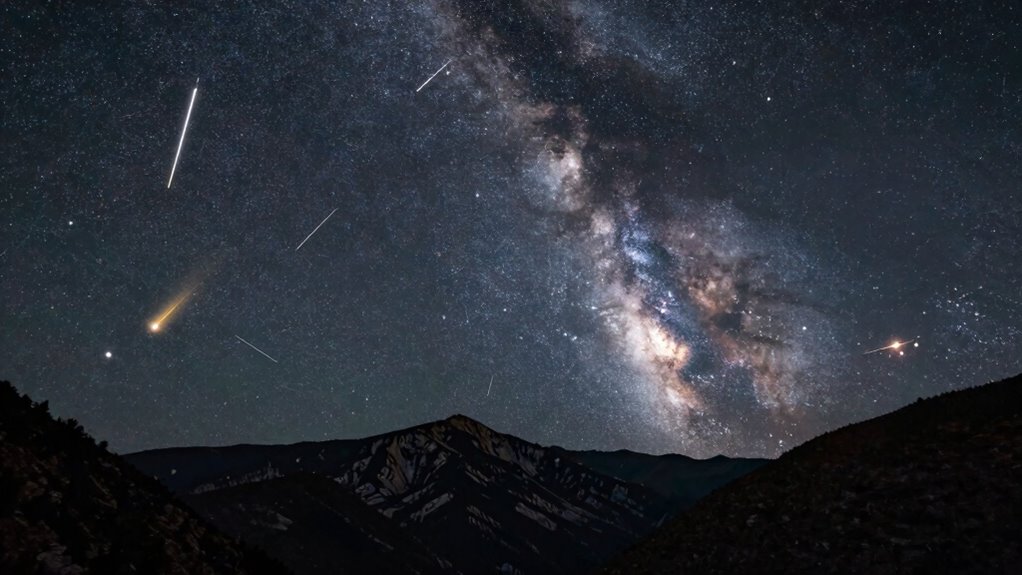
Timing is essential for capturing stunning night sky shots, so you need to plan your shoot around specific astronomical conditions. To maximize your chances, consider the timing of meteor showers, when meteors streak across the sky in dramatic bursts. Use celestial navigation to find the best vantage points, such as dark sky parks or open fields away from light pollution. Aim for nights with clear, moonless skies for ideal visibility and longer exposures. Pay attention to weather forecasts and avoid cloudy evenings. Additionally, plan your shoot during the period when the Milky Way is high overhead, offering a stunning backdrop. By aligning your schedule with these celestial events and conditions, you’ll create striking, time-lapse images of meteors, satellites, and star trails.
How to Track Meteors, Satellites, and the Milky Way Effectively
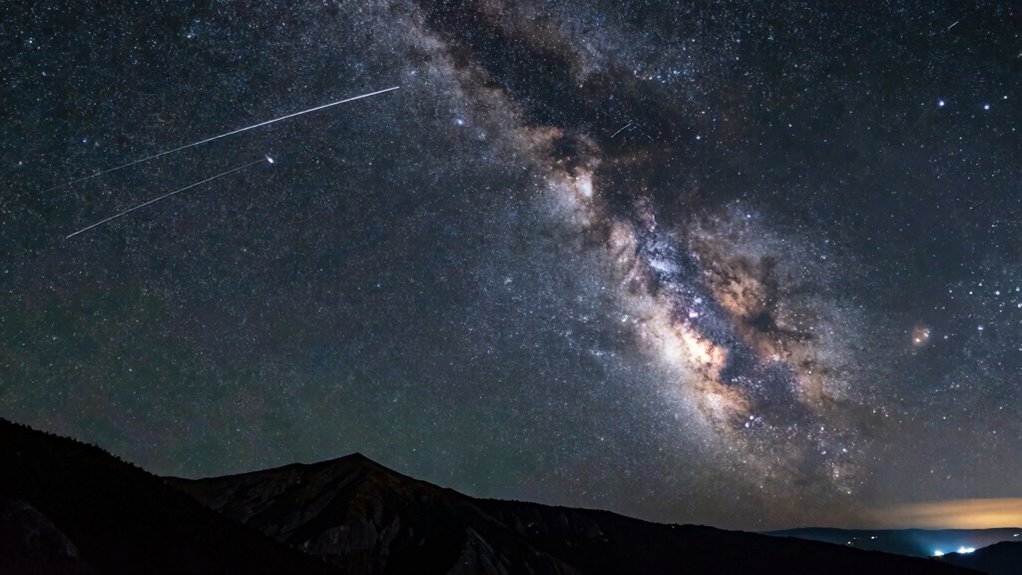
To track meteors, satellites, and the Milky Way effectively, you need to understand their movement patterns and use the right tools. Meteor showers follow predictable annual paths, so consult meteor shower calendars to time your shoots. Satellite tracking apps help you locate satellites passing overhead, allowing you to plan your camera angles and exposure settings. The Milky Way moves across the sky nightly, so familiarize yourself with its position using star charts or astronomy apps. During meteor showers, aim your camera toward radiant points for maximum effect. For satellites, track their paths in real-time with satellite tracking tools. By understanding these patterns and utilizing precise tracking tools, you’ll improve your chances of capturing stunning, well-composed night sky sequences.
Tips for Composing Engaging Night Sky Sequences
To create mesmerizing night sky sequences, you should incorporate interesting foreground elements that add depth and context. Experiment with dynamic camera movements to make your shots feel lively and engaging. Combining these techniques will help you craft more compelling and immersive time-lapse videos. Additionally, understanding the significance of LPGA milestones can inspire unique storytelling in your compositions.
Frame With Foreground Interest
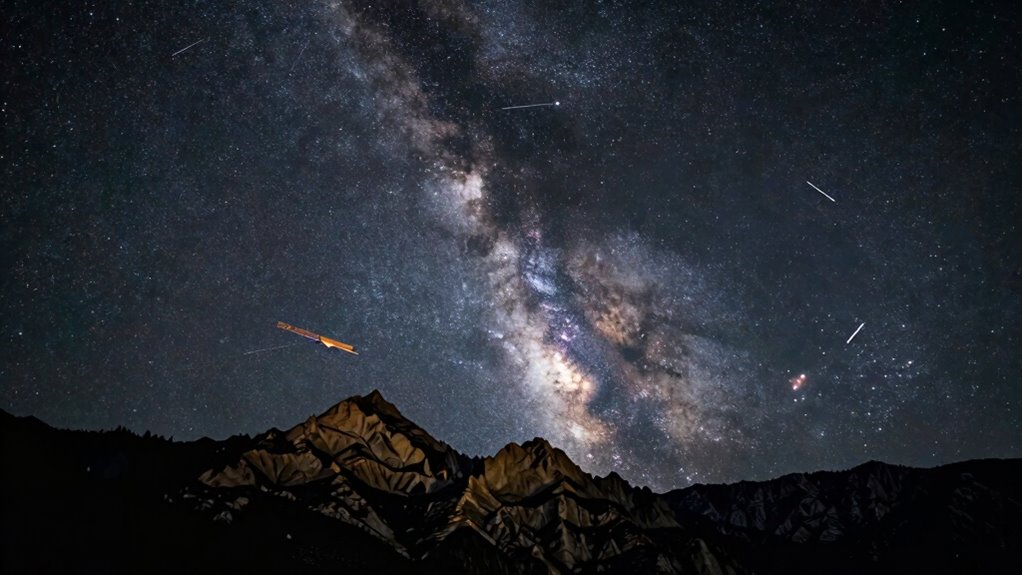
Including a mesmerizing foreground element can make your night sky sequence much more engaging, drawing viewers’ eyes into the scene and providing context for the stars or celestial movement. Effective foreground framing adds depth enhancement, making the scene feel immersive and three-dimensional. To achieve this, choose objects like trees, rocks, or buildings that complement the sky without overpowering it. Position them thoughtfully within your frame to lead the viewer’s gaze toward the celestial features. Focus on balancing the foreground and background elements, creating a sense of scale and perspective. This approach not only adds visual interest but also guides the viewer through the scene naturally. Remember, a well-chosen foreground transforms a simple night shot into a captivating story.
- Towering trees reaching toward the sky
- Rustic barn silhouetted against stars
- Jagged mountain ridges in the distance
- A reflective lake or pond anchoring the scene
Use Dynamic Camera Movements
Dynamic camera movements can considerably enhance the visual impact of your night sky sequences, making them more immersive and engaging. Incorporate camera motion to create dynamic framing that guides viewers’ focus and adds energy to your shots. Use smooth pans or gentle tilts to reveal sweeping scenes of the Milky Way or track fast-moving meteors and satellites. Consider camera dolly or slider movements for fluid changes that emphasize shifting perspectives. These movements help break static compositions and add a sense of motion, making your time-lapse more mesmerizing. Be intentional with your camera motion—avoid excessive or erratic movements that distract from the scene. Instead, aim for purposeful, subtle shifts that complement the natural flow of the night sky.
Troubleshooting Common Challenges in Astrophotography
When facing challenges in astrophotography, optimizing your camera settings is vital to get clear, sharp images. Managing light pollution helps guarantee your shots aren’t washed out by unwanted brightness, while properly stabilizing your equipment prevents blurry frames. Addressing these common issues sets the foundation for successful time-lapse photography of the night sky.
Camera Settings Optimization
Optimizing camera settings is essential for capturing clear, detailed astrophotographs, especially when troubleshooting common challenges. Proper adjustments ensure sharp images and minimize issues like blurriness or star trails. Focus on maintaining camera stability by using a sturdy tripod and remote shutter release. Confirm your lens calibration is accurate to prevent distortion and focus errors. Select a wide aperture to gather maximum light, and set a high ISO carefully to balance brightness without excessive noise. Pay attention to the exposure time—too long can cause star trails, too short may miss details. Keep your settings consistent throughout your shoot. Remember, fine-tuning these elements helps you overcome technical hurdles and captures stunning celestial scenes.
Managing Light Pollution
Light pollution is one of the biggest hurdles in capturing clear astrophotographs, especially if you’re shooting near urban areas. The urban glow from streetlights, buildings, and other artificial sources creates a haze that washes out faint celestial objects. To manage light pollution, plan your shoots during new moon phases or when the sky is darkest. Use light pollution filters designed for astrophotography to block out unwanted wavelengths. You can also choose locations farther from city centers, where the urban glow is less intense. Additionally, adjusting your camera’s exposure settings helps minimize the impact of light pollution without losing image detail. Post-processing software can further reduce light pollution effects, but starting with a darker site and proper filters makes the biggest difference in capturing crisp, vibrant night sky images.
Stabilizing Equipment Properly
Properly stabilizing your astrophotography equipment is essential for capturing sharp, clear images of the night sky. Stable camera stabilization prevents blurring caused by movement, ensuring your shots are crisp and detailed. To achieve this, carefully calibrate your equipment before each session, checking for any wobble or imbalance. Use a sturdy tripod or mount that can withstand wind and vibrations, and double-check that all screws and connections are tight. Keep the entire setup level to avoid unwanted tilts. When focusing on your target, make sure your tracking mount is accurately calibrated to match celestial motion. These steps help eliminate common issues like camera shake and misalignment, resulting in cleaner images of meteors, satellites, or the Milky Way.
Post-Processing Techniques to Enhance Your Time-Lapse
Post-processing is a crucial step in transforming your raw time-lapse footage into a polished, engaging sequence. To enhance your night sky scenes, focus on star trail techniques that emphasize the movement of stars and celestial objects. Proper lens calibration guarantees your images are sharp and free of distortions, making post-production adjustments more effective. Use stacking software to blend multiple frames for smoother star trails or to reduce noise. Adjust brightness and contrast to highlight the Milky Way or meteors without overexposing details. Here’s a quick guide:
| Technique | Purpose |
|---|---|
| Star trail techniques | Create smooth, dynamic star movements |
| Lens calibration | Ensure image sharpness and accuracy |
| Noise reduction | Improve clarity in low-light shots |
| Contrast adjustment | Enhance celestial features |
Final Checklist to Prepare for Your Night Sky Adventure
Preparing thoroughly before heading out guarantees your night sky photography session runs smoothly and yields stunning results. To do this, review your gear, confirming your camera, tripod, and lenses are ready and functioning. Check the weather forecast to avoid clouds blocking celestial mythology scenes and observe the moon phase, as it influences your shot of the Milky Way’s core. Pack extra batteries and memory cards, so you’re prepared for a long night. Familiarize yourself with astronomical history to anticipate celestial events like meteor showers or satellite passes. Visualize a quiet, dark spot with minimal light pollution, where stars shine like ancient stories etched in the sky. This preparation ensures you capture the cosmos’ timeless beauty and historical significance seamlessly.
Frequently Asked Questions
How Can I Predict the Best Meteor Shower Nights in Advance?
You can predict the best meteor shower nights through meteor shower forecasting, which relies on celestial event timing. Check reputable astronomy websites or apps for upcoming peak dates, as they provide detailed predictions based on moon phases and earth’s orbit. Keep an eye on local weather forecasts too, since clear skies are vital. Planning around these factors ensures you catch the most spectacular meteor displays at their peak.
What Safety Precautions Should I Take During Night Sky Photography?
Think of night sky photography as dancing in the dark—stay aware and cautious. Always secure your equipment to prevent accidents, and avoid handling gear in the dark to prevent injuries. Protect your eyes from bright lights, and choose a location away from light pollution for better images. Be mindful of your surroundings, watch for uneven ground, and never leave your gear unattended. Safety keeps your stargazing smooth and your photos stunning.
Can I Shoot Astrophotography With a Smartphone or Only With Professional Gear?
You can definitely try astrophotography with a smartphone, but keep in mind its limitations like smaller sensors and less manual control, which can affect image quality. Professional equipment, on the other hand, offers larger sensors, better lenses, and adjustable settings, resulting in sharper, more detailed shots. If you’re serious about capturing stunning night sky images, investing in dedicated gear is worth it, but smartphones are a good starting point for beginners.
How Do Weather Conditions Affect My Time-Lapse Planning?
Weather conditions can make or break your time-lapse adventure. Cloud cover can completely obscure your shot, turning your night into a cloudy, gloomy mess. Temperature fluctuations can cause equipment to fog up or malfunction, ruining your footage. To plan effectively, check weather forecasts regularly, choose clear nights, and be prepared for sudden changes. Remember, a perfect night sky is as rare as finding a needle in a haystack!
What Are Common Mistakes to Avoid in Astrophotography Sequencing?
Avoid common mistakes like neglecting equipment calibration, which can cause blurry images or focus issues. Always double-check your camera settings and make sure your lens is properly focused using precise focusing techniques. Rushing your setup or forgetting to test your gear beforehand leads to wasted shots. Take time to calibrate and focus correctly, so your astrophotography sequencing captures sharp, detailed images of meteors, satellites, and the Milky Way.
Conclusion
As you weave your night sky tapestry, remember each shot is a star’s whisper, a satellite’s glide, and the Milky Way’s gentle glow. With patience and precision, you’ll craft a celestial symphony that dances across your screen like a cosmic ballet. Trust your gear, embrace the night’s magic, and let your time-lapse become a shimmering story written across the universe’s endless canvas. Your adventure is the starry brushstroke on the universe’s grand mural.