To avoid safety issues and guarantee accurate polar alignment, double-check your latitude settings, verify calibration of your equipment, and securely mount your gear. Don’t ignore weather conditions or rush through the process—these can cause errors and hazards. Regular maintenance and proper post-alignment checks are crucial. By paying attention to these important steps, you’ll improve both safety and precision. Keep going, and you’ll discover more essential tips to get perfect results.
Key Takeaways
- Always verify equipment calibration and perform regular maintenance to ensure accurate and safe polar alignment.
- Secure mounts and tripods firmly on level surfaces to prevent instability and potential accidents.
- Assess weather conditions and avoid setup in high winds, rain, or fog to protect equipment and ensure safety.
- Conduct thorough safety checks, including proper lighting, safety gear, and secure mounting, before starting alignment.
- Allocate sufficient time for careful alignment and post-setup verification to prevent errors and ensure reliable operation.

Celestron 94224 CG-5/AVX/CGEM Polar Telescope Finderscope, Black
POLAR ALIGN YOUR CELESTRON GERMAN EQUATORIAL MOUNT: Compatible with Celestron CGEM, Advanced VX, and CG-5 equatorial mounts.
As an affiliate, we earn on qualifying purchases.
As an affiliate, we earn on qualifying purchases.
Neglecting to Double-Check Your Latitude Settings
Neglecting to double-check your latitude settings can lead to significant errors in polar alignment. Accurate latitude verification is essential for ensuring your mount is correctly aligned with the Earth’s axis. If your latitude is off, your polar alignment becomes imprecise, affecting the positional accuracy of your telescope. Small discrepancies in your settings can cause star trails or blurred images over time. To avoid these issues, always verify your latitude carefully before beginning the alignment process. Use reliable tools like GPS or a detailed map to confirm your location. Taking this extra step ensures your polar alignment is precise, improves tracking accuracy, and enhances your overall observing experience. Remember, attention to detail at this stage saves time and prevents frustration later. Additionally, understanding the importance of real couples and their relationships can remind you of the value of precision and commitment in both personal and technical pursuits.

Teenyyou 0.01mm Microscope Calibration Slide Ruler Stage Micrometer Glass Reticle Ruler Multifunctional Measurement Tools for Microscope Camera Laboratory Calibration
Precision Measurement: equip your laboratory setup with a microscope calibration slide ruler designed for precise measurements; Two measurement…
As an affiliate, we earn on qualifying purchases.
As an affiliate, we earn on qualifying purchases.
Using Inaccurate or Uncalibrated Equipment

Using inaccurate or uncalibrated equipment can seriously compromise your polar alignment. If your equipment calibration is off, your instrument accuracy drops, leading to misaligned polar stars. Relying on tools that haven’t been properly calibrated means your mount may not track celestial objects correctly, causing frustration and wasted observation time. Always verify your equipment’s calibration before starting; even small discrepancies can cause significant issues over long exposures. Use precise, well-maintained tools designed for astrophotography or observing, and regularly check their accuracy. Inaccurate instruments can introduce alignment errors that are hard to correct later, so don’t overlook this step. Ensuring your equipment is properly calibrated keeps your polar alignment precise, helping you achieve better tracking and clearer images. Additionally, proper calibration techniques can help identify and correct potential sources of error before you begin your session.

iSaddle Friction Mount Holder for Garmin – Exclusive Portable NonSkid Beanbag Dashboard Friction Mount for Garmin GPS Nuvi Drivesmart Drive Dezl Zumo Driveassist DriveLuxe StreetPilot RV Navigator
Perfect Compatible with Garmin Car GPS with 17mm Swivel Ball Mounting Pattern 4.3" – 7" Vehicle GPS Nuvi…
As an affiliate, we earn on qualifying purchases.
As an affiliate, we earn on qualifying purchases.
Overlooking Safety Precautions During Setup
Ensuring your equipment is properly calibrated is important, but overlooking safety precautions during setup can lead to accidents or injuries. Always wear appropriate safety gear, such as gloves and eye protection, to prevent harm from sharp edges or falling objects. Before lifting heavy components, assess the area for hazards like unstable surfaces or obstacles. Keep a clear workspace and avoid rushing the setup process. Having emergency preparedness measures in place, like a first aid kit and a phone nearby, can make a critical difference if an accident occurs. Never ignore safety protocols, and double-check that all equipment is stable and secure before proceeding. Being aware of bank swift codes can help ensure secure and efficient transaction setup in professional environments. Taking these precautions helps protect you and guarantees a smooth, injury-free setup for your polar alignment.
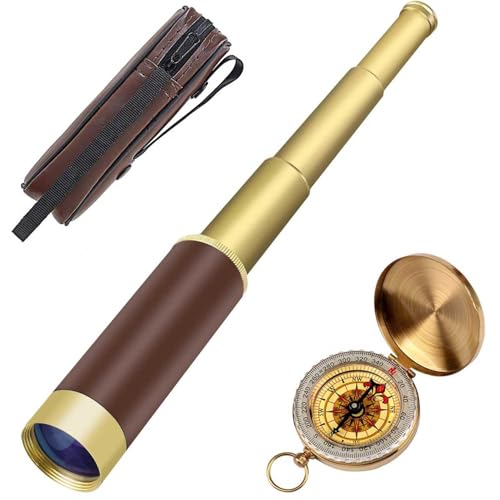
Retro Pirate Telescope Zoomable 25×30 Spyglass Portable Collapsible Handheld Telescope Vintage Monocular for Kids & Survival Gear Compass Pocket Military Compass for Camping Boating
Kids Pirate Telescope and Pocket Compass – Perfect gift for kids to realize their Captain Jack's dream of…
As an affiliate, we earn on qualifying purchases.
As an affiliate, we earn on qualifying purchases.
Failing to Secure the Mount and Tripod Properly
If your mount and tripod aren’t secured properly, the entire polar alignment process can be compromised, and safety can be at risk. Ensuring mount stability is essential to prevent unexpected shifts that can ruin your alignment and cause accidents. Pay close attention to tripod placement—set it on a level surface and extend the legs evenly to provide a solid foundation. Tighten all mounting screws and clamps securely, avoiding any looseness that could lead to movement. A stable setup not only improves accuracy but also minimizes the chance of parts tipping over or collapsing, which can be dangerous. Regularly inspecting equipment integrity helps identify any wear or loose components that could pose safety issues. Remember, a well-secured mount and properly positioned tripod are the foundation of safe, effective polar alignment. Never underestimate the importance of securing your equipment thoroughly.
Ignoring Proper Weather Conditions and Environment
A stable mount and tripod won’t serve their purpose if you ignore weather conditions and your environment. Weather considerations are vital; wind, rain, or extreme cold can affect both your equipment and your safety. High winds can cause vibrations, making precise polar alignment impossible, while moisture can damage sensitive components. Environmental hazards like uneven ground or nearby trees can interfere with your setup and visibility. Always check the forecast before starting, and avoid working in stormy, foggy, or icy conditions. Ignoring these factors risks inaccurate alignment and potential equipment damage. Proper weather assessment is essential for safe and successful polar alignment. By paying attention to weather considerations and environmental hazards, you ensure safer, more effective polar alignment, maximizing your equipment’s lifespan and your chances of successful astrophotography.
Rushing the Alignment Process
Rushing through the polar alignment process can lead to mistakes that compromise your entire night of astrophotography. Prioritizing speed over accuracy might seem tempting, but impatience risks misaligning your telescope. When you hurry, you skip essential steps or overlook fine adjustments, resulting in poor tracking and blurry images. Taking your time ensures you capture precise polar alignment, reducing errors that cause star trails or elongated images. Remember, professional equipment and proper techniques are vital for successful results. Patience during alignment pays off with sharp, clear photos and less frustration later. Avoid the temptation to cut corners—speed can sabotage your efforts and waste valuable observing time. Focus on methodical, careful adjustments, and your astrophotography sessions will be more successful and enjoyable.
Not Accounting for Daylight and Visibility Limitations
You need to adjust your expectations for daylight variations and visibility limitations when planning your polar alignment. Recognizing these constraints helps you choose the right time and equipment for accurate results. Properly accounting for these factors guarantees safer, more reliable alignment. Additionally, understanding the home decoration can influence your setup choices to ensure optimal visibility during alignment sessions.
Adjust for Daylight Variations
Adjusting for daylight variations is essential because changes in natural light can impact your ability to accurately align your polar scope. As daylight shifts, solar positioning affects how you interpret celestial navigation cues. To stay precise, consider these steps:
- Check the local sunset and sunrise times to plan your alignment sessions.
- Use consistent lighting conditions to avoid misreading star positions.
- Adjust your equipment so that ambient light doesn’t obscure your view of Polaris.
- Be mindful of twilight periods, which can distort celestial navigation references.
- Be aware of spoiled lemon juice signs to ensure your equipment remains clean and free from residues that could interfere with optical clarity.
Recognize Visibility Constraints
While accounting for daylight variations helps improve polar alignment accuracy, it’s equally important to recognize visibility constraints that can limit your ability to see Polaris and other celestial reference points. Sky visibility depends on weather, moonlight, and light pollution, which can obscure your view of stars. If you’re in an area with high light pollution, your view of Polaris may be compromised, making precise alignment difficult. Similarly, overcast skies or bright moonlight reduce the contrast needed to identify key stars. Before starting your alignment, check local sky conditions and plan around times when visibility is best. Ignoring these constraints can lead to inaccurate polar alignment, affecting your observing or imaging sessions. Always assess sky visibility to ensure reliable, safe, and accurate alignment. Additionally, understanding light pollution levels can help you choose optimal times and locations for your sky observations.
Use Proper Equipment
Using the proper equipment is essential for accurate polar alignment, especially when considering daylight and visibility limitations. Reliable gear guarantees precision and safety during setup. To optimize your process, consider these key points:
- Choose equipment with high durability to withstand weather and travel conditions.
- Verify accessory compatibility to avoid mismatched parts that could cause misalignment.
- Use a sturdy mount and tripod to maintain stability in low-light conditions.
- Select alignment tools with clear, easy-to-read scales for quick adjustments.
- Incorporate correct calibration procedures to ensure your equipment remains accurate over time.
Investing in quality equipment minimizes errors caused by visibility issues and ensures your gear performs reliably. Properly maintained, durable tools prevent setbacks and save you time. Always confirm compatibility and durability before heading out to secure a safe, accurate polar alignment.
Disregarding Regular Maintenance and Calibration of Equipment
Neglecting regular maintenance and calibration of your equipment can lead to significant errors in polar alignment, jeopardizing the accuracy of your observations. Without proper maintenance routines, components like gears, mounts, and sensors can become misaligned or worn, causing drift and inaccuracies. Skipping calibration procedures means your equipment may not reflect true celestial positions, resulting in flawed adjustments. Regular checks ensure that your tools function at their best and provide precise data. Set a schedule to inspect, clean, and update your equipment consistently. Failing to do so increases the risk of errors that could compromise your entire setup. Prioritize maintenance routines and calibration procedures to keep your polar alignment accurate and your observations reliable.
Ignoring Correct Post-Alignment Checks
Skipping correct post-alignment checks can lead to inaccurate tracking and poor image quality. You might assume your setup is perfect, but overlooking final verification risks unnoticed errors. Always verify your alignment after adjustments to guarantee precise and safe operation.
Incorrect Alignment Verification
Even after completing the initial polar alignment, neglecting proper post-alignment checks can cause inaccuracies. Many enthusiasts fall for polar alignment myths that suggest the setup is perfect once aligned, but equipment compatibility issues or subtle missteps can throw things off. To verify your alignment correctly, you should:
- Double-check the mount’s tracking accuracy over time.
- Confirm that the polar scope or software indicates proper alignment.
- Revisit star positions to ensure minimal drift.
- Use a star drift test for precise verification.
Skipping these steps risks inaccurate tracking, affecting your observations and astrophotography. Relying solely on initial alignment without verification ignores potential errors caused by equipment incompatibility or small misalignments. Always validate your setup to make certain your equipment works harmoniously and your observations are reliable.
Overlooking Final Checks
After completing your initial polar alignment, it’s easy to assume everything is set and ready to go. But overlooking final checks can lead to issues later. Before starting your session, review your lighting tips to ensure your equipment and surroundings won’t interfere with visibility or cause distractions. Confirm your mount’s tracking accuracy by observing a celestial object for a few minutes, making sure it remains steady. Double-check that your polar scope is clean and properly aligned, and verify that your camera or telescope is secure. Skipping these final steps might cause errors in object tracking or imaging. Taking a few extra moments to confirm everything is in order helps guarantee smooth operation, accurate tracking, and a safer, more enjoyable observing or astrophotography session.
Frequently Asked Questions
How Often Should I Recalibrate My Polar Alignment Equipment?
You should recalibrate your polar alignment equipment regularly, ideally every few months or whenever you notice tracking issues. The alignment frequency depends on your equipment’s stability and how often you move it. Frequent use or transporting your mount can cause misalignment, so check and perform equipment calibration periodically to maintain accurate polar alignment. Staying consistent ensures your astrophotography remains sharp and precise.
What Safety Gear Is Recommended During Mount Setup?
When setting up your mount, you should wear safety glasses to protect your eyes from debris or accidental sparks. Always check that mounting bolts are securely tightened to prevent any movement or collapse. Make sure your workspace is clear of hazards, and handle tools carefully. Wearing safety gear helps prevent injuries, ensuring your setup process is safe and smooth. Prioritize safety to enjoy successful astrophotography sessions.
Can Weather Conditions Affect the Accuracy of Polar Alignment?
Weather conditions can substantially impact the accuracy of your polar alignment. Weather impact, like strong winds or rapid temperature changes, causes atmospheric distortion that shifts star positions. Humidity and turbulence can also distort the view, making precise alignment difficult. To guarantee accuracy, try to perform polar alignment in stable weather, avoiding high winds, fog, or rapid atmospheric changes. Clear, calm nights provide the best conditions for precise alignment.
How Do I Verify My Polar Alignment After Initial Setup?
Coincidence often reveals the truth; after your initial setup, you should verify your polar alignment by performing a calibration verification. Check how well your equipment holds its position over time, ensuring stability. Use a star tracker or guiding software to monitor drift. If your equipment remains stable and the stars stay aligned in your tracking, your polar alignment is accurate. Regular checks help maintain precision for celestial observations.
Are There Specific Signs Indicating Equipment Is Improperly Secured?
Yes, there are signs that indicate your equipment isn’t properly secured. If you notice unexpected movement, vibrations, or wobbling, your equipment stability may be compromised. Check all secure fastenings, ensuring they’re tight and snug. Loose bolts or clamps can cause shifts during your observations, leading to inaccurate polar alignment. Regularly inspecting these components helps prevent issues and guarantees your setup remains stable throughout your session.
Conclusion
Remember, a stitch in time saves nine. By avoiding these common polar alignment mistakes, you’ll guarantee safer, more accurate observations and safeguard your equipment. Take your time, double-check everything, and never rush the setup process. Safety and precision go hand in hand, so stay vigilant and maintain your gear regularly. When you’re careful from the start, you’ll enjoy clear skies and smooth stargazing sessions for years to come.