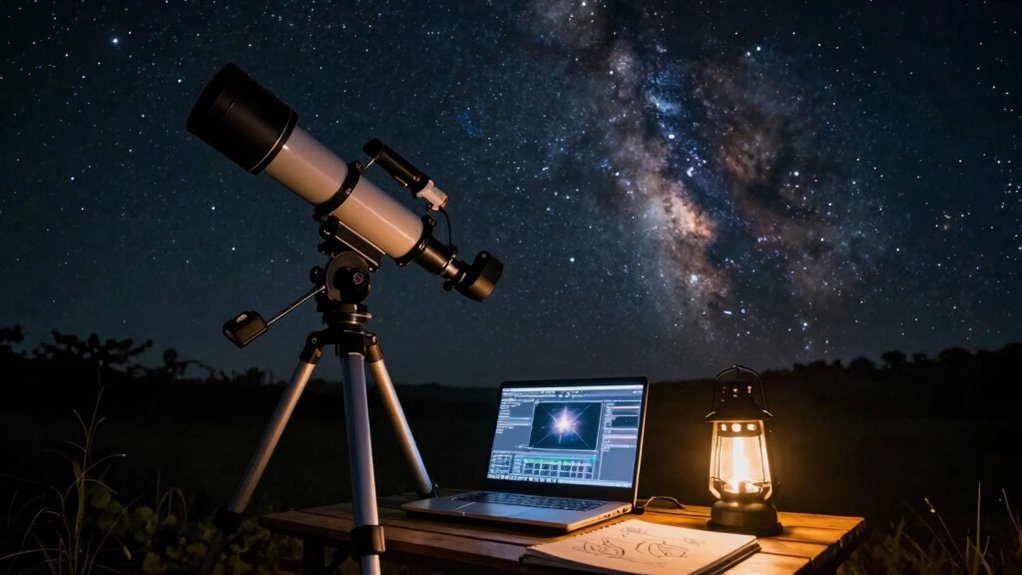
Start by choosing durable, compatible gear like a sturdy mount and telescope, then carefully set up and align your equipment, ensuring proper calibration with dark frames and focus. Capture multiple exposures on clear, low-light nights, adjusting settings for sharp, bright images. Use stacking and processing software to combine your images and reveal faint details. Troubleshoot any issues, maintain your gear, and soon your first usable deep-sky image will emerge. Keep exploring to master every step of the process.
Key Takeaways
- Start with proper mount and telescope setup, ensuring accurate polar alignment for stable tracking.
- Perform calibration with dark, bias, and flat frames to correct sensor noise and artifacts.
- Focus precisely using tools like Bahtinov masks, and set optimal exposure and ISO/gain settings.
- Capture multiple aligned images under good sky conditions, minimizing light pollution and atmospheric turbulence.
- Use stacking software to combine images, then apply noise reduction and adjustments for a clear, detailed final image.

ZWO Seestar S30 Pro Smart Telescope, App-Controlled Astrophotography
Effortless Smart Digital Telescope for Beginners: Simply power on, connect the app, and start exploring the universe. With…
As an affiliate, we earn on qualifying purchases.
As an affiliate, we earn on qualifying purchases.
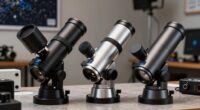
How to Choose the Best Gear for Deep-Sky Imaging
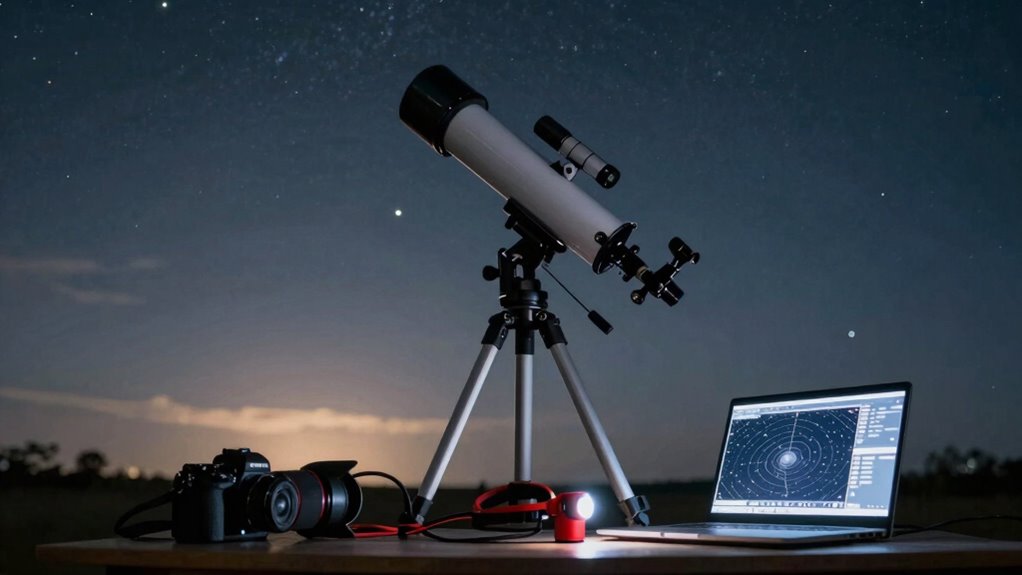
Choosing the right gear for deep-sky imaging can make or break your experience and results. You want equipment that’s durable enough to withstand long exposure times and changing conditions, so look for astrophotography accessories built with quality materials. Prioritize sturdy mounts and telescopes that won’t shake or wobble, ensuring sharp images. Compatibility is key—make sure your camera and accessories fit well with your chosen setup. Invest in reliable power sources and cooling systems to prevent overheating during extended sessions. While it’s tempting to buy the latest gadgets, focus on proven, durable gear that offers consistent performance. Remember, quality equipment reduces frustrations and boosts your chances of capturing stunning deep-sky images. Proper maintenance of your gear also plays a crucial role in its longevity and performance. Durability and thoughtful accessory choices set a solid foundation for your astrophotography journey. Additionally, consider the role of color accuracy in enhancing your celestial captures.

Astromania Polar Alignment Scope for EQ-5, Quickly and Easily Align Your Equatorial Mount with The North Celestial Polar – The Foundations for Successful Astrophotography
Full metal; Good alignment of the mount with the North Celestial Pole can be achieved in a short…
As an affiliate, we earn on qualifying purchases.
As an affiliate, we earn on qualifying purchases.
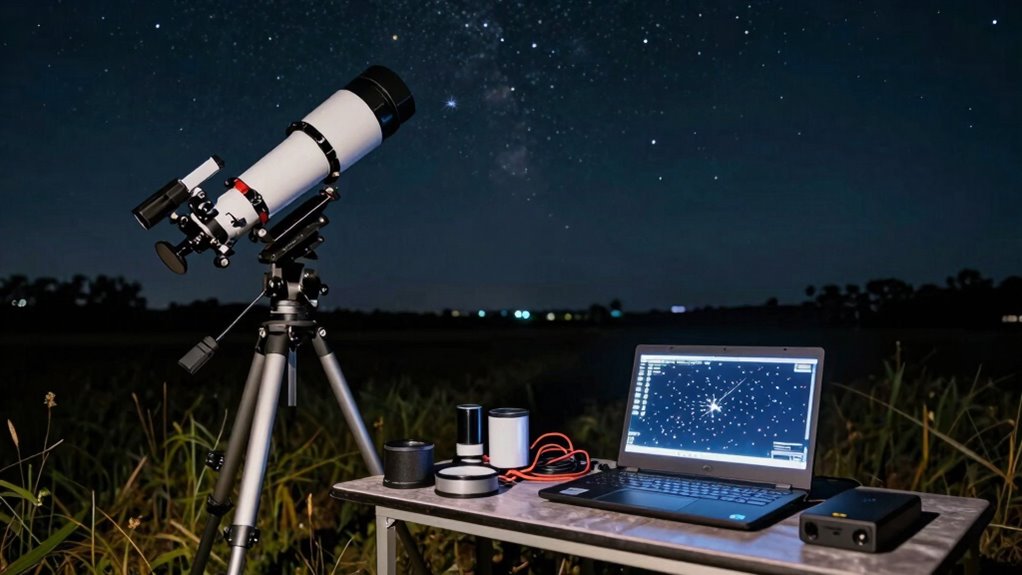
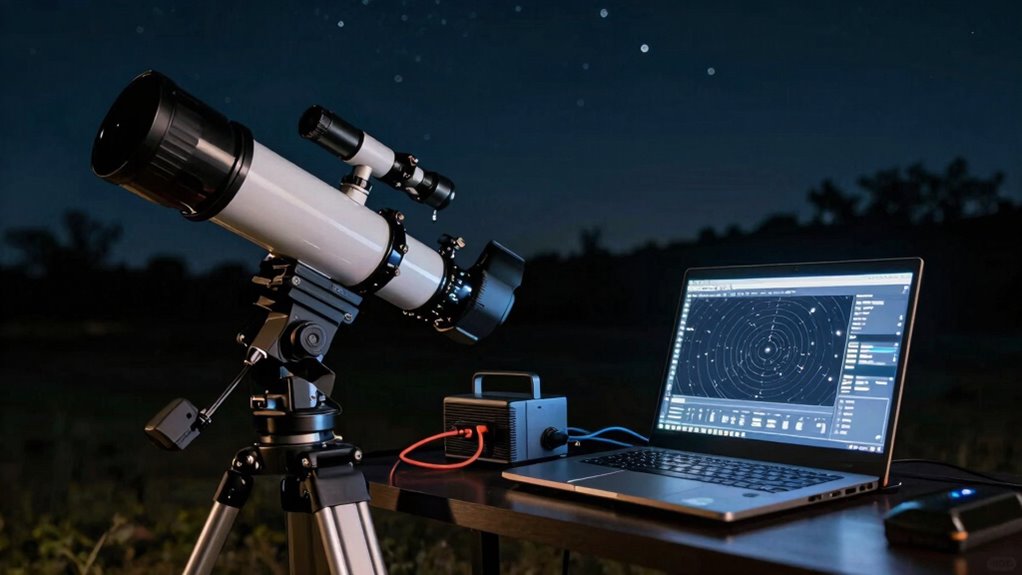
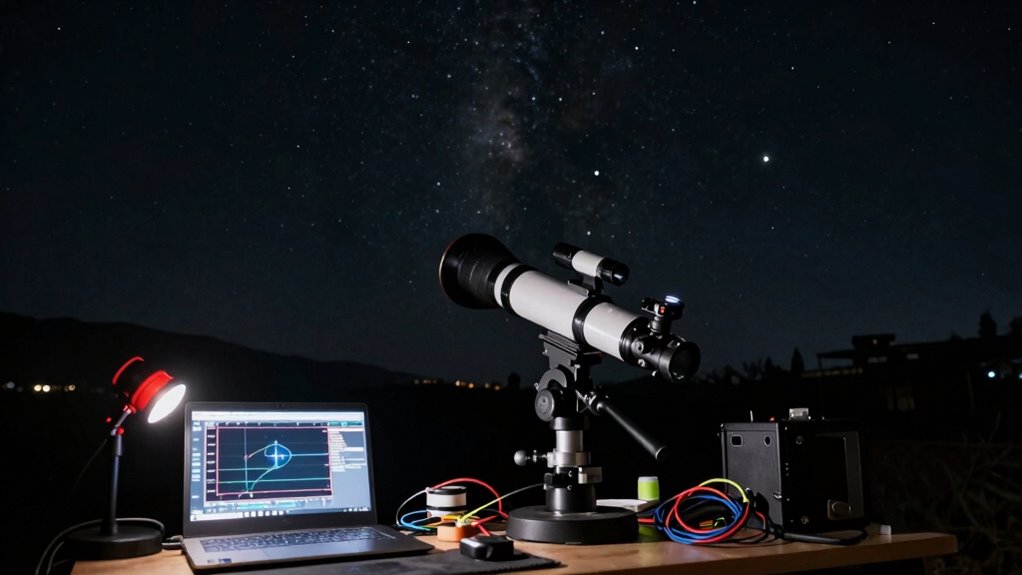
Set Up and Calibrate Your Equipment for Clear Results
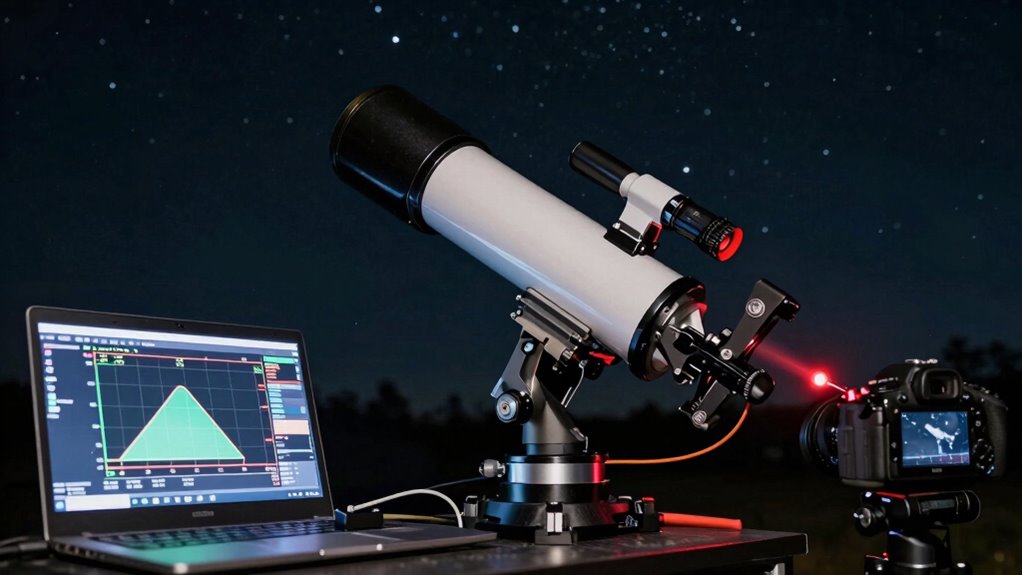
To get clear images, you need to set up and calibrate your equipment carefully. Start with proper mount alignment to keep your target steady, then calibrate your camera sensor for accurate color and noise reduction. Finally, adjust focus and exposure settings to capture sharp, well-exposed deep-sky shots. Additionally, exploring content formats can enhance your understanding of how to present your findings effectively.
Proper Mount Alignment
Ever wonder why your deep-sky images turn out blurry or streaked? The key is proper mount alignment. Start with polar alignment, ensuring your mount’s polar axis points accurately at the North Celestial Pole (or South, if you’re in the Southern Hemisphere). This minimizes star movement during long exposures. Once aligned, perform drift correction by observing a star near the celestial equator; any drift indicates misalignment. Adjust your mount slowly until the star remains steady in your field of view. Accurate polar alignment and regular drift correction are essential for tracking the night sky precisely. This reduces star trailing, keeps your images sharp, and makes stacking much easier. With a well-aligned mount, you’ll maximize your imaging success from the very first session.
Camera Sensor Calibration
Before capturing your deep-sky images, it’s vital to set up and calibrate your camera sensor properly, as this guarantees your data is accurate and free of artifacts. Sensor noise can distort your images, so taking dark frames is imperative. Dark frames are images taken with the same exposure and temperature as your light frames but with the lens cap on, capturing sensor noise and hot pixels. Use these dark frames during stacking to subtract unwanted noise, ensuring cleaner results. Additionally, consider how landscaping can enhance beauty in your setup area, as a well-organized environment can improve your overall imaging experience. Here’s a quick overview:
| Step | Purpose |
|---|---|
| Capture Dark Frames | Record sensor noise for calibration |
| Keep Camera at Same Settings | Maintain consistency during calibration |
| Subtract in Processing | Remove sensor noise from your images |
| Keep the Camera Cool | Reduce sensor noise during capture |
| Repeat Regularly | Keep calibration accurate over sessions |
Focus and Exposure Settings
Achieving sharp, well-exposed deep-sky images hinges on setting your focus and exposure parameters correctly. Use focusing techniques like fine-tuning with a Bahtinov mask or electronic focuser to guarantee your stars appear as sharp points. Proper focus minimizes star elongation and maximizes detail. For exposure optimization, start with shorter exposures to evaluate your settings, then gradually increase exposure time until your histogram shows ideal brightness without clipping highlights. Adjust ISO or gain carefully to balance sensitivity and noise. Consistent focusing and exposure calibration are vital for clear results. Take test shots, review the images, and refine your focus and exposure settings accordingly. This process ensures your images capture the maximum detail and quality during your deep-sky imaging session.
Astromania Bahtinov Mask Focusing Mask for Telescopes – FM60mm for a Tube Outer Diameter (OD) from 65mm-100mm – can be Mounted with the Brass Screws Inside or Outside the drawtube
Bahtinov masks take the guesswork out of focusing and even get over the seeing conditions as it is…
As an affiliate, we earn on qualifying purchases.
As an affiliate, we earn on qualifying purchases.
Capture High-Quality Deep-Sky Photos Step-by-Step
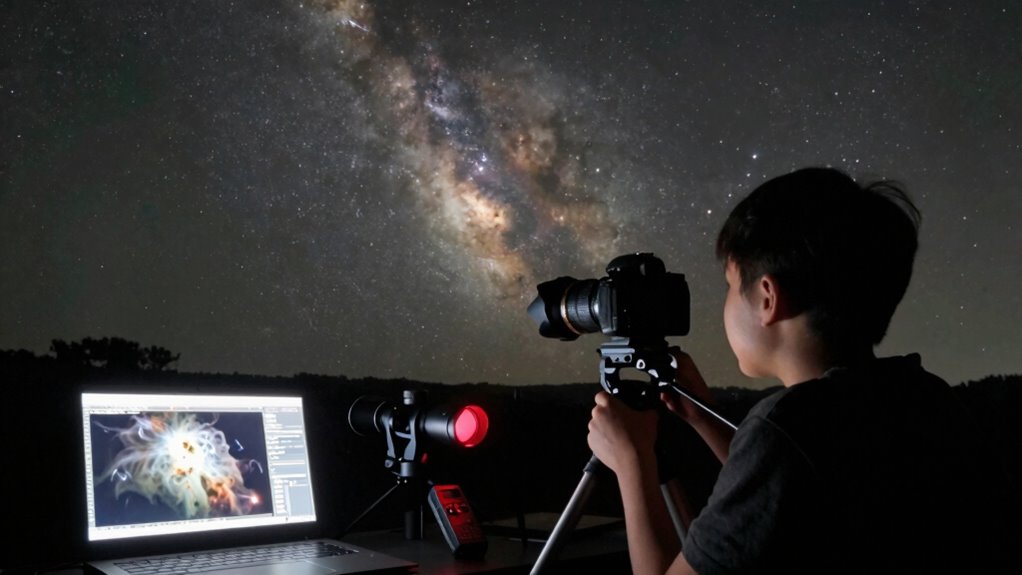
Capturing high-quality deep-sky photos requires careful planning and precise execution. First, check sky conditions—clear, stable skies with minimal light pollution yield better results. Set up your camera with proper focus and exposure, ensuring your image composition emphasizes your target object. Use a sturdy mount for stability during long exposures. Keep track of your camera settings, adjusting for the best contrast and detail.
| Sky Conditions | Image Composition | Equipment Setup |
|---|---|---|
| Clear skies | Center your target | Mount stability |
| Low light pollution | Rule of thirds | Focus accuracy |
| Stable atmosphere | Brightness balance | Correct framing |
| Minimal wind | Avoid cluttered background | Proper alignment |
| No moonlight | Highlight main features | Camera calibration |
MASTER ASTROPHOTOGRAPHY WITH GIMP AND SIRIL 2026: Deep-Sky Imaging, Stacking, and Advanced Processing Techniques for Modern Astrophotographers
As an affiliate, we earn on qualifying purchases.
As an affiliate, we earn on qualifying purchases.
Stack and Process Your Images to Reveal Faint Details
To bring out faint details in your images, you need to carefully align and calibrate your frames first. Using proper stacking techniques guarantees your data combines correctly, reducing noise and enhancing signal. Once you master these steps, your deep-sky images will reveal stunning, subtle features. Additionally, understanding the Milky Way shooting techniques can further improve your astrophotography results.
Align and Calibrate Frames
Before you can see the faint details in your deep-sky images, it’s vital to align and calibrate your frames accurately. Proper frame alignment ensures stars line up perfectly, preventing blurriness. Calibration accuracy removes sensor noise and artifacts, revealing true nebula and galaxy details. Use calibration frames—dark, bias, and flat—to correct each exposure. Keep in mind:
| Aspect | Purpose | Effect |
|---|---|---|
| Frame Alignment | Corrects star positioning | Sharp, consistent images |
| Calibration Frames | Remove noise and artifacts | Clearer, more accurate data |
| Consistency | Use same setup/settings | Reliable results |
Focusing on these steps guarantees your final stacked image captures faint details without distortion or noise interference.
Use Proper Stacking Techniques
Once your images are aligned and calibrated, stacking them correctly is vital for revealing faint details in your deep-sky images. Proper image stacking combines your exposures to enhance signal and suppress noise, making subtle features visible. Use your stacking software’s best practices, such as selecting the appropriate stacking method—mean, median, or sigma clipping—based on your data. This helps reduce noise and artifacts. Make certain you include all your calibrated frames and check alignment accuracy before stacking. After stacking, apply noise reduction techniques carefully to smooth out residual noise without losing detail. This process improves the clarity and detail of your final image, allowing you to see faint nebulae, galaxies, and star details that were invisible in individual frames.
Troubleshooting Common Deep-Sky Imaging Issues
Deep-sky imaging often presents a range of issues that can frustrate even experienced astrophotographers, but understanding common problems can help you diagnose and fix them quickly. Equipment maintenance is vital—regularly check your mount, camera connections, and lenses to prevent technical glitches. Atmospheric interference, like turbulence or light pollution, can cause blurry or uneven images. To combat this, shoot during ideal conditions and use filters or adaptive optics when possible. If you notice star trails or inconsistent exposures, verify your tracking accuracy and confirm your camera is securely mounted. Addressing these issues early and maintaining your gear keeps your setup reliable, minimizes image problems, and helps you capture cleaner, sharper deep-sky images.
Save, Share, and Celebrate Your First Astrophotos
Sharing your first astrophotos is an exciting milestone that lets you celebrate your progress and connect with the wider astronomy community. Once you’ve saved your image, sharing sparks pride and inspires others. When sharing, consider the creative composition—highlighting unique details or features of the sky. Respect astrophotography ethics by giving credit and avoiding manipulation that misleads viewers. To make the most of your achievement, you can:
Sharing your first astrophotos celebrates progress, inspires others, and fosters a supportive community in astronomy.
- Post your images on astronomy forums or social media, inviting feedback
- Organize a small viewing party with friends or fellow enthusiasts
- Write a brief story about your process and challenges faced
- Encourage others to start their own deep-sky adventures, fostering community and inspiration
Celebrating your work helps you stay motivated and grow as an astrophotographer. Additionally, consider sharing your images alongside easy homemade flautas to create a fun and engaging viewing experience for your audience.
Frequently Asked Questions
What Are the Ideal Weather Conditions for Deep-Sky Imaging?
For ideal deep-sky imaging, clear skies with minimal cloud cover are essential, as clouds block your view of faint objects. You should also aim for low wind speeds to keep your telescope steady and prevent vibrations that blur your images. Ideally, shoot on nights with stable atmospheric conditions, low humidity, and a consistent temperature, ensuring your equipment performs well and your images come out sharp and detailed.
How Do I Choose the Best Software for Image Processing?
You should choose software that offers robust image calibration and noise reduction tools. Look for programs like PixInsight or DeepSkyStacker, which excel at calibrating your images and reducing noise effectively. Consider your skill level and budget too. User-friendly options with strong noise reduction features help improve your final image quality, making your deep-sky objects clearer and more detailed. Prioritize software that fits your workflow and enhances your processing capabilities.
How Long Should Each Exposure Be for Optimal Results?
You should aim for the ideal duration of your exposures, typically between 1 to 5 minutes, depending on your target and equipment. Ironically, longer exposures might seem like a good idea—until your images turn into star trails or get overwhelmed by noise. Exposure timing is essential; too short, and you miss details, too long, and you risk losing clarity. Find that sweet spot for clear, detailed deep-sky images.
What Is the Best Way to Prevent Dew on Your Equipment?
To prevent dew on your equipment, you should use dew prevention methods like dew heaters or anti-dew shields. These keep your optics warm and dry during imaging sessions. Regular equipment maintenance also helps, ensuring connections are tight and equipment stays clean. Keep a close eye on humidity levels, and consider using silica gel packs or desiccants in your gear storage. Consistent dew prevention and maintenance keep your equipment functioning at its best.
How Can I Improve Alignment Accuracy for Better Stacking?
You can improve alignment accuracy by refining your star alignment techniques, like using multiple calibration stars to guarantee precise pointing. Regular autoguide calibration is essential; it helps your mount track accurately during long exposures. Make sure your autoguider is well-focused and properly calibrated, and double-check your star alignment to minimize errors. Combining these steps ensures your images stack more accurately, resulting in sharper deep-sky astrophotography.
Conclusion
You’ve conquered your first deep-sky adventure, from selecting stellar gear to stacking stunning shots. With patience and practice, your photos will flourish, revealing faint, fantastic features of the universe. Keep calibrating, troubleshooting, and sharing your space stories. Remember, the journey of astrophotography is as rewarding as the results. So, stay spontaneous, keep curiosity alive, and let your passion for the stars shine bright beyond the beginner’s boundary. Happy stargazing!