
To focus on the Milky Way, switch your lens to manual mode and set it to infinity, then back off slightly to prevent overshooting. Use live view to zoom in on a bright star or distant light, and adjust focus until that point appears sharp and pinpoint. Take a test shot, review it carefully, and fine-tune until stars look crisp and clear. Keep experimenting, and you’ll achieve stunning, sharp nightscape shots. More tips await if you keep going.
Key Takeaways
- Switch to manual focus and set the lens to infinity, then slightly back off for sharper stars.
- Use live view mode to magnify a bright star or distant light for fine focus adjustments.
- Ensure stars appear as sharp points, not trails, by reviewing and refining focus before shooting.
- Take test shots and zoom in on the LCD to verify star sharpness and adjust focus if necessary.
- Avoid autofocus; manual focus with live view provides more precise control in low-light conditions.
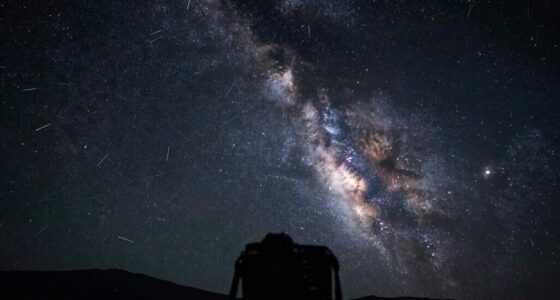
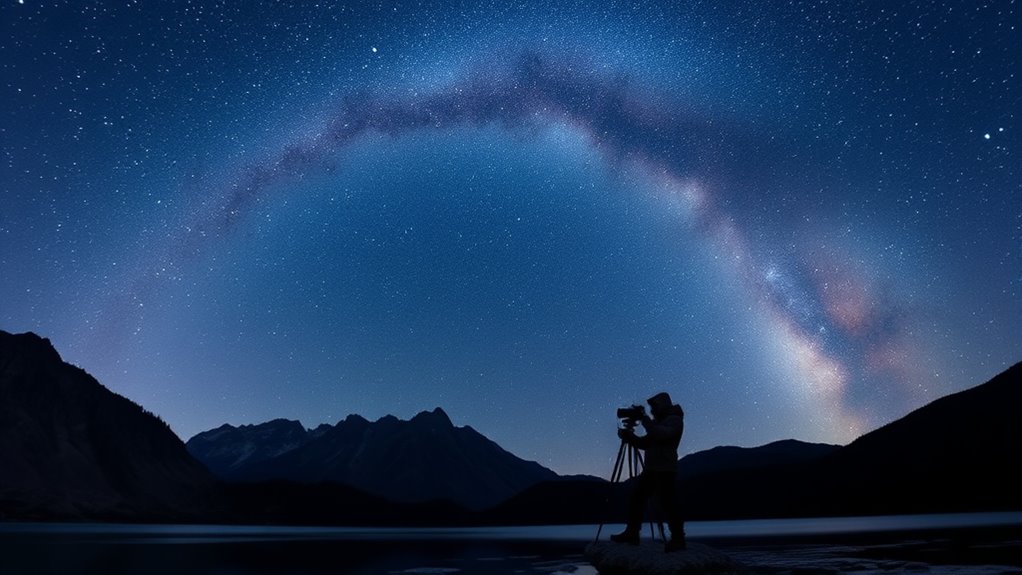
Have you ever wondered how to capture the breathtaking beauty of the Milky Way? Achieving sharp, vibrant nightscapes requires more than just pointing your camera at the sky—it demands understanding astrophotography tips and mastering your camera settings. Your first step is to set your camera to manual mode. This gives you full control over exposure, focus, and ISO, which are essential for clear Milky Way shots. Begin by choosing a wide-angle lens with a large aperture, ideally f/2.8 or lower, to maximize light intake. Set your ISO between 1600 and 3200; this range balances sensitivity with manageable noise levels, but you may need to adjust based on your camera’s capabilities.
Master your camera’s manual mode, use a wide lens at f/2.8 or lower, and set ISO between 1600-3200 for stunning Milky Way shots.
Next, focus is key. Autofocus often struggles in low light, so switch to manual focus. Turn your lens to infinity and then slightly back off—about a quarter turn—since some lenses tend to focus slightly past infinity, especially in cold conditions or on long exposures. To fine-tune your focus, use live view mode, magnify a bright star or distant light, and adjust until the star appears as a sharp point rather than a blur. This guarantees your focus is precise before taking the shot.
It’s also essential to consider your camera’s settings for the best results. Use a tripod to keep your camera steady during long exposures, preventing any motion blur. Set your shutter speed between 20 to 30 seconds; longer exposures can cause star trails unless that’s your artistic intent. Use a remote shutter release or your camera’s timer to avoid shake when pressing the shutter button. Remember, the goal is to gather enough light without introducing motion blur, so experiment within these parameters. Additionally, understanding the contrast ratio can help you evaluate how well your image renders the dark and bright areas, ensuring your nightscape has depth and detail.
Another astrophotography tip is to take test shots and review them on your camera’s LCD. Zoom in to check for sharpness and adjust focus if needed. If the stars appear as tiny trails rather than points, reduce your exposure time or open your aperture slightly more. If the sky appears too dark, increase ISO gradually, but watch out for excessive noise. Post-processing can also help enhance your images, but getting it right in-camera makes a significant difference.

Sky-Watcher Star Adventurer Mini – Motorized DSLR Night Sky Tracking Mount For Nightscapes, Time-lapse, and Panoramas
PORTABLE NIGHTSCAPE TRACKING PLATFORM: Motorized portable nightscape tracking platform perfect for capturing incredible detail of the Milky Way,...
As an affiliate, we earn on qualifying purchases.
Frequently Asked Questions
What Lens Aperture Is Best for Milky Way Photography?
You should use a lens with an aperture of f/2.8 or wider for Milky Way photography. A wider aperture allows more light to hit your sensor, which is vital for capturing faint stars. Pair this with a lens that has a suitable focal length—around 14-24mm for wide shots—and consider your sensor size, as larger sensors perform better in low light. This combo helps you achieve clear, detailed nightscapes.
How Does Moon Phase Affect Milky Way Visibility?
The moon phase considerably impacts your ability to see the Milky Way because moonlight interference can wash out faint stars. During the new moon or when the moon is below the horizon, your skies are darker, making the Milky Way more visible. The lunar cycle impact means planning your shoot around moon phases, ideally during a new moon or a crescent phase, to maximize clarity and detail in your nightscapes.
Can I Shoot the Milky Way With a Smartphone?
Imagine a time traveler with a smartphone — yes, you can shoot the Milky Way, but limitations exist. Smartphone cameras struggle with low light, so your shots might be grainy or blurry. However, using dedicated night sky apps can enhance your camera’s capabilities, helping you adjust settings like exposure and ISO. While a DSLR offers better results, with patience and the right app, your smartphone can still capture stunning nightscapes.
What’s the Ideal Weather Condition for Clear Nightscapes?
You want clear nightscapes, so look for weather with low atmospheric humidity, which reduces haze and moisture that can obscure your view. Check for nights with minimal light pollution, ideally far from city lights, to see the stars vividly. Clear skies without clouds are essential, and a dry, stable atmosphere helps guarantee sharp, detailed shots. Plan your shoot during new moon phases for the darkest, most stunning nightscapes.
How Do I Prevent Star Trails in My Photos?
Imagine capturing a stunning Milky Way shot without star trails—here’s how. Use star trail techniques like keeping exposure times under 20 seconds to prevent trails, and focus on foreground placement for added depth. For example, if you’re photographing a mountain silhouette, set your camera to a short exposure, minimizing movement. Consistent use of these methods guarantees your stars stay pinpoints, giving you crisp, trail-free nightscapes.

DWARFLAB Dwarf 3 Smart Telescope - Portable Astrophotography Camera, Capture Astronomy/Wildlife/Panorama, AZ/EQ Mode, Built-in Processing, 4K Auto-Tracking, Ultra-Light 3lb, Ideal for All Ages
【Ultra-Light Design for All Adventures】Only 3lb/1.35kg - World's Most Portable Smart Telescope! Fits perfectly in standard backpack for...
As an affiliate, we earn on qualifying purchases.
Conclusion
When you master focusing on the Milky Way, you’re painting with stars on the canvas of the night sky. Each careful adjustment is like tuning a delicate instrument, allowing the galaxy’s shimmering secrets to come into sharp, radiant view. With patience and practice, you’ll reveal a celestial masterpiece—turning a dark, endless tapestry into a vivid story of light and wonder. Your nightscape will become a window to the universe’s most breathtaking dreams.

ZWO Seestar S50 Smart Digital Telescope All-in-One Autofocus Portable for Beginners and Experienced Users-Open Box Like-New Condition Telescope
Lightweight Design: highly integrated all-in-one smart telescope. Seestar is a compact body that integrates a telescope, electrical focuser,...
As an affiliate, we earn on qualifying purchases.

Celestron StarSense Explorer LT 114AZ App-Enabled Telescope – 114mm Newtonian Reflector with Smartphone Dock & StarSense App – iPhone & Android Compatible – Easy-to-Use for Beginners
SMARTPHONE-POWERED SKY TOUR: No experience needed! Just dock your phone, launch the StarSense Explorer app, and follow the...
As an affiliate, we earn on qualifying purchases.