To guarantee accurate polar alignment, start by leveling your tripod on a firm, stable surface. Use built-in bubble levels or a smartphone app to check that the tripod is perfectly flat in all directions. Adjust the legs or feet until the bubble centers, creating a stable, level platform. Proper leveling reduces errors in star tracking and improves image sharpness. Mastering this first step sets a solid foundation for successful astrophotography, and you’ll discover more tips as you continue.
Key Takeaways
- Use built-in bubble levels or smartphone apps to verify the tripod is horizontally level before setup.
- Adjust tripod legs or leveling screws for small, incremental corrections until the bubble centers.
- Place the tripod on a firm, stable surface to minimize movement and ensure accurate leveling.
- Proper leveling ensures precise latitude adjustment and prevents star tracking errors.
- Achieving a level tripod provides a stable foundation for accurate polar alignment and astrophotography.
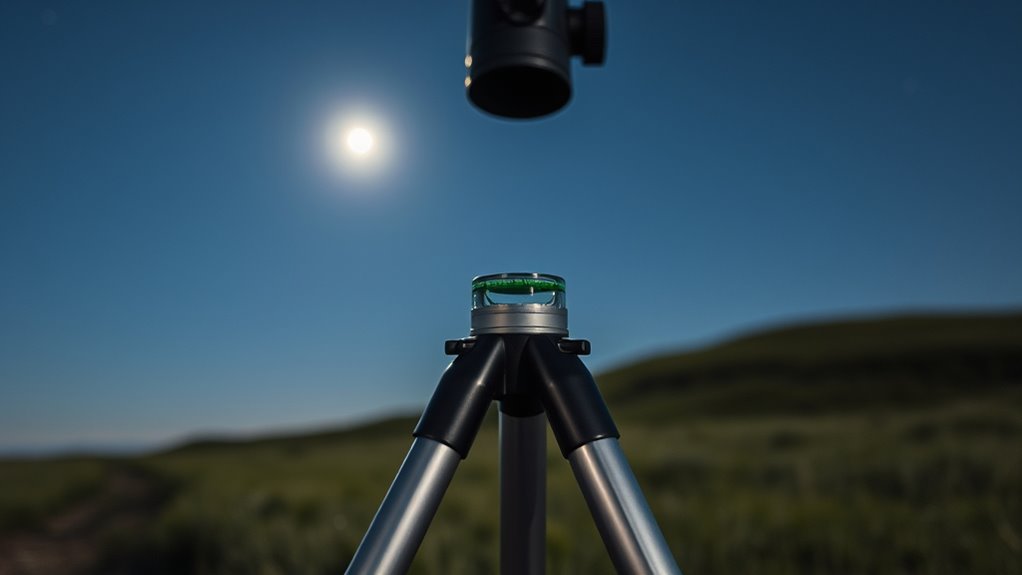
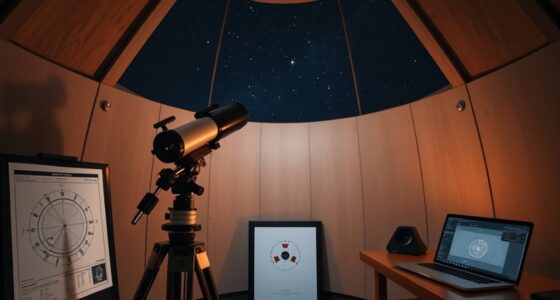
Have you ever struggled with shaky photos or uneven horizons? If so, you’re not alone. Achieving a stable, level platform is essential for astrophotography and precise polar alignment. The first step in this process is ensuring your tripod is perfectly leveled. It might seem simple, but a misaligned tripod can throw off your entire setup, leading to blurry images or inaccurate star tracking. To start, you need to understand your tripod’s mounting options and materials, as these factors influence how easy it is to achieve a stable, level base. Different tripods come with various mounting options, like built-in bubble levels or adjustable feet, which can help you fine-tune the setup. Some tripods also feature quick-release plates or threaded mounts that provide additional stability and ease of leveling. Knowing what your tripod offers allows you to make the most of its features and get it as level as possible before you start polar alignment.
The materials used in your tripod also play a critical role. Aluminum tripods are popular because they’re lightweight and durable, making them easy to carry around and resistant to warping over time. However, they can sometimes be less stable on uneven ground compared to heavier materials like steel. Carbon fiber tripods are a premium choice, offering excellent strength-to-weight ratios and vibration damping, which helps keep your camera or telescope steady during long exposures. Regardless of the material, always check if your tripod has adjustable feet or leveling screws. These small but essential components allow you to balance your setup on uneven terrain, which is common when stargazing or astrophotography. Adjusting these feet to find a flat, level position is critical before you begin any polar alignment process.
Once you’ve selected the right mounting options and considered your tripod’s materials, it’s time to physically level the tripod. Place it on a firm, level surface if possible. Use a bubble level or the built-in leveling tools to check the orientation. If your tripod lacks these features, you can use a small carpenter’s level or smartphone apps designed for leveling. Adjust the tripod’s legs or feet until the bubble centers, indicating a level platform. This step might take a few tweaks, but it’s well worth the effort. A tripod perfectly leveled ensures your mount’s latitude adjustments and star alignments are accurate. Properly leveling your tripod with precise tools is essential, as even a slight tilt can introduce errors in your polar alignment, making tracking stars more difficult and affecting image quality. Taking the time to properly level your tripod sets a solid foundation for precise, successful astrophotography.

LAIESYA 3Pcs Circular Bubble Level Bullseye Degree Marked Surface Round Spirit Levels Measuring Tool for Leveling Phonograph, Camera, Turntable, Tripod, Telescope (32X7mm)
Product: Circular Bullseye Degree Marked Surface Round Bubble Spirit Levels Measuring Tool.
As an affiliate, we earn on qualifying purchases.
As an affiliate, we earn on qualifying purchases.
Frequently Asked Questions
How Precise Does the Tripod Leveling Need to Be?
You should aim for a tripod leveling accuracy within a few millimeters to guarantee precise polar alignment. If your tripod isn’t stable or markedly off-level, it can introduce errors that affect tracking and image quality. Keep the tripod stable and level it carefully, as even small deviations can impact your results. Prioritize tripod stability and fine leveling to achieve the best possible polar alignment and imaging accuracy.
Can Uneven Terrain Affect Tripod Stability During Leveling?
They say a house built on a shaky foundation won’t stand, and the same applies to your tripod. Uneven terrain can definitely affect tripod stability during leveling, especially if the surface isn’t flat. To guarantee stability, place your tripod on stable, level ground and use a bubble level to double-check. This helps prevent wobbling and ensures accurate polar alignment, no matter how uneven the terrain may be.
What Tools Are Best for Checking Tripod Levelness?
You should use a bubble level or digital leveling accessories to check your tripod’s levelness. For the best accuracy, consider leveling accessories designed specifically for your tripod material, whether aluminum or carbon fiber, as they provide precise readings. Keep your tripod on stable, even terrain, and regularly verify its level to ensure accurate polar alignment and steady astrophotography sessions. Proper tools make the process quick and reliable.
How Often Should I Re-Level My Tripod During a Session?
Think of your tripod as the foundation of a skyscraper—you need it solid at all times. You should re-level your tripod whenever you notice it shifting or if you change its position, especially during long sessions. Regular tripod maintenance helps keep it stable, but for quick adjustments, consider alternative leveling methods like bubble levels or smartphone apps. Staying vigilant guarantees your polar alignment remains precise, giving you clear, starry shots.
Does Tripod Weight Impact Leveling Accuracy?
Tripod weight can impact leveling accuracy, especially if the material isn’t stable. A heavier tripod made of sturdy material like aluminum or steel provides better weight distribution, minimizing movement and maintaining levelness. Lighter tripods or those with uneven weight distribution are more prone to shifting, which can throw off your alignment. To guarantee precise polar alignment, choose a tripod with good weight stability and always double-check levelness before starting your session.

NEEWER Tripod Head Leveling Base Camera Leveler, 3 Axis Wheel Metal Head with Bubble Levels, 3/8" Screw & Thread, +/-9° Precise Angle Adjustment for Macro Panoramic Photography, Max Load 33lb, LP65
【Tripod Leveling Base with Bubble Level】 The tripod leveling base features three short support pillars that provide up…
As an affiliate, we earn on qualifying purchases.
As an affiliate, we earn on qualifying purchases.
Conclusion
Now that your tripod is level, you’ve laid the solid foundation for a perfect night of stargazing. Think of it as tuning a musical instrument—when everything’s aligned just right, the symphony of the stars unfolds with clarity and beauty. With your tripod steady and true, you’re ready to chase celestial dreams and reveal the universe’s secrets. Remember, a stable start makes for a spectacular journey among the stars. Happy observing!

QWORK Universal Survey Tripod – Aluminum Heavy Duty Contractor Tripod with Quick Clamp,Transit Leveling Equipment, 5/8" x 11" Thread (Orange)
Robust Construction: This universal survey tripod is crafted from high-grade aluminum, ensuring long-lasting durability and performance for demanding…
As an affiliate, we earn on qualifying purchases.
As an affiliate, we earn on qualifying purchases.

Auto Face Tracking Tripod 360 Rotation with Stand,Android and iPhone Tripod Holder with Remote and Gesture Control, No App,Built-in Tracking Camera Selfie Stick for Vlog Video Recording Tiktok
💚【360° Face Tracking Phone Holder & Smart AI】 360°Face-Tracking Tripod Adopts Smart Ai System Technology To Accurately Identify…
As an affiliate, we earn on qualifying purchases.
As an affiliate, we earn on qualifying purchases.