Before you start, make certain your mount is level and securely positioned on stable ground. Locate Polaris or the celestial pole using a polar scope or smartphone app. Make initial rough adjustments with your mount’s knobs, then fine-tune the alignment by slowly adjusting the screws to match Earth’s rotational axis. Test the setup by tracking a bright star for a few minutes, noting any drift. Keep your setup stable, and you’ll improve your accuracy—if you continue, you’ll learn how to perfect your alignment step by step.
Key Takeaways
- Ensure your mount is level and securely positioned before starting the alignment process.
- Identify the celestial pole accurately using Polaris or a polar scope.
- Use the mount’s adjustable screws to fine-tune polar alignment for precision.
- Confirm the mount is stable and properly leveled to avoid errors during setup.
- Test alignment by observing a bright star and checking for drift, making adjustments as needed.

Astromania Polar Alignment Scope for EQ-5, Quickly and Easily Align Your Equatorial Mount with The North Celestial Polar – The Foundations for Successful Astrophotography
Full metal; Good alignment of the mount with the North Celestial Pole can be achieved in a short…
As an affiliate, we earn on qualifying purchases.
As an affiliate, we earn on qualifying purchases.
Essential Steps for Accurate Polar Alignment
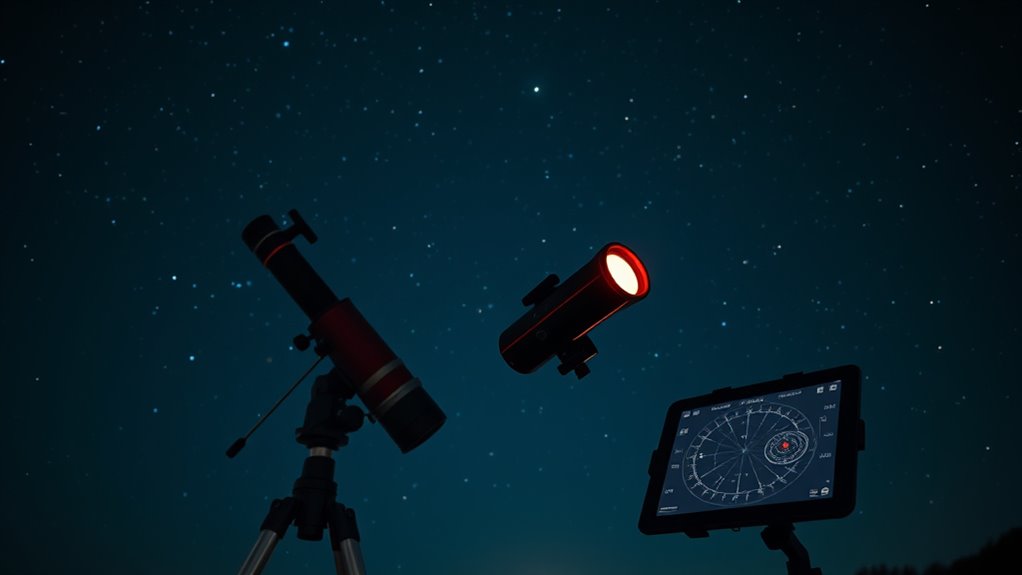
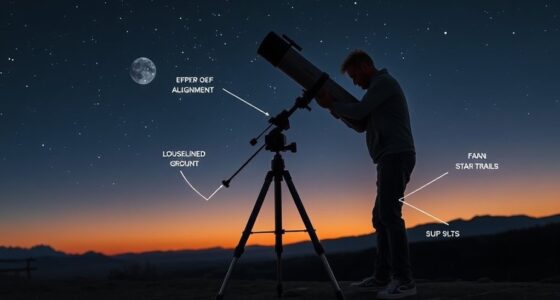
Ever wondered how amateur astronomers keep their telescopes precisely aimed at the night sky? The key lies in proper mount alignment, which guarantees your telescope stays accurately pointed as you observe or photograph celestial objects. Before diving into star tracking or capturing images, you need to verify that your mount is correctly aligned with the Earth’s rotational axis. This step is essential because any misalignment can cause your telescope to drift off target, making it difficult to follow objects smoothly across the sky. To start, make sure your mount is level and securely positioned. Many beginners overlook this, but a stable setup provides a solid foundation for precise polar alignment.
Proper mount alignment ensures your telescope tracks celestial objects accurately and smoothly.
Next, you should identify the celestial pole in your sky, which, in the Northern Hemisphere, is near Polaris, the North Star. Using your mount’s built-in polar scope or a smartphone app, locate Polaris and align your mount’s axis accordingly. This process is known as polar alignment, and it directly impacts your star tracking accuracy. When your mount’s axis is aligned with the Earth’s axis, your telescope can follow the stars’ apparent movement with minimal drift, making long exposures or detailed observations possible. Many mounts have adjustable screws or knobs to fine-tune this positioning, so take your time to get it as precise as you can.
Once your mount is aligned, it’s time to test your star tracking. Pick a bright star near the celestial equator or a well-known constellation, and observe how it moves through your eyepiece or camera viewfinder. If the star drifts out of view after a few minutes, your mount may need further adjustment. Small tweaks to your polar alignment can considerably improve tracking accuracy. This is especially important for long-exposure astrophotography, where even slight misalignments can result in star trails rather than pinpoint images. Remember, the better your mount is aligned, the less you’ll need to correct your position manually or with software.
Additionally, for support and troubleshooting, many amateur astronomers turn to online resources or local astronomy clubs that can provide guidance on support hours and best practices. Double-check your setup before you start observing or imaging. Confirm that your mount remains stable and that your star tracking remains consistent. With practice, you’ll develop a feel for the adjustments needed to keep your telescope accurately aligned and tracking the stars seamlessly. Proper mount alignment is the foundation of successful celestial observation, so take your time to get it right at the start. This initial effort will make all the difference in how smoothly your sessions proceed and how beautifully your images turn out.

VERTECFOTO 【Upgraded+】 Tripod Leveling Base :Support 1/4" and 3/8" Both on top and Bottom, Bigger Bubble Level w/Crosshair, Fine Leveling Faster; Enlarged Lock knobs, Lock Easier,; Max Load 33 Ib
【SUPPORT 1/4" and 3/8" for Top and Bottom】Compatible with 1/4" and 3/8" thread both on the top and…
As an affiliate, we earn on qualifying purchases.
As an affiliate, we earn on qualifying purchases.
Frequently Asked Questions
Can I Perform Polar Alignment Without Special Tools or Equipment?
Yes, you can perform a manual polar alignment without special tools or equipment. You might use your smartphone apps to help you find Polaris and align your telescope accurately. These apps provide real-time sky charts and polar scope simulations, making manual alignment easier. While it’s less precise than using dedicated tools, it’s a good starting point for beginners who want to get their telescope roughly aligned before refining the setup.
How Long Does the Polar Alignment Process Typically Take?
The polar alignment process usually takes about 15 to 30 minutes, depending on your experience and equipment calibration. Using celestial navigation, you’ll locate Polaris or the celestial pole, which speeds up the process. If your equipment is well-calibrated, you’ll achieve precise alignment faster. Keep in mind, patience helps, especially when fine-tuning your mount. With practice, you’ll complete polar alignment more efficiently.
Is It Necessary to Re-Align Before Each Observing Session?
If you’re planning a long night of stargazing, re-alignment isn’t always necessary, but for shorter sessions or if your mount moves, it’s wise to verify again. For example, after a quick setup, you might only need re-alignment if you bump the mount. Re-alignment frequency depends on session preparation and how much your equipment shifts. Regular checks ensure precise tracking, especially if you’re capturing detailed astrophotography.
Can Polar Alignment Be Done During the Daytime?
Yes, you can do polar alignment during the daytime, especially since solar tracking makes it easier to see celestial landmarks and Polaris’ position. Daytime visibility allows you to use specific tools like a polar scope or smartphone apps for precise alignment. Just guarantee you’re in a clear, shadow-free area, and avoid direct sunlight on your equipment to prevent damage. Daytime polar alignment helps ensure accurate tracking during your nighttime observing sessions.
How Often Should I Check and Refine My Polar Alignment?
You should verify and refine your polar alignment regularly to maintain accuracy, especially if you notice star trails or tracking issues. Typically, a weekly or monthly maintenance schedule works well, but more frequent checks might be necessary if you move your telescope or encounter rough conditions. Consistent alignment checks ensure your telescope’s alignment accuracy, helping you get clear, accurate astrophotography or observations.

POLAR Unite Water Resistant Health Tracker GPS Smartwatch with Fitness Monitoring Tools;, S-L, for Men or Women, Black-Black
Lightweight fitness tracking smartwatch to help keep you active
As an affiliate, we earn on qualifying purchases.
As an affiliate, we earn on qualifying purchases.
Conclusion
Getting your polar alignment right is key to sharp, accurate astrophotos. Just remember, even a small misalignment can throw off your star tracking by minutes, affecting your images. Did you know that precise polar alignment can improve your tracking accuracy by up to 90%? By following these simple methods, you’ll save time and frustration, ensuring clearer, more detailed shots of the night sky. Happy stargazing and clear skies!

Astromania Aluminum Alloy Adjustable Laser Finder Scope Mounting Bracket with 1/4 Screw- 30mm Inside Diameter (Pair) – for Astronomy Laser Pointer
The laser pointer holder is compatible with various sizes; accommodating a maximum diameter of 30mm and a minimum…
As an affiliate, we earn on qualifying purchases.
As an affiliate, we earn on qualifying purchases.