When using calibration frames, do capture darks at the same temperature and exposure as your lights, and keep your camera fixed. Don’t reuse or neglect proper flat frames—verify they match focus and illumination. Always take bias frames at the start or end of your session, under the same conditions, to reduce electronic noise. Following these tips ensures cleaner images; stick around to learn how to perfect your calibration workflow for stellar results.
Key Takeaways
- Do match dark and flat frames to light frames in temperature, exposure, and focus; avoid mixing different conditions.
- Do capture bias frames at the start or end of a session with the same camera settings; do not reuse bias frames across different sessions.
- Do normalize flat frames before calibration to ensure even correction; do not skip normalization, which can cause uneven illumination issues.
- Do keep camera temperature stable during calibration frame capture; do not change settings or let temperature fluctuate, as this affects calibration accuracy.
- Do organize calibration frames properly and follow consistent workflows; do not reuse or improperly apply frames, which can introduce artifacts.

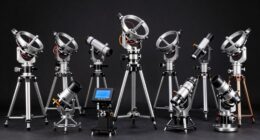
Celestron CG-4 German Equatorial Mount and Tripod
SUPERIOR STABILITY - The CG-4 German Equatorial Mount features a robust stainless steel tripod with 1.75" diameter legs,...
As an affiliate, we earn on qualifying purchases.
Understanding Calibration Frames: The Basics

Calibration frames are vital tools in astrophotography that help improve the quality of your images by correcting for camera and optical system imperfections. To achieve this, you’ll rely on calibration techniques integrated into your imaging workflows. These frames—darks, flats, and biases—serve specific roles in reducing noise, uneven illumination, and sensor artifacts. Understanding their purpose and proper use is key to producing sharp, accurate images. For example, incorporating calibration frames at the right stages ensures your data remains consistent. Mastering these basics allows you to build robust imaging workflows that streamline processing. Consistent application of calibration frames also minimizes sensor artifacts and enhances overall image fidelity. By consistently applying calibration techniques, you enhance image quality, making your astrophotography more professional and visually appealing. This foundational knowledge is vital for capturing truly stunning celestial shots.

Sky-Watcher Star Adventurer 2i Pro Pack – Motorized DSLR Night Sky Tracker Equatorial Mount for Portable Nightscapes, Time-Lapse and Panoramas – Wi-Fi App Camera Control – Long Exposure (S20512)
Portable nightscape tracking platform: Motorized portable tracking platform perfect for capturing incredible detail of the Milky Way, eclipses...
As an affiliate, we earn on qualifying purchases.
What Are Darks and How to Use Them Properly

Darks are specialized frames captured with your camera’s shutter closed, designed to record the sensor’s inherent noise and thermal signal. They help you identify and subtract unwanted artifacts caused by sensor noise and heat, which can be especially noticeable during long exposures. When shooting in areas with light pollution, dark frames become even more critical, as they help eliminate the glow and noise introduced by stray light. To use them properly, capture dark frames at the same temperature and exposure settings as your light frames. Keep your camera in a fixed position, and avoid changing settings. Subtracting dark frames from your images ensures that sensor noise and light pollution effects are minimized, resulting in cleaner, more accurate astrophotos. Additionally, understanding Bitcoin IRA concepts can help diversify your retirement portfolio for future financial security.

Sky-Watcher HEQ5 – Fully Computerized GoTo German Equatorial Telescope Mount – Motorized Astrophotography Mount with 42,000 Object Database,White
LIGHTWEIGHT COMPUTERIZED EQUAORIAL MOUNT: The HEQ5 is ideal for beginning astrophotographers, or skilled astronomers looking for a lightweight...
As an affiliate, we earn on qualifying purchases.
Flats: Correct Application and Common Mistakes

To guarantee your astrophotos are clear and free of optical imperfections, applying flats correctly is crucial. Flats help correct issues like flat field vignetting, which causes brightness falloff toward the edges of your image. Proper flat calibration ensures these imperfections are removed without introducing flat calibration errors. Avoid using flats taken at different focus positions or with inconsistent illumination, as this can cause uneven correction. Make sure flats match your light frames in exposure and temperature to prevent mismatched corrections. Also, don’t forget to normalize your flats before calibration. Overlooking these details can lead to uneven backgrounds, star distortions, or residual vignetting. Correct flat application is essential for achieving sharp, balanced astrophotos free of optical artifacts.
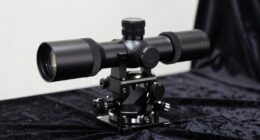
OrionU Star Tracking Equatorial Mount, Portable Single-Axis Star Tracker with High-Precision Alignment Pointer for DSLR & Mirrorless, Suitable for Beginners in Astrophotography (Matte Black)
Reinforced Steel Axis for Stable Tracking: Thick dual-screw steel shaft delivers solid single-axis tracking, supporting 4kg axial loads...
As an affiliate, we earn on qualifying purchases.
Bias Frames: When and Why to Use Them

You should capture bias frames whenever you’re preparing to process your images, especially if your camera produces read noise. Applying bias frames helps eliminate this electronic noise from your photos, resulting in cleaner data. Knowing when and how to use them ensures your calibration process is accurate and effective. Additionally, understanding the signs of spoilage in your calibration frames can prevent introducing errors into your data.
When to Capture Bias
Bias frames should be be captured at the start or end of your imaging session, ideally under the same camera temperature and settings as your light frames. This guarantees that camera noise remains consistent, preventing inaccuracies in calibration. You want to minimize differences in sensor temperature, which can affect the amount of noise generated. Capturing bias frames when your camera is at its normal operating temperature helps you account for the inherent sensor noise, which is present even with a closed shutter. Avoid capturing bias frames when your camera temperature is fluctuating or during long breaks, as this can introduce inconsistencies. By taking bias frames at stable temperatures and consistent settings, you improve calibration accuracy and ensure your data is free from temperature-related noise variations. Additionally, understanding Kia Tuning options can help optimize your imaging setup for better performance.
Bias Frame Application
Bias frames are used to correct for the inherent electronic noise present in your camera sensor, guaranteeing your light frames are as accurate as possible. You should apply bias frames whenever you capture images to remove sensor noise that can distort details, especially in low-light conditions. During image stacking, using bias frames helps eliminate the electronic background noise, resulting in cleaner, sharper final images. Bias frames are particularly useful when working with short exposure times, as they account for the readout noise that can otherwise compromise your data. Incorporate bias frames into your calibration process consistently to improve the overall quality of your astrophotography. Proper application ensures your stacked images reveal true details without noise artifacts, making your astrophotography results more precise and professional. Additionally, understanding sensor noise can help you better interpret your images and optimize your calibration workflow.
Do’s and Don’ts for Effective Calibration

Effective calibration depends on following key do’s and don’ts to guarantee high-quality results. First, always maintain a consistent sensor temperature when capturing calibration frames; fluctuations can introduce unwanted noise. Be sure to monitor and control this temperature throughout your process. Second, pay attention to exposure timing—use precise, repeatable exposure durations for dark and flat frames to ensure accurate subtraction and calibration. Avoid rushing this step, as inconsistent exposure times can lead to residual artifacts. Don’t neglect proper calibration frame organization or reuse frames improperly, which can cause mismatched data. Finally, don’t forget to check your camera’s temperature stability during calibration to prevent subtle shifts that compromise your results. Following these dos and don’ts will help you produce cleaner, more reliable calibration frames.
Tips for Organizing and Managing Calibration Data

Organizing your calibration data systematically guarantees you can easily access and verify your frames when needed. Use consistent file naming conventions to identify each frame type quickly, incorporating details like date, exposure, and filter. Good metadata management guarantees all relevant information is stored with each file, simplifying future calibration. Create a clear folder structure, separating darks, flats, and biases. Label files with descriptive names to avoid confusion. Here’s a helpful layout:
| Folder Type | Naming Convention |
|---|---|
| Darks | dark_YYYYMMDD_exposuresec.fits |
| Flats | flat_YYYYMMDD_filter.fits |
| Bias | bias_YYYYMMDD.fits |
This organization saves time and reduces errors during calibration. Additionally, consistent file naming ensures that your calibration frames remain organized and easily retrievable, preventing mix-ups during processing.
Frequently Asked Questions
How Often Should I Recalculate My Calibration Frames?
You should recalculate your calibration frames whenever your imaging setup changes, or if you notice inconsistencies in your data. Typically, a good recalibration schedule is every few months or after significant equipment adjustments, like lens changes or temperature shifts. Regular calibration frequency guarantees your frames remain accurate, reducing noise and artifacts in your images. Keep track of your calibration results to determine when it’s time for a recalibration schedule update.
Can Calibration Frames Be Reused Across Different Camera Models?
Calibration frames generally shouldn’t be reused across different camera models due to camera compatibility issues. Each camera has unique sensor characteristics, meaning calibration transfer isn’t reliable. Using frames from one camera on another can introduce errors and reduce image quality. Always capture fresh calibration frames tailored to your specific camera model to guarantee accurate calibration and ideal results. This approach guarantees your data remains precise and consistent.
What Software Is Best for Managing Calibration Data?
You should consider software like DeepSkyStacker or PixInsight for managing calibration data, as they excel in compatibility with various camera models and streamline your calibration workflow. These programs allow you to organize, process, and apply calibration frames efficiently. By choosing software tailored for calibration management, you guarantee accurate results and save time, making your astrophotography projects smoother and more reliable.
How Do Temperature Variations Affect Calibration Frames?
Temperature variations can greatly impact your calibration frames by disrupting temperature stability, which increases thermal noise in your images. When temperatures fluctuate, your camera’s sensor may produce inconsistent dark frames, leading to inaccurate calibration. To minimize this, keep your equipment in a thermally stable environment, use temperature-controlled cameras if possible, and always match your calibration frames’ temperature to your light frames. This ensures more reliable, noise-free results.
Are There Specific Storage Conditions for Calibration Frames?
You should store calibration frames in a cool, dry, and stable environment to maintain calibration frame stability. Keep them away from direct sunlight, humidity, and temperature fluctuations, as these can impair their quality over time. Use sealed containers or dedicated storage drives to prevent dust and moisture from affecting the frames. Proper storage ensures your calibration frames remain accurate and reliable for consistent astrophotography results.
Conclusion
Mastering calibration frames is like tuning a musical instrument—you guarantee every note is pure and true. By understanding and applying darks, flats, and bias frames correctly, you bring harmony to your astrophotography. Avoid common pitfalls, keep your data organized, and let your images shine brighter than the stars themselves. With practice, your calibration routine will become second nature, turning chaos into celestial symphony and your images into breathtaking masterpieces.