
Understanding sub exposure length tradeoffs helps you control how much light your camera captures, affecting brightness, motion, and detail. Shorter exposures freeze action, while longer ones create motion blur or night effects. Balancing exposure time with shutter speed, ISO, and environment guarantees clear, well-lit photos. Adjusting these settings takes practice, but mastering them opens creative possibilities and improves your skills. Keep exploring, and you’ll discover how to optimize every shot for your desired result.
Key Takeaways
- Sub exposure length affects photo brightness, motion capture, and detail, requiring balancing with ISO and aperture settings.
- Longer exposures brighten images but risk motion blur, while shorter exposures freeze motion but may underexpose.
- Proper exposure tradeoffs involve adjusting shutter speed, ISO, and aperture based on lighting conditions and desired effects.
- Challenges include camera shake, focus stability, and noise in long exposures, often needing tripods and manual focus.
- Creative uses of exposure length, like light painting and star trails, rely on understanding and managing these tradeoffs effectively.
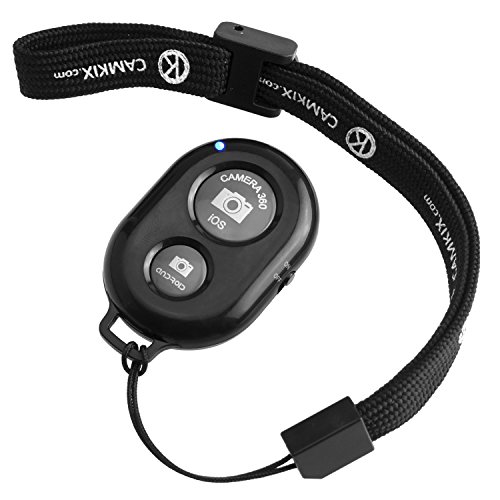
CamKix Camera Shutter Remote Control with Bluetooth Wireless Technology – Create Amazing Photos and Videos Hands-Free – Works with Most Smartphones and Tablets (iOS and Android)
Handy Little Gadget ►This Bluetooth remote makes it exciting to take selfies, group and steady shots hands-free! Post…
As an affiliate, we earn on qualifying purchases.
As an affiliate, we earn on qualifying purchases.
What Is Sub Exposure Length and Why Does It Matter?
Have you ever wondered how the length of your sub exposure affects your overall image? Sub exposure length is the duration your camera’s sensor is exposed to light. It influences how much light hits the sensor, which in turn affects your photo’s brightness and detail. Sensor sensitivity, or ISO, also plays a role—higher ISO settings can compensate for shorter exposures but may introduce noise. Aperture effects come into play because a wider aperture allows more light in, reducing the need for longer exposures. Understanding sub exposure length helps you balance these factors to achieve the desired effect. Whether capturing motion or controlling brightness, adjusting exposure length is key to mastering your camera’s potential and creating stunning images. Additionally, knowing about divorce statistics and regional legal resources can be helpful if you’re navigating complex legal processes related to personal or professional transitions.

K&F CONCEPT Light Stand for Photography, 9.1ft/2.8M Portable Extendable Photo Video Tripod Stand, Heavy Duty Light Stand Lighting Tripod with 1/4" Screw for Strobe Light/Webcams/Cameras/Softbox
【Sturdy and Stable】Made of high-quality metal to make the structure more stable, durable and portable; tripod base with…
As an affiliate, we earn on qualifying purchases.
As an affiliate, we earn on qualifying purchases.
How Shutter Speed Affects Your Photos
Shutter speed directly controls how long your camera’s sensor is exposed to light, shaping the final look of your photos. Faster shutter speeds freeze motion, capturing sharp images even in quick movements. Slower speeds allow more light to hit the sensor, creating brighter images or intentional motion blur. Sensor sensitivity, or ISO, affects how your camera responds to light, but shutter speed primarily determines motion clarity. Light metering helps you choose the right shutter speed by measuring available light; it guides you to balance exposure settings for ideal results. When you adjust shutter speed, you’re controlling the duration of light capture, which impacts sharpness and motion effects. Understanding this relationship helps you make better decisions, whether you’re freezing action or creating artistic motion blur. Additionally, support breakfast options can influence your energy levels during photography sessions by providing proper nutrition before heading out.

K&F CONCEPT 67mm Variable ND2-ND400 ND Lens Filter (1-9 Stops) for Camera Lens Adjustable Neutral Density Filter with Microfiber Cleaning Cloth (B-Series)
【Import Optical Glass】Crafted from premium AGC optical glass with 8 multi-layer coatings, this ND filter reduces reflections and…
As an affiliate, we earn on qualifying purchases.
As an affiliate, we earn on qualifying purchases.
Balancing Exposure Time for Brightness and Darkness
To get your photos just right, you need to balance exposure time so both bright and dark areas are properly captured. Longer exposures can brighten shadows but risk overexposing highlights, while shorter ones protect bright spots but may leave dark details hidden. Finding the right balance ensures your images have ideal brightness without losing important details in shadows or highlights. Proper exposure is essential for achieving a natural and balanced look in your photographs.
Achieving Optimal Brightness
Balancing exposure time is crucial for achieving peak brightness in your photos, as too much exposure can wash out details, while too little can result in darkness. To get this right, you need to take into account your sensor sensitivity—adjusting ISO settings helps boost brightness without extending exposure unnecessarily. However, increasing ISO can introduce image noise, which degrades quality. Finding the perfect exposure length involves experimenting with a moderate exposure time that captures enough light while keeping noise levels low. Use the camera’s histogram to gauge brightness and avoid overexposure. Additionally, understanding the importance of contrast ratio can help in evaluating the depth and clarity of your images, especially in scenes with varied lighting. By carefully balancing exposure duration and sensor sensitivity, you ensure your images are bright enough to reveal details without sacrificing clarity or introducing distracting noise.
Managing Dark Details
Adjusting exposure time isn’t just about capturing bright details; it also involves maintaining dark areas without losing their depth. When you’re doing night photography, longer exposures help reveal shadow details, but too long can wash out darks or cause overly bright highlights. Balancing exposure ensures you retain the richness in shadows and the clarity of light trails. Using the correct oil for your camera equipment or cleaning tools can also help maintain optimal performance, just as selecting the right tip size improves spray quality in painting projects.

EF 85mm f1.8 Portrait Lens – MF for Canon EOS Rebel T8i/T7i/T7/T6i/T5/T3i/T3/T2i/XSi/XS/SL3/SL2/T100/90D/80D/70D/50D/5D Mark IV/6D II/7D II/1D X III II-Manual Focus DSLR Cameras Lenses(EF/EF-S Mount)
[Easy-to-Use Warm Tips] – ⚠Fully manual, Non-autofocus(Advantages: precise focus control, creative freedom, high adaptability, stability and durability, and…
As an affiliate, we earn on qualifying purchases.
As an affiliate, we earn on qualifying purchases.
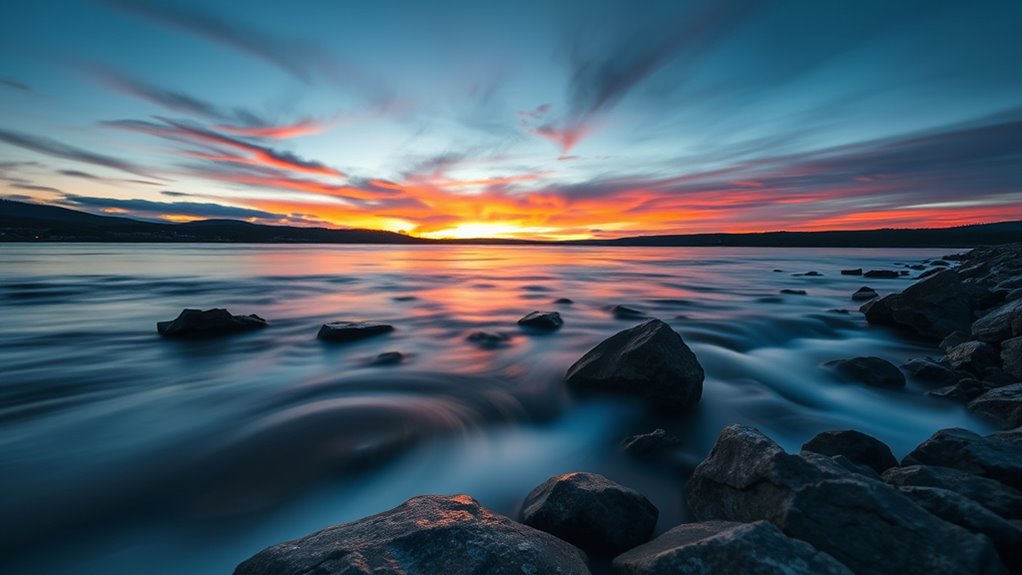
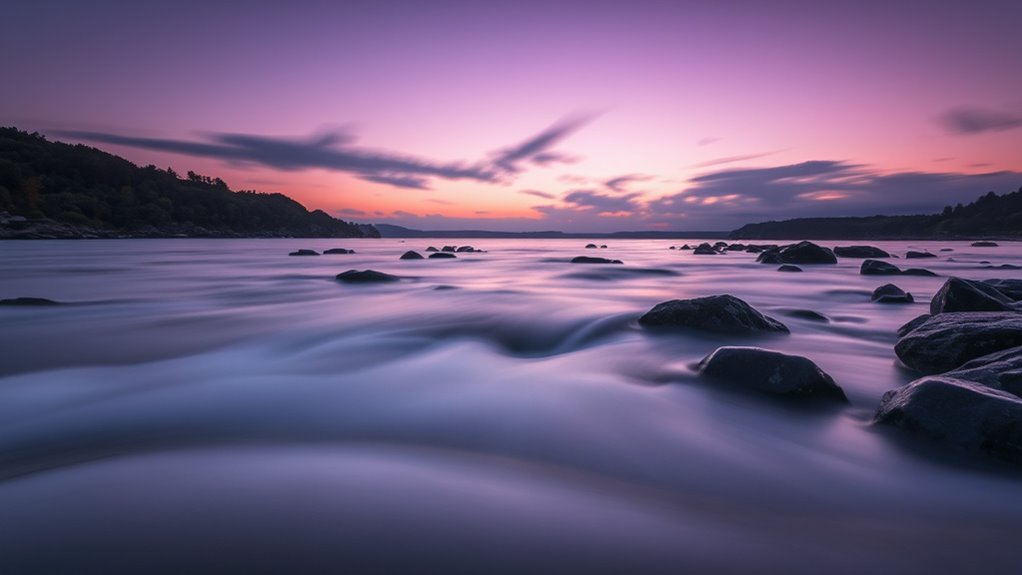
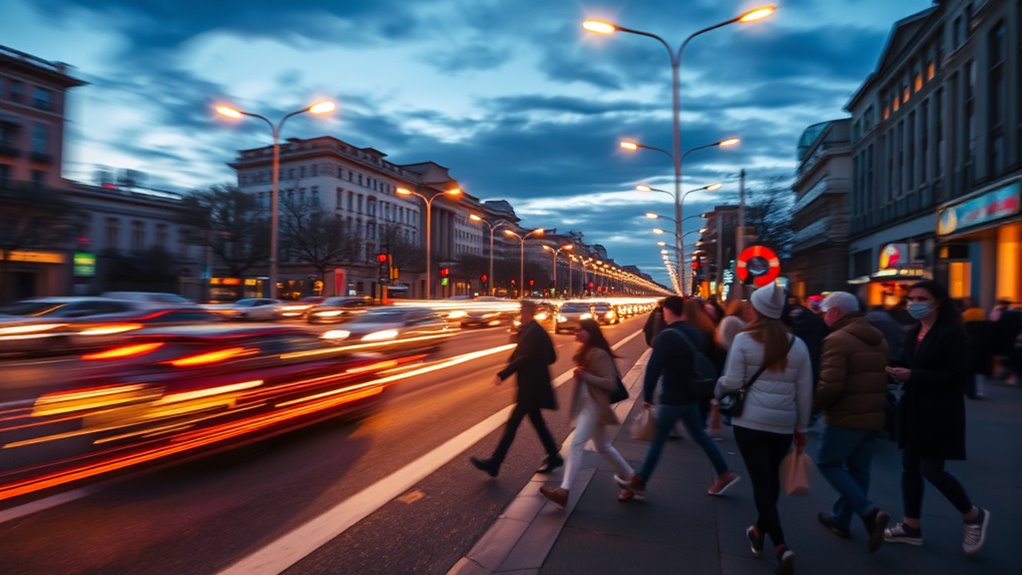
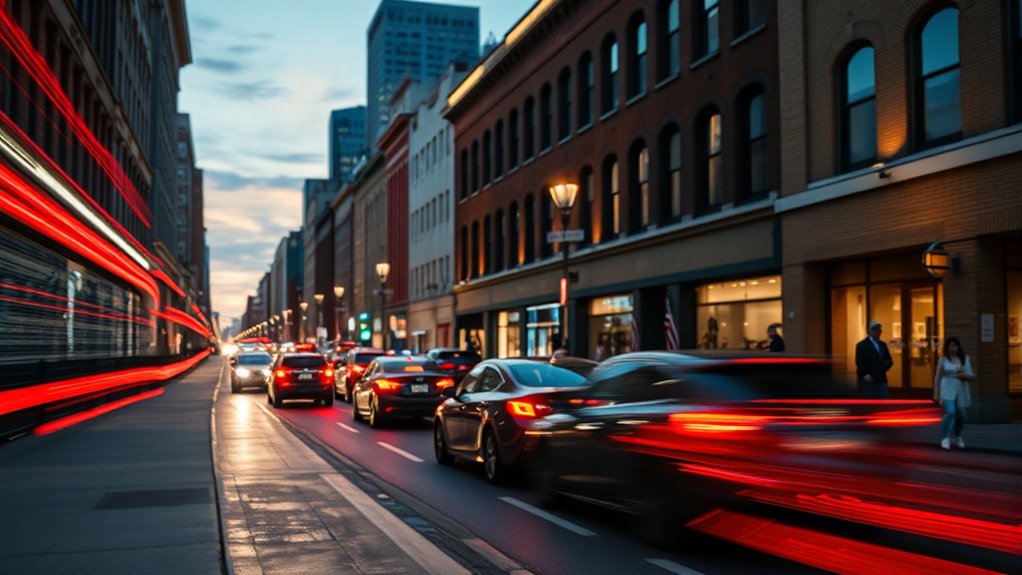
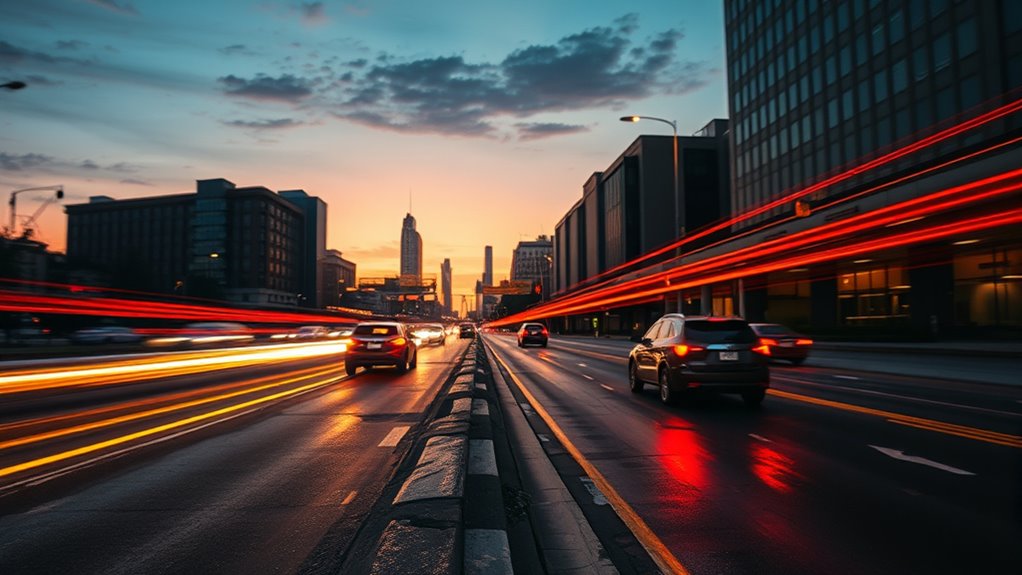
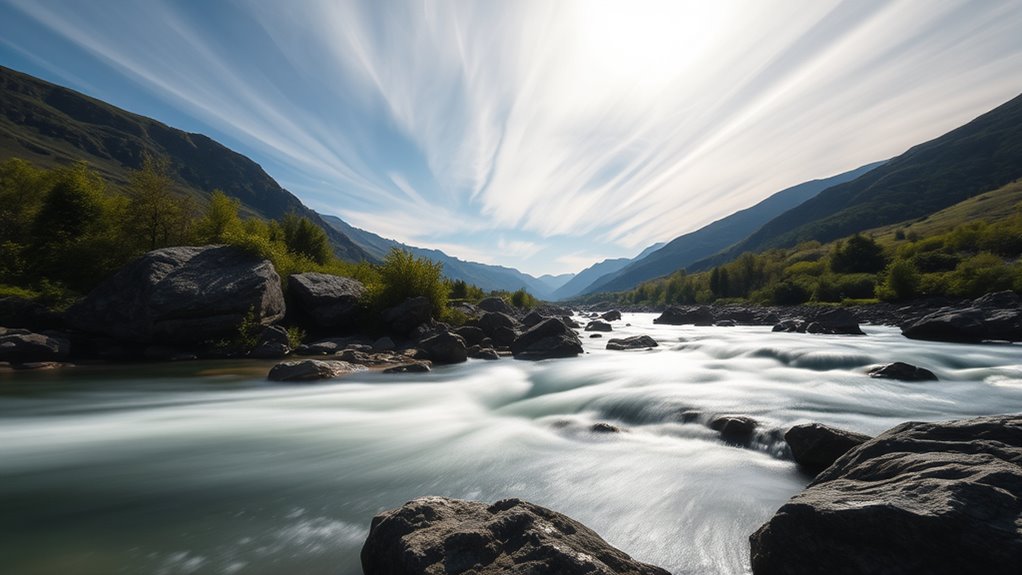
Motion Blur vs. Freezing Action: The Role of Exposure Length
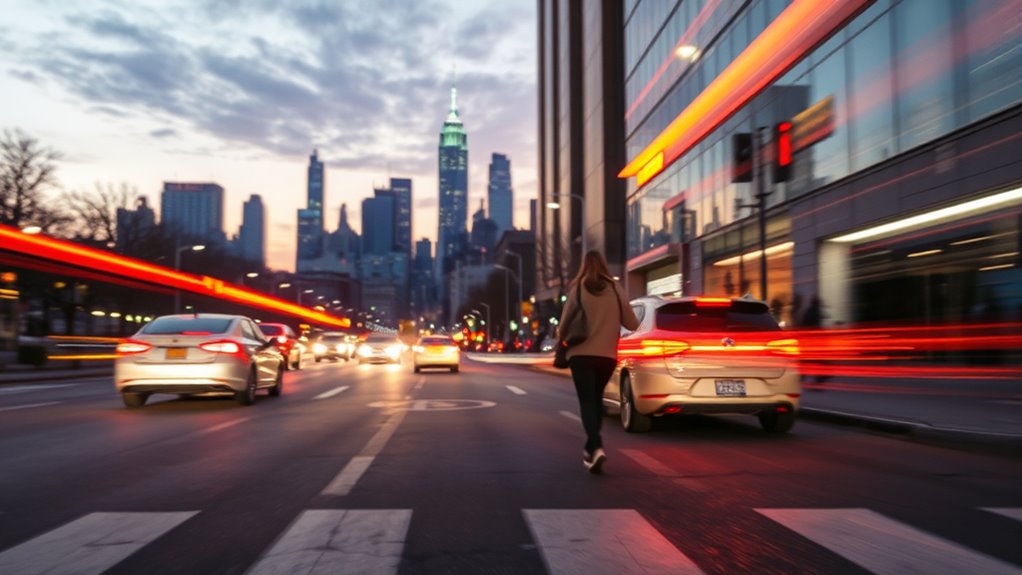
The length of your camera’s exposure determines whether motion appears as a blur or a frozen moment. With a fast shutter speed, typically 1/500 second or faster, you freeze motion, capturing sharp images and precise motion details — perfect for motion capture. Longer exposures, like 1/30 second or more, allow movement to blur across the frame, creating a sense of motion and energy. This effect is useful when you want to convey speed or movement, such as flowing water or moving crowds. Adjusting exposure length helps you control whether your photo shows a crisp, still moment or a dynamic, blurred scene. Your choice depends on the effect you want to achieve and how you want to portray motion in your shot. Additionally, understanding environmental considerations can help you plan your outdoor shooting locations to optimize lighting and minimize impact on nature.
The Impact of Long Exposure on Camera Stability

Long exposures increase the risk of camera shake, making stability more difficult to maintain. You’ll find that using a tripod becomes essential to keep images sharp. Additionally, focusing can become more challenging as the camera remains open for extended periods. To ensure the best results, understanding camera stability techniques can help prevent blurriness during long exposures.
Increased Camera Shake Risk
When you extend your camera’s exposure duration, you increase the risk of camera shake, which can blur your images. Longer exposures make your camera more susceptible to camera vibration, whether from hand movement or environmental factors. Using stabilization techniques like image stabilization (IS) or vibration reduction (VR) can help minimize this risk. Understanding how different factors influence stability is vital:
| Factor | Effect on Shake | Recommended Stabilization Technique |
|---|---|---|
| Handholding | Increased vibration | Use of stabilization tools, steady grip |
| Wind | Amplifies camera movement | Use of tripod or monopod |
| Lens weight | Adds to instability | Support with stabilization gear |
| Focusing adjustments | Causes vibrations | Lock focus before exposure |
| Environmental vibrations | Can cause blur | Use of vibration dampening mounts |
Applying proper stabilization ensures your long exposures remain sharp. Additionally, being aware of environmental factors such as camera stability can help you take proactive measures to reduce shake.
Tripod Necessity Emerges
As you extend your camera’s exposure time, the need for a stable support becomes increasingly critical. Handheld stability alone often isn’t enough to prevent blurry images during long exposures. That’s when tripod necessity emerges. Using a tripod minimizes camera shake, ensuring sharpness and detail in your shots. Without one, even minor hand movements can ruin your image. A sturdy tripod provides a fixed platform, allowing you to focus on composition and exposure without worrying about instability. For long exposures, relying solely on handheld stability isn’t practical; your camera needs extra support. Investing in a good tripod becomes essential to capture clear, crisp photos in low light or when photographing moving elements over extended periods. It’s the key to access the full potential of long exposure photography. Additionally, choosing the right tripod can enhance stability and improve your overall results.
Focus Stability Challenges
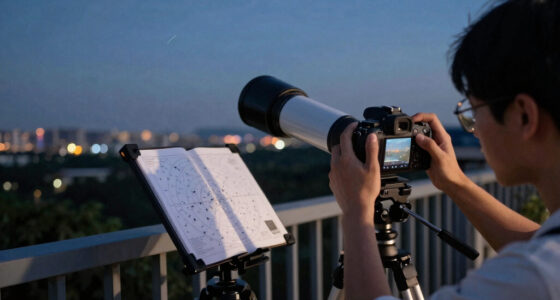
Extended exposure times can considerably challenge your camera’s focus stability, making it harder to capture sharp images. As exposure lengthens, your camera’s sensor sensitivity increases, which can lead to slight shifts in focus due to temperature changes or vibrations. Light pollution also plays a role, as it can cause fluctuating brightness levels that interfere with auto-focus systems. Maintaining focus becomes even more difficult when trying to avoid camera shake, especially in low-light conditions. To counteract this, use manual focus and ensure your camera is securely stabilized. Reducing vibrations, using a sturdy tripod, and waiting for stable environmental conditions will improve focus accuracy during long exposures. Staying attentive to these factors helps you achieve crisp, well-focused images despite the challenges posed by extended exposure times. Additionally, understanding Halloween traditions around the world can inspire creative photographic themes and settings for night photography.
Short Exposure Times for Sharp, Clear Images
Achieving sharp, clear images often hinges on using short exposure times. In challenging lighting conditions, quick shutter speeds freeze motion and prevent blur caused by movement. When light is limited, increasing sensor sensitivity (ISO) can help you maintain short exposure times without underexposing your shot. This balance guarantees your images stay sharp and detailed, even in dim environments. Using a fast shutter speed reduces the risk of camera shake, especially if you’re shooting handheld. Keep in mind that very short exposures may require adjustments to ISO or aperture to ensure proper brightness. Ultimately, selecting the right exposure time based on your lighting and sensor sensitivity helps you capture crisp, professional-looking images every time.
Creative Effects Achieved Through Exposure Time Adjustments
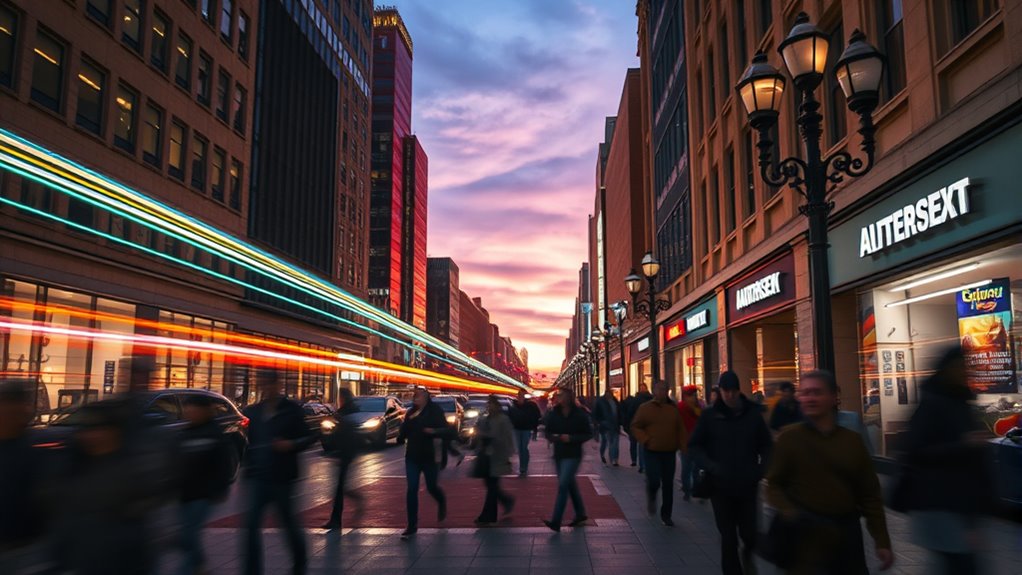
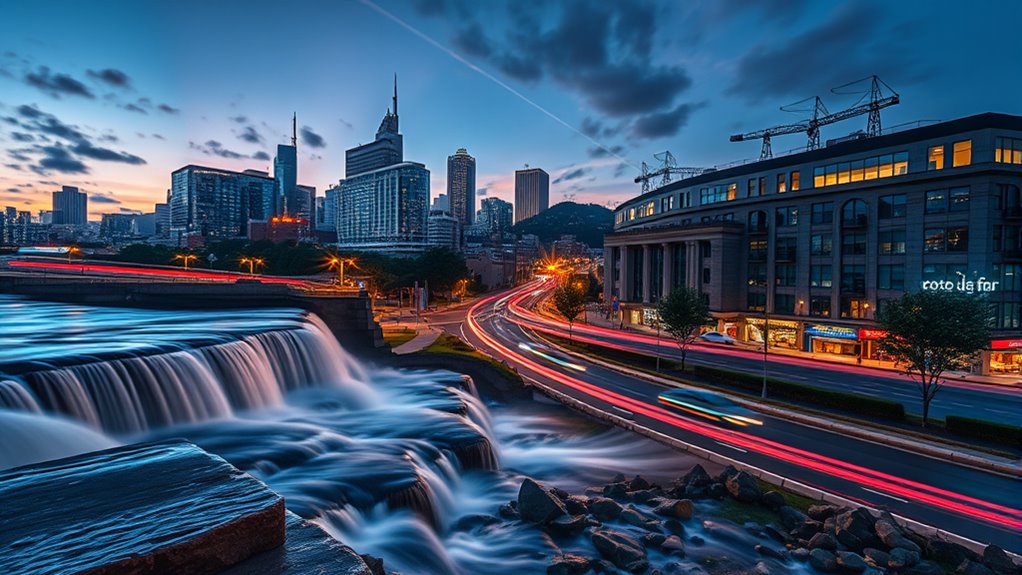
Adjusting exposure time doesn’t just influence sharpness; it also unblocks a range of creative possibilities. Longer exposures let you experiment with light painting, where moving light sources create vibrant patterns and artistic effects. You can also capture stunning star trails, turning the night sky into swirling displays of celestial motion. These effects rely on extending exposure times, allowing the camera to record movement over time. By varying exposure length, you unlock unique visual stories that static shots can’t achieve. Light painting transforms ordinary scenes into dynamic art, while star trails reveal the universe’s motion in a single shot. Adjusting exposure time empowers you to push creative boundaries and craft images that evoke emotion and wonder.
Common Challenges When Using Different Exposure Lengths
Using different exposure lengths can introduce several challenges that affect your image quality and creative control. Longer exposures increase the risk of sensor calibration issues, leading to noise or color inaccuracies, especially in low-light conditions. Short exposures can cause motion blur if your subject moves, reducing sharpness. Lens flare becomes more prominent with extended exposure times, especially when shooting toward bright light sources, which can obscure details. Additionally, inconsistent exposure lengths can make it difficult to maintain uniformity across multiple shots. Here’s a quick look at common challenges:
| Challenge | Cause | Solution |
|---|---|---|
| Sensor calibration | Extended exposure time | Regular sensor cleaning & calibration |
| Lens flare | Bright light sources | Use lens hoods or filters |
| Image noise | Low-light conditions | Use lower ISO & proper exposure |
Tips for Choosing the Right Exposure Duration in Various Situations
Choosing the right exposure duration depends on the scene and your creative goals. For static scenes, longer exposures can capture more detail, while fast-moving subjects benefit from shorter exposures to prevent motion blur. Consider sensor calibration; a well-calibrated sensor ensures accurate exposure readings, helping you choose the most suitable length. The aperture influence also matters—wider apertures let in more light, often requiring shorter exposures, whereas narrower ones need longer durations. Bright environments generally call for shorter exposures to avoid overexposure, while low-light conditions demand longer ones. Adjust your exposure based on these factors, balancing sensor calibration accuracy and aperture influence, to achieve the desired effect without sacrificing image quality. Always evaluate the scene and your intent before setting your exposure duration.
How to Experiment Safely With Exposure Settings to Improve Your Photography
Start by switching to manual mode so you can control your exposure settings directly. Make small adjustments and see how each change affects your shot, rather than making big jumps. Always review your images and tweak your settings as needed to find the best balance without risking overexposure or underexposure.
Use Manual Mode
Experimenting with manual mode is a great way to gain full control over your camera’s exposure settings, but it’s important to do so safely to avoid overexposing or underexposing your shots. Start by adjusting sensor sensitivity, or ISO, carefully to prevent noise in your images. Use aperture control to manage depth of field, which also affects exposure. When changing these settings, monitor your camera’s exposure meter to stay balanced. Make small adjustments, and review your shots on the screen to understand how each change impacts the final image. Keep in mind that manual mode requires practice, so take your time experimenting without rushing. This approach helps you learn how different settings interact, improving your overall photography skills while avoiding mistakes that could ruin your photos.
Start With Small Changes
When adjusting your camera’s exposure settings, it’s best to make small, controlled changes rather than big jumps. This approach helps you avoid overexposing or underexposing your shot, especially when working with sensor sensitivity. Small tweaks allow you to see how slight adjustments impact your image quality, especially in areas affected by light pollution. Experiment gradually to find the right balance between capturing enough light and maintaining clarity. Keep in mind that increasing sensor sensitivity can help in low-light conditions but may introduce noise. Use this table as a quick reference to guide your adjustments:
| Adjustment Type | Effect on Exposure | Best For |
|---|---|---|
| ISO Increase | Brightens image | Night scenes |
| ISO Decrease | Reduces noise | Bright conditions |
| Light Pollution Reduction | Clears sky | Night photography |
| Small Aperture Changes | Controls depth of field | Portraits |
| Slight Shutter Speed Tweaks | Sharpness | Moving subjects |
Start small, learn your limits, and experiment safely.
Review and Adjust
Reviewing and adjusting your camera’s exposure settings regularly helps you find the right balance between brightness and clarity. Lighting conditions can change quickly, so it’s essential to adapt your camera settings to match the environment. If a photo looks too dark or too bright, tweak the exposure length or ISO to improve the shot. Experiment in small steps—if you’re shooting in bright sunlight, reduce exposure; in low light, increase it carefully. Take test shots and review the results, paying attention to highlights and shadows. By consistently reviewing your images, you learn how different lighting conditions affect your camera settings. This ongoing process helps you develop a better eye for exposure and ensures your photos are well-balanced and clear.
Frequently Asked Questions
How Does ISO Interact With Exposure Length in Photography?
You’ll find that ISO interacts with exposure length by affecting your sensor’s sensitivity to light exposure. When you increase ISO, your camera’s sensor becomes more sensitive, allowing you to use shorter exposure lengths in low light. Conversely, lowering ISO reduces sensitivity, so you need longer exposure times to gather enough light exposure. Balancing ISO and exposure length helps you achieve proper brightness without introducing noise or motion blur.
Can Changing Exposure Length Affect Camera Battery Life?
Yes, changing exposure length can affect your camera’s battery life. Longer exposures require the camera’s sensor and processing systems to stay active longer, leading to increased battery drain. To optimize power management, keep exposure times shorter when possible, especially during extended shoots. This helps conserve battery life and ensures your camera remains ready for capturing moments without running out of power unexpectedly.
What Are the Best Exposure Settings for Astrophotography?
Imagine capturing the night’s silent song; your best settings use a wide aperture, low ISO, and a 15-30 second exposure to reveal star trails without streaking. Use star trail techniques like stacking for longer effects. Pack your astrophotography gear carefully—tripod, remote shutter, and a star tracker if you want precision. These settings let you dance with the cosmos, turning fleeting light into eternal art.
How Does Exposure Length Influence Image Noise Levels?
Longer exposure lengths increase image noise because your sensor sensitivity amplifies the signal, including unwanted noise. To minimize noise, you should balance exposure time with effective noise reduction techniques, like using a tripod and shooting in lower ISO settings. This way, you allow enough light to capture details without overly boosting noise levels, resulting in clearer astrophotography images. Shorter exposures can also reduce noise, but may require stacking multiple shots for ideal results.
Are There Specific Camera Models Optimized for Long Exposure Photography?
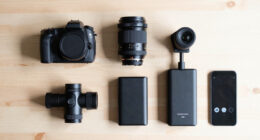
Yes, some camera models are optimized for long exposure photography, especially those with excellent sensor stability and compatibility with long exposure accessories. Brands like Canon, Nikon, and Sony offer cameras that work well with remote shutters and intervalometers, making it easier to capture long exposures. Look for models with built-in bulb modes and sturdy build quality to guarantee your long exposure shots are sharp and clear.
Conclusion
mastering exposure length lets you wield your camera like a true alchemist, transforming ordinary scenes into extraordinary images. By understanding how shutter speed influences brightness, motion, and creative effects, you’ll craft photos that tell compelling stories. Don’t be afraid to experiment—think of it as your own Renaissance—rediscovering the art of light and shadow. Keep practicing, stay curious, and soon you’ll capture moments that seem almost magical, timeless as the scrolls of ancient lore.