
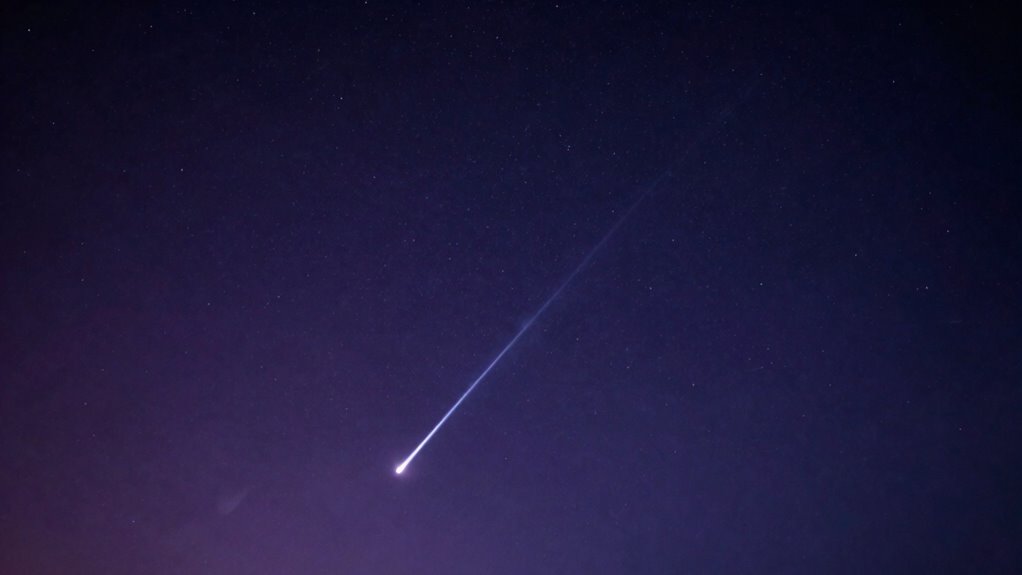
If your stars look like comets in night sky photos, it’s often caused by camera shake, improper focus, long exposures, or atmospheric turbulence. Using a tripod, manual focus, and keeping exposure times short helps keep stars sharp. Avoid over-processing in post-production, which can create halos and unnatural trails. For more tips on capturing crisp, natural-looking stars, explore how to refine your technique and equipment choices for stunning results.
Key Takeaways
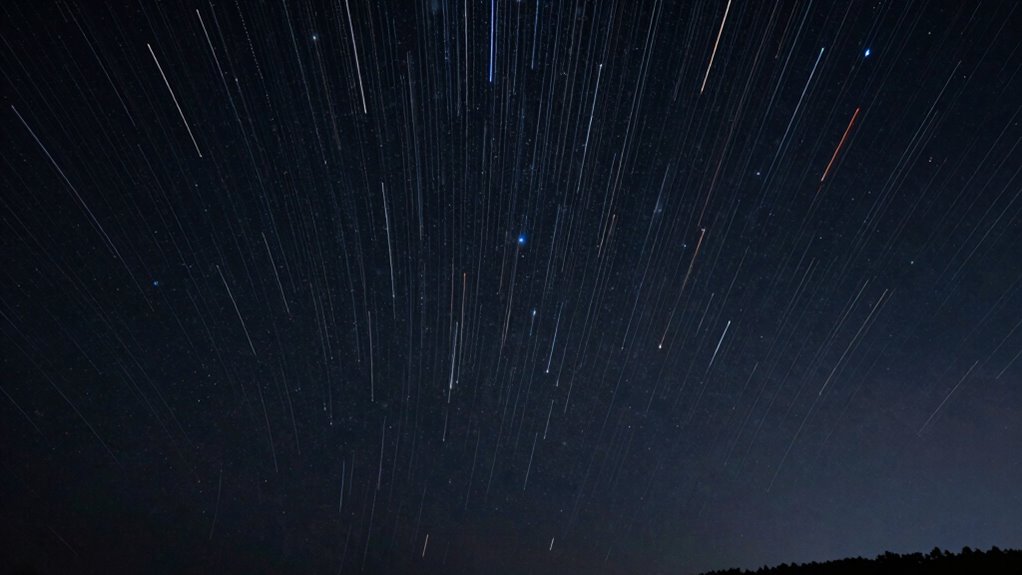
- Excessive exposure time causes star trails, making stars appear elongated like comets. Keep shutter speeds under 20 seconds.
- Camera shake or vibration during shooting results in blurred, streaked stars; stabilize your camera with a tripod.
- Improper focus, especially near infinity, causes star shapes to distort and resemble comet tails; focus precisely on stars.
- Over-sharpening or excessive post-processing creates halos and unnatural star shapes, mimicking comet-like streaks.
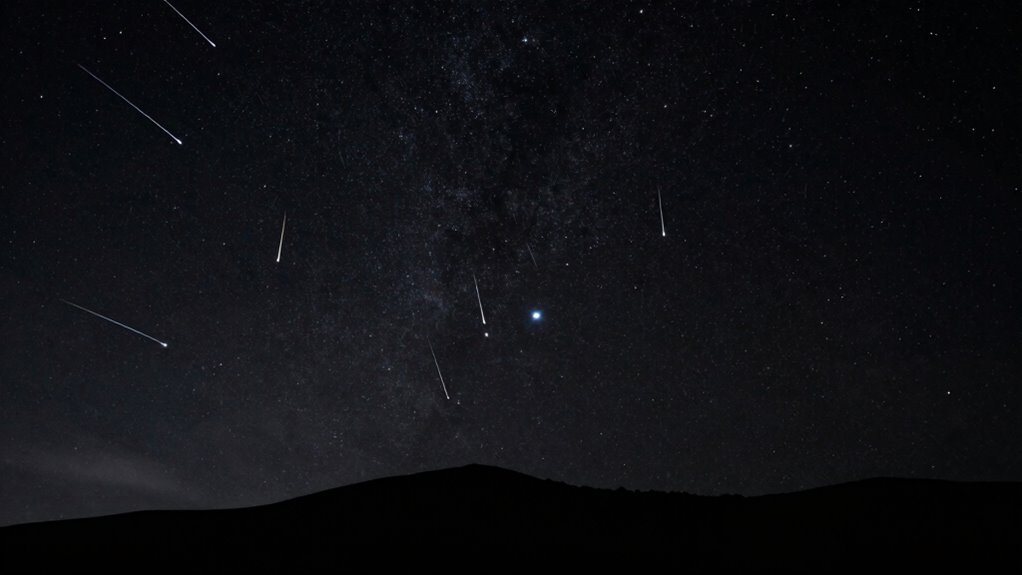
- Atmospheric turbulence and light pollution can distort and wash out stars, making them look fuzzy or like trails.

K&F CONCEPT 64 inch/163 cm Camera Tripod,Lightweight Travel Outdoor DSLR Tripods with 360 Degree Ball Head Load Capacity 17.6 lbs/8 kg,Cellphone Clip for Smartphone Live Streaming Vlog O234A1+BH-36
【Lightweight and Portable】4 section leg can adjust tripod height from 20.4''/52cm to 64.1''/163cm; it can be folded to…
As an affiliate, we earn on qualifying purchases.
As an affiliate, we earn on qualifying purchases.
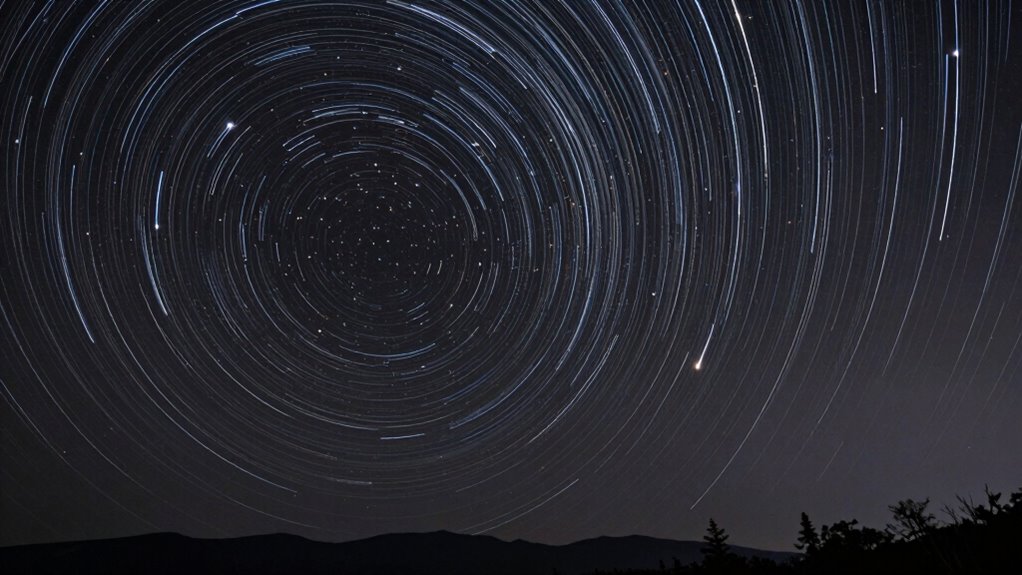
Why Do Stars Look Like Comets in Night Sky Photos?
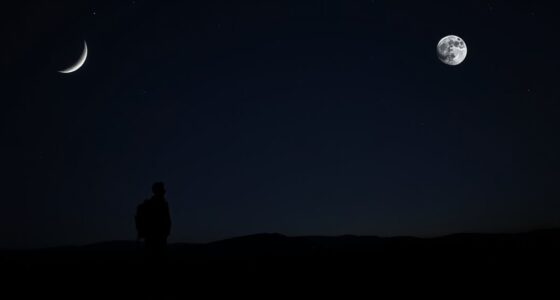
When you see stars that appear streaked or elongated in night sky photos, it’s usually due to the Earth’s rotation during the exposure time. This celestial motion causes stars to trace lines across your image, making them look like comets. You might notice star color variations along these trails, as different stars emit light at varying wavelengths, adding color diversity to the streaks. Longer exposures capture more of this motion, intensifying the comet-like appearance. To minimize this effect, you can reduce the exposure time or use tracking mounts that follow the stars’ movement. Understanding how celestial motion impacts star images helps you adjust your camera settings for crisper, more accurate night sky photos—without the unwanted comet effect. Additionally, exploring digital concepts can provide insights into how different settings affect your photography outcomes. A well-calibrated camera can also enhance color accuracy in your images, making celestial bodies appear more vivid and true to life. Furthermore, being aware of mammography guidelines can help you appreciate the importance of precise imaging techniques in various fields.
Rokinon 12mm f/2.0 CS Lens for Sony E
SUPERIOR IMAGE QUALITY – Experience exceptional sharpness and clarity with this 12mm lens, designed with 12 elements in…
As an affiliate, we earn on qualifying purchases.
As an affiliate, we earn on qualifying purchases.
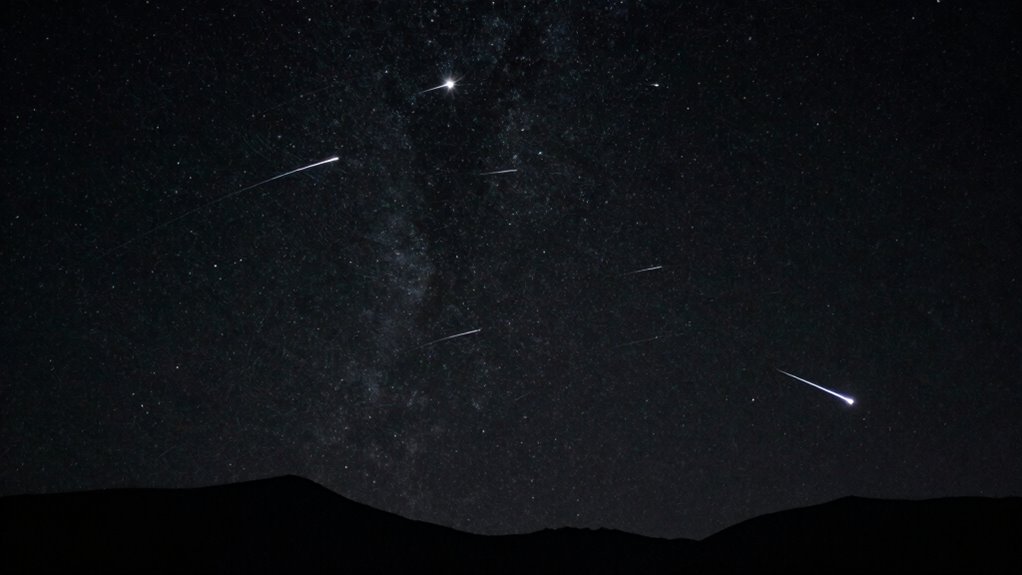
How Atmospheric Conditions Cause Star Trails and Blur
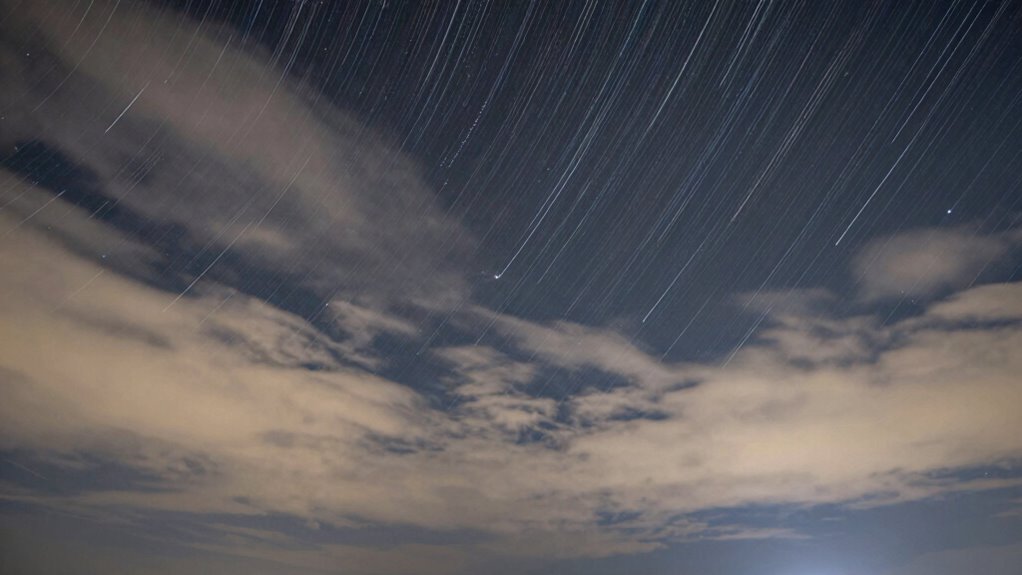
Atmospheric conditions play a significant role in causing star trails and blurring in night sky photographs. When you shoot, atmospheric turbulence causes the air to move unpredictably, distorting the light from stars and creating shimmering or streaking effects. Additionally, using remote car covers can help protect your vehicle from the effects of humidity and temperature fluctuations, which can worsen atmospheric conditions. Light pollution effects also contribute by reducing contrast and washing out stars, making images appear blurry or streaked. These conditions are especially problematic during humid or windy nights, where turbulence is stronger. To understand this better, consider the following:
| Cause | Effect | Solution |
|---|---|---|
| Atmospheric turbulence | Star trails and blurring | Use stable, clear nights |
| Light pollution effects | Reduced star clarity | Shoot away from city lights |
| Humidity and wind | Increased turbulence | Wait for calm, dry nights |
Additionally, heatstroke signs can be important to recognize if you’re spending extended periods outdoors under the night sky. Understanding pomade can also help you adapt your techniques for better results. Utilizing proper audio setups can enhance your experience by allowing you to clearly hear ambient sounds, enriching your overall stargazing adventure.

Equatorial Mount Star Tracker with Ball-Head Gimbal for Astrophotography
The shell of the equatorial mount is made of PETG and carbon fiber (CF).
As an affiliate, we earn on qualifying purchases.
As an affiliate, we earn on qualifying purchases.
Choosing the Right Camera Settings to Keep Stars Sharp
Choosing the right camera settings is essential for capturing sharp, clear images of stars. To avoid star trails or blurring, you need to optimize your camera sensor and lens aperture. Use a wide lens aperture to gather more light, but avoid overly wide settings that cause optical issues. Keep your shutter speed fast enough to prevent star movement from Earth’s rotation—generally under 20 seconds. Adjust ISO carefully: higher ISO boosts brightness but can introduce noise. Stabilize your camera with a tripod to minimize vibrations. Finally, set your camera to manual mode for full control over exposure, aperture, and ISO.
- Use a wide lens aperture for better light capture
- Keep shutter speed under 20 seconds
- Increase ISO cautiously to boost brightness
- Stabilize your camera with a tripod
- Set your camera to manual mode

Kiwifotos RS-60E3 Remote Switch Shutter Release Cord for Canon EOS Rebel T6 T7 T5 EOS R50V R6 Mark III II R6 V R7 R8 R10 R100 RP T8i T7i T6s T6i T5i T4i SL3 SL2 90D 80D 70D 77D M5 M6 Mark II & More
Control autofocus and shutter triggering, Capture images without shaking camera
As an affiliate, we earn on qualifying purchases.
As an affiliate, we earn on qualifying purchases.
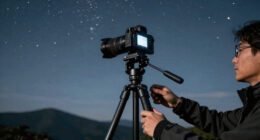
How to Focus and Stabilize Your Camera for Clear Stars
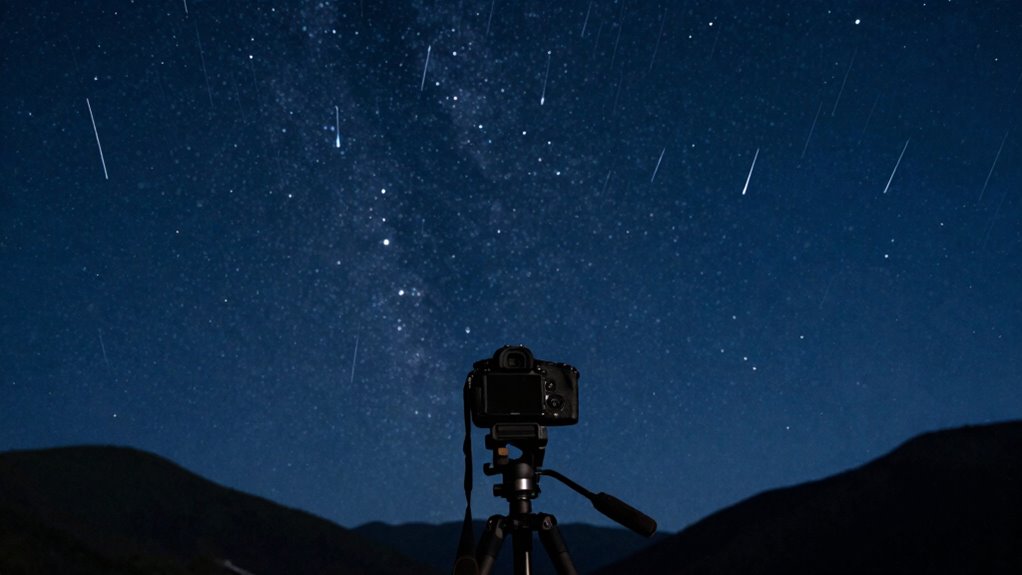
To get sharp, clear stars in your photos, start by setting your camera on a sturdy tripod to eliminate shake. Next, carefully adjust the focus to infinity or use manual focus to guarantee the stars are pinpoint sharp. Stabilizing your camera and dialing in the correct focus are key to capturing stunning night sky images. Additionally, consider utilizing landscaping to enhance natural beauty in your foreground to create a more captivating composition. Using a home theater projector can also help you visualize your night sky setup, ensuring you capture the best perspective. Implementing cybersecurity measures for your devices can protect your photography equipment from unauthorized access.
Use a Tripod
Stabilizing your camera with a sturdy tripod is essential for capturing clear, sharp images of stars. A stable setup minimizes camera shake, allowing longer exposures without blur. Focus on good camera ergonomics—adjust your tripod height and position for comfort and stability. Use tripod accessories like a ball head or quick-release plate to ease adjustments and improve precision. Ensure the tripod is on solid ground, and tighten all joints securely. Additional tips include avoiding overextending tripod legs, which can cause instability, and using a remote shutter release or timer to prevent vibrations. These small tweaks considerably enhance your ability to capture crisp, detailed star images, making your night sky photography more successful. Additionally, consider the Milky Way shooting techniques that can further refine your approach to night photography.
Adjust Focus Properly
Achieving sharp star images starts with proper focus, since even the tiniest misalignment can cause your shots to appear blurry. Start by calibrating your lens to verify it’s accurately focused for night photography; this helps prevent focus drift during long exposures. Use manual focus when possible, as autofocus techniques can struggle in low light and may hunt for focus points, resulting in softer images. Fine-tune your focus by magnifying a bright star or distant light in your camera’s live view, adjusting until the star appears as a pinpoint. Take test shots and review them carefully, making small adjustments each time. Consistent lens calibration and precise focusing are key to capturing crisp, clear stars and avoiding that comet-like blur. Additionally, incorporating nutritional information into your diet can enhance your overall well-being, indirectly improving your focus and concentration during photography. Remember that proper packing techniques can help you ensure that your gear is organized and ready for use when you arrive at your destination.
Common Post-Processing Mistakes That Blur Your Stars
When editing your star photos, over-processing can cause your stars to look blurred or unnatural. Excessive sharpening often introduces halos and noise, making the image appear less sharp rather than more. Be cautious with your adjustments to preserve the clarity and integrity of your stars. Maintaining image quality standards is essential to achieving stunning astrophotography results. Understanding the importance of battery life in electric bike technology can also help you appreciate the nuances of capturing clear images in varying conditions.
Over-Processing Causes Blur
Over-processing your star images can often lead to unwanted blur, diminishing the clarity and sharpness you’re aiming for. When you push your edits too far, details become smudged, and stars can appear streaked like comets. Common mistakes include overusing sharpening tools, which exaggerate noise and create halos. Excessive noise reduction can also soften star points, losing detail. Relying heavily on star trail techniques during post-processing may cause streaks that blur individual stars. Additionally, increasing contrast or saturation too much can make stars look unnatural and fuzzy. Be cautious with these adjustments to avoid making your stars appear elongated or smeared, especially if your initial images contain camera sensor noise. Balance is key—subtle edits preserve star sharpness and prevent unwanted blur.
Excessive Sharpening Effects
Excessive sharpening can quickly turn your star images into a blurry mess, making it harder to see fine details. When you over-sharpen, star color often becomes exaggerated or unnatural, distracting from the natural hues in your shot. It can also cause unwanted halos around stars, which resemble comets rather than crisp points. Your lens aperture influences star shape, but over-sharpening can distort this, making stars appear jagged or elongated. This is especially problematic in images taken with wide or narrow apertures, where details are already compromised. To fix this, reduce sharpening during post-processing and avoid pushing it too far. Focus on maintaining natural star points and colors, and trust your original image details instead of relying on excessive sharpness to enhance the scene.
Top Tips for Capturing Crisp, Point-Like Stars Every Time
Capturing crisp, point-like stars requires a combination of proper technique and equipment adjustments. To avoid star trails caused by celestial motion, keep your exposures short and use a sturdy tripod. Focus carefully to ensure the stars are sharp and avoid over-sharpening, which can distort star color. Use a remote shutter release or timer to prevent vibrations. Adjust your ISO and aperture for bright, well-defined stars without introducing noise. Additionally, consider star tracking mounts for longer exposures. Pay attention to star color; different stars have varied hues that can fade with excessive exposure. Monitoring these factors will help you achieve pinpoint stars every time, giving your astrophotography a professional touch.
- Use a star tracker for longer exposures
- Keep exposure times brief to prevent trails
- Focus precisely on the stars
- Minimize vibrations with remote shutter release
- Adjust ISO and aperture for ideal star brightness
Frequently Asked Questions
Can Lens Quality Affect Star Image Clarity?
Yes, lens quality directly affects star image clarity. Poor lenses with inadequate coatings can cause glare and reduce sharpness, making stars look streaked or blurry. Aperture effects also play a role; a wider aperture might introduce more aberrations, decreasing clarity. Investing in high-quality lenses with good coatings helps minimize these issues, ensuring sharper, more defined star images and reducing the comet-like streaks caused by lens imperfections.
How Does Moonlight Impact Star Photography?
Moonlight effects can wash out the night sky, dimming the stars and making them harder to see, like trying to spot fireflies in a floodlight. When the moon is bright, star visibility decreases because its glow competes with the faint light of distant stars. To capture clearer images, you might wait for a new moon or use filters to block the moonlight’s glare, letting stars shine in their full, twinkling glory.
What’s the Best Time of Year for Star Photography?
You should plan your star photography during the new moon or when skies are darkest, typically in late fall or winter, for clearer views. This helps with celestial navigation and capturing long star trail techniques without interference from moonlight. Clear, dry nights with minimal light pollution are ideal, so check weather forecasts and moon phases to maximize your chances of stunning shots. Timing is key to getting sharp, vibrant star images.
Do Different Camera Brands Perform Better for Star Shots?
Think of astrophotography gear as a trusted companion—some brands excel in low-light performance, just like a reliable friend. You’ll find that camera brands like Canon and Nikon often offer better sensor sensitivity and versatile camera settings for star shots. During my first night shoot, switching to a different brand made a huge difference in capturing crisp stars. Ultimately, choose a camera with excellent low-light capabilities and customizable settings for the best results.
How Do I Prevent My Camera From Overheating During Long Exposures?
To prevent your camera from overheating during long exposures, use camera cooling techniques like placing it in a shaded or well-ventilated area. Turn off unnecessary features and limit live view usage to reduce heat. You can also use external cooling devices or fans for overheating prevention. Taking breaks between shots helps, too. Proper cooling guarantees your camera stays cool, maintains performance, and captures clear, starry images without star trails caused by overheating.
Conclusion
Now that you know the causes behind star trails and blurs, you’re ready to sharpen your night sky photos. Think of your camera as a telescope, guiding your shots through the cosmic chaos. With the right settings, focus, and patience, you’ll turn your camera into a starlight brush, painting crisp, sparkling points in the darkness. Keep practicing, and soon your photos will shine brighter than a comet streaking across the night!