
To avoid mid-session surprises during your meridian flip, plan carefully by predicting when your mount will cross the meridian using star charts or planetarium software. Prepare your equipment beforehand, check your calibration, and automate the flip if possible. Monitor your mount during the session, ensuring it stays within limits. Address common challenges like focus shifts or tracking errors early. Keep these tips in mind, and you’ll stay on track—if you look further, you’ll discover more ways to streamline your process.
Key Takeaways
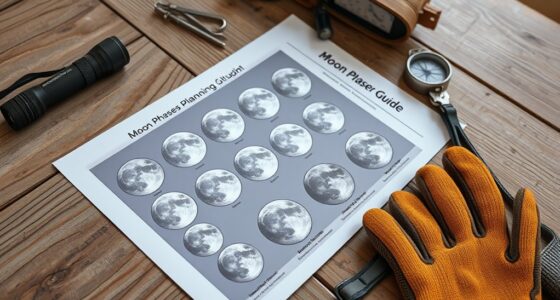
- Use star charts or planetarium software to accurately predict the meridian crossing time before imaging sessions.
- Automate the mount’s meridian flip trigger to ensure seamless, timely reorientation during long exposures.
- Perform thorough calibration and polar alignment beforehand to prevent tracking errors post-flip.
- Check and adjust limit switches and mount settings regularly to avoid unexpected hitting of physical limits.
- Monitor the mount during imaging to quickly address any issues or deviations caused by the flip process.
automated meridian flip mount
As an affiliate, we earn on qualifying purchases.
As an affiliate, we earn on qualifying purchases.
Why Meridian Flips Are a Critical Part of Astrophotography
Have you ever wondered why meridian flips are essential in astrophotography? When capturing images of objects like a star cluster or monitoring a solar flare, your telescope must cross the meridian, the imaginary line dividing the sky. Without a flip, your equipment might lose alignment or cause issues like trailing or image distortion. The flip reorients your camera, ensuring continuous, sharp imaging. This process prevents your telescope from hitting its physical limits and helps maintain tracking accuracy. Additionally, understanding digital concepts in astrophotography can further enhance your imaging techniques. Ignoring the meridian flip can result in blurry photos or missed details of celestial objects. Understanding why this maneuver is critical keeps your sessions smooth and maximizes your chances of capturing stunning details, whether it’s a solar flare illuminating the sun or a distant star cluster. Furthermore, high refresh rates can improve your tracking accuracy during long exposures. Moreover, proper battery maintenance is crucial to ensure that your equipment functions optimally throughout your imaging sessions. Additionally, incorporating eco-friendly practices** in your setup can enhance both your imaging experience and environmental impact.

Stargazing Cards – Messier Catalog | Night Sky Exploration Kit for Telescopes & Binoculars | Flashcards with Star Charts, Astrophotography & Facts | Perfect Astronomy & Space Gift for Kids & Adults
⭐ PORTABLE & PRACTICAL STARGAZING TOOL. Skip the bulky astronomy books and sky atlases – Stargazing Cards are…
As an affiliate, we earn on qualifying purchases.
As an affiliate, we earn on qualifying purchases.
When Will Your Meridian Flip Occur?
Your meridian flip happens when your telescope’s mount reaches its limit as the celestial object crosses the local meridian. Knowing the object’s path and your mount’s position helps you predict exactly when the flip will occur. Planning your observation schedule around these factors guarantees smoother imaging sessions.
Telescope Mount Position
Understanding when your telescope mount will reach its meridian is crucial for effective planning, especially if you’re aiming to avoid or prepare for a meridian flip. The mount’s position determines if it’s approaching the meridian, which impacts mount stability and power management. As your object nears the meridian, the mount shifts from east to west, risking instability if not managed properly. Monitoring the current altitude and azimuth helps predict this moment. Use the table below to understand key mount positions:
| Position | Significance |
|---|---|
| East of meridian | Pre-flip, stable mount |
| At meridian | Flip moment approaches |
| West of meridian | Post-flip, stable mount |
| Near zenith | Risk of overload |
Being aware of your mount’s position helps prevent mid-session surprises.
Celestial Object Path
Ever wonder exactly when your celestial object will cross the meridian? The timing depends on its path across the sky, which varies daily. Planetary conjunctions can shift the apparent position of planets, slightly altering their meridian crossing times. Solar activity, too, influences the sky’s brightness and can affect your perception of the object’s position, especially during dawn or dusk. To predict the exact moment, you’ll need to consult star charts or planetarium software that accounts for these factors. Tracking the object’s trajectory helps you prepare for the meridian flip, avoiding surprises mid-session. Remember, even minor shifts caused by planetary conjunctions or solar activity can change the crossing time, so keep an eye on current sky conditions for precise planning. Additionally, enhancing recovery can help you stay focused and ready for the observation session.
Observation Scheduling Tips
Knowing the exact timing of your celestial object crossing the meridian helps you plan your observation session smoothly. For deep sky imaging, timing is vital to avoid interruptions during critical exposures. If you’re doing planetary imaging, knowing when the object crosses the meridian lets you optimize your session, minimizing the risk of a mid-session flip that could disrupt your focus. Use planetarium software or your mount’s built-in tools to calculate the crossing time precisely. Schedule your most important images around this moment, especially if you want to avoid flipping during an essential shot. Planning ahead ensures you’re ready for the flip, reducing downtime and maximizing data quality during your deep sky or planetary work.

Astromania Polar Alignment Scope – Bundle with – Accessory Kit Telescope Fully-Coated Eyepieces
Fully-coated eyepieces for higher magnification; 2x Power Lens will double the magnification of any eyepiece used with it
As an affiliate, we earn on qualifying purchases.
As an affiliate, we earn on qualifying purchases.
How to Prepare Your Mount for a Smooth Meridian Flip
Preparing your mount for a smooth meridian flip starts with ensuring it’s properly aligned and calibrated beforehand. Accurate star tracking is essential; use your mount’s calibration procedures to confirm it’s tracking stars precisely across the sky. Perform a thorough mount calibration, focusing on polar alignment and ensuring your mount’s gears and motors are functioning smoothly. Double-check that your polar alignment is accurate, as even minor errors can cause issues during the flip. Run a test tracking session to verify consistent star movement and positions. If needed, re-calibrate or refine your alignment before starting your imaging session. Properly prepared, your mount will handle the meridian flip seamlessly, reducing the risk of image shift or focus disruption during the session. Additionally, understanding the impact of performance analysis can help you fine-tune your setup for future sessions.
TWTADE 2Pcs ME-8108 Adjustable Roller Lever Arm Limit Switch NC-NO CNC Mill Router
Product name : mini limit switch; model no. : me8108; actuator action : Momentary
As an affiliate, we earn on qualifying purchases.
As an affiliate, we earn on qualifying purchases.
How to Automate Your Meridian Flip for Seamless Imaging
Automating your meridian flip allows for uninterrupted imaging sessions by eliminating the need for manual intervention. This is especially useful when capturing detailed planetary nebulae or observing lunar eclipses, where timing is critical. To set up automation:
- Configure your mount’s software for automatic flip triggers based on target position.
- Use planetarium software to plan your session, guaranteeing flips occur at ideal times.
- Test your setup with a few short sessions to verify smooth transitions.
- Enable remote control features to monitor and intervene only if necessary.
This approach minimizes surprises mid-session, keeps your imaging seamless, and maximizes the quality of your astrophotography. Automation ensures you don’t miss essential moments, whether observing planetary nebulae or lunar eclipses.
What Are Common Meridian Flip Challenges and How to Fix Them?
Despite careful planning, meridian flips can present several common challenges that disrupt your imaging session. One major issue is inaccurate polar alignment, which can cause the mount to struggle during the flip, leading to misaligned images or focus shifts. Longer focal lengths exacerbate these problems, as even slight tracking errors become more noticeable. Additionally, inconsistent focus after the flip is a frequent challenge, especially if your focuser isn’t precisely calibrated. To fix these issues, double-check your polar alignment before starting, especially if you’re using high focal length equipment. Use autofocus routines immediately after the flip to maintain sharp images. Ensuring your mount’s tracking is stable and your equipment is properly balanced also helps minimize problems during the meridian flip. Proper cabling solutions can also play a crucial role in maintaining a stable connection during the flip. Moreover, utilizing eco-friendly materials in your setup can reduce the environmental impact of your imaging process. Furthermore, understanding the Milky Way shooting techniques can enhance your overall astrophotography experience and preparation. Maintaining hive health in your equipment setup can also contribute to a more stable imaging process. Additionally, being aware of ethical consumerism can lead to better choices in equipment that support sustainable practices.
Workflow Tips for Before and After the Meridian Flip
To guarantee a smooth meridian flip, you should prepare your equipment ahead of time and verify that your mount is properly aligned. Additionally, understanding modern family expectations can help you communicate more effectively about any adjustments needed during the session. After the flip, perform calibration steps to re-center and confirm tracking accuracy. Following these tips helps prevent delays and keeps your imaging session on track. Additionally, incorporating safety tips from experienced DIYers can further enhance your workflow and minimize potential issues. Maintaining good indoor air quality during your session can also contribute to a more comfortable and productive environment. Creating a cozy atmosphere with snack ideas can elevate the overall experience of your session. Moreover, having a clear understanding of employee ownership benefits can strengthen team dynamics and ensure everyone is aligned during the process.
Prepare Equipment in Advance
Preparing your equipment in advance can save you from unnecessary delays and frustration during the meridian flip. To streamline your session, consider these steps:
- Set your focus using focusing techniques to ensure sharp images throughout the session.
- Plan color correction adjustments beforehand, so you don’t waste time fine-tuning during the flip.
- Pre-load filters and accessories needed for post-flip imaging to avoid scrambling during the process.
- Check camera settings and save your preferred configurations for quick reinitialization after the flip.
Verify Mount Alignment
Verifying your mount’s alignment before and after the meridian flip is essential to guarantee accurate tracking and seamless imaging. Proper mount calibration ensures your setup maintains precision, reducing errors during imaging sessions. After the flip, perform alignment verification to confirm the mount’s pointing accuracy remains intact. Use a star alignment tool or software to check for deviations. Regularly calibrate your mount to account for mechanical or environmental shifts that may occur over time.
| Step | Action |
|---|---|
| 1 | Perform initial mount calibration before imaging |
| 2 | Capture reference stars for alignment verification |
| 3 | Execute the meridian flip |
| 4 | Reassess star positions after the flip |
| 5 | Adjust mount calibration if needed |
This process minimizes misalignment, ensuring consistent, high-quality imaging results.
Post-Flip Calibration Steps
After completing the meridian flip, it’s important to perform a thorough calibration check to maintain accurate pointing and tracking. First, verify your polar alignment, as a slight shift can affect image quality and may lead to scorching effects during the session. Additionally, implementing proper enterprise governance can help ensure that your imaging process remains secure and efficient. Next, recheck your focal length calibration, especially if your imaging setup involves any changes. Then, perform a star alignment or calibration routine to ensure your mount’s pointing accuracy is intact. Finally, confirm that your autoguiding system responds correctly after the flip. Additionally, consider using a remote car cover to protect your equipment from the elements during outdoor sessions.
In summary:
- Verify polar alignment
- Recalibrate focal length
- Perform star alignment
- Test autoguiding response
These steps help maintain precision in your imaging session, preventing misalignments caused by the flip and ensuring consistent results throughout your session.
Troubleshooting Mount Hitting Limits During the Flip

When your mount hits its limits during a flip, it can disrupt your imaging session and cause frustration. To troubleshoot, first check your mount calibration, ensuring it’s accurate and up-to-date. An incorrect calibration can cause the mount to believe it’s near its limits prematurely. Next, inspect the limit switch, which prevents the mount from exceeding safe boundaries. If the limit switch is misaligned or stuck, it might trigger early, halting the flip. Adjust the switch position if needed, and verify it moves freely. Confirm that your mount’s tracking and limit settings are properly configured in your control software. Regular calibration and maintenance of the limit switch help prevent hitting limits unexpectedly, ensuring smoother flips and uninterrupted imaging sessions. Additionally, implementing grocery savings strategies can free up funds for better equipment, enhancing your overall imaging experience. Understanding the potential impact of 2025 tax law changes can also aid in financial planning for such investments. Moreover, utilizing accessibility features can make your imaging setup more user-friendly, especially for kids or those who may need assistance. Additionally, ensuring a proper cage setup for your equipment can help mitigate heat buildup that may affect your mount’s performance.
Frequently Asked Questions
Can I Manually Override the Meridian Flip if Needed?
Yes, you can manually override the meridian flip if needed. Most mount control software allows you to adjust flip timing or perform a manual override, giving you control over the process. This is useful if you want to prevent a flip at an inconvenient time or if your session requires specific timing. Just make certain you’re cautious during the manual override to avoid damaging your equipment or misaligning your setup.
How Does Weather Affect the Timing of Meridian Flips?
Weather considerably impacts the timing of meridian flips. Cloud cover can obscure your target, prompting you to delay or adjust your flip to guarantee clear imaging. High wind speeds may cause vibrations, making it unsafe to proceed and potentially shifting your planned flip time. Always monitor these conditions closely; if wind is strong or clouds threaten, it’s best to postpone or adjust your schedule to maintain image quality and equipment safety.
What Software Options Are Best for Automating Flips?
You should choose software like Sequence Generator Pro or NINA, which automate meridian flips seamlessly. These programs handle camera calibration and focal length adjustments automatically, ensuring your equipment stays aligned. They monitor the sky’s movement and trigger flips at the most suitable time, preventing mid-session surprises. By setting precise parameters, you can focus on capturing images without worrying about manual intervention, making your astrophotography more efficient and accurate.
How Can I Prevent My Mount From Hitting Limits During the Flip?
To prevent your mount from hitting limits during a flip, make certain your mount is properly aligned and calibrated beforehand. Regularly check and adjust your mount’s alignment to avoid unexpected limit hits. Also, plan your flip timing carefully, considering the position of celestial objects and the mount’s limits. Using automation software can help synchronize flip timing, giving your mount enough clearance and preventing collisions during the flip process.
Is It Necessary to Recalibrate After a Meridian Flip?
Think of your mount as a dancer returning to center stage after a twirl. After a meridian flip, you should recalibrate to keep the rhythm smooth. Performing calibration checks and verifying mount alignment guarantees your mount stays in harmony with the sky’s dance. While some mounts maintain accuracy without recalibration, it’s wise to confirm alignment and run calibration checks, preventing missteps and ensuring your session continues flawlessly.
Conclusion
By planning your meridian flips carefully, you can avoid surprises and keep your imaging sessions smooth. For example, if you anticipate your mount hitting a limit during the flip, adjusting your target’s position beforehand can prevent delays. With proper preparation and automation, you’ll enjoy seamless sessions, capturing stunning images without interruption. Remember, understanding your mount’s behavior and workflows guarantees you stay in control, making every night under the stars a success.


![SpaceX Starship Flight 13 Livestream [Video]](https://astrophotographyhq.com/wp-content/uploads/2026/07/spacex-starship-flight-13-livestream-video-featured-260x140.jpg)