Fast optics filters can cause issues like star halos, band shifts, and color fringing that ruin your astrophotos. These problems often result from lens flare, chromatic aberration, or low-quality coatings, especially with fast lenses. To fix them, you should use high-quality filters, adjust camera settings, and shoot with a lens hood. Proper post-processing can also help reduce artifacts. Keep exploring to discover more effective ways to achieve clearer, sharper images with your fast optics setup.
Key Takeaways
- Use high-quality, anti-reflective coated filters to reduce internal reflections causing star halos and band shifts.
- Employ proper filter mounting and alignment to prevent vignetting and color shifts during astrophotography.
- Incorporate lens hoods and avoid shooting directly into bright light sources to minimize flare and halo formation.
- Adjust camera settings—smaller apertures, correct focus, and optimal exposure—to lessen aberrations and artifacts.
- Regularly clean and maintain filters to prevent dust and scratches that exacerbate filter-related optical issues.
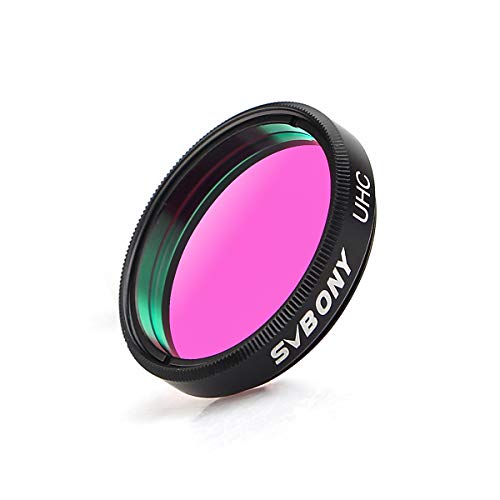
SVBONY Telescope Filter 1.25" UHC Filter Astrophotography to Improve The Image Contrast Reduces Light Pollution (1.25 inch)
UHC filters or light pollution reduction filters are designed to selectively reduce the transmission of certain wavelengths of…
As an affiliate, we earn on qualifying purchases.
As an affiliate, we earn on qualifying purchases.
How to Recognize Filter-Related Artifacts in Your Photos
Recognizing filter-related artifacts in your photos can be tricky, but being aware of common signs helps you identify when a filter has affected your image. Look for unnatural edges, color distortions, or halos around bright objects—these often indicate filter issues. Consistent filter maintenance is essential; dirty or improperly mounted filters can cause artifacts. Regular cleaning and proper installation help prevent problems. Additionally, optical calibration of your camera and lens system ensures accurate image capture, reducing unintended effects caused by filters. If you notice strange color shifts or blurry spots, consider whether the filter is contributing. Understanding effective cleaning techniques can also help maintain your filters, ensuring optimal performance. By staying vigilant and maintaining your equipment, you can better distinguish genuine scene details from filter-induced artifacts, leading to clearer, more accurate photos. Furthermore, exploring digital content formats can enhance your overall photography experience. It’s also wise to consider electric power generation methods, as they can provide sustainable energy solutions for charging camera equipment. Ethical considerations in consumer choices can also influence which filters you choose to invest in, ensuring you support responsible manufacturing practices.

Hoya NXT Plus 49mm UV Filter — Schott B270 Clear Glass with 10-Layer HMC Multi-Coating for 98% Light Transmission, Waterproof Top-Coat, Aluminum Frame – Camera Lens Filter for Sharp, Clear Images
10-Layer Coating for Unparalleled Light Clarity: Our 49 mm UV lens filter protector features 10 layers of Hoya’s…
As an affiliate, we earn on qualifying purchases.
As an affiliate, we earn on qualifying purchases.
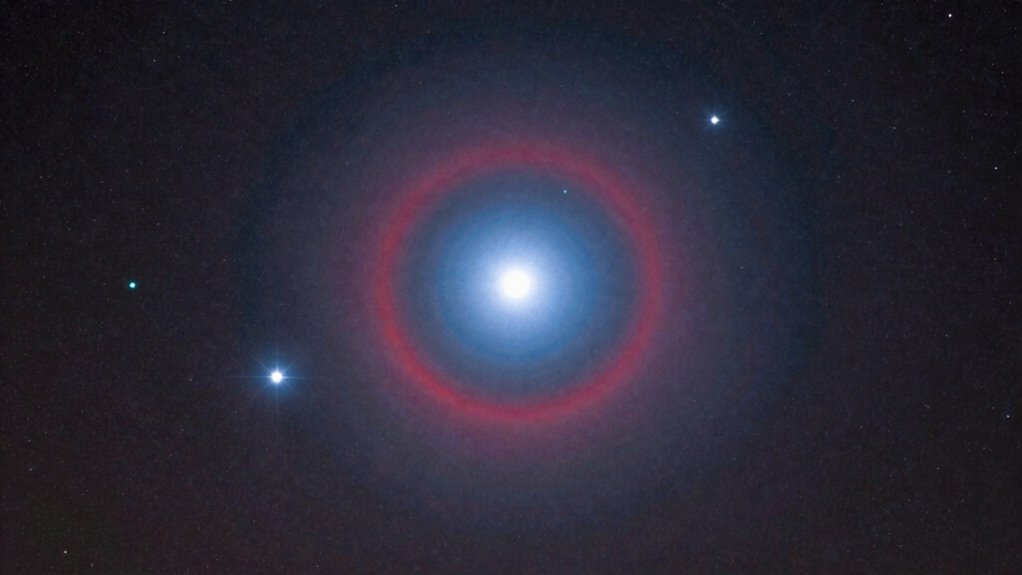
What Causes Star Halos, Band Shifts, and Color Fringing?
Have you ever noticed star-shaped halos around bright lights, unexpected color shifts, or fringes along high-contrast edges in your photos? These are often caused by chromatic aberration, a lens defect where different wavelengths of light focus at different points. This results in color fringing, especially around highlights and high-contrast areas. Lens flare can also contribute, creating streaks or halos from internal reflections within the lens elements. Fast lenses with wide apertures are more prone to these issues because they allow more light to pass through, increasing the likelihood of aberrations. Both chromatic aberration and lens flare can produce the star halos, color shifts, and fringes you see, but they can be minimized with proper lens design, filters, or post-processing adjustments. Additionally, understanding somatic therapy techniques may offer insights into the body’s response to visual stimuli and how it can affect perception.

JJC ET-60 Lens Hood Shade for Canon RF 75-300mm f/4-5.6, EF 75-300mm f/4-5.6 III, EF-S 55-250mm f/4.5-5.6 is II, Replaces Canon ET-60, Reversible & Compatible with 58mm Filter/Lens Cap
【Lens Compatibility】The tulip lens hood is compatible with Canon RF 75-300mm f/4-5.6, EF 75-300mm f/4-5.6 III, EF 75-300mm…
As an affiliate, we earn on qualifying purchases.
As an affiliate, we earn on qualifying purchases.
Tips to Minimize Artifacts While Shooting

To minimize artifacts like star halos, color fringing, and lens flare while shooting, it’s essential to pay close attention to your camera settings and shooting environment. Use a lens hood to reduce unwanted lens flare and avoid shooting directly into bright light sources. Adjust your aperture to a smaller setting to decrease chromatic aberration and improve overall sharpness. Keep your lens clean to prevent flare caused by dust or smudges. Be mindful of the angle you shoot at—tilting the camera can increase flare and aberrations. Using filters carefully and avoiding overly wide apertures can also help. By controlling these factors, you reduce the risk of artifacts appearing in your images, resulting in cleaner shots with better overall quality.

K&F CONCEPT 4-in-1 Camera Lens Cleaning Kit with Lens Cleaning Pen, Camera Air Blower, Microfiber Cleaning Cloth, Lens Cleaner Kit for Canon Nikon Pentax Sony DSLR Camera Lens Filter Cell Phones
【PROFESSIONAL LENS CLEANING KIT】:Dslr cleaning kit includes Camera Dust Blower*1, Lens Cleaning Pen*1, Microfiber Lens Cleaning Cloths*2. Safe…
As an affiliate, we earn on qualifying purchases.
As an affiliate, we earn on qualifying purchases.
Post-Processing Fixes for Filter Artifacts

Once your images have filter artifacts, you can use post-processing techniques to improve them. Removing star halos, correcting band shifts, and boosting image clarity are common fixes that make a big difference. These adjustments help you achieve sharper, more accurate results after shooting.
Removing Star Halos
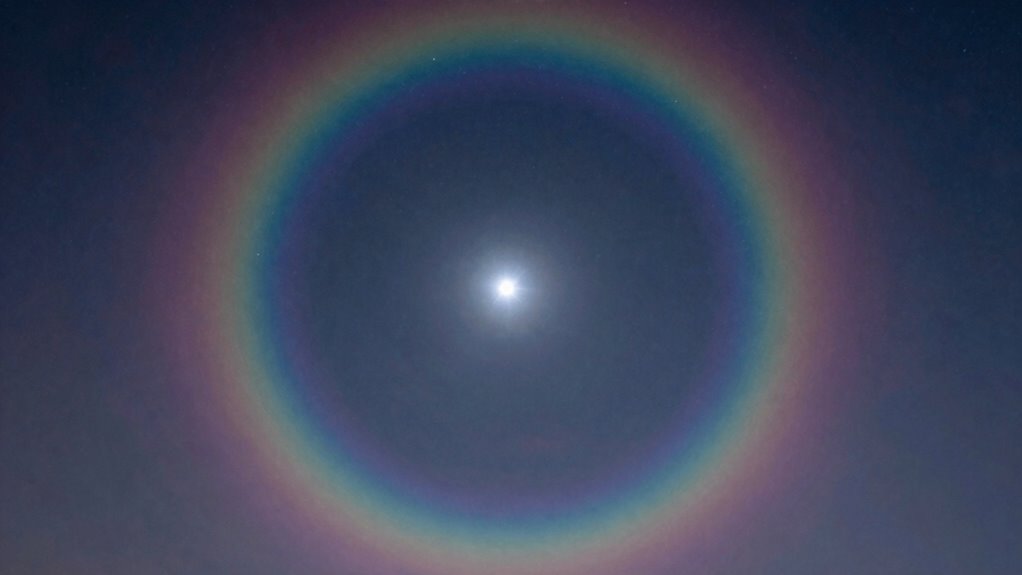
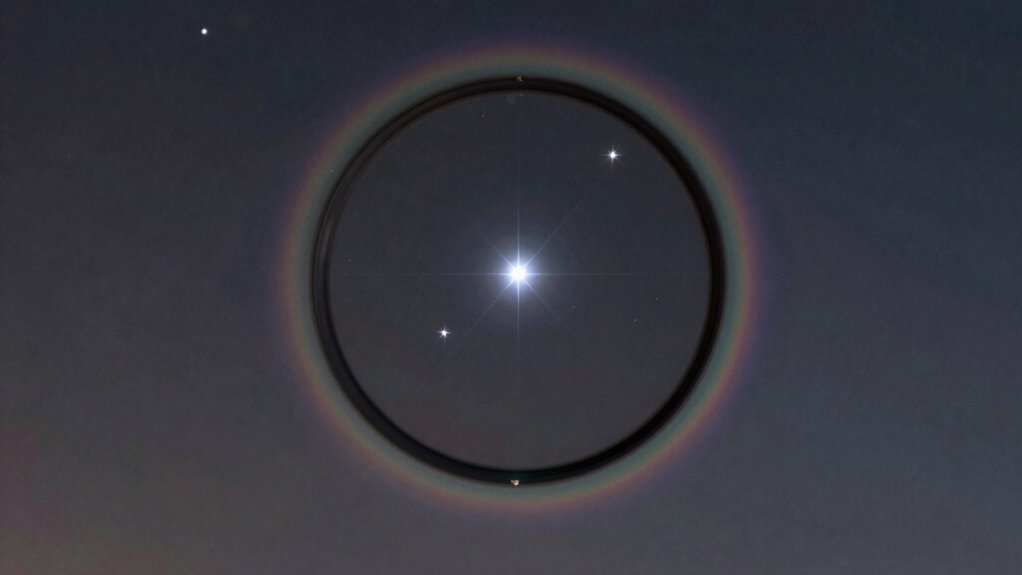
Star halos often appear as bright, ghostly rings around stars in images taken with fast optics filters, and they can detract from the overall quality of your astrophotographs. To address this, you need effective star halo removal techniques during post-processing. Start by accurately filter artifact identification—look for consistent bright rings around multiple stars. Once identified, you can use specialized software tools like star halo removal filters or manual masking to diminish these halos. Adjusting local contrast or applying targeted softening can also help reduce their prominence without harming the main image detail. Be cautious to avoid over-processing, which can introduce new artifacts. Properly identifying and removing star halos enhances your image clarity, enabling a more accurate and visually appealing representation of your celestial targets.
Correcting Band Shifts
After removing star halos, you might notice that your filter images don’t align perfectly across different bands, resulting in color shifts or misregistration. This occurs because variations in filter material and optical coatings can cause slight differences in wavelength transmission. To rectify band shifts, you can apply image registration techniques in post-processing, aligning the images precisely. Use software tools to overlay the images and adjust their position until the stars and features line up correctly. Sometimes, minor color adjustments or stretching can help reduce residual shifts. Recognizing that filter material and optical coatings influence the spectral response helps you understand why these shifts happen. Correcting them ensures consistent, accurate color representation and sharp, well-registered images across all bands.
Enhancing Image Clarity
When filter artifacts like diffraction spikes, halos, or uneven shading appear in your images, enhancing clarity often requires targeted post-processing techniques. Start by applying sharpening tools carefully to avoid exaggerating artifacts. Use noise reduction filters selectively to smooth out uneven shading without losing detail. To combat halos, employ local contrast adjustments or specialized dehazing algorithms. Ensuring proper filter maintenance is essential; clean filters regularly to prevent dirt or smudges that worsen artifacts. Verify optical compatibility before shooting to minimize issues caused by mismatched filters or incompatible equipment. Incorporating landscaping techniques can also help enhance the overall aesthetic of your images by creating a more visually appealing composition. Post-processing software like Adobe Photoshop or Lightroom offers precise controls for refining image clarity, helping you restore sharpness and contrast while reducing unwanted artifacts. Additionally, maintaining air quality benefits is crucial, as improved air quality can enhance overall home comfort and reduce the visibility of artifacts. Properly addressing these issues improves overall image quality with minimal loss of detail.
Choosing the Right Filters and Camera Settings to Avoid Problems
Choosing the right filters and camera settings is essential for avoiding common problems in fast optics photography. Start by selecting filter material that minimizes light scattering and ghosting, reducing star halos and band shifts. High-quality glass or optical plastic with anti-reflective coatings often outperform cheaper options. Proper filter mounting is equally important; make sure filters are securely and precisely attached to avoid vignetting or uneven light transmission. Use filters designed for fast optics, with slim or threaded mounts that fit your camera and lens without causing obstruction. Adjust camera settings accordingly—use appropriate exposure times, ISO, and focus modes to prevent overexposure or star bloating. Careful selection of filter material and proper mounting, combined with optimized camera settings, helps you achieve clearer images and avoid common fast optics issues.
When to Upgrade Your Fast Optics Filters

You should consider upgrading your fast optics filters when you notice a decline in image clarity or performance. Advances in filter technology can offer significant improvements, making your images sharper and more accurate. Staying aware of these signs helps guarantee you’re using the best equipment for your needs.
Detecting Filter Performance Decline
Over time, the performance of your fast optics filters can gradually decline, making it harder to achieve sharp, accurate results. You’ll notice issues like increased lens flare, inconsistent color accuracy, or difficulty maintaining proper camera sensor calibration. To detect these signs, look for:
- Persistent star halos or ghosting effects
- Shifts in color balance or band shift
- Increased need for lens flare management
- Reduced image sharpness despite focusing
- Difficulty maintaining consistent calibration
These indicators suggest your filter may be losing effectiveness, affecting image clarity and color fidelity. Regularly check your images for subtle changes and compare them to previous shots. When these problems persist, it’s time to evaluate upgrading your filters to restore ideal performance. Additionally, consider how color accuracy plays a vital role in achieving the best results in your photography.
Upgrading for Better Clarity
When signs of filter performance decline become noticeable, it’s time to think about upgrading your fast optics filters to restore image quality. Over time, filter material can degrade, leading to increased star halos or reduced contrast. Upgrading guarantees you get sharper, cleaner images. Focus on filters with high-quality material, which resist scratches and temperature changes better. Coating durability is also vital; a more durable coating prevents peeling, smudging, and color shifts that impair image clarity. If your current filters show signs of wear or no longer produce consistent results, it’s a clear indicator that an upgrade is needed. Investing in better filter material and coatings guarantees improved performance, helping you capture clearer, more precise astrophotographs.
Advancements in Filter Technology
Advancements in filter technology continuously push the boundaries of astrophotography, making it essential to recognize when your current filters are holding you back. Upgrading becomes necessary when your filters show signs of outdated filter material or reduced coating durability. Modern filters feature improved glass compositions that enhance light transmission and minimize distortions. Enhanced coating durability ensures resistance to scratches, dew, and environmental damage, extending filter lifespan. Consider upgrading if you notice increased star halos, band shifts, or color shifts that no longer improve with calibration. Newer filters also offer better anti-reflective coatings, reducing internal reflections. Staying current with filter tech helps you capture clearer, more accurate images and reduces post-processing work.
- Improved filter material for higher light transmission
- Advanced coating durability for longevity
- Better anti-reflective coatings
- Reduced star halos and artifacts
- Enhanced resistance to environmental damage
How to Maintain Image Quality and Reduce Artifacts
Maintaining high image quality and minimizing artifacts in fast optics filtering requires careful attention to both hardware setup and calibration. Start by selecting high-quality filter materials, as they influence light transmission and artifact reduction. Guarantee your filters have advanced lens coatings, which minimize reflections and flare that can cause star halos or ghosting. Properly align your filters and camera to avoid vignetting and band shift issues. Regularly calibrate your system, checking for color accuracy and focus consistency. Clean your filters gently to prevent scratches or dust that can introduce unwanted artifacts. Using well-crafted filter materials combined with lens coatings helps preserve sharpness and contrast. Consistent maintenance and precise calibration are key to achieving preferable image quality with fast optics filters.
Summary: Quick Tips for Flawless Photos With Fast Optics Filters
To achieve flawless photos with fast optics filters, focus on selecting high-quality materials and ensuring proper alignment. Opt for filters with superior optical coatings that minimize reflections and halos. Choose filter materials known for durability and minimal light distortion. Properly mount and clean filters regularly to prevent dust and scratches that impact image quality. Use filters specifically designed for your camera and lens system to avoid band shifts and color inaccuracies. Additionally, verify that filters are free from warping or manufacturing defects that could cause artifacts.
Use high-quality, well-maintained filters with advanced coatings for flawless, distortion-free photography.
- Opt for filters with advanced optical coatings
- Use high-quality, compatible filter materials
- Keep filters clean and free from dust
- Mount filters securely to prevent shifting
- Regularly inspect filters for defects
Frequently Asked Questions
Can Filter Quality Impact Artifact Severity?
Yes, filter quality can impact artifact severity. When filters degrade over time or are low quality, they can cause issues like star halos or band shift, which reduce image clarity. Poor-quality filters may introduce more artifacts, making them more noticeable and distracting. To minimize these problems, invest in high-quality filters and regularly maintain or replace them. This way, you preserve image clarity and reduce unwanted artifacts in your astrophotography.
Are Certain Camera Models More Prone to Filter Issues?
Yes, some camera models are more prone to filter issues due to camera compatibility and manufacturer variability. You might notice more artifacts or problems with certain brands or models because their sensor design or filter mounting standards differ. When choosing filters, check your camera’s compatibility and consider manufacturer recommendations to minimize issues. Being aware of these differences helps you select filters that work best with your camera, reducing potential problems.
Do Lens Coatings Influence Artifact Formation?
Lens coatings play a vital role in artifact formation, acting as both protectors and influencers. Good coatings minimize reflections, reducing star halos and ghosting, while poor coatings can increase unwanted artifacts. Think of coatings as a barrier that manages light transmission; when imperfect, they cause light to scatter, leading to artifacts. By choosing lenses with high-quality coatings, you improve image clarity and considerably cut down on undesirable visual effects.
How Do Environmental Conditions Affect Filter Artifacts?
Environmental conditions markedly impact filter artifacts. Atmospheric interference, like humidity or dust, can cause reflections and halos around bright objects, while light pollution introduces unwanted glare that worsens band shifts. To minimize these issues, you should use filters designed for your environment, avoid shooting during high pollution times, and verify your lens and filters are clean. Adjusting your camera settings also helps reduce the effects of atmospheric interference and light pollution on your images.
Are Specialized Filters Available to Prevent Specific Problems?
Yes, specialized filters can prevent specific problems. You should look for filter types with high-quality optical coatings designed to minimize issues like star halos or band shift. These coatings enhance light transmission and reduce reflections, helping you achieve clearer images. By choosing filters with the right optical coatings, you can effectively address and prevent common filter artifacts, ensuring better performance and more accurate results in your astrophotography or imaging projects.
Conclusion
Don’t let filter artifacts hold you back from stunning photos. With careful shooting, proper filter choice, and smart post-processing, you can minimize issues like star halos and color shifts. It’s easy to enjoy the creative benefits of fast optics filters when you understand how to manage their quirks. If you’re concerned about complexity, remember—practice makes perfect. Stick with it, and you’ll capture breathtaking images without sacrificing quality.