To combine Hα and OIII data into a compelling bi-color image, start by selecting narrowband filters that isolate each emission line effectively. Calibrate your images with darks, flats, and bias frames to remove noise. Adjust the intensities and contrast separately to highlight faint structures, then map Hα to red and OIII to blue or green. Carefully combine these layers, making incremental tweaks to guarantee color balance and detail. Continuing will reveal the key techniques that produce striking, high-contrast astrophotography.
Key Takeaways
- Select appropriate narrowband filters for Hα and OIII to ensure accurate isolation of each emission line.
- Calibrate images with dark frames, flats, and bias corrections before combining to enhance data quality.
- Map Hα data to red and OIII data to blue or green, adjusting intensities for optimal contrast and visibility.
- Use incremental, nonlinear adjustments during merging to highlight faint features without introducing artifacts.
- Evaluate and refine the composite continuously to produce a balanced, high-contrast bi-color image that reveals physical structures.

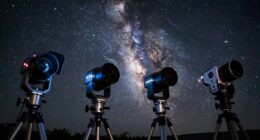
Bi-color imaging techniques have revolutionized how we visualize and analyze complex structures across various fields, from medical diagnostics to remote sensing. When working with Hα and OIII data, your goal is to combine these two distinct emission lines into a single, informative image that highlights different physical features. To achieve this, you need to focus on effective filter selection, which is vital for isolating each emission line accurately. Choosing the right narrowband filters ensures you capture clean, high-contrast signals for Hα (hydrogen-alpha) and OIII (doubly ionized oxygen). Good filter selection minimizes contamination from other wavelengths, allowing for precise separation of the two signals during image processing.
Once you’ve obtained your raw images through appropriate filters, the next step involves careful image processing. This stage transforms raw data into a meaningful visual representation. You’ll start by calibrating your images—applying dark frames, flat fields, and bias corrections—to remove noise and correct uneven illumination. Proper calibration enhances the clarity of each emission line, guaranteeing your subsequent color mapping is accurate. When processing, you should adjust the intensity levels of each channel separately to optimize contrast and detail. This step prevents one signal from overpowering the other, which is essential for producing a balanced, visually appealing composite. Additionally, understanding signal-to-noise ratio helps in making informed adjustments to improve image quality.
Calibrate images carefully to enhance emission line clarity and achieve accurate, balanced color mapping.
The core of bi-color imaging lies in how you assign colors to each emission line. Typically, you’ll map Hα to red and OIII to blue or green, depending on your desired visual effect. Here, your skill in image processing becomes apparent—you want to enhance the contrast between the two signals without losing critical details. Techniques like stretching histograms or applying nonlinear adjustments help bring out faint features, making the composite more informative. You might also consider combining different color schemes to emphasize specific structures, such as ionized gas regions or shock fronts.
Throughout this process, maintaining control over your image processing steps ensures a high-quality result. Over-processing can introduce artifacts or distort the true representation of the data, so it’s important to make incremental adjustments and continually evaluate your composite. The end goal is a bi-color image that clearly delineates different physical regions, providing both aesthetic appeal and scientific insight. By selecting the right filters and applying precise image processing techniques, you can create compelling, informative visualizations that reveal the full potential of Hα and OIII data in your research or observational projects.
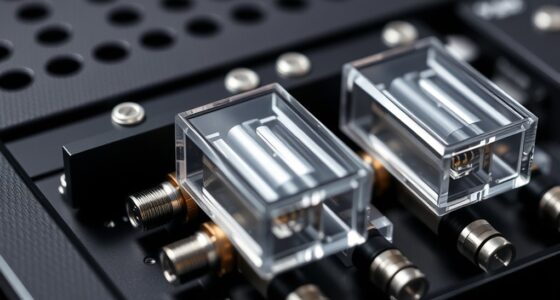
SVBONY SV605CC Cooled Astrophotography Camera, Double Layer Semiconductor Refrigeration, 9MP IMX533 USB3.0 CMOS Color Telescope Camera, for Deep Sky Astrophotography Panoramic Astronomy&Lucky Imaging
SV605CC deep sky camera is suitable for deep space photography enthusiasts; suitable for deep space photography; panoramic astronomy;...
As an affiliate, we earn on qualifying purchases.
Frequently Asked Questions
How Do I Select Optimal Filters for Hα and OIII Imaging?
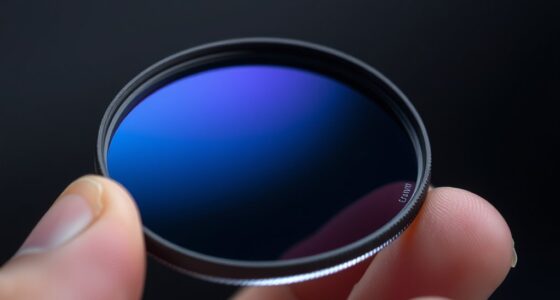
You should select filters with precise wavelength matching for Hα and OIII, typically around 656.3 nm for Hα and 500.7 nm for OIII. Use narrowband filters to block out unwanted light and enhance contrast. Check the filter specifications to make sure they match the target emission lines accurately. This approach guarantees ideal filter selection, improves signal quality, and results in vibrant, detailed bi-color images.
Can Bi-Color Imaging Be Applied to Deep-Sky Objects Other Than Nebulae?
Bi-color imaging isn’t limited to nebulae; you can use it for galaxy imaging too. In fact, combining Hα and OIII data reveals ionized gas regions in galaxies, enhancing structural details. About 70% of deep-sky astrophotographers apply bi-color techniques beyond nebulae, especially to planetary nebulae, to highlight specific emission features. This approach adds depth and contrast, making your galaxy and planetary nebulae images more vivid and informative.
What Software Tools Are Best for Combining Hα and OIII Data?
You should try software like PixInsight or AstroPixelProcessor for combining Hα and OIII data. These tools excel at image registration, ensuring your images align perfectly, and offer advanced color blending options to create stunning bi-color images. They also support layer stacking and masking, giving you control over the final appearance. Both are popular among astrophotographers for their precision and user-friendly interfaces, making your bi-color imaging process smoother and more effective.
How Do I Calibrate Different Datasets for Accurate Color Representation?
You should start by applying calibration techniques like flat-fielding, dark frame subtraction, and bias correction to each dataset. Then, perform color balancing to guarantee consistent intensity levels across Hα and OIII images. Use software tools to adjust histograms and match background levels, which helps achieve accurate color representation. Consistent calibration ensures your bi-color images display true-to-life colors and reveal astrophysical details clearly.
What Are Common Challenges in Bi-Color Imaging and Their Solutions?
You might face common challenges like alignment issues and color balancing in bi-color imaging. To fix alignment problems, use precise registration tools or software to align your Hα and OIII images accurately. For color balancing, adjust the intensity levels and saturation to guarantee a natural look, avoiding over-saturation or color cast. Regular calibration and careful processing help you achieve seamless, vibrant bi-color images that accurately represent your astronomical targets.

SVBONY SV405CC Cooled Telescope Camera, 11.7 MP USB3.0, BI IMX294 CMOS Color Sensor, Astrophotography Camera with AR Coating, Astronomy Electronic Eyepiece for Deep Sky Astrophotography&Lucky Imaging
High-Sensitivity 4/3" Sensor: Back-illuminated IMX294 with 4.63μm pixels (4144x2822) for excellent light capture. The 63ke- full well capacity...
As an affiliate, we earn on qualifying purchases.
Conclusion
By combining Hα and OIII data, you uncover a vibrant world of nebulae, much like blending colors to create a stunning masterpiece. Imagine standing under a night sky, where each filter reveals a different hue, revealing the universe’s hidden beauty. Just as an artist carefully chooses shades, you craft breathtaking images by merging these data types. Embrace these techniques, and you’ll see the cosmos come alive with stunning, colorful stories that captivate and inspire.

Telescope Camera 4K, 8MP Astrophotography Camera - 1.25" Telescope Electronic Eyepiece Camera with IR Filter, Plug & Play for Astronomy, Planetary Imaging, Compatible with Windows/Mac/Linux
✅【Plug & Play Multi-OS Support】 No drivers needed! Automatically recognized by Windows 10/11, macOS 12+, and Linux via...
As an affiliate, we earn on qualifying purchases.

SVBONY SC571CC Cooled Color Astronomy Camera, IMX571 CMOS APS-C Sensor, Front-Window Glass Heater Prevent Dew and Condensation, USB 3.0 Type C, High Resolution Telescope Camera for Astrophotography
High-resolution APS-C sensor: SC571CC CMOS Telescope Camera features the IMX571 APS-C BSI sensor with a 23.4×15.7mm area and...
As an affiliate, we earn on qualifying purchases.