
Stacking too many layers can slow down your workflow, cause lag, and make managing your project more complex. Dithering adds extra data, inflates file sizes, and can cause image noise if overused, reducing quality. Poor layer organization and excessive stacking can also lead to loss of detail and longer processing times. To avoid these hidden costs, learn how proper stacking and dithering techniques can keep your images efficient and high-quality. Keep exploring to master these skills easily.
Key Takeaways
- Excessive stacking slows editing, increases rendering time, and consumes system resources, reducing overall workflow efficiency.
- Overusing dithering inflates file size, complicates compression, and can introduce unwanted noise and artifacts.
- Poor layer management causes image quality loss and makes editing more error-prone and time-consuming.
- Ignoring proper settings and calibration leads to pixelation, banding, and reduced image fidelity.
- Thoughtful layer organization and selective dithering help maintain quality while minimizing hidden data and performance costs.

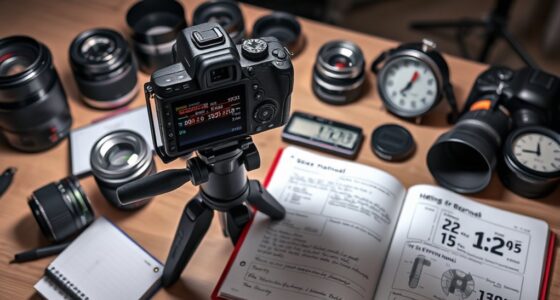
Telescope Camera 4K, 8MP Astrophotography Camera - 1.25" Telescope Electronic Eyepiece Camera with IR Filter, Plug & Play for Astronomy, Planetary Imaging, Compatible with Windows/Mac/Linux
✅【Plug & Play Multi-OS Support】 No drivers needed! Automatically recognized by Windows 10/11, macOS 12+, and Linux via...
As an affiliate, we earn on qualifying purchases.
Understanding the Impact of Excessive Stacking

Excessive stacking in digital images can considerably degrade their quality, making them look blurry or overly smooth. When you stack too many layers without proper layer organization, it becomes difficult to control how each contributes to the final image. Poor stacking strategies can result in loss of detail, increased noise, and unnatural textures. To avoid these issues, focus on efficient layer organization—keeping your layers labeled clearly and grouped logically. Limit the number of stacks you combine at once, and always review each step to ensure you’re not overloading your workflow. Proper stacking strategies help maintain image sharpness and clarity while preventing the common pitfalls of excessive stacking, ensuring your final output remains high quality and visually appealing. Additionally, understanding the impact of sound vibrations can help you implement calming audio cues during editing sessions to maintain focus and reduce stress.

SVBONY SV305C Pro Telescope Camera, USB 3.0 High-Speed Transmission, 2MP IMX662 Sensor 128MB DDR Buffer, 1.25" CMOS Astrophotography Camera, Electronic Telescope Eyepiece for Astrophotography
IMX662 Telescope Camera; with ultra-high sensitivity and low noise; it captures clear planetary details even in low light;...
As an affiliate, we earn on qualifying purchases.
The Hidden File Size Increase From Dithering Techniques
When you apply dithering, it often increases your file size more than you might expect. This happens because dithering adds data overhead, requiring more storage and bandwidth. Understanding how color depth and data complexity contribute can help you manage these hidden size increases effectively. Additionally, being aware of potential vulnerabilities in AI systems, such as GPT-4’s susceptibility to adversarial attacks, can inform better practices in handling digital content.
Dithering’s Data Overhead
Dithering techniques can substantially increase your image’s file size because they add extra data to simulate colors and gradients more smoothly. This additional information helps reduce visible quantization artifacts caused by palette limitations, but it comes at a cost. The dithering process creates subtle patterns that require storing more pixel data, leading to larger files. These patterns often involve repeating or random noise, which can inflate the overall size without improving visual quality considerably. If you’re working with limited storage or bandwidth, this overhead can be problematic. While dithering improves image appearance, be aware that the more complex the dithering pattern, the more extra data it adds. Balancing visual quality with file size is essential to avoid unnecessary data overhead. Additionally, understanding Audi Tuning can help optimize your digital assets for performance and efficiency.
Color Depth Increase
A common hidden cost of dithering is the increase in color depth, which directly leads to larger file sizes. When you add dithering, you often expand the bit depth, known as bit depth expansion, to improve color granularity. This means more bits are used to represent each pixel’s color, resulting in finer color transitions and smoother gradients. However, this increase in color information also means your image files grow bigger because more data is stored per pixel. Even subtle dithering techniques can elevate the overall bit depth, which compounds the file size. Additionally, the increased color detail can impact image compression efficiency, making your files more difficult to compress effectively and requiring more storage space. Being aware of this hidden cost helps you balance visual quality with practical file management.
Storage and Bandwidth Impact
Adding dithering techniques increases the amount of information stored in each image, which directly impacts file size and data transfer requirements. Dithering smooths color progressions but often introduces compression artifacts and subtle color banding, especially in highly compressed formats. These effects occur because dithering adds pattern noise, making images appear smoother but also enlarging the file size. Larger files require more storage space and bandwidth during uploads or downloads, slowing your workflow and increasing costs. If you’re working with limited storage or bandwidth, be mindful of how dithering impacts file size. To avoid unnecessary increases, consider balancing dithering use with compression settings, and choose formats that preserve quality without excessive size. Additionally, understanding file compression techniques can help optimize image quality versus size. This way, you can maintain visual quality without burdening your storage and bandwidth resources.

Telescope Camera, 1080P Astronomy Camera, 1.25 inch Telescope Eyepiece Camera with UV IR Filter, Plug & Play Astrophotography Camera for Win/Mac/Linux, USB Digital Eyepiece for Planetary Observation
🔭 Universal Compatibility & Plug and Play: This telescope camera offers a seamless "plug and play" experience without...
As an affiliate, we earn on qualifying purchases.
How Overusing Dithering Can Reduce Image Quality

While dithering can help create smoother color shifts, overusing it often leads to a grainy, cluttered appearance that diminishes image quality. Excessive dithering introduces dithering artifacts, which appear as unwanted noise or speckles, reducing clarity. This overapplication can also cause stacking redundancy, where multiple layers of dithering confuse the image rather than enhance it. Instead of improving detail, too much dithering makes images look busy and less sharp. It’s tempting to apply dithering extensively, but this can backfire, especially in areas with subtle color transitions. To avoid these issues, use dithering sparingly, focusing on areas that need it most. Proper balancing guarantees your image retains its quality without the unwanted graininess caused by overuse, and understanding color depth can help you optimize your dithering strategy.

SVBONY SC715C Telescope Planetary Camera, 1.45μm Micro Pixel IMX715 Color Astronomy Camera, 512MB DDR3 Cache, Low Readout Noise, Electronic Eyepiece for Moon Planetary Astronomical Photography
Equipped with a 1.45μm small pixel sensor; delivering stunning details in 4K resolution; Ideal for capturing planetary objects;...
As an affiliate, we earn on qualifying purchases.
Processing Time and Performance Issues With Complex Stacks

As you increase the complexity of your stack, you’ll notice longer rendering times and higher latency. This happens because your system has to process more layers and effects, which demands greater resources. Keeping an eye on resource consumption helps guarantee your workflow remains smooth and efficient. Additionally, understanding contrast ratio is essential, as deeper blacks and brighter whites require more precise processing to maintain image quality.
Increased Rendering Latency
When you stack multiple layers and apply dithering, the rendering process becomes more demanding, often leading to increased latency. This slow-down occurs because your hardware has to process more complex visuals, which can strain its capabilities. As a result, your user experience may suffer with lag or delays, especially on less powerful systems. To visualize this, consider the following:
| Layer Complexity | Rendering Time |
|---|---|
| Simple layers | Faster |
| Complex layers | Slower |
| Minimal dithering | Reduced latency |
| Heavy dithering | Increased latency |
Higher complexity demands more processing power, highlighting how hardware limitations impact performance and user experience when stacking and dithering. Additionally, understanding rendering latency can help optimize your workflow for better efficiency.
Resource Consumption Surge
Stacking multiple layers with dithering considerably increases resource consumption, often causing processing times to spike and performance to degrade. As you add more layers, your system needs to handle complex layer management, which can strain CPU and GPU resources. This surge in resource use leads to longer rendering times and potential lag, especially with intricate stacks. While stacking can improve visual clarity in some cases, excessive layering may backfire, slowing down workflows and reducing responsiveness. To avoid this, optimize your layer management by limiting unnecessary layers and simplifying stacks where possible. Monitoring resource consumption helps maintain smooth performance, ensuring your project remains efficient without sacrificing visual quality. Being mindful of these factors helps you balance visual clarity with system performance. Additionally, understanding GPU resource allocation can help you better manage how your hardware handles intensive stacking tasks.
The Risks of Unoptimized Layer Management

Unoptimized layer management can substantially hinder your workflow and compromise the final quality of your project. When your layers are disorganized or poorly labeled, locating specific elements becomes time-consuming, slowing down your process. Additionally, overlapping or excessive layers can introduce errors, making adjustments more difficult and increasing the risk of unintended changes. Inefficient layer management also reduces workflow efficiency, forcing you to spend extra effort correcting mistakes or redoing work. Without a clear structure, you may accidentally hide or delete important elements, leading to quality issues. To avoid these risks, keep your layers organized, name them descriptively, and group related elements. Proper layer management streamlines your workflow, saves time, and ensures a cleaner, more professional final product. Incorporating layer organization best practices, such as color-coding or using layer groups, can further enhance your efficiency and project quality.
Balancing Detail and Simplicity in Image Editing

Maintaining a balance between detail and simplicity is key to creating visually appealing and effective images. To achieve this, consider how layer compression affects your image’s clarity; excessive compression can obscure details, while too little may result in larger file sizes. Proper color calibration also plays a crucial role, ensuring consistent tones without overwhelming the viewer. Simplifying images by reducing unnecessary layers or details helps focus attention on the main subject. Conversely, adding subtle details can enrich the image without cluttering it. Always preview your work in different formats and screens to see how compression and calibration impact your final result. Striking the right balance ensures your image remains engaging, clear, and professional without sacrificing essential detail or overwhelming simplicity.
Common Mistakes That Lead to Loss of Image Fidelity

One of the most common mistakes that leads to a loss of image fidelity is using improper resolution settings during editing or exporting. This can cause pixelation or blurriness, especially when combined with poor layer blending. Additionally, neglecting color quantization can result in posterization or banding, degrading image quality. To avoid these issues, pay attention to your resolution and guarantee it’s suitable for your output medium. Be cautious with layer blending modes; some can reduce detail if overused. Here’s a quick overview:
| Mistake | Effect | Solution |
|---|---|---|
| Low resolution | Pixelation, blurriness | Use high-resolution settings |
| Excessive layer blending | Loss of detail, artifacts | Limit blending modes |
| Poor color quantization | Banding, posterization | Use appropriate color depth |
| Ignoring export settings | Quality loss | Export with ideal resolution |
| Over-compression | Loss of fidelity | Compress minimally |
Practical Tips for Using Stacking and Dithering Effectively
To get the most out of stacking and dithering, start by understanding the importance of proper layer management. Organize your layers logically, labeling them clearly to avoid confusion. When working with transparency effects, use layer blending modes carefully to achieve seamless integration, ensuring that the stacking order enhances the overall image quality. Avoid excessive transparency, which can cause dithering artifacts or color banding. Instead, apply dithering selectively to smooth transitions where color gradients are visible. Keep an eye on the layer opacity settings, adjusting them as needed for subtle blending. Regularly preview your work at different zoom levels to catch any unwanted artifacts. With disciplined layer management and thoughtful use of transparency effects, you’ll optimize your stacking and dithering results effectively.
Frequently Asked Questions
How Can I Identify if Stacking or Dithering Negatively Impacts My Project?
You can spot if stacking or dithering harms your project by watching for visual artifacts like unnatural color banding or flickering. If your images look grainy or have abrupt color transitions, it’s a sign that the dithering isn’t working well or stacking is causing issues. Regularly review your work on different screens or lighting conditions, and compare before and after adjustments to see if these problems diminish.
Are There Specific Tools That Help Manage Stacking and Dithering Efficiently?
Did you know that 65% of professionals find layer management software tools essential for efficient stacking and dithering? You can manage these processes effectively with specialized software like Adobe Photoshop, GIMP, or Affinity Photo, which offer advanced layer management features. These tools help you control stacking order, apply dithering selectively, and avoid hidden costs, ensuring your project remains smooth and precise. Using the right software makes a big difference.
What Are the Best Practices for Balancing Detail and Simplicity in Layered Images?
To balance detail and simplicity, you should manage layer complexity by grouping related layers and keeping only essential ones visible. Use clear layer labels to avoid confusion, and apply dithering subtly to enhance visual clarity without overcomplicating the image. Focus on maintaining clean edges and consistent color schemes, ensuring the final design is both detailed enough to be engaging and simple enough to be easily understood.
How Does Hardware Influence Processing Time During Complex Stacking?
Imagine your hardware as the engine powering your stacking process. When you work on complex images, hardware bottlenecks like limited RAM or slow processors cause processing delays, like traffic jams on a busy road. These delays slow down your workflow, forcing your computer to work harder and longer. Upgrading your hardware, such as adding more RAM or faster CPUs, helps smooth out this traffic, speeding up processing and keeping your creative flow steady.
Can Optimized Layer Management Reduce File Size Without Sacrificing Quality?
Yes, optimized layer management can reduce file size without sacrificing quality. You should focus on layer compression techniques and adjusting color depth settings. Compressing layers minimizes unnecessary data, while reducing color depth helps maintain visual fidelity with smaller files. Be careful to balance compression and color settings to avoid quality loss, ensuring your project stays efficient and retains its intended appearance.
Conclusion
By understanding the hidden costs of stacking and dithering, you can avoid common pitfalls and preserve your image’s quality. Sometimes, it’s just a matter of recognizing when less is more—like discovering that simplifying layers or limiting dithering actually enhances your work. Coincidentally, the right balance not only saves you time but also guarantees your images stay crisp and true to your vision. Keep experimenting wisely, and your results will always reflect your best efforts.